Google Forms is one of the most popular tools for gathering responses, be it for class quizzes, client feedback, or event registrations. But once your form is live, one concern often arises: how do you ensure people don’t submit multiple responses? Whether you want to prevent spam, maintain fairness in assessments, or avoid duplicate data, learning how to limit responses in Google Forms is a game-changer. This feature allows you to control submissions effectively and helps maintain clean, trustworthy results.
In this guide, we’ll walk you through 5 easy steps to activate this feature and offer a powerful bonus tip using ExtendedForms.
Table of Contents
Why Limit Responses in Google Forms?
There are several use cases where you might want to restrict form responses. For example, in academic settings, you may want each student to take a quiz only once. In event planning, you may need to cap RSVPs or make sure one person doesn’t reserve multiple slots. When it comes to data analysis, duplicate responses can skew results and reduce reliability. That’s why the ability to limit responses in Google Forms becomes so valuable. It ensures fairness, protects data accuracy, and saves time that would otherwise be spent filtering or cleaning up repeated entries.
Limiting responses also creates a structured experience for users, they know they only have one chance to participate, which encourages more thoughtful submissions. Whether you’re working with a small internal team or a large public audience, this simple setting can significantly enhance your form’s effectiveness.
How to Limit Responses in Google Forms
Google Forms offers a built-in feature to restrict form submissions to one per user. This setting relies on the respondent being logged into a Google account, which the form uses to track whether a submission has already been made. Let’s explore the setup process step-by-step.
Step 1: Create a Google Form
Begin by visiting Google Forms and creating a new form from scratch or selecting a template. Add your form title, description, and all relevant questions – these could include text entries, multiple-choice options, dropdowns, or even file uploads. You can organize your form using sections, add logic jumps, and personalize confirmation messages as needed.
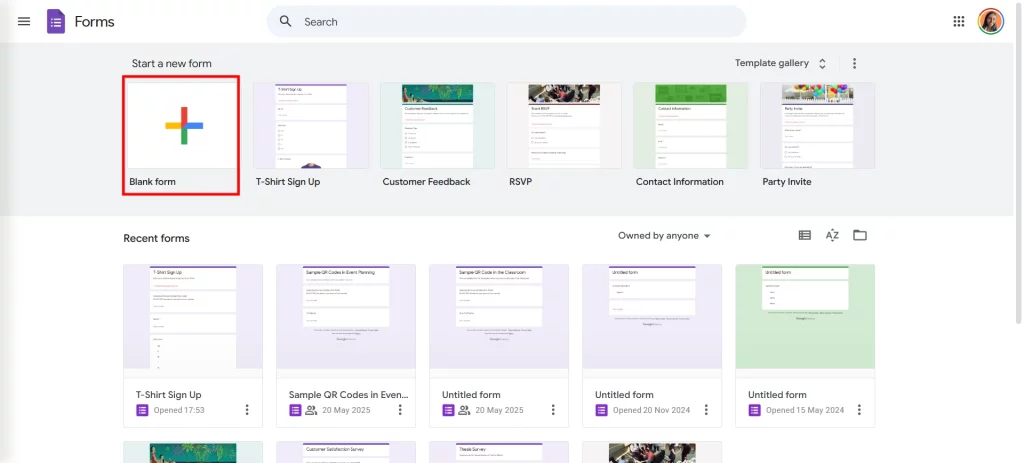
While creating your form, make sure everything is set before limiting responses. That’s because enabling submission restrictions doesn’t impact how your form looks or functions; it simply governs how many times each person can respond.
Step 2: Go to Google Form’s Settings Tab
Once your form is ready, navigate to the gear icon at the top-right corner of the form editor. This will open the Settings menu. Inside the settings panel, you’ll see several tabs: “General,” “Presentation,” and “Quizzes.” To limit responses in Google Forms, we’ll be working primarily with the “General” tab, which houses the response restriction settings.
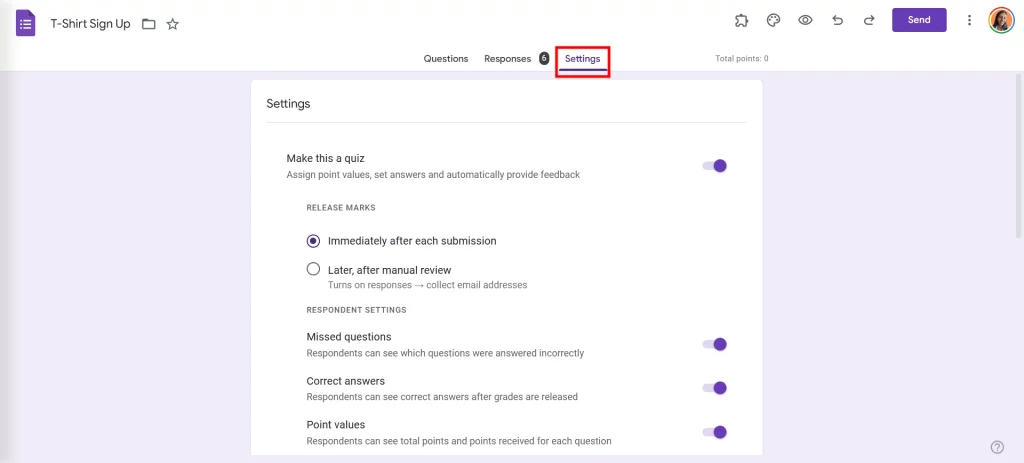
These tabs also offer additional controls like customizing the confirmation message, turning the form into a quiz, or shuffling question orderbut for now, stay in the “General” section.
Step 3: Open “Responses” Dropdown
Inside the “Responses” dropdown, you’ll find a checkbox labeled “Limit to 1 response.” By default, this box is unchecked, meaning anyone can fill out your form multiple times, even from the same browser. To activate the restriction, simply check the box.
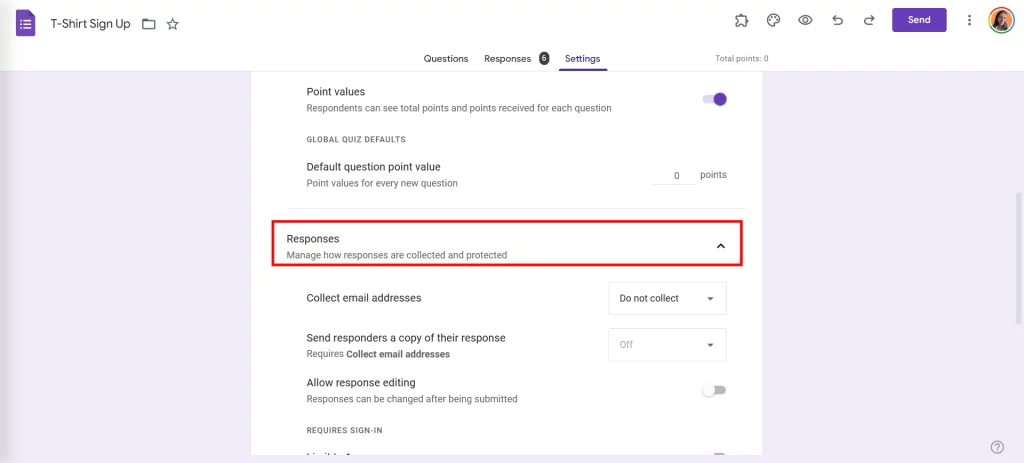
This change requires respondents to be signed into their Google account to participate. Google Forms will then link their response to their email and prevent further submissions. It’s important to note: this method works only with logged-in users. If you’re distributing the form to people without Google accounts, this option won’t be applicable.
Step 4: Enable “Limit to 1 Response” Option
Once you check the “Limit to 1 response” box, the form is now configured to track individual submissions. This means that after someone submits the form, they’ll see a message like, “You’ve already responded.” They won’t be able to submit again from that account.
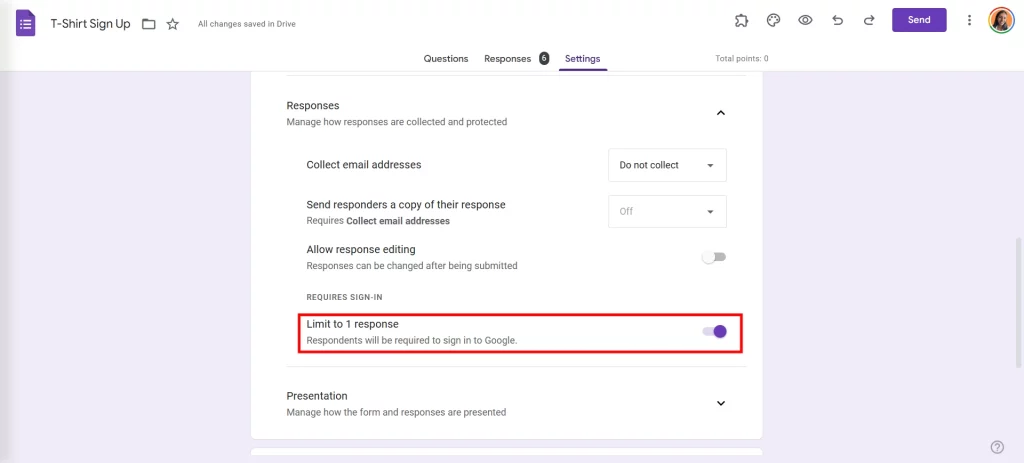
Additionally, you can choose to allow respondents to edit their submissions. This is helpful if users need to revise answers later, especially in team surveys or long-term project updates. However, even with editing enabled, they still won’t be able to submit a second response.
This setting is ideal for forms like academic quizzes, official surveys, single-entry contests, and internal team polls where limiting submissions ensures control and consistency.
Step 5: Preview the Form
After you’ve enabled the “Limit to 1 response” setting and saved the changes, it’s important to preview your form to ensure everything works as expected. Click on the eye icon in the top-right corner of the form editor to open the preview mode.
Pro Tip: Limit Form Submissions Using ExtendedForms
While the built-in Google Forms settings are useful, they don’t offer advanced controls like closing the form at a specific time or after a certain number of submissions. That’s where ExtendedForms (EF) comes in. With EF, you can do two powerful things:
- Set a time range: Define when your form starts and stops accepting responses.
- Set a response count: Choose the exact number of people allowed to submit the form.
Here’s a quick guide to limiting submissions using ExtendedForms:
Step 1: Install the ExtendedForms add-on from the Google Workspace Marketplace.
Step 2: In your Google Form, click the add-on (puzzle piece) icon in the top-right corner.
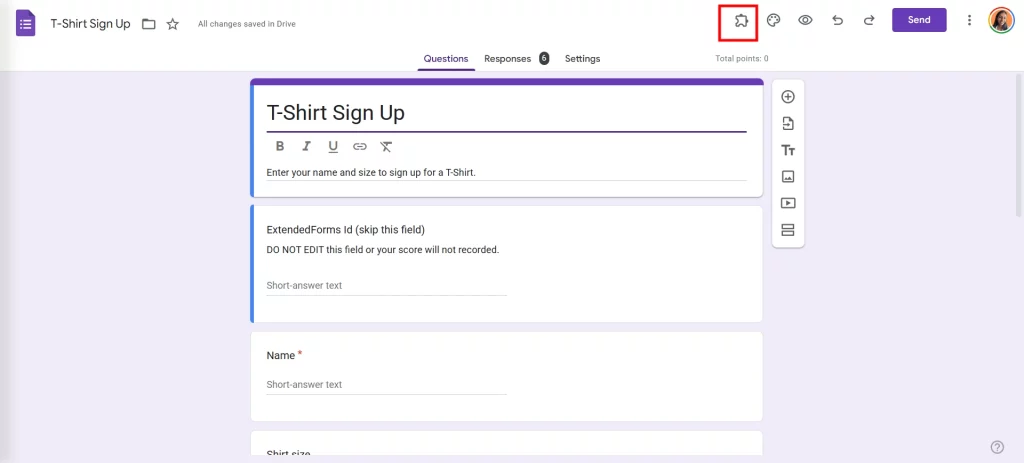
Step 3: Select Extended Forms → Configure to open its panel on the right.
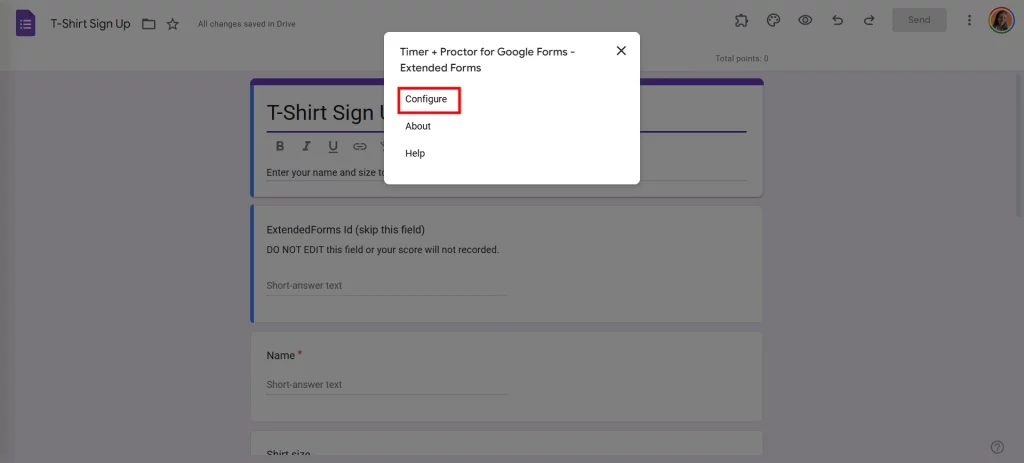
Step 4: Once the panel opens, click the three-dot menu in the top-right of the panel.
Step 5: Select “Accepting Responses Limiter.”
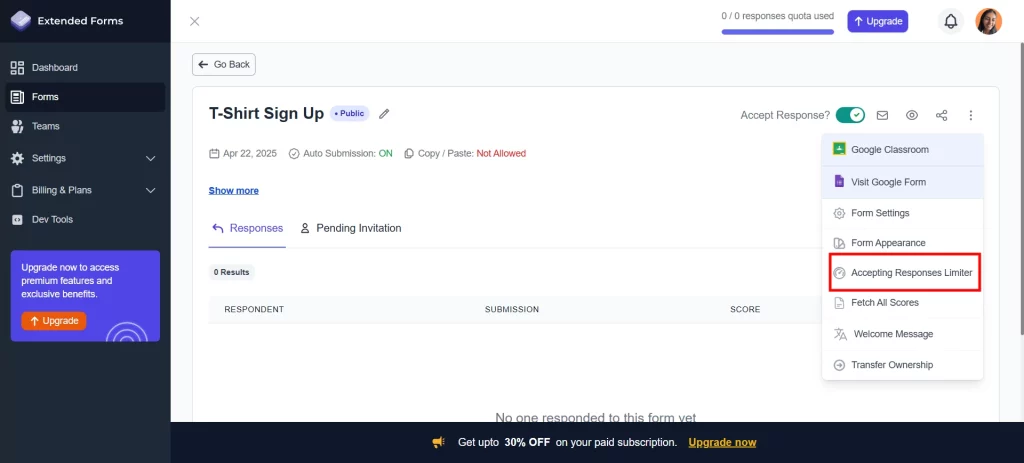
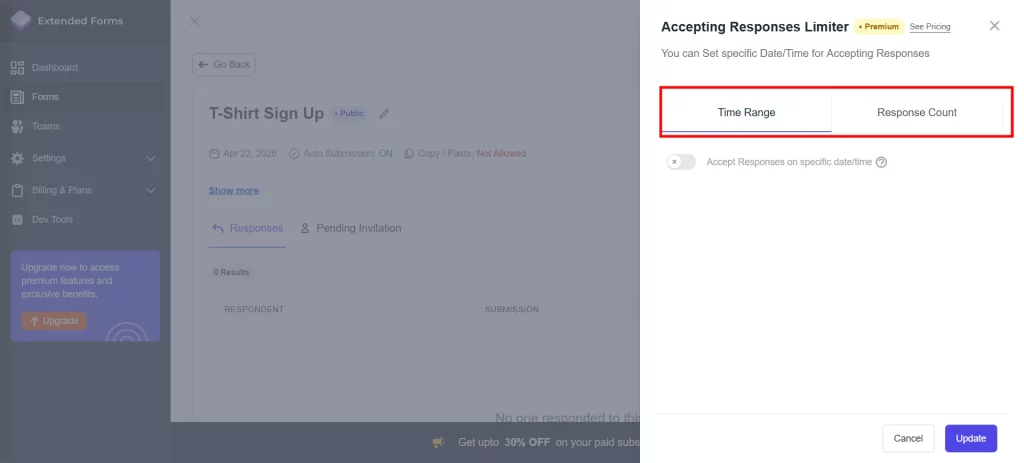
Step 6: You’ll now see two options:
- Time Range – Schedule when the form will open and close.
- Response Count – Set a maximum number of total form submissions.
This setup takes only a few minutes and offers much greater flexibility than the default Google Forms settings. If you’re handling timed assessments or limited-capacity events, ExtendedForms is a seamless and efficient way to limit responses in Google Forms more precisely.
In Conclusion
Knowing how to limit responses in Google Forms is a small but powerful skill that can help streamline your data collection, maintain fairness, and prevent misuse. Whether you’re creating a sign-up sheet, school quiz, or feedback survey, applying these restrictions ensures your form serves its intended purpose, without the chaos of duplicate entries or spam.
By following these five steps, you’ve learned to activate the built-in “Limit to 1 response” feature. And if you need more advanced control, tools like ExtendedForms allow you to manage submissions based on count, time, or even user experience.
If you liked reading this, also read our detailed guide on How to Add a Countdown in Google Forms? (4 Easy Steps) and How to Italicize in Google Forms (4 Easy Ways).