When organizing events, workshops, or offering services, ensuring legal protection is crucial. A liability waiver form safeguards your organization by outlining risks and securing participant acknowledgment. But drafting and distributing these waivers doesn’t have to be complicated or costly.
Google Forms offers a simple, free solution to create and manage liability waivers digitally. In this guide, we’ll explore each step in detail, so you can build an effective form that’s easy to understand, legally sound, and professional. Let’s get started!
Table of Contents
What Is a Liability Waiver Form?
A liability waiver form is a legal document that protects organizations or individuals from legal claims. Participants acknowledge the risks associated with an activity and agree not to hold the organizer responsible for injuries or damages. Common in events, sports, and fitness, waivers ensure transparency and help mitigate legal risks.
Creating a digital waiver with Google Forms makes it easier to collect and store responses.
Steps to Create a Liability Waiver Form
Step 1: Create a New Form and Give It a Title
The very first step to creating a liability waiver form is to create a new form. To do so, navigate to the Google Forms website and click on the (+) icon to start creating a new form. Alternatively, you can choose a form from the pre-built templates and edit it to align with your requirements.

Here, we will create a new form from scratch. So, after you click on the (+) icon, you need to give your form a proper name. Make sure it is short and relevant. You can also add a brief description in the description field.
Step 2: Add Required Questions
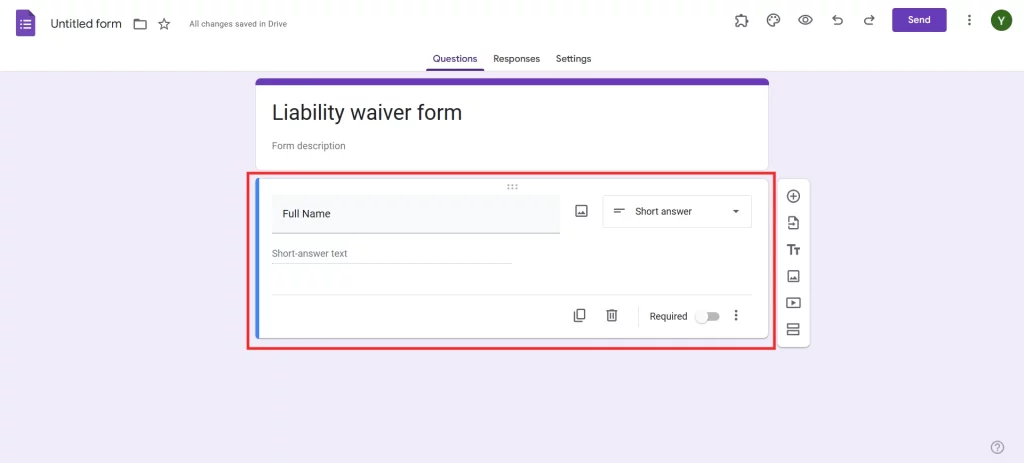
Once you have named your form and added relevant info, it’s time to add questions. Google Forms offers various question types like checkboxes, tick box grids, date, time, and more. You can select the one that is relevant to your questions and add the required questions. Make sure you add all the required fields like name, email address and date.
Ready to go one step ahead with your timers in Google Forms? Read ExtendedForms Unveils: Customized Timer Themes.
Step 3: Create the Waiver Statement
While creating a liability waiver form in Google Forms, you will need to add a paragraph about the purpose of a waiver. Make sure it clearly outlines the liability clauses.
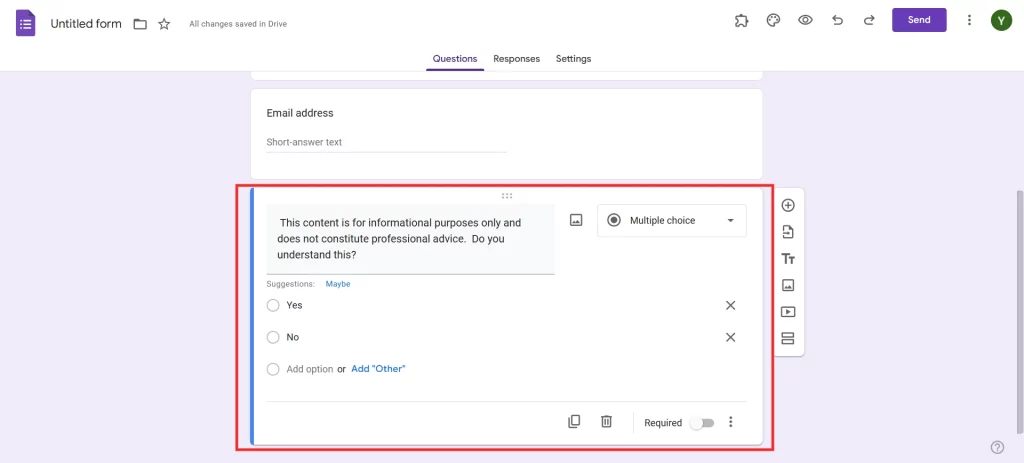
Step 4: Include Agreement Acknowledgment
It is important for you to know whether your participants agree to the waiver terms or not. For that, add options like ‘Yes’ or ‘No’.
Step 5: Add an Image or Logo
Since Google Forms is a versatile tool, it helps you add your company’s image or logo. This helps you extend your brand identity even to the liability waiver form in Google Forms.
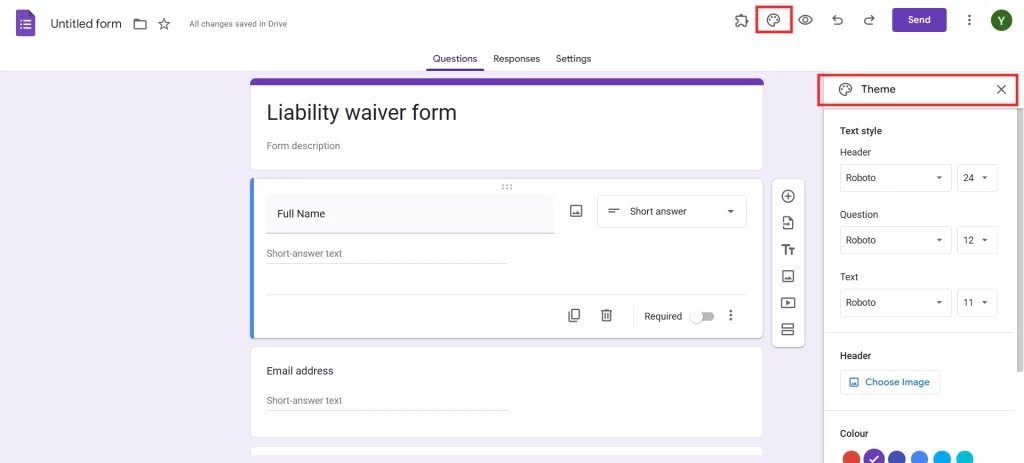
To do so, click on the palette icon at the top right corner of the interface and customize the theme according to your branding.
Step 6: Set Required Fields
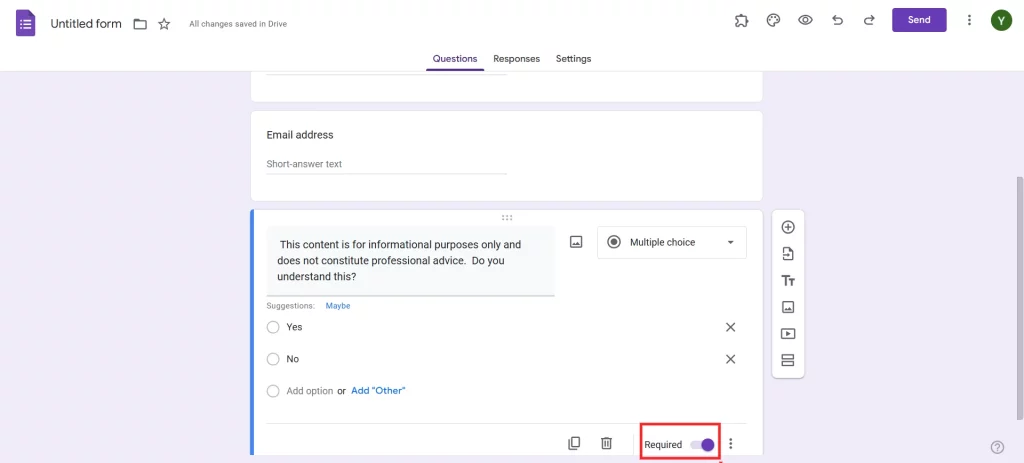
Review all questions and ensure essential fields are marked as required. This step prevents incomplete submissions, which could lead to legal gaps or participant confusion.
Want to create a voting poll? Read How To Create A Voting Poll In Google Forms? (7 Simple Steps)
Step 7: Preview and Share
Once done with customizing and adding all the necessary fields in the form, make sure to review it. Click on the eye icon on the top right corner of the interface and preview your form.
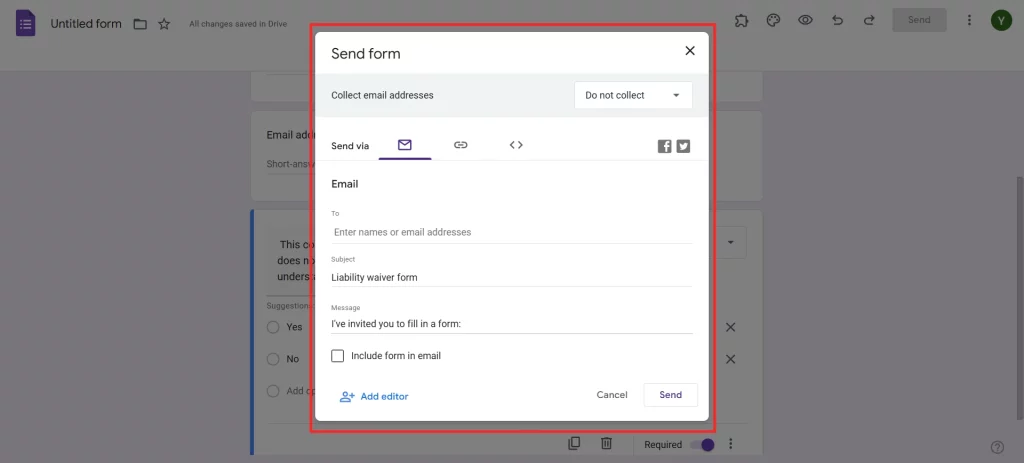
Once done with the preview, click on the ‘Send’ button and share your Google Form.
Best Practices for Using a Liability Waiver Form
Here are a few best practices you can use while creating a liability waiver form-
- Use clear language: Avoid legal jargon. Ensure the waiver is easy to understand.
- Get legal approval: Consult a lawyer to verify your waiver covers all necessary aspects.
- Secure data: Enable Google Forms’ security features to protect participant information.
- Provide easy access: Include the waiver link in event registration emails, websites, or social media pages.
- Keep records: Regularly download and back up responses for your records.
Concluding Everything Above
Creating a liability waiver form using Google Forms is straightforward and efficient. In just a few steps, you can build a professional, customizable form that protects your organization and informs participants.
By following these steps and best practices, you’ll ensure a smooth experience for both you and your participants—no technical expertise is required!
If you liked reading this blog, also read our detailed guide on How to Stop Accepting Responses in Google Forms. (4 Easy Steps) and How to Make a Customized Business Form With Google Forms? (4 Easy Steps)
