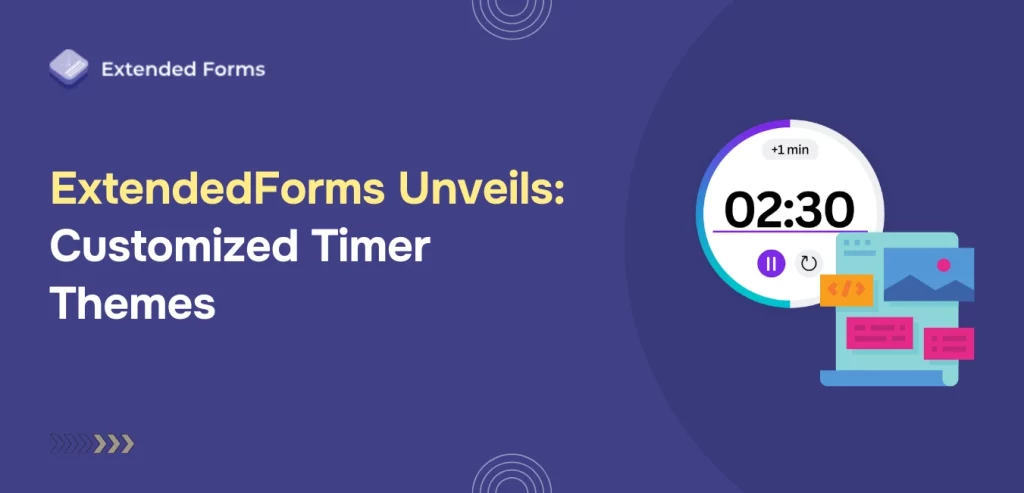
ExtendedForms has recently launched the customized timer themes option. This will help you extensively customize the timer of your Google Forms and add up to its aesthetics, not to mention the benefits it brings to the users.
Recently, it launched an outstanding feature allowing customization of the timer. It lets you design a timer that matches your brand identity and your business. Whether you like simple and elegant designs or vibrant eye-catching designs, this customization has endless options.
Let us take you through a detailed guide of how you can easily work on customized timer themes without a single line of code.
Table of Contents
How to Customize the Timer in Google Forms?
Step 1: Select Timer Themes
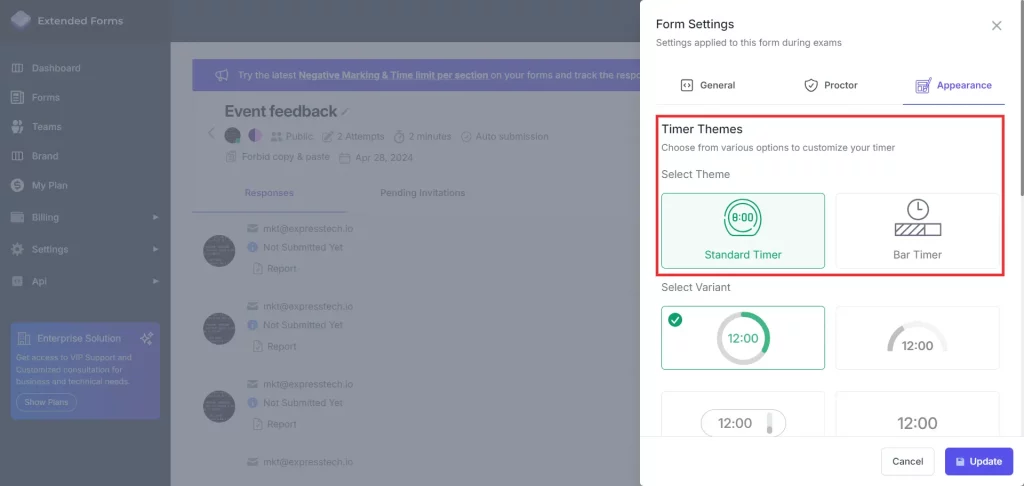
The very first step for customized timer themes in Google Forms is to select the timer’s theme. To select the theme, first, you need to log into the ExtendedForms account and select the form that you wish to customize.
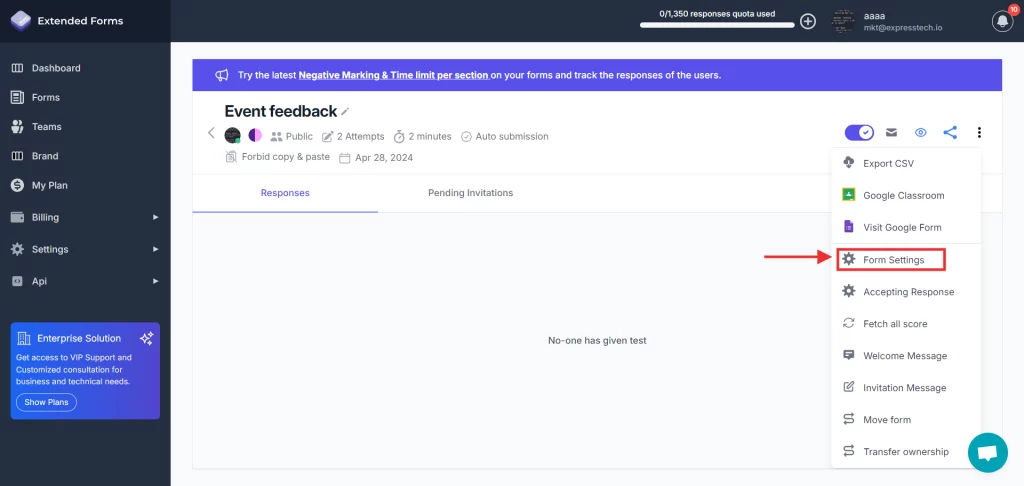
Next, navigate to Form Settings > Appearance. Here, you will see two different timer themes.
Namely,
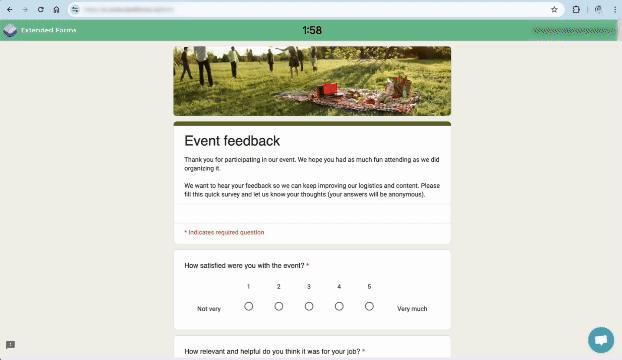
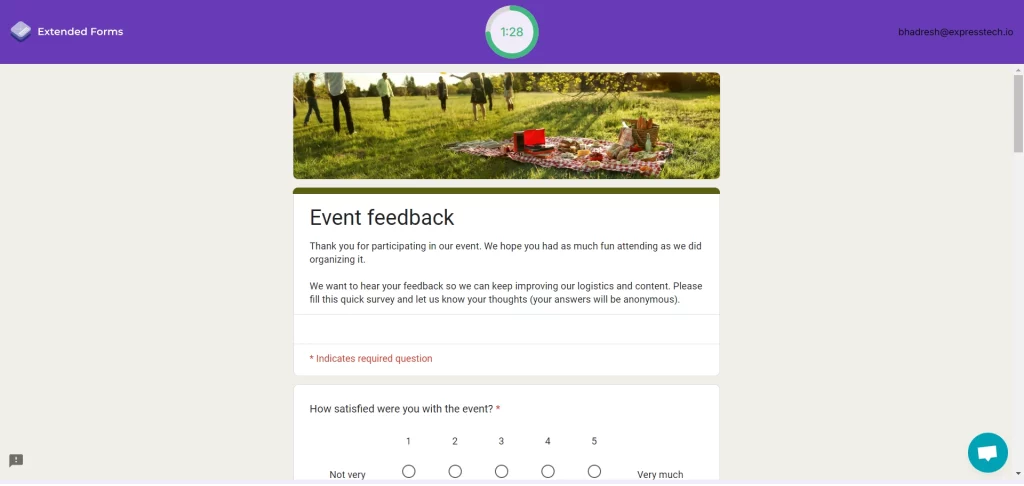
- Standard Timer: It represents the timer at the center of the navigation bar.
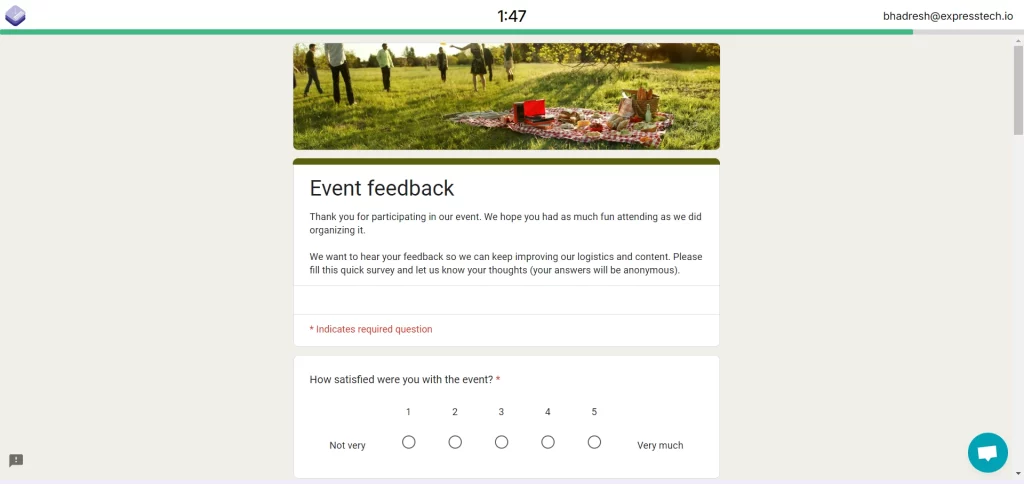
2. Bar Timer: It visually represents the passage of time using a graphical bar that fills up or empties based on the elapsed time.
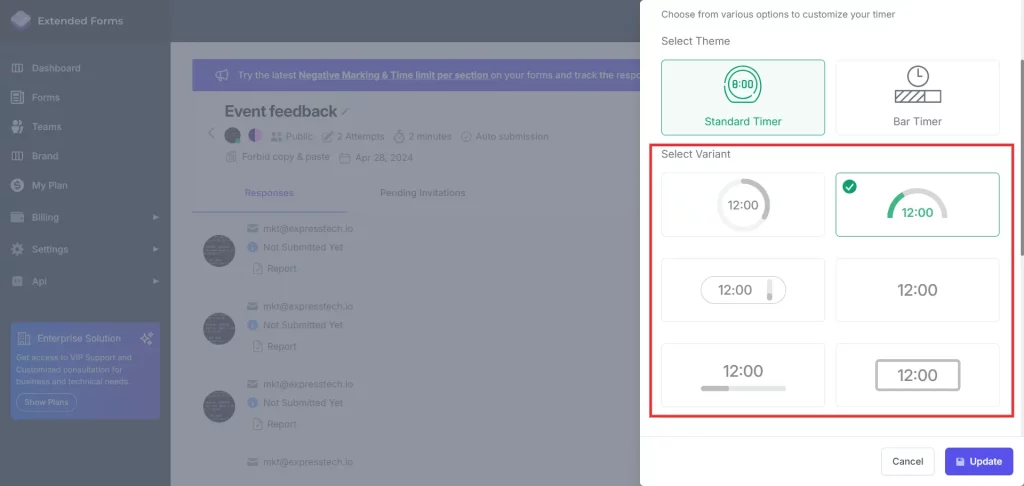
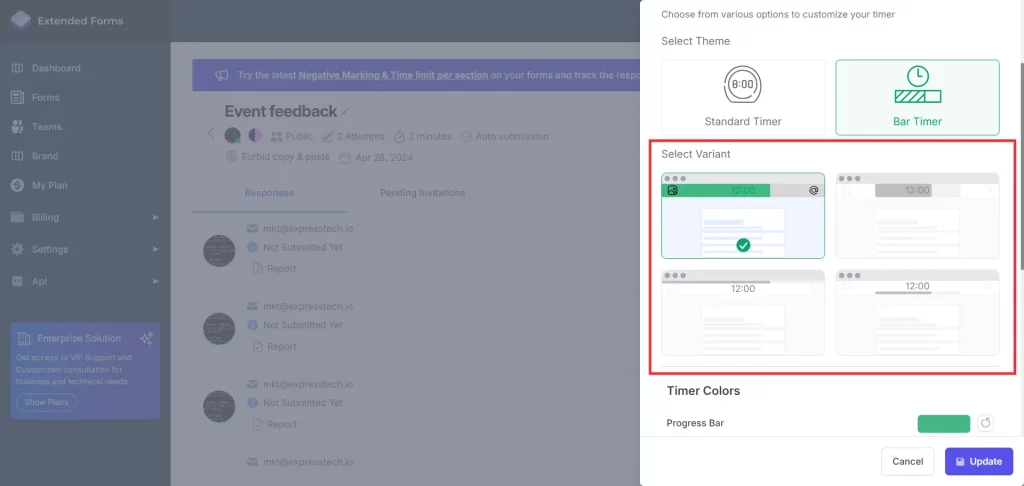
Step 2: Select Variants
Once you have selected the customized timer themes, you will need to select the variant. Both themes have multiple variant options. For instance, the Standard Timer theme offers,
- Circular timer: Displays progress in a circular format, emptying as completion increases.
- Semi-circular timer: This represents progress in a half-circle shape, emptying from one side to the other.
- Vertical timer: Shows progress vertically, emptying from top to bottom.
- Text timer: Represents progress numerically through text countdown.
- Horizontal timer: Displays progress horizontally, emptying from right to left.
- Text in box timer: Shows progress through text displayed within a box or container.
And the Bar Timer theme offers,
- Full-length bar: A timer that extends to the full width of the screen.
- Form length bar: A timer that extends to the form width only.
- Full line bar: A progress line bar that extends to the full width of the screen
- Form line bar: A progress line bar that extends to the form width only.
These options will help you with customized timer themes to your Google Forms and align its branding to your brand.
If you are looking for an easy way to add a time limit per section, read ExtendedForms Unveils – Time Limit Per Section Feature.
Step 3: Select Timer Colors
Under ‘Timer Colors’ you can customize,
- Progress Bar: It refers to the color that is used to indicate the progress itself.
- Progress Background: It refers to the color of the empty portion of the bar.
There are two ways to set the progress bar color and its background color,
- Manual method: You can opt from the predefined color palette or adjust the shade by clicking on the color.
- Hex code: with hex code, you can get the accurate color as per your requirements.
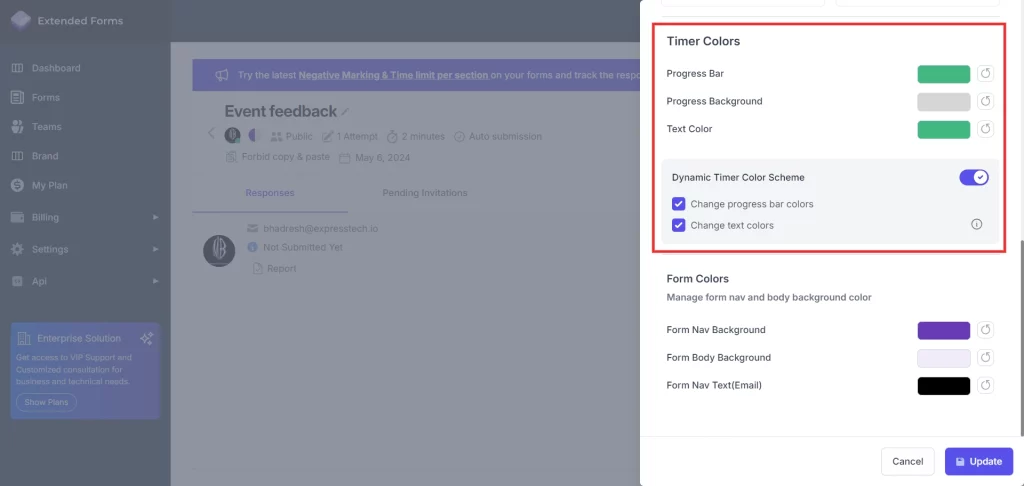
If you wish to reset the color, then select the reset sign next to the color box. To change the color of the timer based on the remaining time left, then check the box provided.
Next, you can also customize the text color the same way you would customize the colors of the timer.
Step 4: Select Form Colors
Once you have selected the color of the timer and text, now you will need to select the form colors. Here, ExtendedForms offers three different areas for customization:
- Form Nav Background: This refers to the background color of the navigation section within a form interface
- Form Body Background: This refers to the background color of the main content area within a form interface.
- Form Nav Text(Email): This refers to the color of the text specifically within the navigation section of the form, particularly in relation to email-related elements.
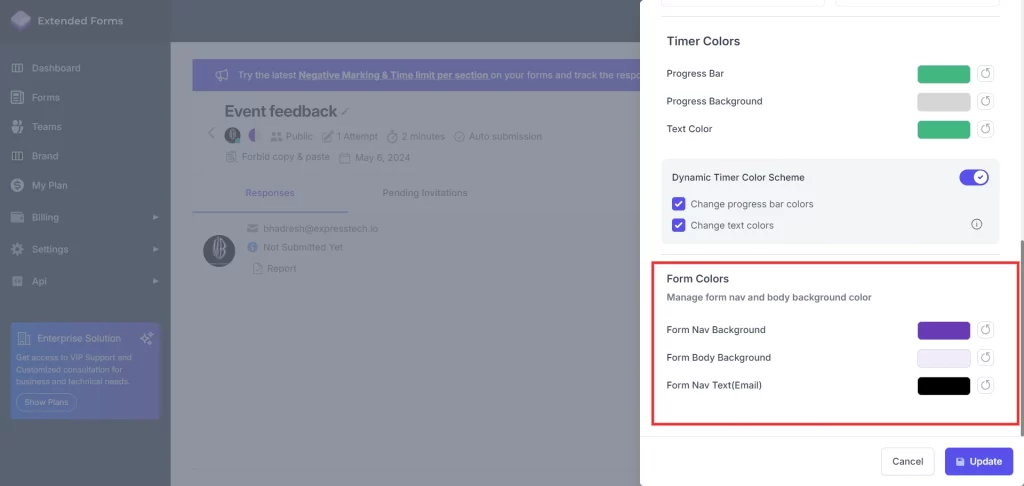
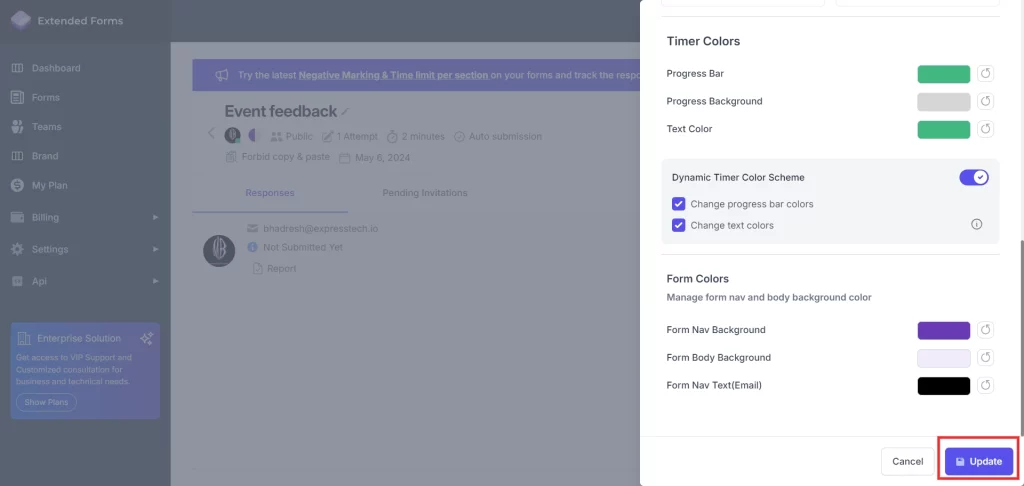
Select the colors as per your brand or campaign theme. Now, hit the update button to update the colors and theme in your Google Forms.
Step 5: Preview
Once done with all the customization, make sure you review the Google Form. Select the eye icon for the preview. While previewing check whether the Google Form has come out as per our requirements or not.
If any changes are required, go back and customize accordingly. Else, you can go ahead, and share it with the users or embed it into your website.

As ExtendedForms has just added customized timer themes functionality to Google Forms, this makes the form-building process even more joyful and effortless. This is quite powerful and the users are capable of modifying the look of the timer with a wide array of options that can redefine how forms are made and experienced.
Looking for an easy way to collect data from Google Forms? Read, How to Collect Data with Google Forms? [2 Best Ways]
Dynamic Timer Color Scheme
The dynamic timer color scheme is a feature that transforms the visual presentation of the timer depending on the remaining time, so users will be able to perceive that time as a key factor. By employing color changes as a method of communication, this system intuitively signals urgency to users, compelling them to prioritize tasks and complete them swiftly.
When the boxes are checked, the timer color will change based on the remaining time left.
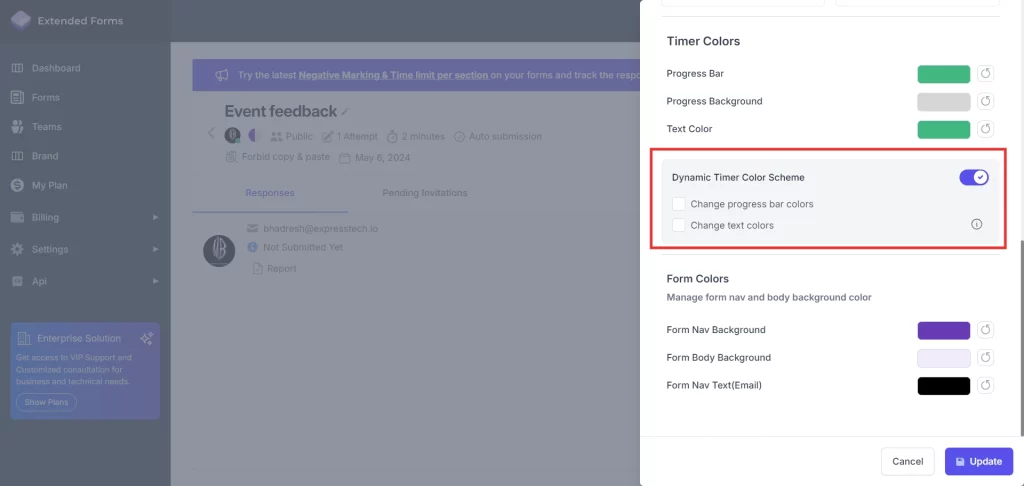
Dynamic timer color scheme has two options:
Change Progress Bar Colors
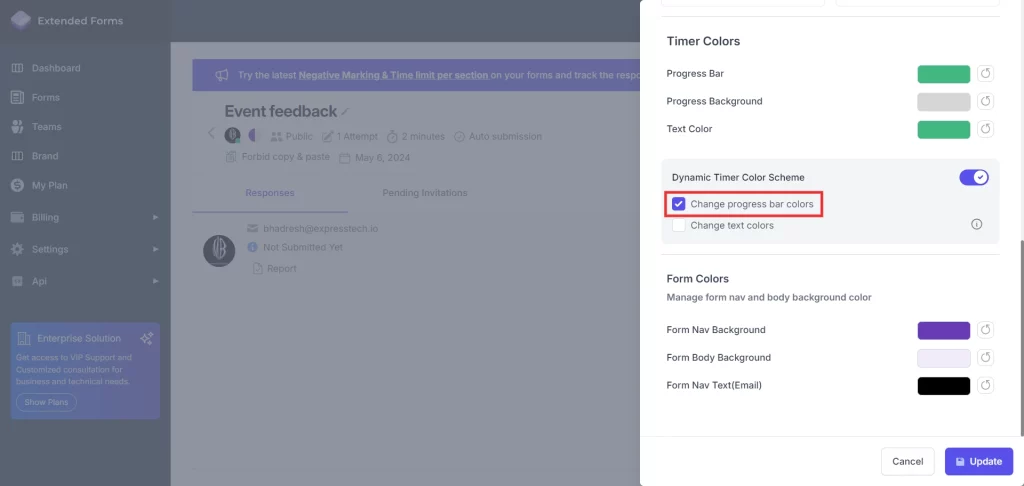
The progress bar serves as a visual representation of task completion. Enabling this option prompts users to gauge their pace based on the changing colors of the timer. For example, the timer may start as green when ample time remains, transition to yellow as time decreases, and shift to red when nearing completion.

Change Text Colors
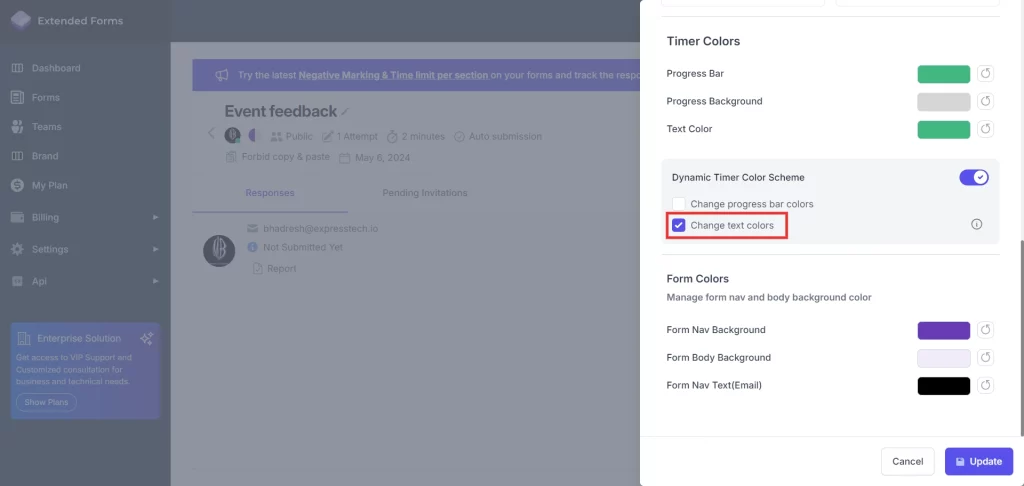
Additionally, users can opt to alter text colors based on the time remaining. This further emphasizes urgency and ensures crucial information, such as deadlines, is prominently displayed

Benefits of Customized Timer Themes in Google Forms
- Enhanced Branding: The ability of timer customization enables users to embed their brand colors, logos, or themes into the form itself. This maintains consistency among the other marketing materials and builds a professional image in the minds of the respondents.
- Improved User Experience: A visually appealing timer can improve the user experience by giving clear and understandable feedback on form progress. The customization options like color choice, animation effects, and text labels would keep the timer interesting and would make it easier for the respondents to understand.
- Increased Engagement: A timer in a personalized form can retain the respondent’s focus and impel them to keep filling out the form until the end. The inclusion of creative customizations could make the process of filling out forms more fun or exciting.
- Competitive Advantage: With the customized timer themes, ExtendedForms makes it possible for users to differentiate their forms from their competitors. One-of-a-kind and visually appealing timers may help users stand out in a large crowd, which will attract more respondents and create a strong impression.
Concluding Everything
With customized timer themes, you can stand out from the crowd and improve your user experience. With this blog, you will know that ExtendedForms offers numerous customization options that help you elevate your visual appeal.
Consider trying various options and choose the one that best fits your requirements. Make sure you leave a long-lasting impression on your customers with your Google Forms.