If you’re a Google Forms user looking to enhance your quizzes without using built-in timers, this blog post offers valuable guidance. I’ll walk you through the process of incorporating a timer into your quiz using the ExtendedForms – Google Forms timer add-on.
Google Forms is one of those platforms that is not only used by researchers or companies for market surveys but is also now used for various other purposes. One of them is widely used by educators to conduct online tests.
In this article, we are going to discuss with you – the benefits of using Google Forms and how you can create Google Form quizzes or tests by using a timer.
Table of Contents
Steps To Add A Timer To A Quiz
It’s not rocket science to create a Google Forms and if you are here, then you might not know how to create one and what features it includes. So, here is the easy guide on how you can create a Google Forms timer quiz that too with a third-party app, basically a countdown best timer for Google Forms add-on.
So, let’s not waste your time and directly get into the steps.
1. Set up Google Forms for Quiz
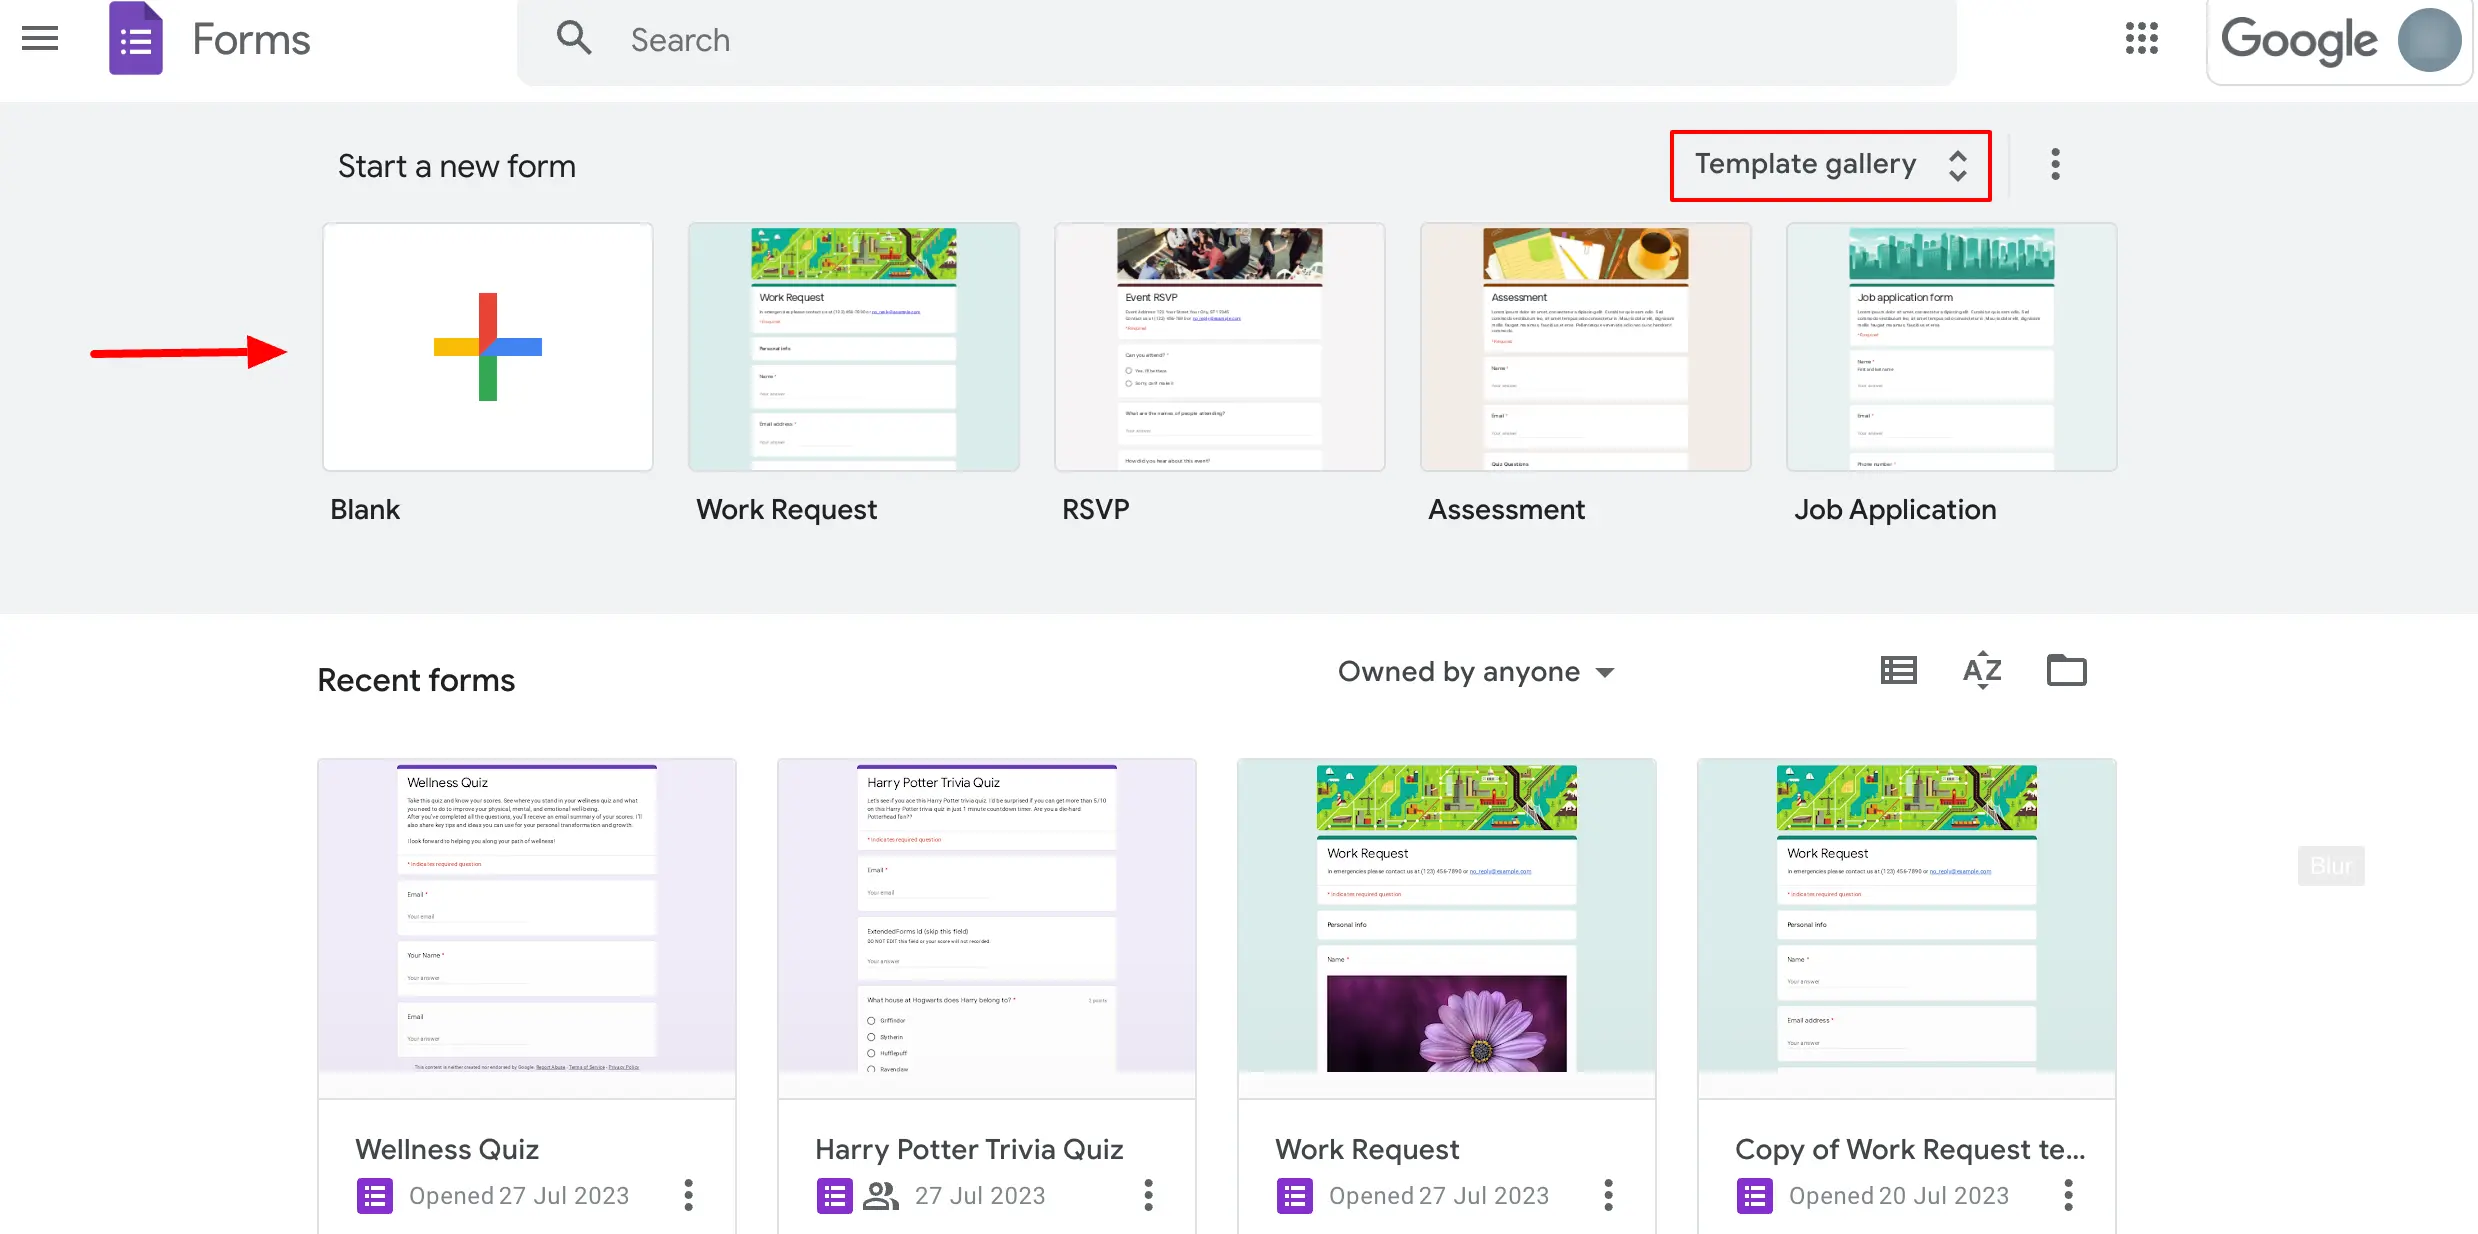
If you don’t have a Google account, sign up for free, it is your first step. Then go directly to Google Forms or head over through Google Drive. There are pre-built templates you can go over. Scroll down to the Education section and select one for your quiz purpose.
Or instead of selecting ‘blank form’ just choose ‘blank quiz,’ to create an online quiz. You can also change the form into a quiz from inside the Google Form template.
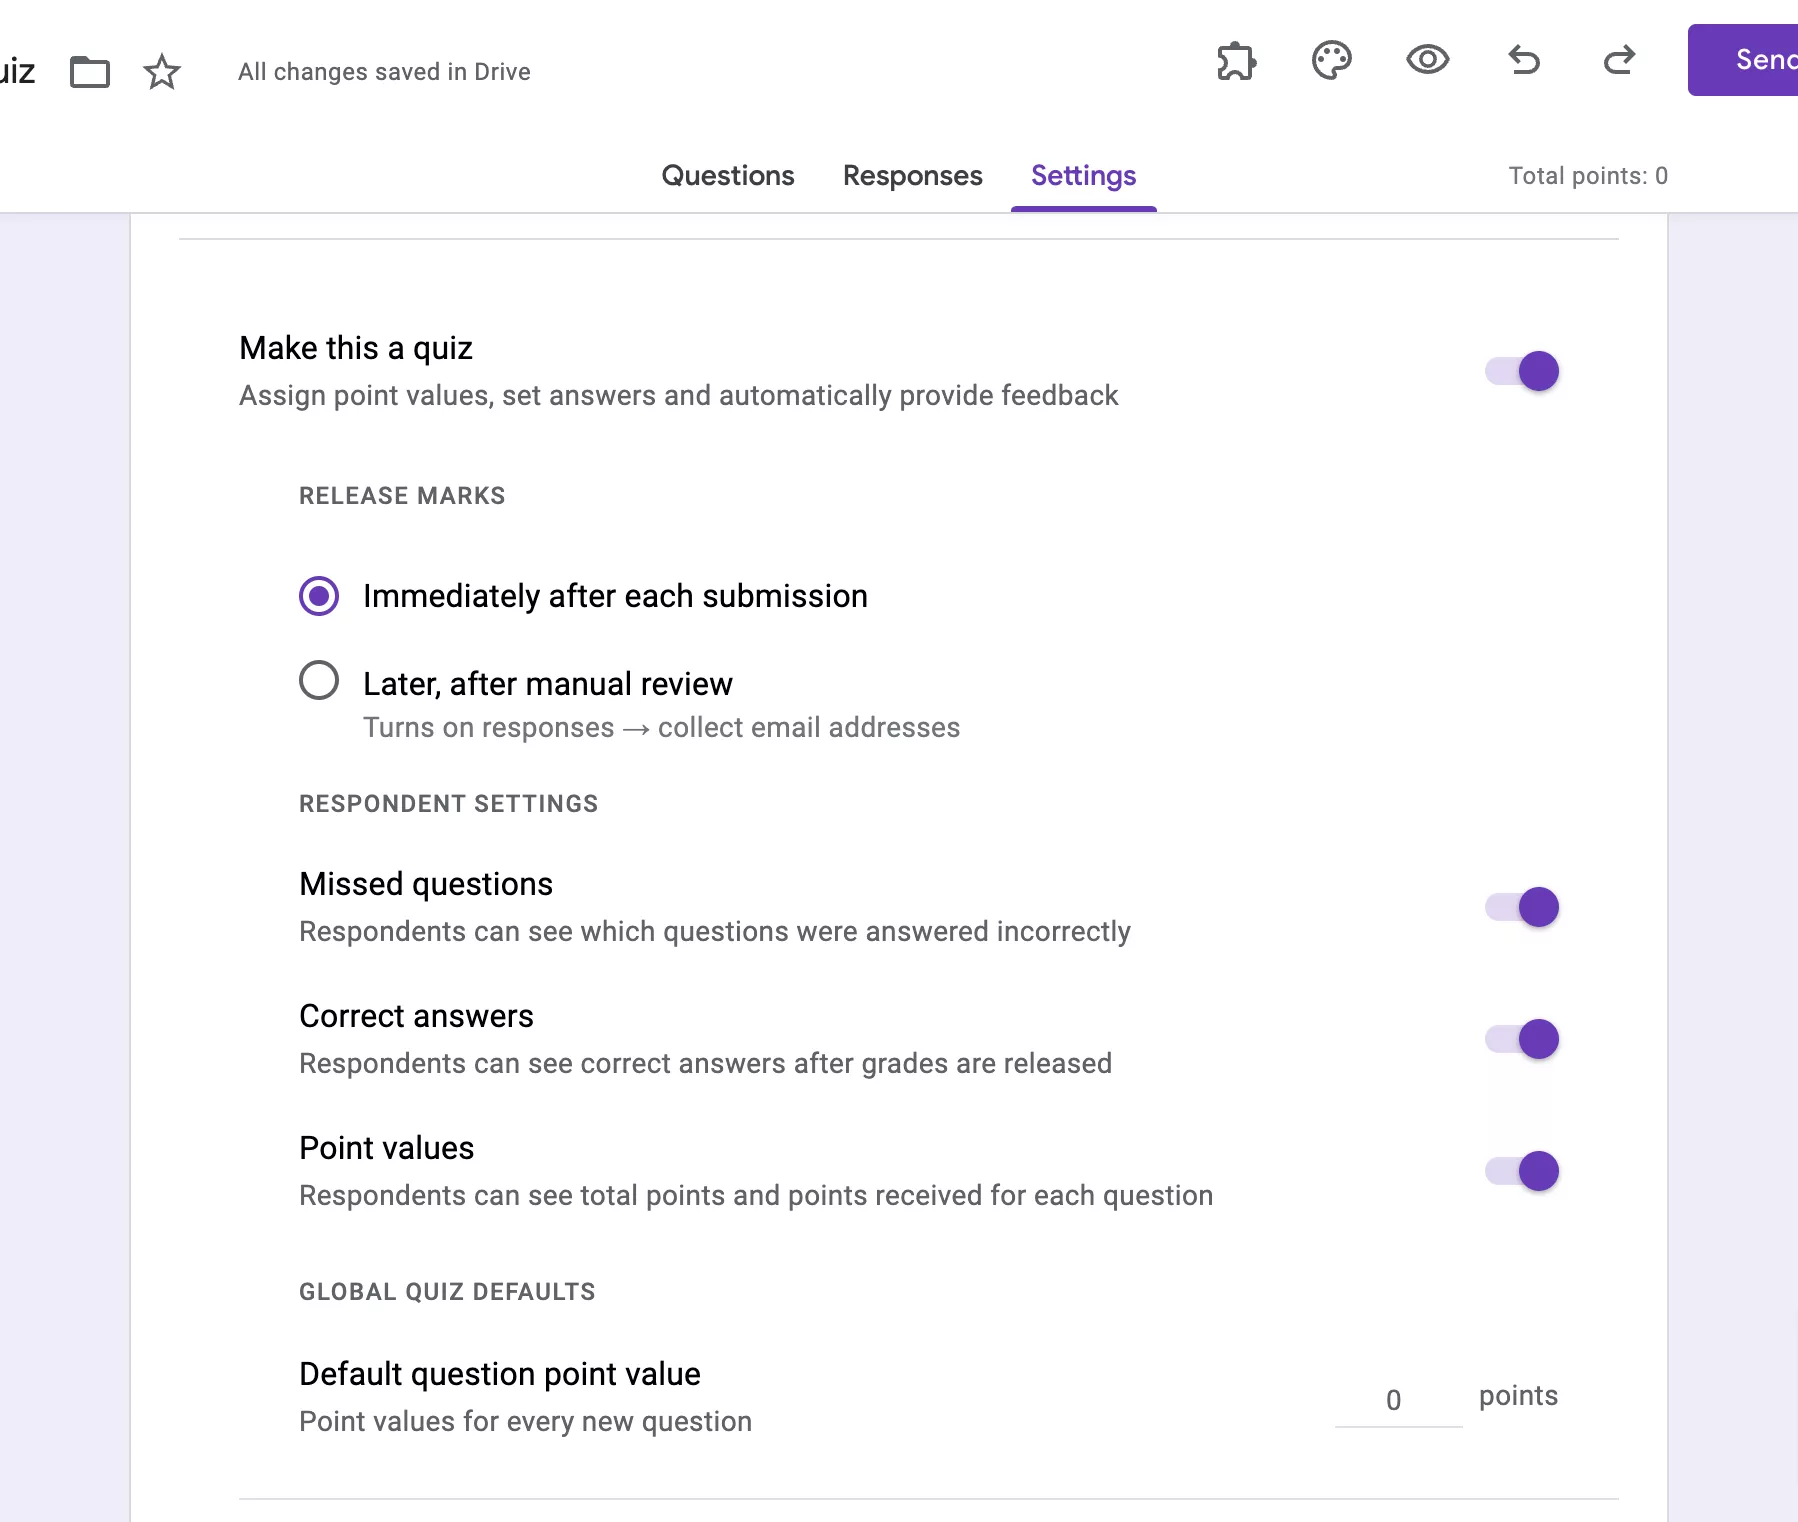
For that, Just go to ‘Settings’ and enable the ‘make this quiz’ option. Tadaa! In ‘Settings’ you’ll see more options to customize like;
- ‘Release Marks,’ where you can choose when and how to give grades.
- In ‘Respondents’ Settings,’ you can customize details like point values, missed questions, and correct answers.
- In the ‘Responses” category you can manage how responses are collected like ‘collect email addresses,’ which will make entering the email id before moving forward into the quiz mandatory.
- Then, there’s the ‘Presentation’ tab, where you customize how forms & responses are presented.
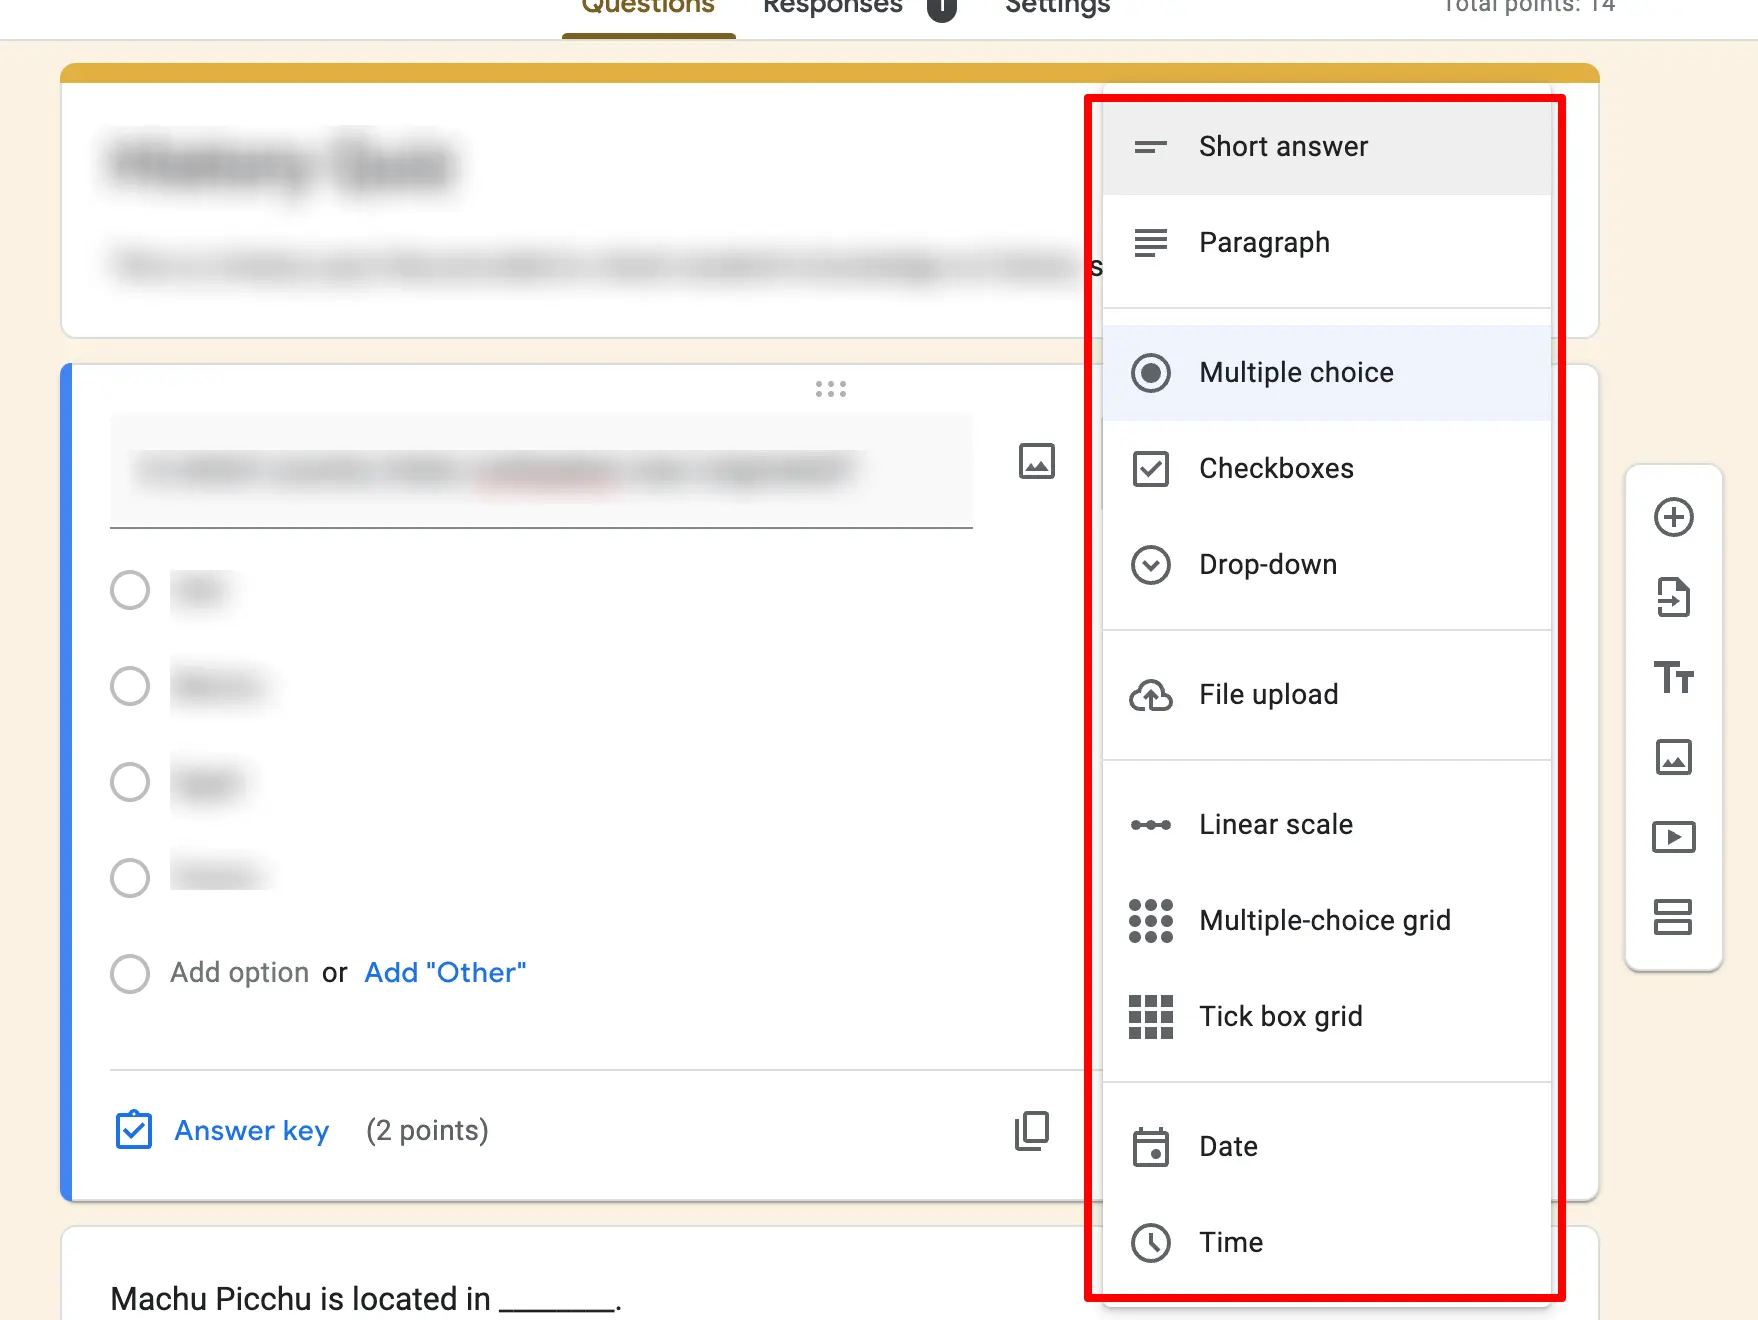
Moving to the main part of creating a Google form quiz i.e, Q&A. Whether you want to create competition quizzes for students, trivia quizzes, or any knowledge-based type, Google Forms quiz is perfect for any type.
It comes with various question types you can use like multiple choice, Likert scale, checkboxes, long/short paragraph answers, and more. Apart from that, there are settings for adding files, images, and videos to your questions & answers.
Furthermore, in each question, you can add point values (if you haven’t added default point values from settings), correct answers, and provide feedback for correct/incorrect answers.
Are you a business owner and want to create forms? Read, Creating Business Forms Using Google Forms (7 Simple Steps)
2. Add ExtendedForms Timer
ExtendedForms can turn your Google forms into quizzes and timer tests with an integrated one-click countdown timer. You can not only add just timer to your quiz but can also add a proctor to prevent cheating.
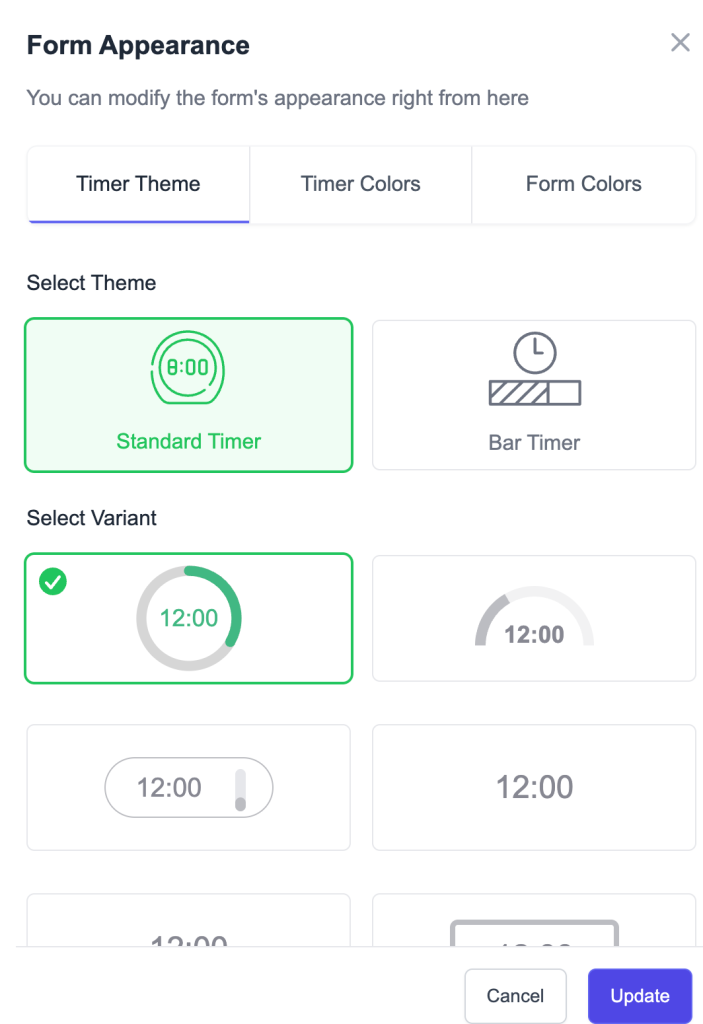
To add a timer to your quiz, you will open the ExtendedForms Configure panel from the puzzle icon. ExtendedForms gives you more than one timer theme. You can pick the Standard Timer, which shows the time in numbers at the top of your form. You can also choose the Bar Timer, which shows time as a moving bar, making progress easy to see without reading minutes constantly. Inside each theme, there are multiple design variants, so you can test and select the one that looks best for your quiz.
Once you pick a theme and variant, you can change the timer colors. You will control the Timer Bar (the main bar color), the Timer Bar Background (the color behind the bar), and the Timer Text Color (the color of the timer digits and labels). If you want the timer color to shift with time left, you can turn on the Dynamic Timer Color Scheme. This makes the timer bar or the text color change based on progress, so users can sense urgency as time reduces. You can edit both the changing bar colors and text colors in this setting to make the timer clear and stress-free to read.

ExtendedForms also lets you adjust the main form colors to match the timer look. You can change the Form Nav Background (the top bar section of the form), the Form Body Background (where your quiz questions show), and the Form Nav Text Color for Email so the email field and timer text look balanced together. While you make these changes, the timer live preview screen shows you exactly how your timer will appear. This helps you check readability, spacing, and contrast before saving anything. When you are happy with the look and rules, you will click Save to store your timer theme and colors.
To add the timer to a quiz, we have to first install the Google Form timer app.
3. Customize Google Forms
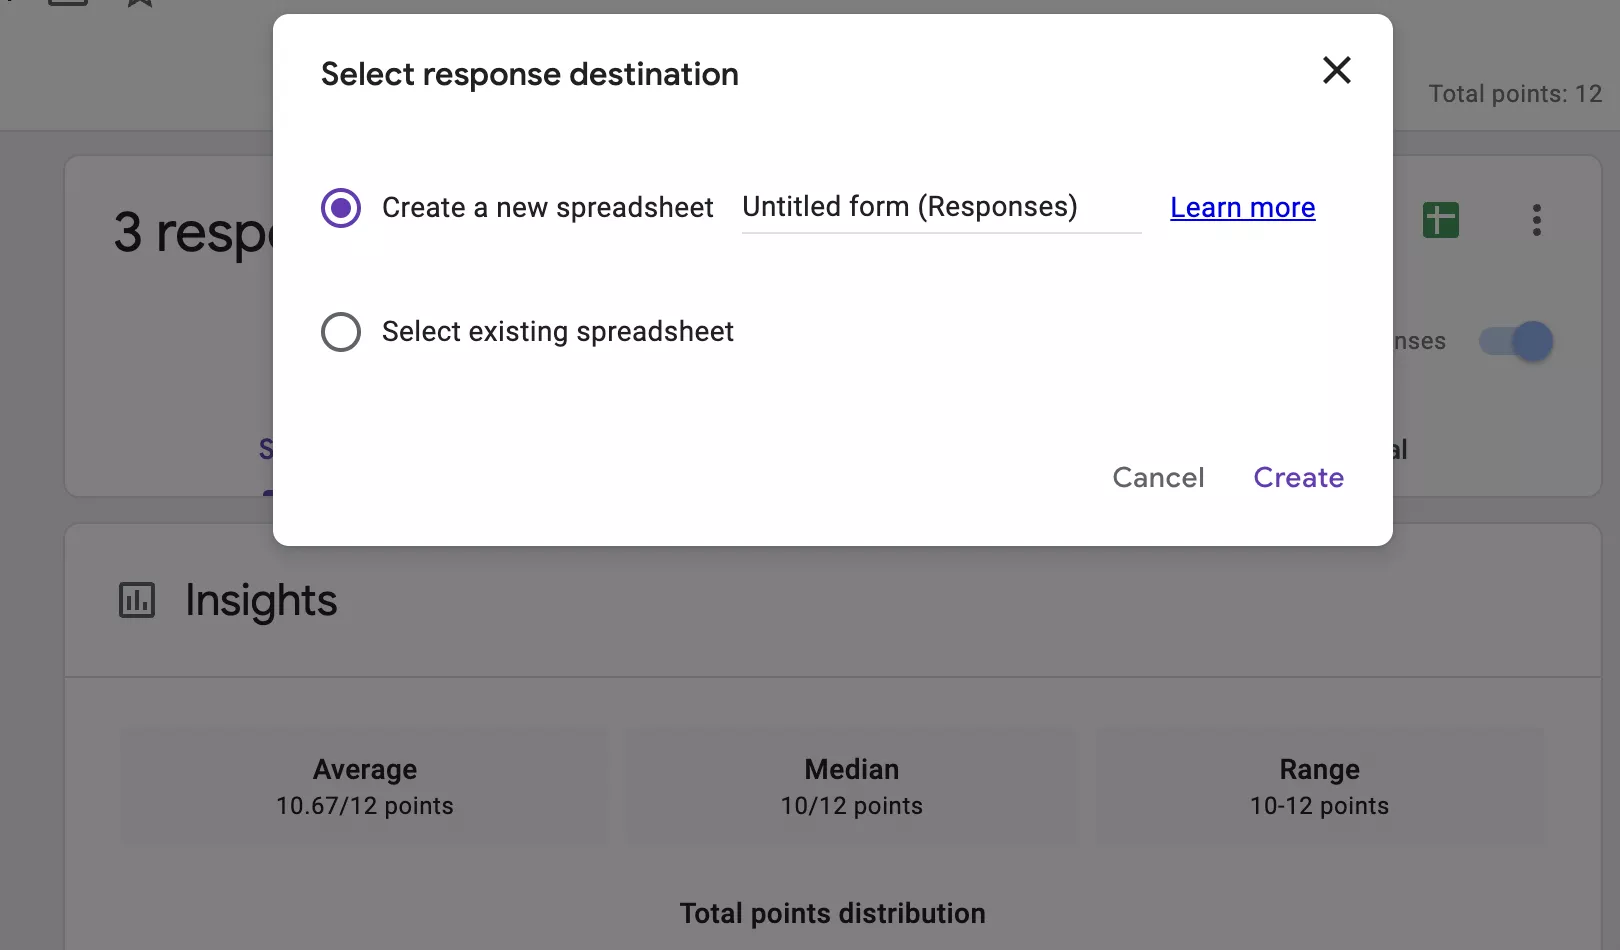
If you want to customize your form then start with Settings (if you haven’t done that in 1st step), and then move to the ‘Responses‘ tab, link Google Forms with Sheets, if you want to have all the responses in one place. A Google sheet will be formed and the form will be linked to it.
Besides, you can also select previously created sheets for your response destination. In the ‘Responses’ option only, go to the ‘፧’ menu option and choose ‘select response destination.’ Also, you can opt to get an email notification for every response.
Moreover, if you want to customize your Google form then you can change it by clicking on ‘Customize Theme’ on the top navigation bar. You will see a dialog box with ‘Theme options’, from there you can change the background color, font style, header image, and theme color.

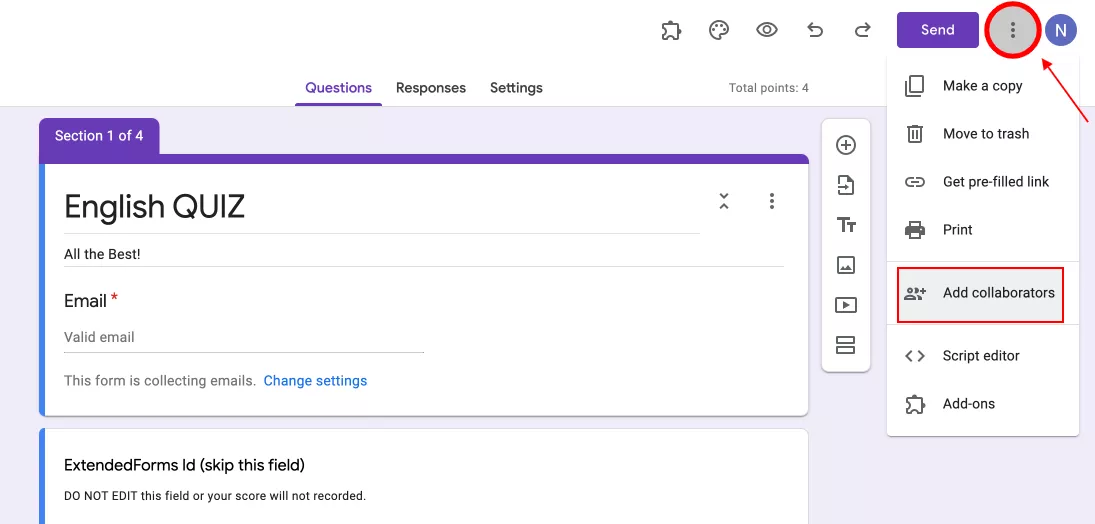
Further, if you want to add a collaborator (e.g.: interviewers, editors, teachers), with whom you want to share the Google Form quiz then you can do so by navigating to “፧”.
Click on ‘Add Collaborators’ and add another person’s email or copy the link and make it visible to all. Further, in the same settings, you can get a pre-filled form quiz link.
Enhance security by adding CAPTCHA to Google Forms. Read, How to Add CAPTCHA to Google Forms? (4 Easy Steps) to know more.
4. Preview and share it
Once everything is done, it’s time to share it with your audience. To see what the Google Forms timer quiz looks like, first preview it through ExtendedForms settings. Click on the ‘Preview’ button on the ExtendedForms dialogue box to see your Google Forms timer quiz.
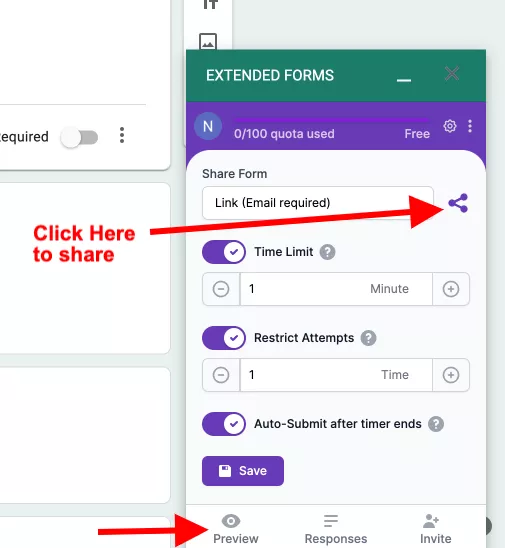
Then share it by navigating to the ExtendedForms box, click on the share form link and the link will be copied. You can also through the ‘Invite’ option share it with people, you’ve to add all the email ids. Voilà! You have added a Google Forms timer and created a quiz to share.
Other Useful Features of Extended Forms:
Advanced Proctor for fair tests
- Full Screen Detection: Marks a rule break if a user exits full screen during a test.
- Tab Switch Detection: Logs every time a user moves to another browser tab.
- Camera Snapshots: Takes random camera photos to confirm focus and presence.
- Copy-Paste Block: Stops copy, paste, and inspect actions inside the form.
- Hide Back Button: Removes the back button to enforce forward-only answers.
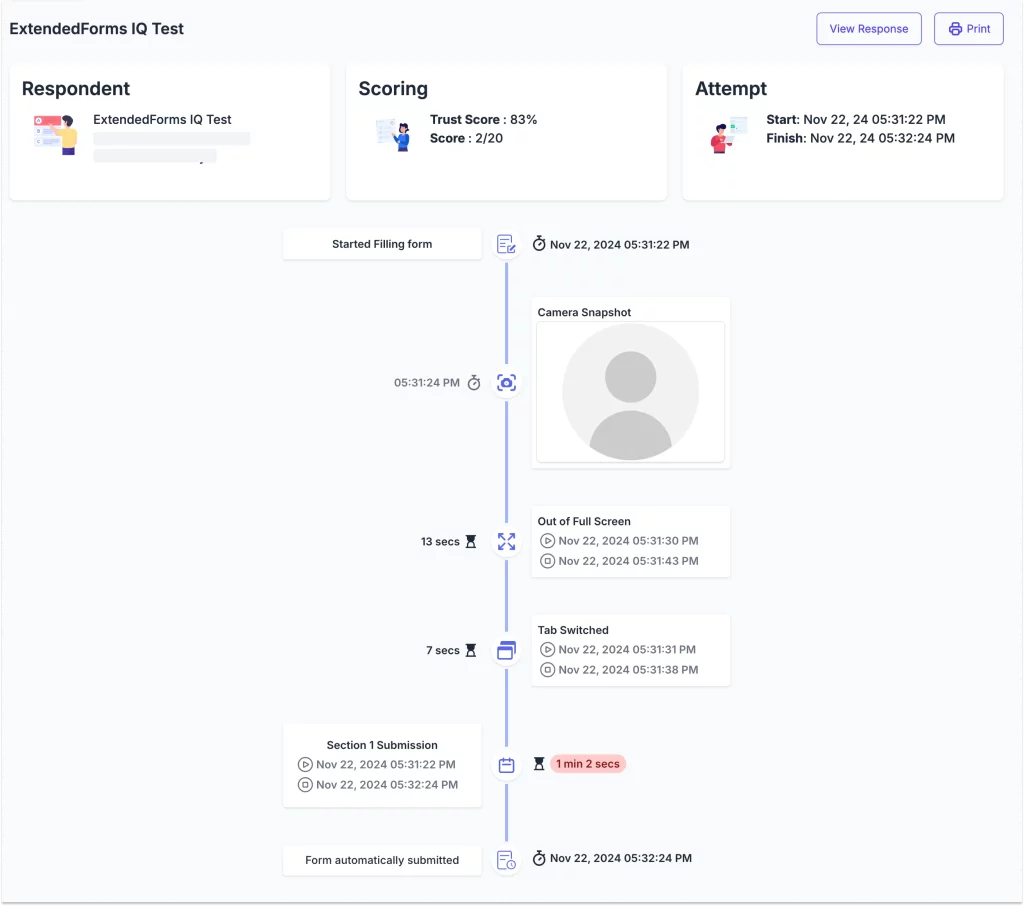
- Trust Report: Shows a log of all rule breaks with timestamps and camera images.
Branding controls for a clean form look
- Custom Logo + Colors: Add your logo and brand colors to the form view.
- Invite Design: Send clean, branded email invites to selected users or groups.
- Welcome Screen in many languages: Write the welcome page in multiple languages.
- Domain Limit: Allow access only to specific email domains (school or company).
- Short or named form links: Change or shorten links to match your brand.
- Timer Themes: Pick a timer style that matches your form design.
Team control without mixing accounts
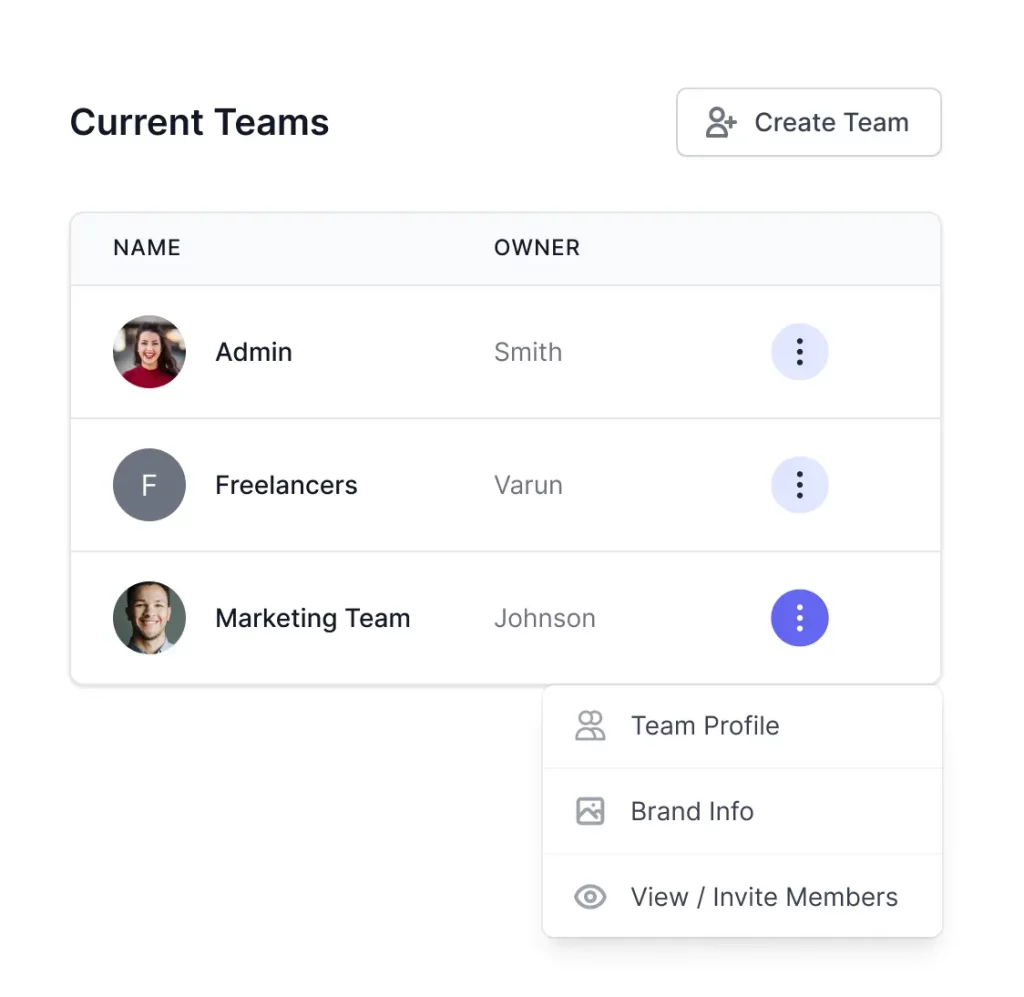
- Create teams, add members: Group users by department or function to run tests at scale.
- Team branding + support email: Each team can have its own logo, colors, and help email.
- Multiple roles: Assign who builds forms, shares links, reviews scores, or gets reports.
- Move form ownership: Transfer forms between teams or accounts safely. No data is lost.
Scoring, limits, QR and data flow
- Negative marking: Deduct points for wrong answers in competitive tests.
- Cap total form responses: Stop new entries after a set number and show a message.
- Limit tries per user: Stop repeat submissions after the set number.
- QR code for sharing: Let users scan and open tests instantly on any device.
- Response time tracking: See the exact timestamp of every form submit.
- Score resubmit: Recheck or resend scores after review if needed.
- Dashboard charts: See response trends and time spent per test or section.
- API + webhook: Send invites, pull answers, or trigger other tools based on form submit.
Concluding Everything
ExtendedForms has made it much easier to add a timer to your Google Forms quiz without complex setup. You now have control over how the timer looks and how the test behaves. Timer themes like a clean number timer or a progress bar timer help users see time the way they need. Dynamic color rules give you visual cues as time changes.
ExtendedForms adds a layer of time, fairness, safety, and identity to it. This makes your quiz feel more solid, fair, and easy to manage. If you run tests often, need to protect content, or want your form to look like it truly belongs to a school or a brand, ExtendedForms gives you those tools in one place. Try the add-on, test the timer, save it, and share it. Small changes like a clear timer can have a big impact on how your quiz works for you and the people taking it.
If you like reading this guide on how you can add a timer in Google Forms, also read, How to Add a Hyperlink to Google Forms. (7 Simple Steps).