
Looking for an easy way to create business forms using Google Forms?
In the current fast-paced business world, efficiency is important to stay ahead of the competition. One of the power tools that companies can use to simplify work processes is Google Forms.
Google Forms is a powerful tool for businesses of all sizes, making it easy to create different types of forms. Whether you are collecting customer feedback, conducting employee evaluations, or organizing event registrations, with Google Forms, you have an easy and efficient option.
Here, in this blog, we will take you through a detailed guide to how you can create business forms using Google Forms.
Why Create Business Forms Using Google Forms?
There are multiple reasons why a business should consider generating personalized invoices using Google Forms.
- Convenience: Google Forms, with its range of features, allows you to effortlessly create, distribute, and collect responses for your form. There’s no need to have specialized software or technical skills – Google Forms is easy to use by anyone familiar with a computer.
- Customization: Google Forms allows you to design and structure your forms as you like. Options range from different types of questions to themes and branding, which allows you to customize the form to suit your specific needs.
- Collaboration: Google Forms assists the seamless collaboration process in the team. Many people can work on the same form at the same time, thus ensuring the consistency and accuracy of all the components. Real-time editing and commenting tools support communication and productivity.
- Data Management: With the help of Google Forms, the responses you get are automatically compiled and organized, resulting in saving your precious time and effort in data management. Answers are neatly arranged in Google Sheets, which makes it easy to analyze and report them.
How to Create a Business Form Using Google Forms?
Step 1: Develop A New Form
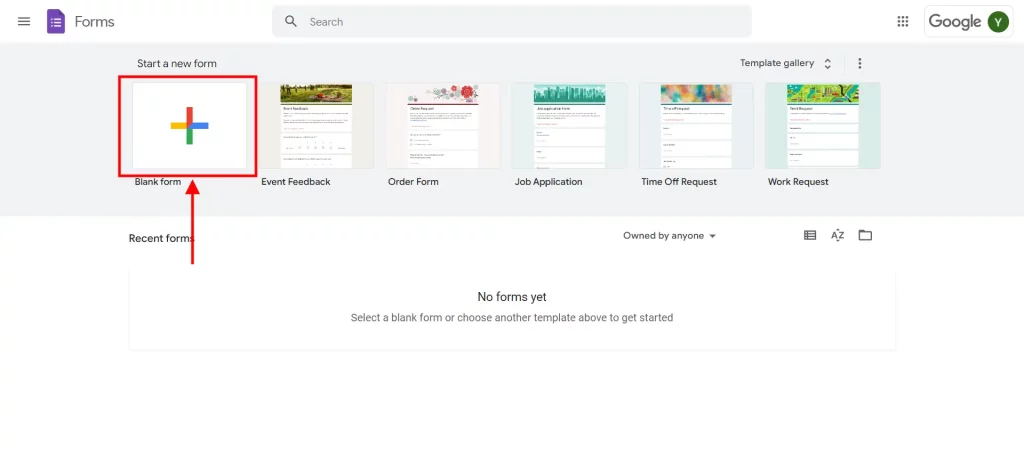
The first step to creating a business form using Google Forms is to start a new form. Once you are logged into Google Forms, click on the “+” icon or the “Blank” option to start a new form from scratch.
Give your form a name that reflects it. For instance, if you are making a customer satisfaction survey, you could name it “Customer Feedback Survey”. Google Forms has different ready-to-use templates, for instance, event RSVPs, job applications, and feedback forms. You can either opt for a pre-existing form that matches your requirements or start creating a new one from scratch for full control.
Want to create a voting poll? Read How To Create A Voting Poll In Google Forms? (7 Simple Steps)
Step 2: Ask Questions and Responses
After you’ve come up with a fresh form, you need to fill it with proper questions and response options. Click On The “+”: In a form builder, click the “+” icon to add a new question.
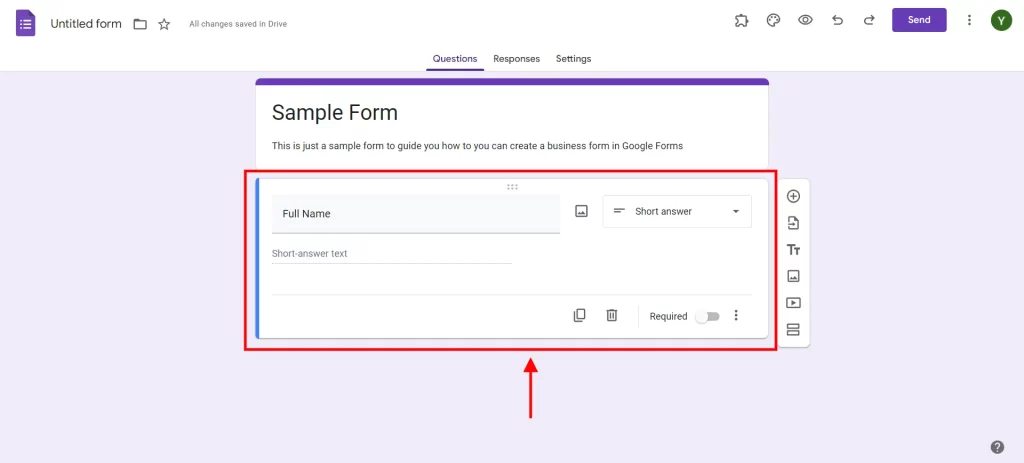
Select the type of question you want to add from the drop-down menu while creating business forms using Google Forms. Google Forms provides a range of question types such as multiple-choice, short answer, paragraph text, checkboxes, and dropdowns. Type your question into the text box below. Be clear, relevant, brief, and precise with your questions.
Based on the type of question, you need to add the response option. For multiple-choice questions, prepare the options on separate lines. For checkboxes and dropdowns, input all the possible options. Likewise, understand your question and add relevant response options.
Step 3: Organize Sections
The form becomes more understandable and easier to navigate by dividing it into logical sections. Click On “Add Section”: Within the form builder, at the bottom-right corner of the screen, click on the “Add section” option.
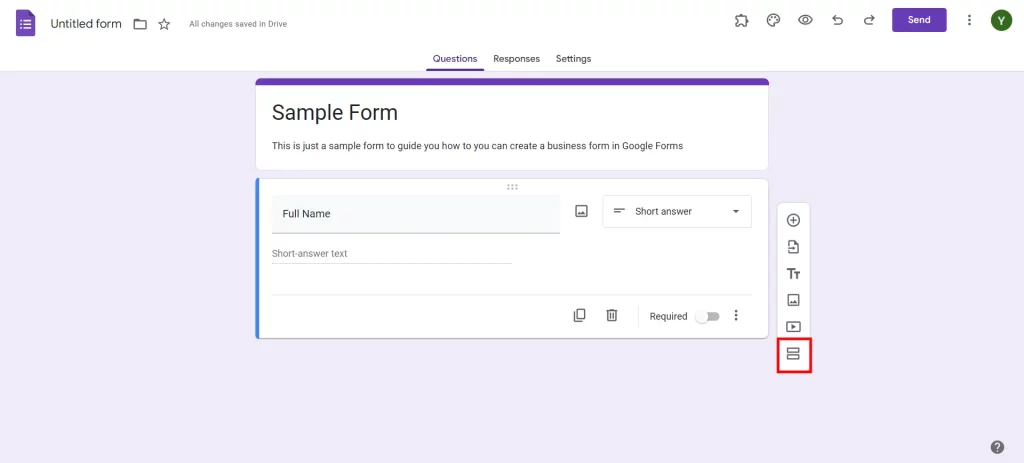
The “Add section” button allows you to create a new section in business forms using Google Forms. Label your section with a descriptive title to indicate its purpose, for example, “Contact Information” or “Product Feedback”.
Add other sections until your form gets segmented into different sections that coincide with the data you’re entering. You can avoid this step if your form is short. But for descriptive form, you should add sections as your users can get overwhelmed with so many questions.
Step 4: Edit The Theme and Design
The theme and design of your form should be customized to create a unified and professional appearance.
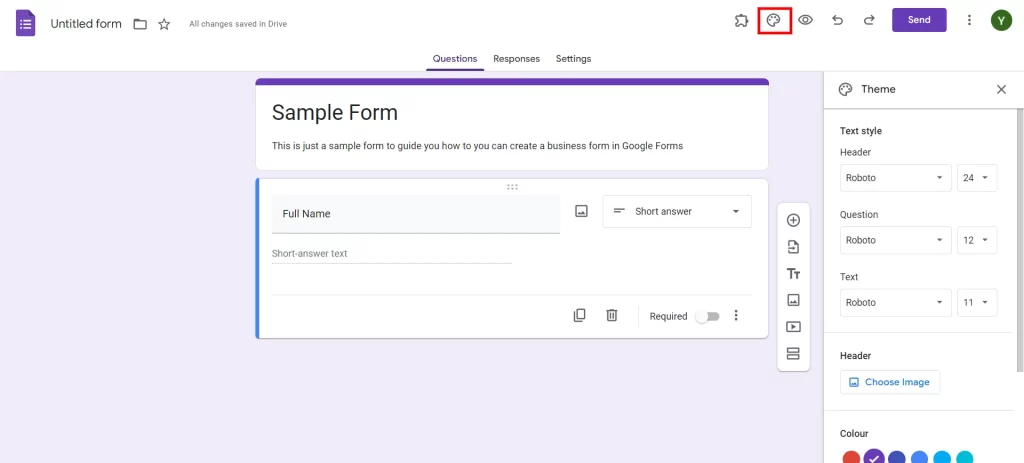
Google Forms provides many pre-designed templates for a selection. Browse available options to choose a theme that matches your brand’s aesthetic.
Choose the colors and fonts that align with your brand identity. Add a visual appeal to your form by including images or logos. Upload the images representing your brand message or add visual attraction to the form.
Step 5: Customize Settings
Adjusting the settings of your forms guarantees a better user experience. Limit the number of responses your form can take to control the data collection process efficiently. This stops the form from getting responses after the limit has been met.
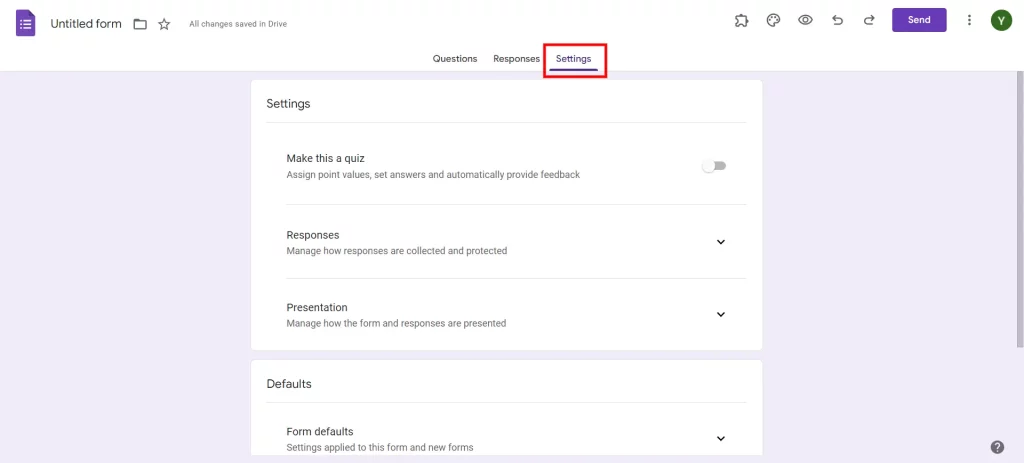
While creating business forms using Google Forms, put up a confirmation note that the respondents see after they submit the form. Make the most of this chance to express your gratitude for their participation or give them additional instructions if needed.
Configure email notifications to receive alerts whenever an individual submits a response to your form. It makes follow-ups on time and keeps you updated about the latest submissions.
Step 6: Add Timer With ExtendedForms
By integrating a countdown timer during assessments or quizzes, users’ engagement can be improved, and allotted timeframes can be adhered to. With ExtendedForms, you can have extending limits for security checks, trust scoring, and detailed reporting.
- Countdown timer: Set a time limit for sections and set auto-submissions when the time is up.
- Proctor settings: Track whether the user is taking form in full screen or not. Also, take random snapshots while filling out the forms.
- Negative marking: Automatically import scores from the linked Google form to the created classwork, making it easy for your teachers to assign Grades.
- Team management: Take a birds-eye view of your form’s performance on the app dashboard. Export all the data to Google Sheets and analyze the forms’ responses.
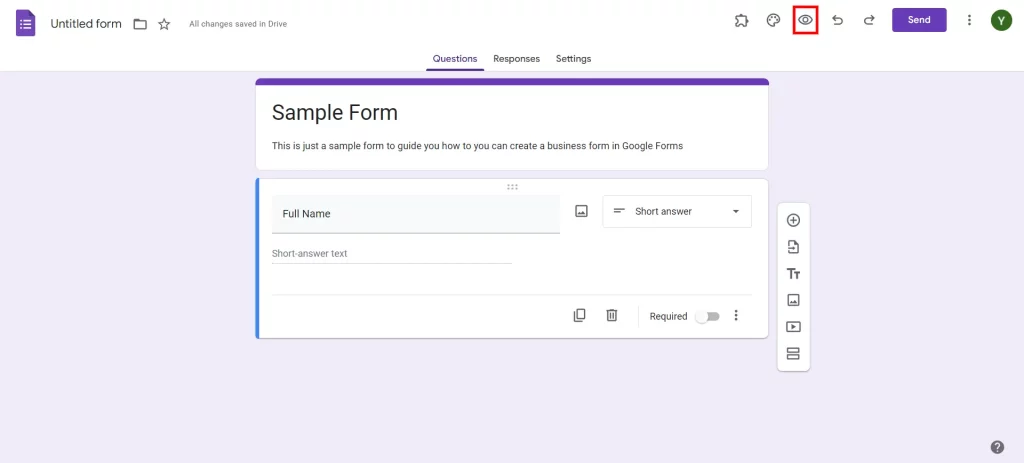
Step 7: Preview and Analyze Feedback
Before you post your form, you should preview it to make sure that it looks good and works well. Through this option, you can correct any layout problems so that a smooth user experience is ensured.
Once your form is completed, the next step in creating your business forms using Google Forms is to make it accessible to your targeted audience. Send the form by email, social media, or embedded links, and ask the respondents to give their opinion. Use the in-built analytics tool of Google Forms to acquire insights and to find out the weaknesses.
Ready to go one step ahead with your timers in Google Forms? Read ExtendedForms Unveils: Customized Timer Themes.
In a Nutshell
Google Form is a versatile tool that can help you streamline the process of collecting data and analyze it for your future business needs. It has rich functionality and powerful features to let you interact with your users and understand what they want. Creating business forms in Google Forms helps you make informed decisions about your marketing campaigns based on facts and real-time statistics.
If you like reading this blog about creating business forms using Google Forms , also read our detailed guide on Best Google Forms Test Maker: ExtendedForms and How to Make Google Forms Accessible. [In 4 Steps].