Sharing Google Forms publicly can be a powerful way to gather opinions and feedback from wider audiences. Whether you’re conducting market research or simply looking to reach broader groups, making Google Forms accessible opens endless possibilities.
While creating Google Forms is a straightforward process, making it from private to public requires an extra few steps. Understanding these steps can help ensure your form is accessible to your target audience without any access issues.
Here, in this blog, we will take you through a detailed blog of how you can make Google Forms accessible.
Table of Contents
Steps to Make Google Forms Accessible
Before making Google Forms accessible, it is important to understand that if you make the Google Form public then anyone can view and submit responses.
In certain situations, it might be called for; however, in other cases, it can lead to precarious situations or not having proper responses.
For this blog, we’ll only focus on making Google Forms accessible to everyone.
Step 1: Access Google Forms Settings
First, you’ve to navigate to Google Forms. Either create your form from scratch or choose an existing form to make it public.
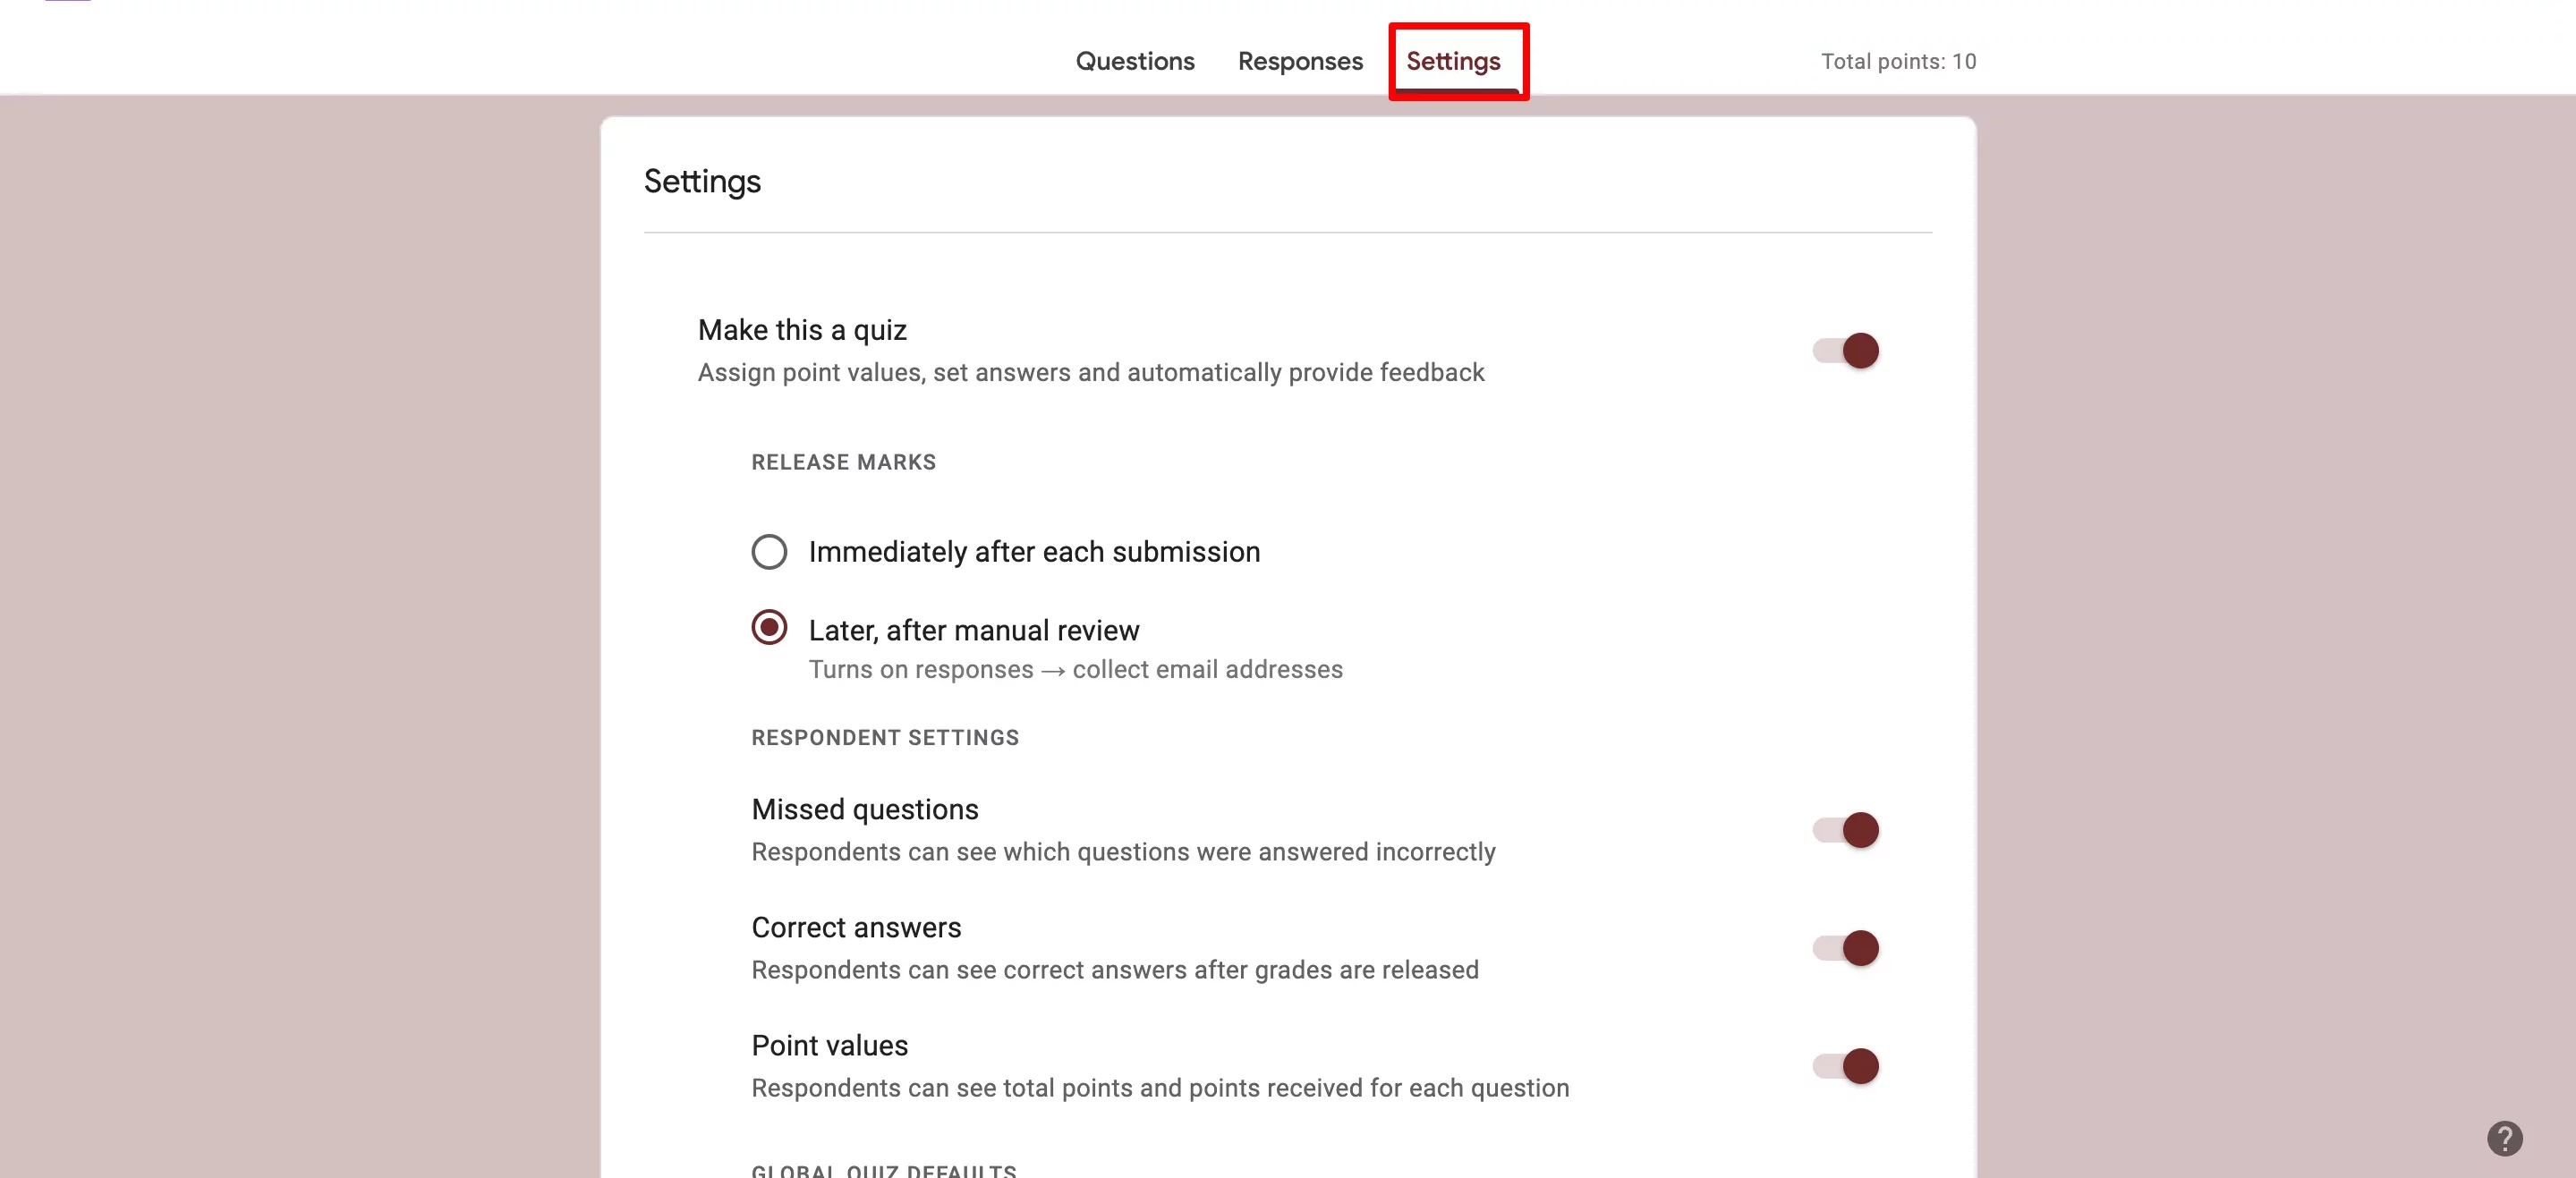
After creating or opening the form to make it public, toggle to the “Settings” tab. It will open settings that help you manage how responses will be collected. This will be important to make sure the form can be made public.
Step 2: Customize Accessibility Settings
To make Google Forms accessible to the public, we must ensure that the “Limit to 1 response” option must be turned off. You’ll find this under the “Responses” section of the Settings tab.
When this option is turned on it means that users must sign in with their Google account to respond to the form. It depicts that a form is private, users can’t access the form without the required sign-in and they won’t be able to submit their responses after one time.
Turning it off will ensure anyone can use the form without signing into Google Forms.
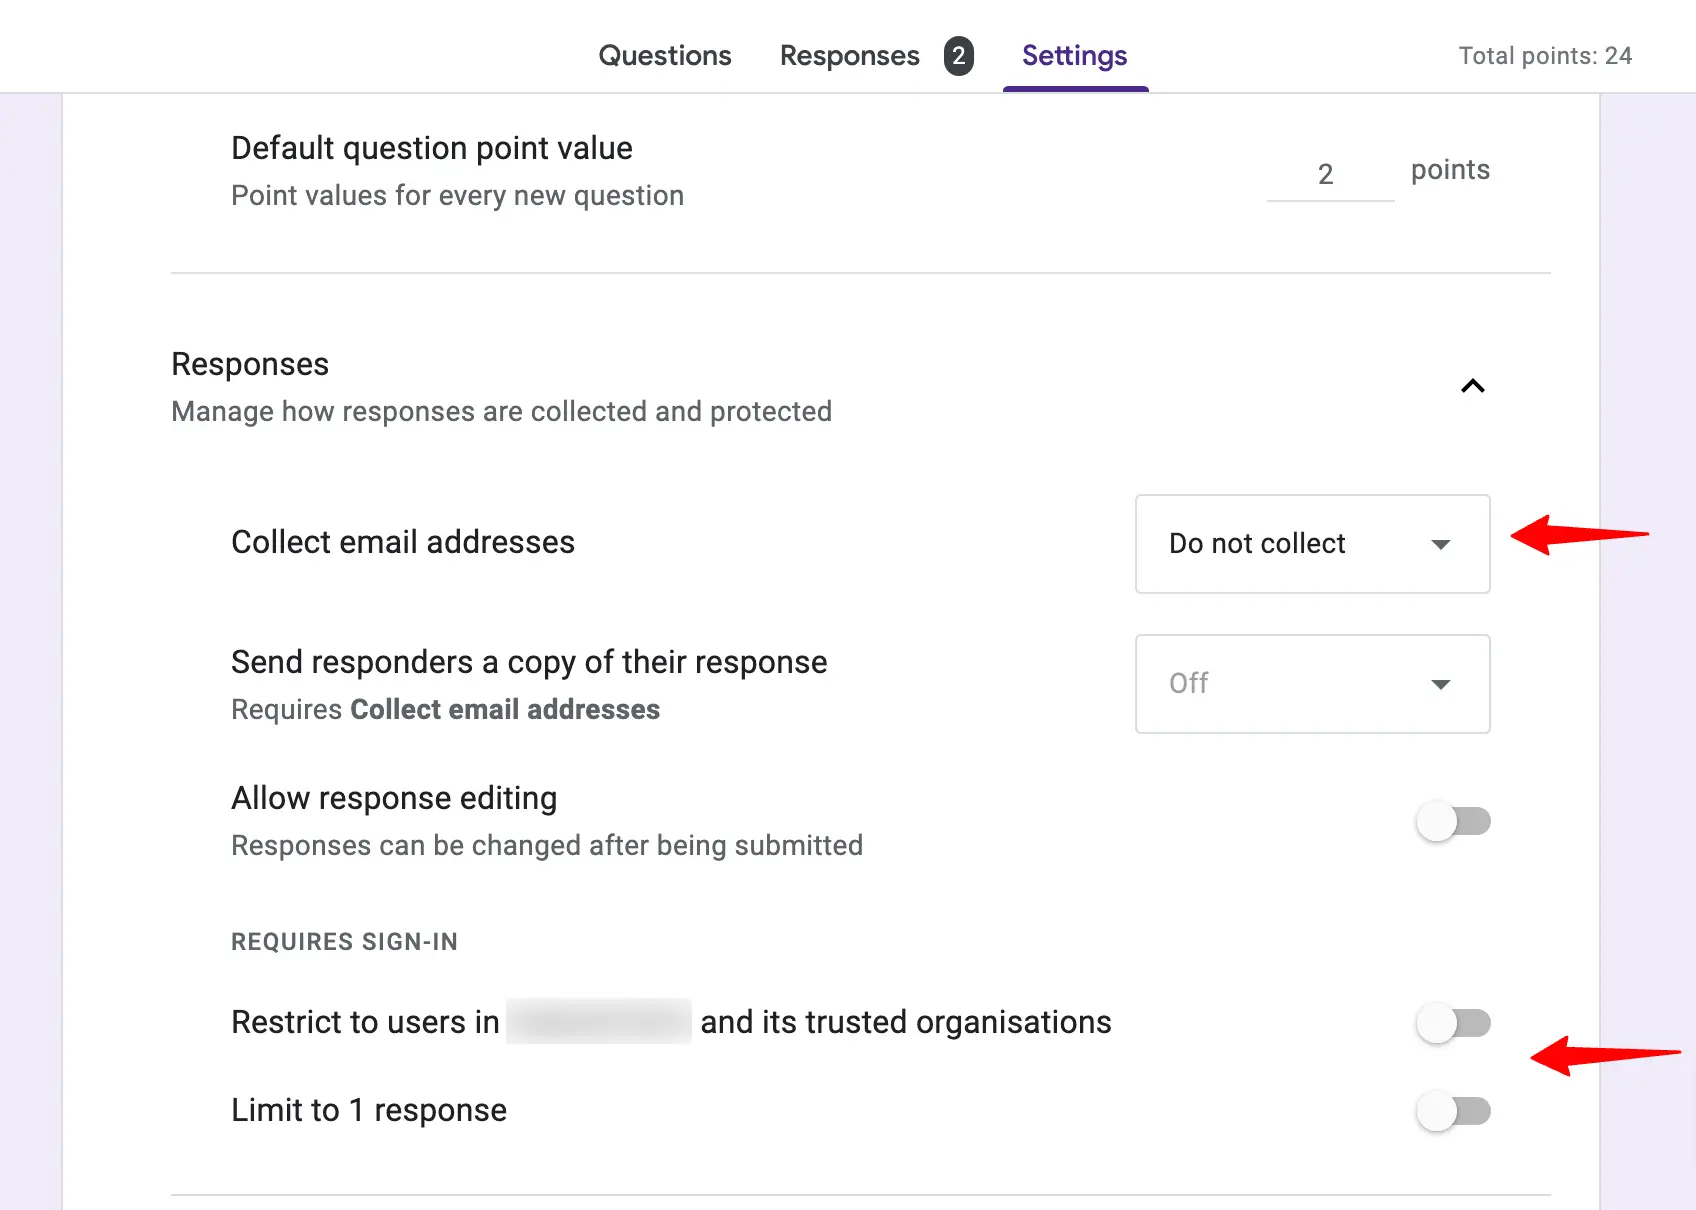
Note – If you’re using Google Forms through your organization account, you’ll also get the “Restrict to users in XYZ and its trusted organizations” option, which you’ll have to turn off as well.
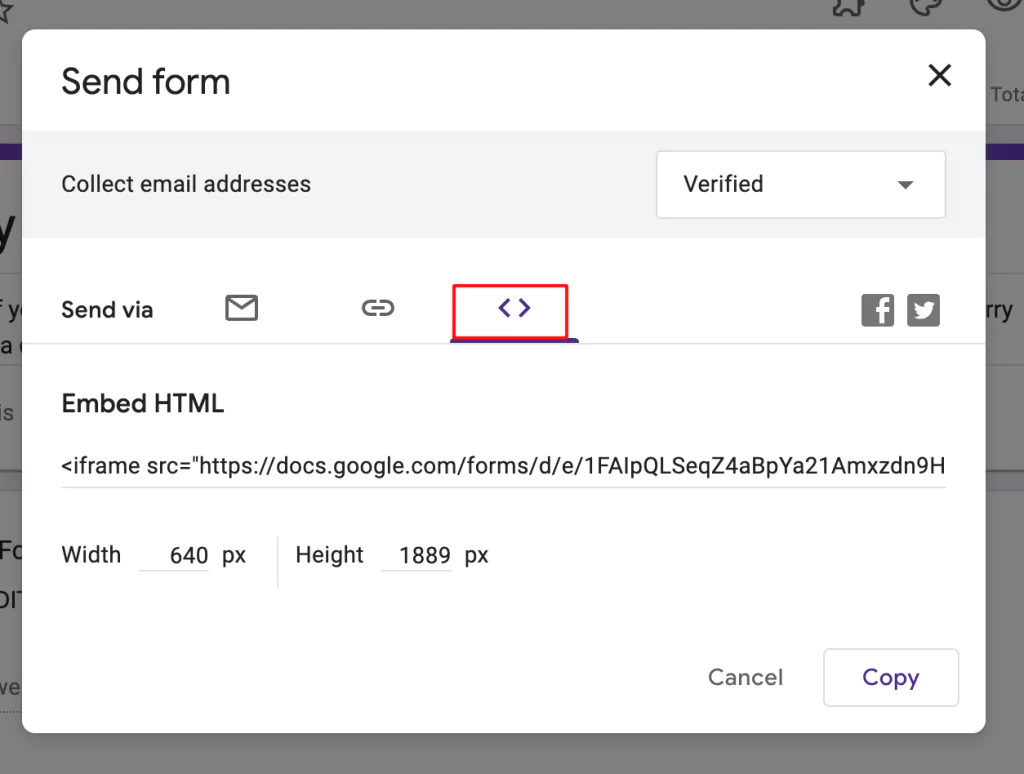
Within the Responses category in Settings, there is another option that needs to be configured as well – “collect email addresses.” Just choose ‘Do not collect” from the dropdown and forms will not collect email addresses.
Even if it is set to the other two options – “verified or responder input,” forms can still be made public. However, turning it off will ensure that anyone can fill form regardless of providing email addresses or not.
Step 3: Send out the Form
Now that the form is ready to be shared with the public, send it out to the world. For this, you need to “Send” the form, here’s how to do it.
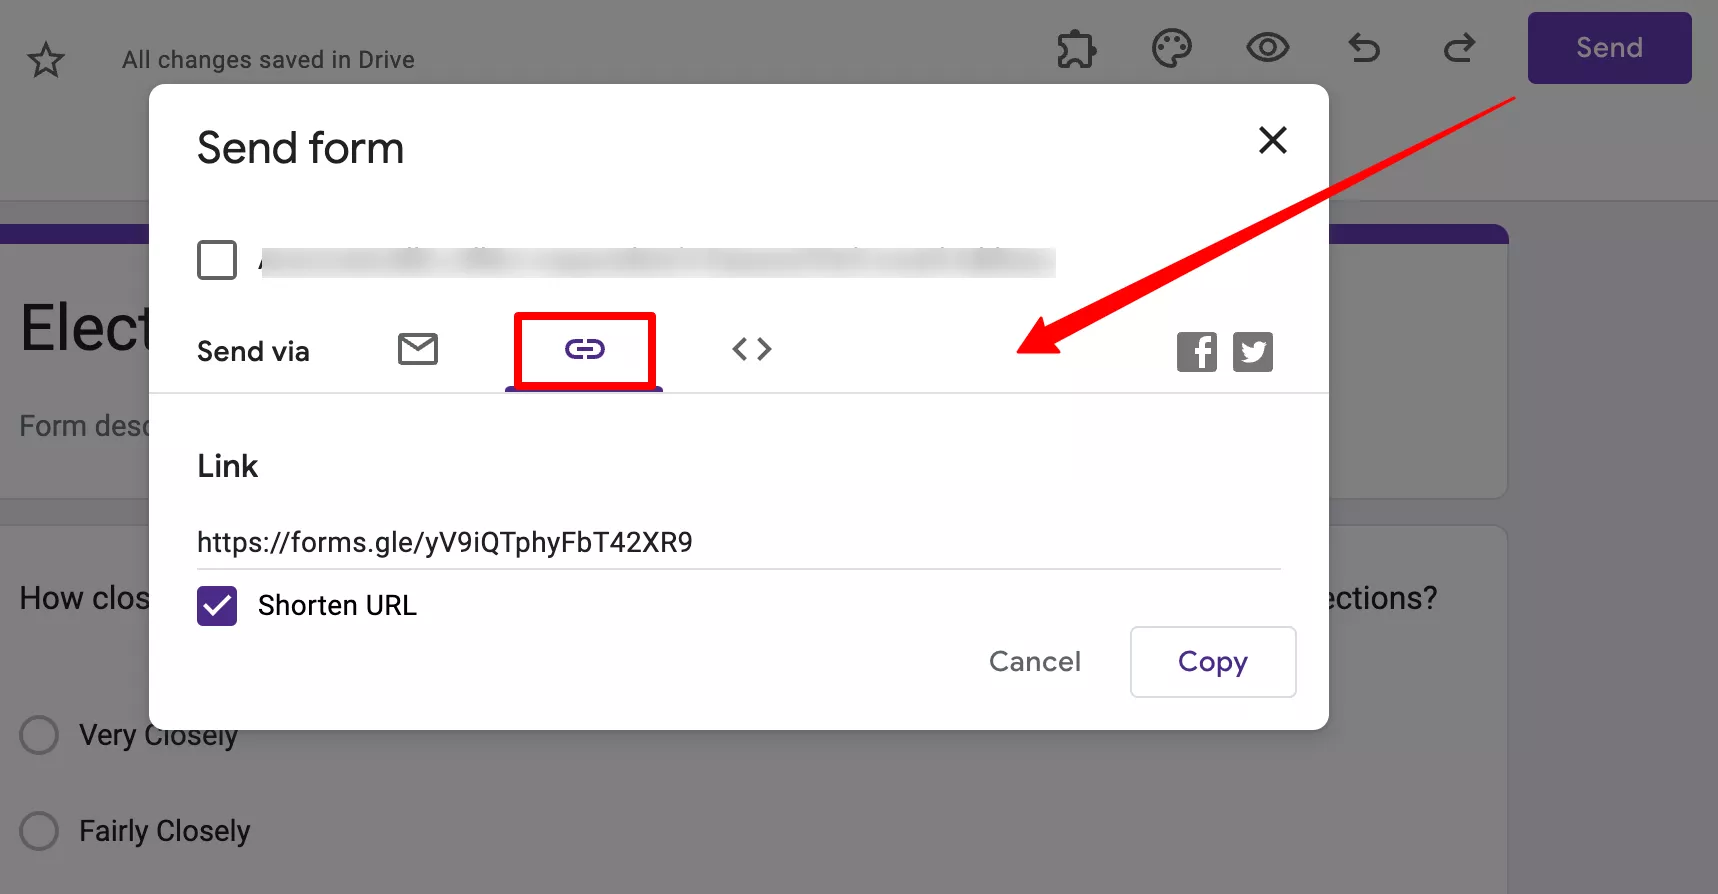
Click on the send button on the form you want to share. Doing this will open a pop-up window; here you can see all the ways through which you can send out the form. The first is via email, you simply have to provide the email addresses to share the form with.
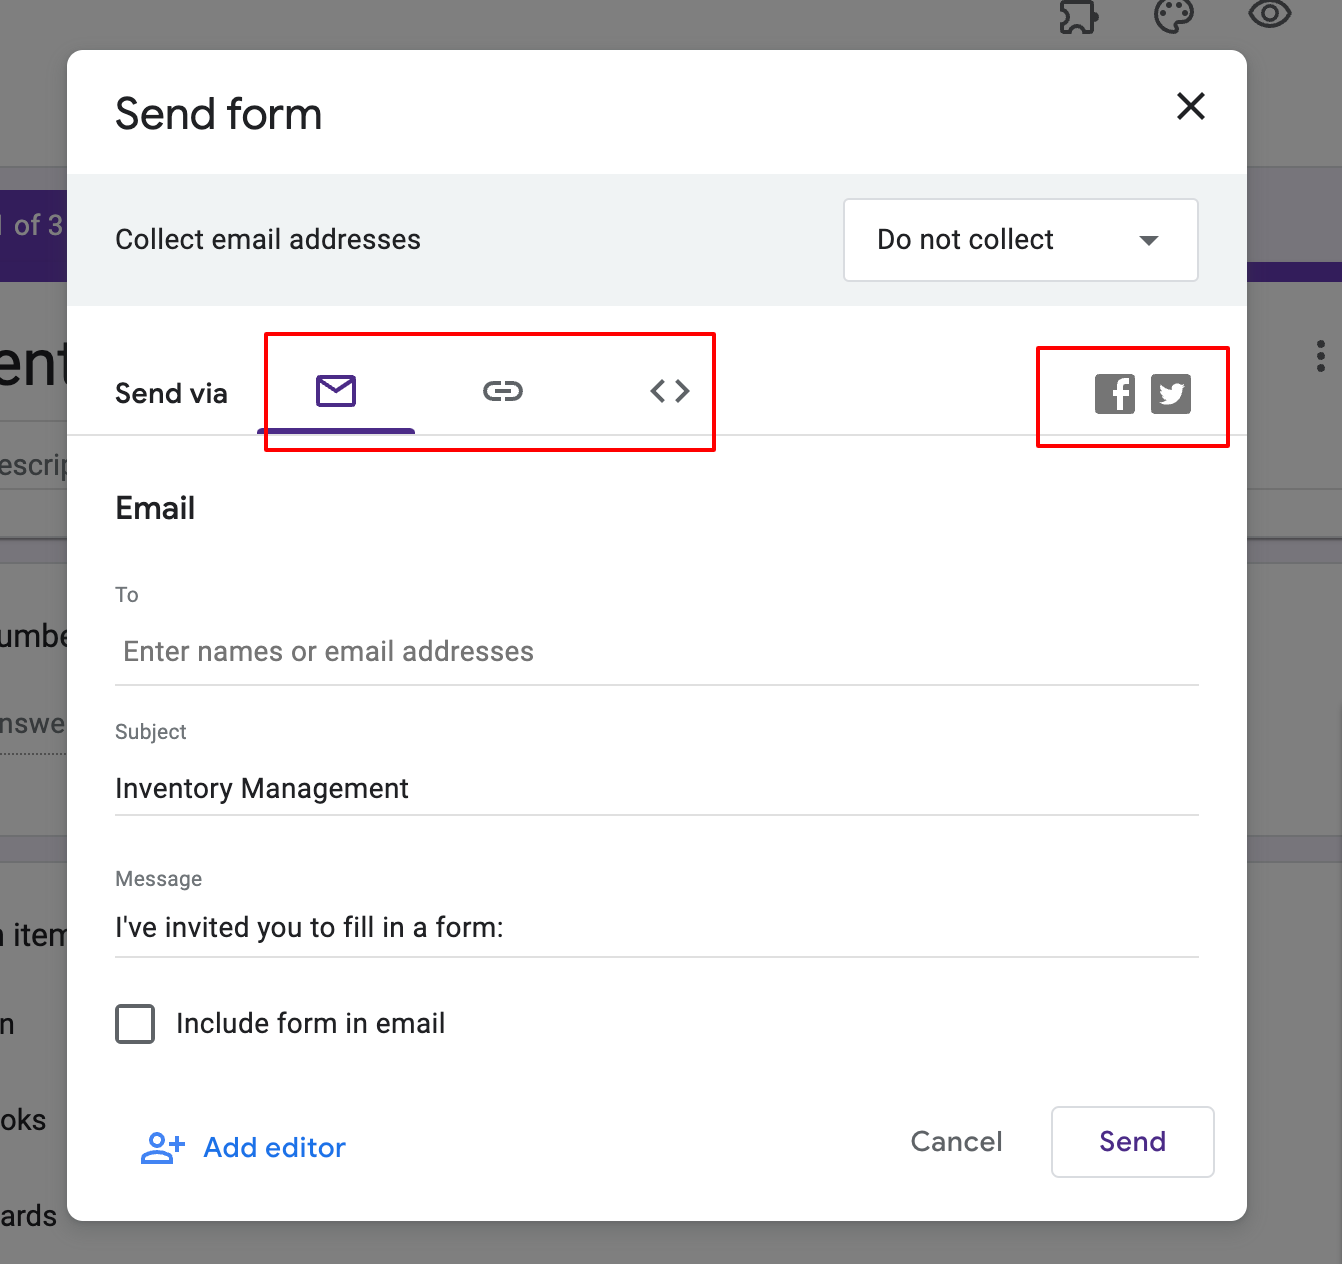
The second option is more appropriate if your form is public – through a link. You can copy the link and paste it anywhere for the form to be accessible. Moreover, it has the ability to shorten the URL link, it will be more convenient.
You can even make the link in a QR code to scan!
Embedding the form into your webpage is the third option for sharing Google Forms. You can even through social media like Facebook and Twitter send the form to the public.
Step 4: Managing Responses
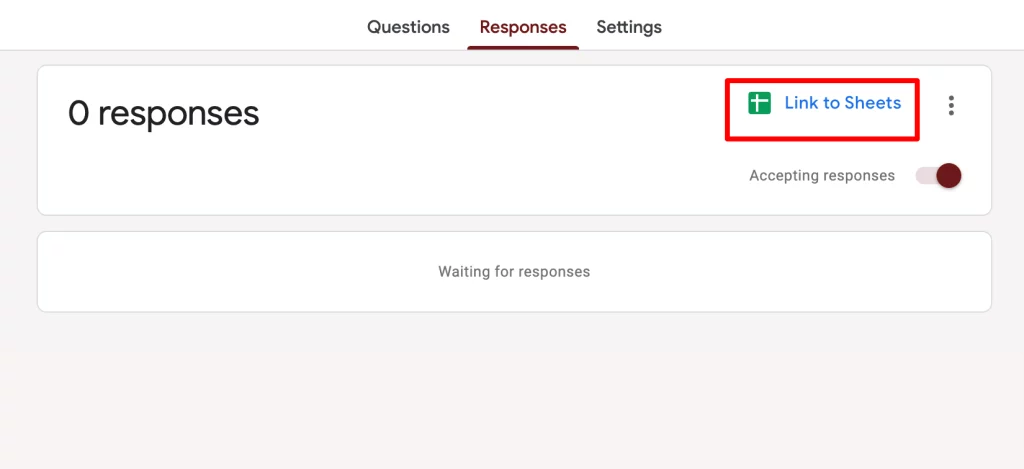
After sharing the form with the public, once you start receiving responses, you can track and manage all the responses in Google Sheets.
In the Responses tab in Google Forms, click on the “Link to Sheets” option, the form will be automatically linked with a spreadsheet.
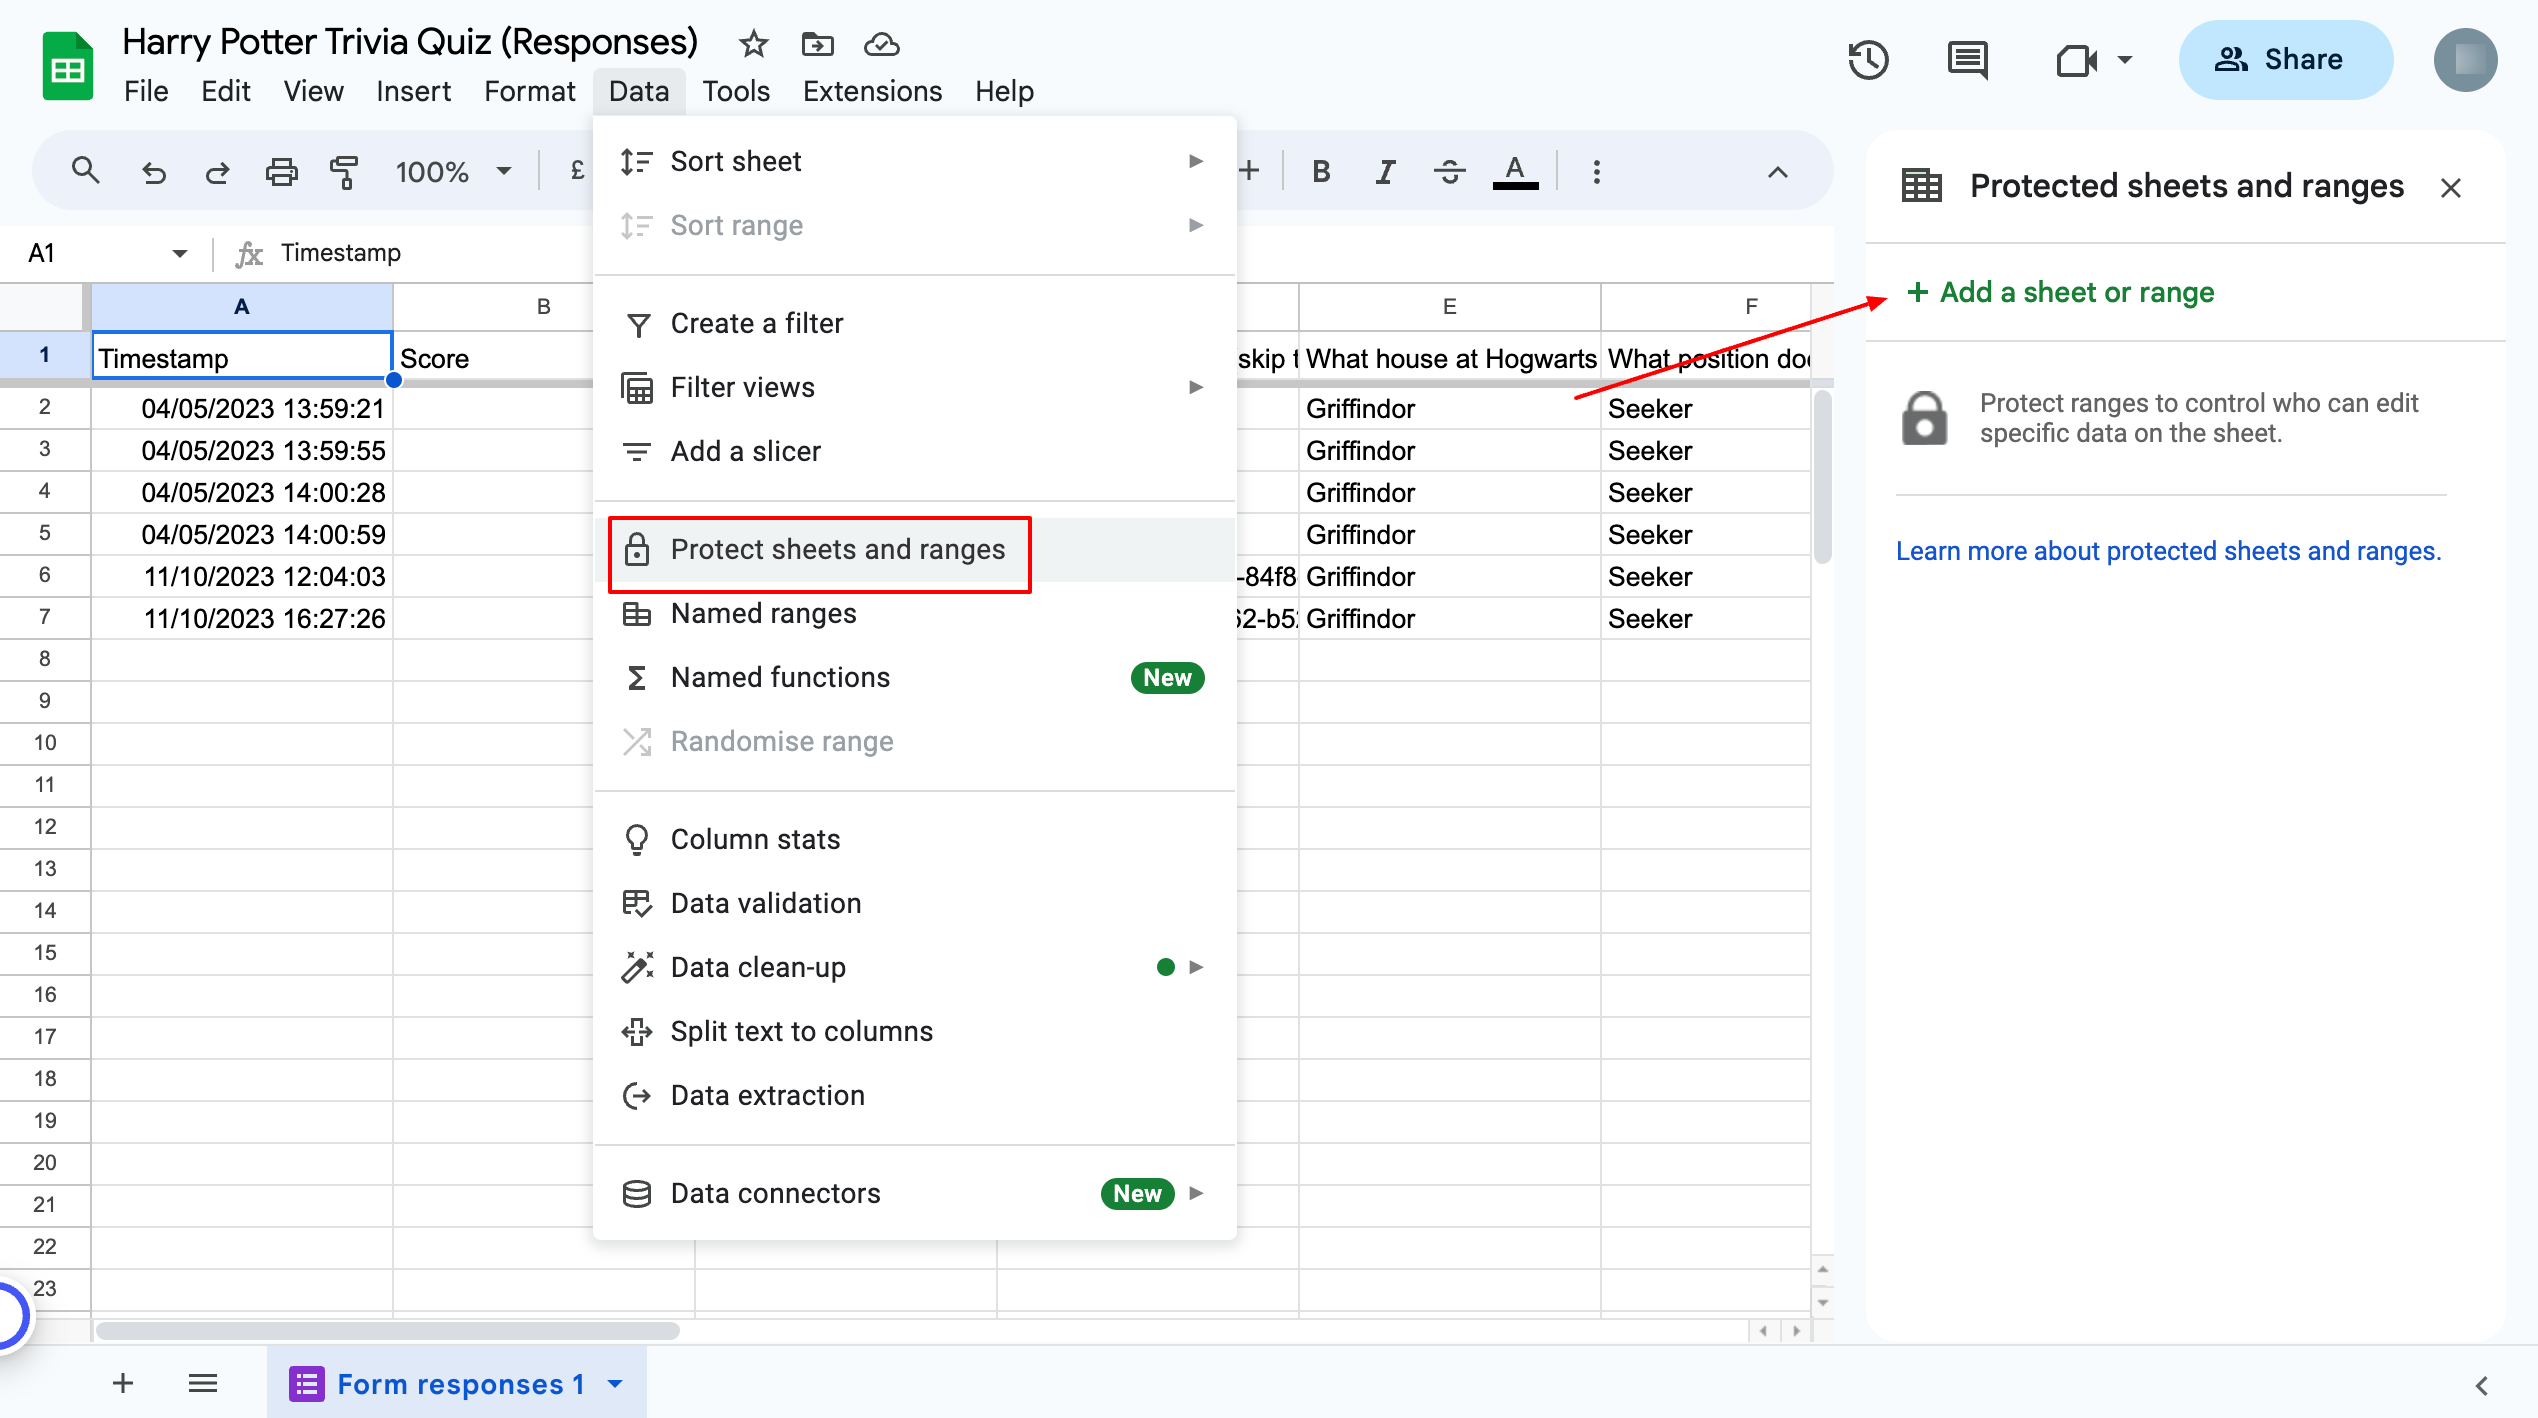
In Google Sheets, you can protect the data by making it read-only and uneditable. To do this, in the Google Sheet, open Data > Protect sheets and ranges.
A box will appear on the right, click on “Add a sheet or range” or click on existing protection to edit it. Enter a range or select a sheet and set permissions.
Want to create a customer satisfaction survey for your business? Read Free Customer Satisfaction Survey With Google Forms (4 Simple Steps)
Google Forms Accessibility Using ExtendedForms
If you want to make Google Forms accessible then there is another way to do that but with certain advantages attached to it. Google Forms has an add-on for timer and proctor features that can be installed from Google Marketplace.
ExtendedForms is the add-on we are talking about here. It is a great app that can be used for Google Forms for multi-purposes and we already mentioned the main two features. However, aside from that, we can even use it to make Google Forms accessible. Here’s how;
- Install the Extended Forms app and go to Google Forms or Google Marketplace. Here we’ll opt for Google Forms – click on More > Get Add-ons > ExtendedForms > Install
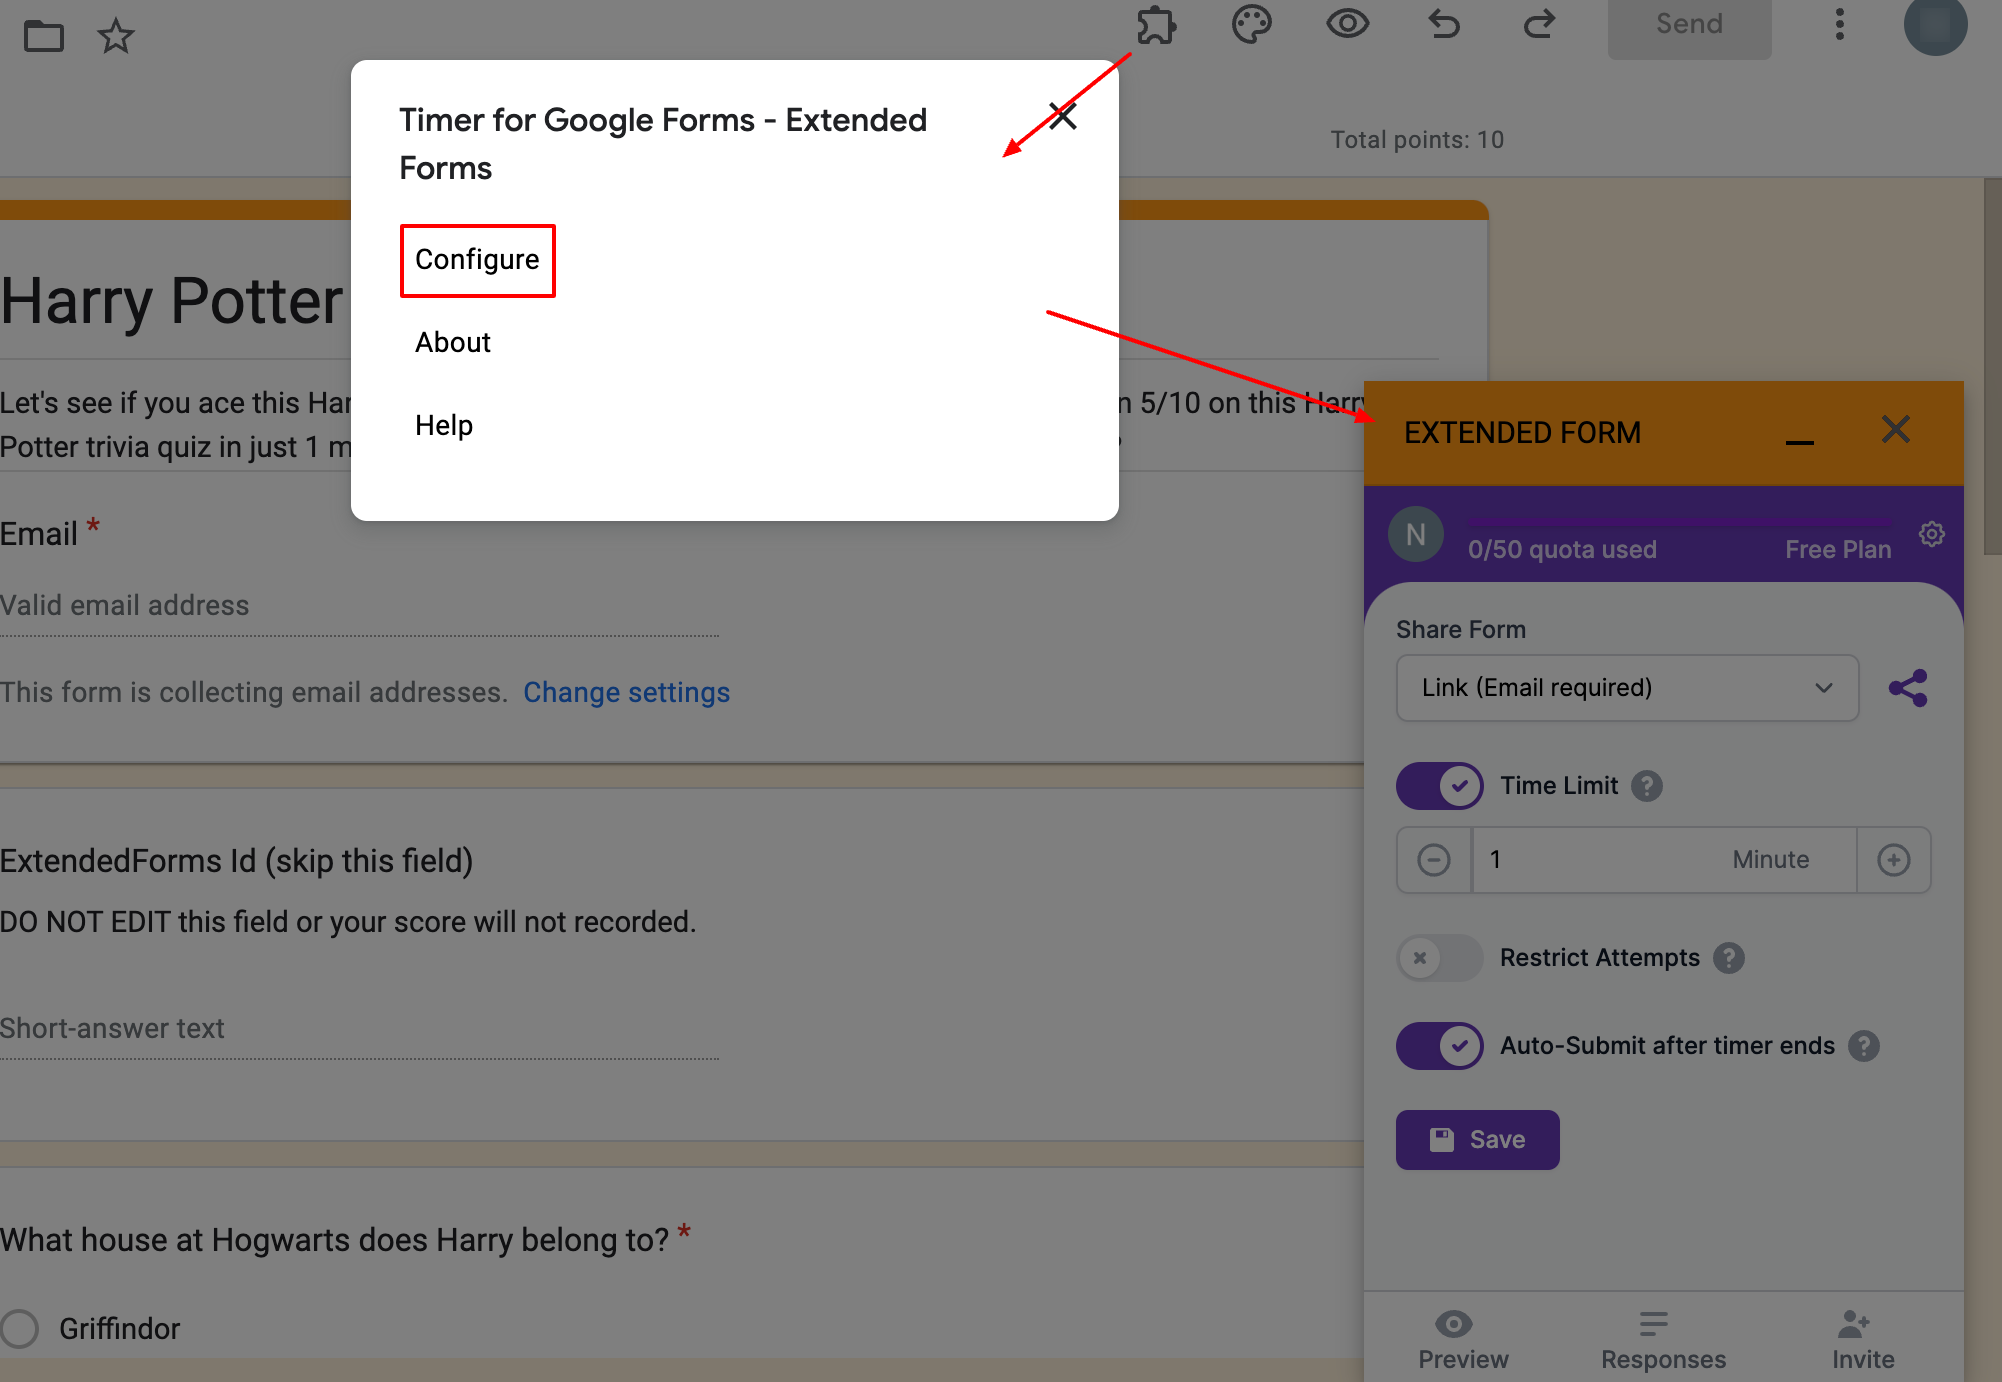
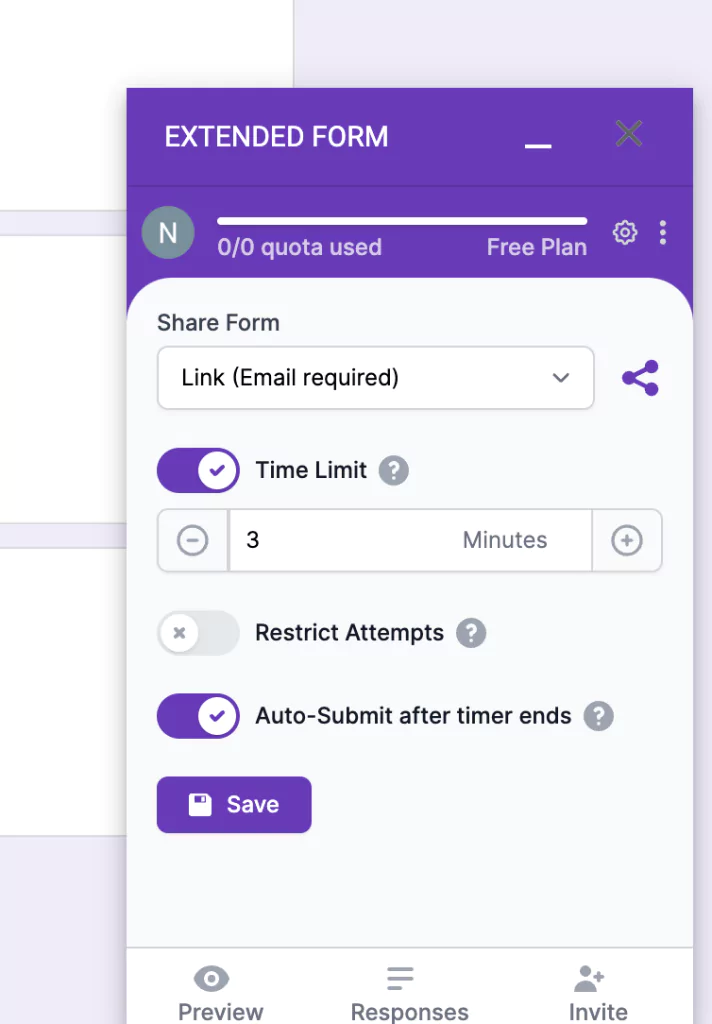
- Once the addon is installed, in the Forms you’ll see a puzzle shape icon named Add-ons, click on it, then ExtendedForms > Configure. A settings box will appear, and from there you can toggle off the restrict attempts.
- However, when sharing the form, if you choose “Link Anonymous” from the Share Form dropdown then the restrict attempts option will be hidden. It means your Google Forms will be accessible to everyone
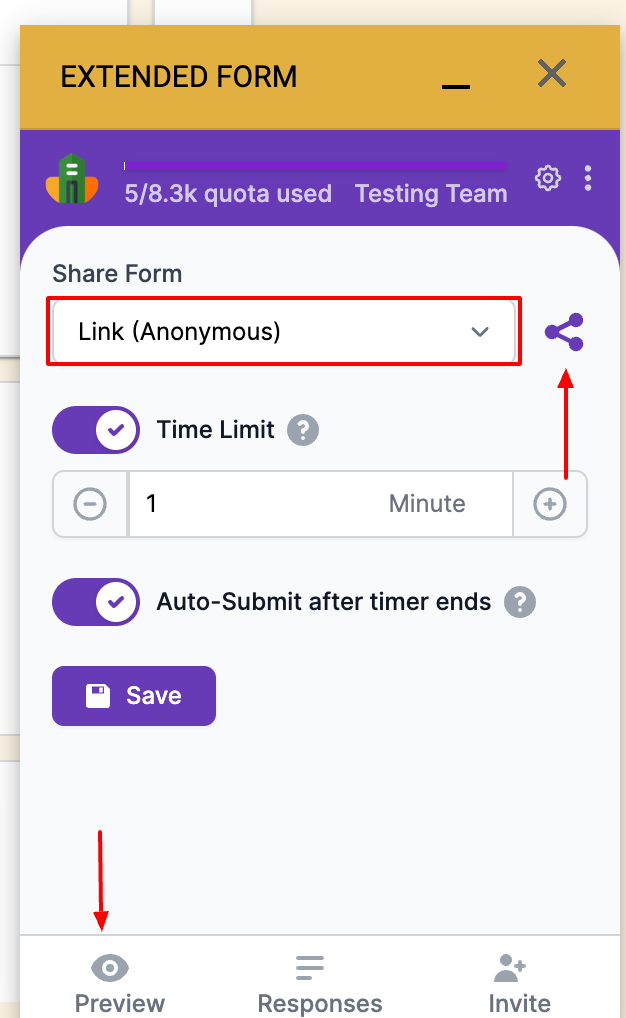
- You can also share the form via Link (email required) where adding an email address will be necessary, email (org. email required), and invite only. For the “invite only” option, you’ll have to click on the “Invite” button at the bottom.
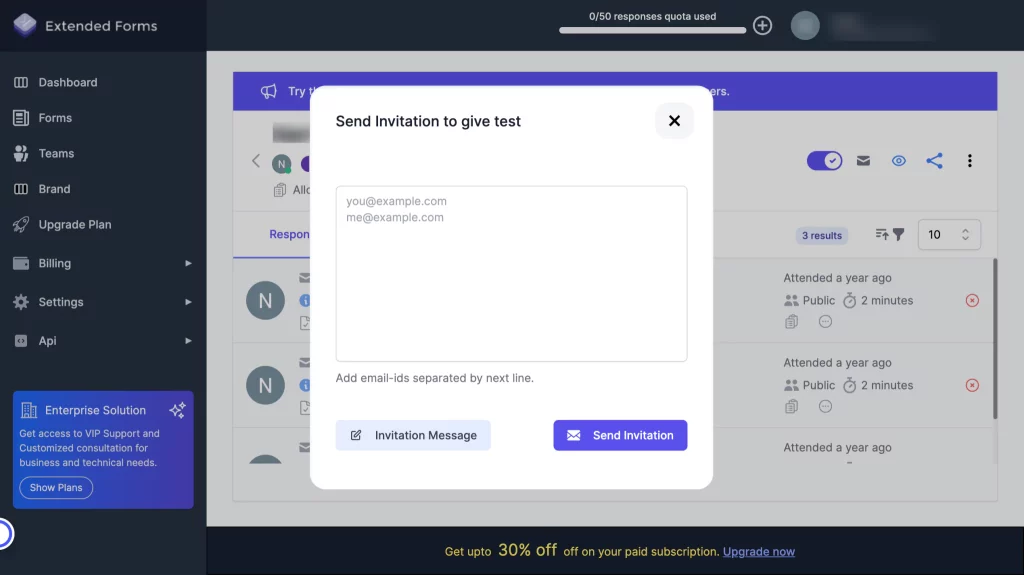
- You’ll be directed to the extended forms main page, a pop-up box will be displayed to Send Invitation. Add email-ids of all participants and you can add an invitation message and then send it.
- Aside from this, you can share the form through a link, click on the “Share Form” button, and copy the link, you can even shorten the URL and customize it.
Savvy Tips for Sharing Google Forms With the Public
Certainly, we have some savvy tips for when Google Forms are made accessible and shared with the public. Here are some;
1. Test your form
Always make sure that you test the form beforehand to ensure that your form is made public and is functioning correctly before sharing it. To ensure that, go to the Send button, navigate to the link option, and copy the URL.
Open a browser from where you’ll not automatically be signed in to Google Forms or open in incognito mode. Now paste the URL to the browser and it should open your form without required sign-in.
2. Make the Google Forms public but uneditable
There are two ways a user may interact with your form – as a respondent or a collaborator. Respondents can view the form and provide responses; however, a collaborator can edit the form and responses, like an owner.
To add collaborators, click on More > Add Collaborators, you can add emails of the people you want as collaborators. However, ensure that the General access is set to “Restricted,” only people you grant access to can edit the form.
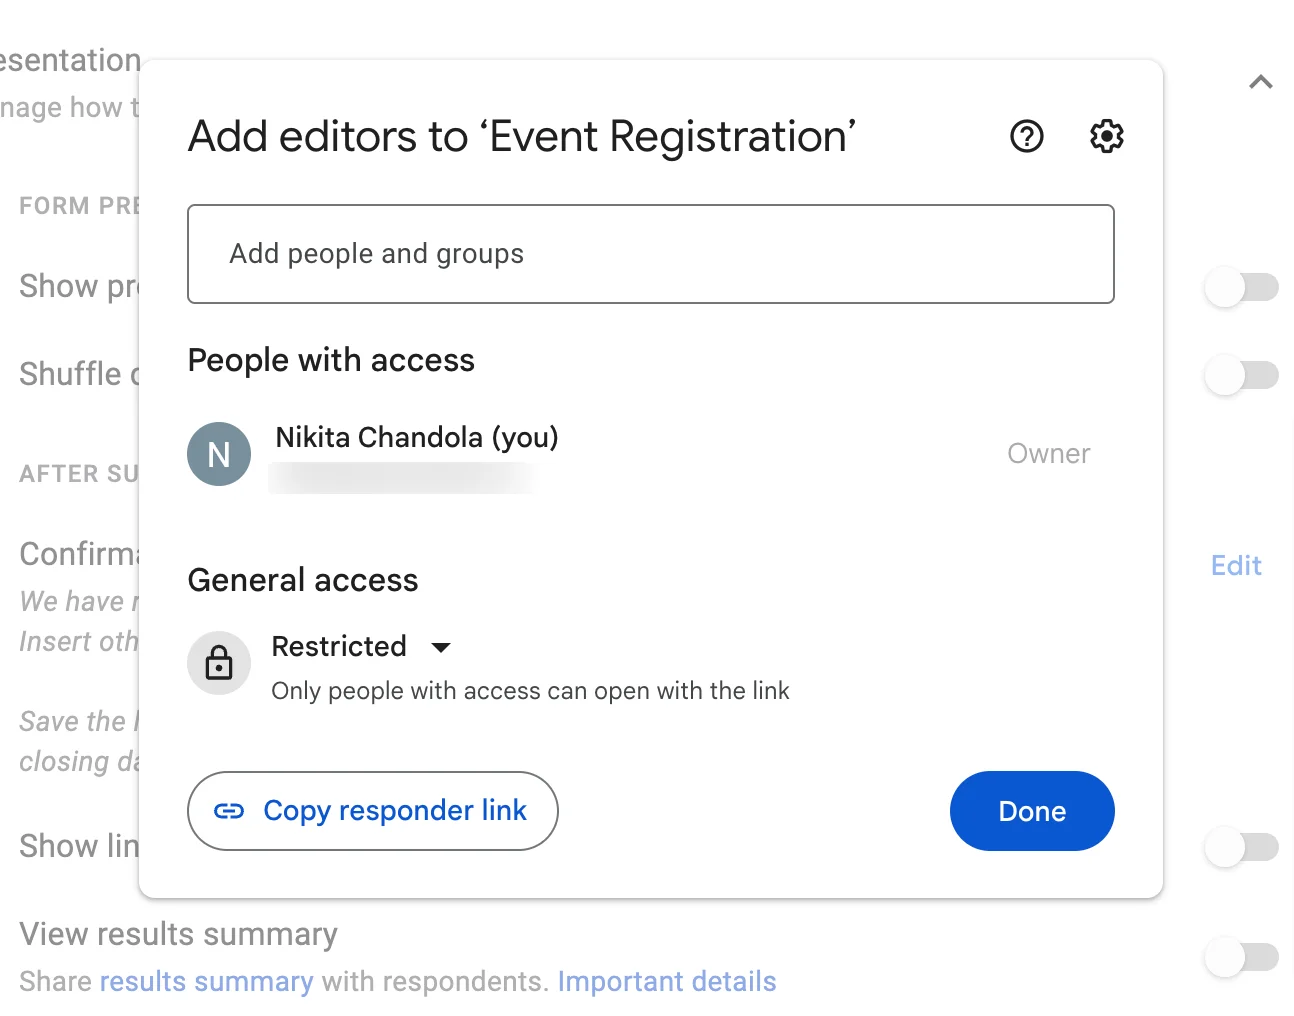
Nonetheless, if you opt for ‘Anyone with link’ access then Google Forms will be made public and editable to all. Besides, you can even add expiry to the collaborators after which they won’t remain collaborators for the form.
3. ‘Upload File’ option is unavailable for public Google Forms
If you want to collect files or more complicated documents but at the same time you’ve made Google Forms accessible. Then know this, the upload file option is not available when Google Forms is made public.
As for the upload file question type, sign-in is required, so Google Forms will ask you to sign in to your Google account. Which dismisses the fact that Google Forms is made public.
Looking for an easy way to add linear scale in Google Forms? Read How Do You Add Linear Scale to Google Forms? (5 Simple Steps)
4. Set form expiration dates
It is great to have a limited timeframe for data collection. This will not allow too many responses and vague or disappointing responses. You can stop accepting responses by toggling off the “accepting responses” option from the Google Forms Responses tab.
However, there is another way where you specify the start and expiration date and timeframe to ensure it’s no longer accessible after an intended period. Through the ExtendedForms app, you can add limited accepting responses date-time frame.
In Conclusion
Making your Google Forms public opens a world of opportunities for data collection, feedback, and engagement. By following the straightforward steps outlined in this guide, you can effortlessly share your forms with a wide audience.
Google Forms’ public sharing feature empowers you to gather the data and insights you need to drive success. So, go ahead, and make your forms public! Also do give a try to our ExtendedForms app for free or subscribe to any paid plans.
If you like reading this blog, also read our detailed guide on How To Create A Voting Poll In Google Forms. (7 Simple Steps) and How to Make an Online Application Form in Google Forms? (4 Easy Steps).