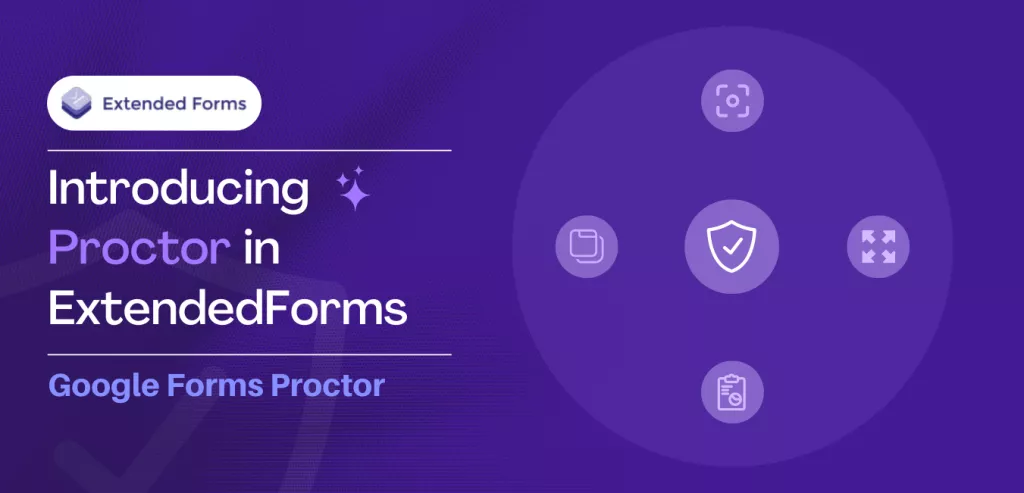
We are introducing you to the newest feature i,e. Proctor System in Google Forms. In this post, we will discuss how the proctor system in ExtendedForms works, so this guide will be helpful when you practically use the Google Forms proctor functionality.
Proctoring means supervising an exam; an online proctored exam implies that the whole test process is overseen by a proctor (through live recording, automated proctoring, or recorded proctoring), ensuring academic integrity, and preventing cheating. There are many benefits of having online invigilation for both examiners and candidates taking exams.
It provides flexibility to organizations and candidates while giving exams, it not only prevents cheating and protects the integrity of an organization but is also flexible to take exams for candidates.
In this guided post, we will provide you with an extensive tutorial on how the proctor system in extended forms works and what are its features.
Table of Contents
Key Takeaways
- The proctor system in ExtendedForms works by supervising an exam and ensuring academic integrity by preventing cheating.
- The proctor system can be enabled by going to the Form Settings dialogue box and navigating to the Proctor feature.
- Once the Proctor is enabled, respondents will be taken through a series of options that they must agree to before starting the exam.
- The proctor system will then take random snapshots of the respondent during the exam to ensure that they are not cheating.
- After the exam is completed, the invigilator can view the reports of each respondent to see if they cheated or not.
Guide to Use Proctor System in GoogleForms
Google Proctor feature will allow users to prevent cheating by students while filling out the online test or quiz. It works like a physical invigilator during assessments and it makes online invigilation more effective.
The ExtendedForms app will help you with that functionality. It is a great countdown timer app and comes with more interesting features. You get the option to auto-submit, export CSV files, auto-submit classwork in the classroom [classroom integration], custom invitation messages, welcome messages (in different languages), and so much more.
In fact, you can add team members and assign team manager roles in ExtendedForms, you can customize your brand, and customize and shorten URLs. Now, it has come up with the newest feature – Google Proctor that will make this add-on and your Google forms more advanced.
Let’s look into it how to use the proctor system in Google Forms.
Step 1: Install ExtendedForms
So, to give you an insight into how to use the proctor system in ExtendedForms and how it works with Google Forms, we have to first start with installing the app,
- Goto Extended Forms in G Suite Marketplace.
- Sign in with your preferred Google Account and Hit the Install Button.
- Once installed navigate to the Google Forms
- Select any of the pre-configured forms from the Google form’s Template Gallery or create a new blank form and customize it as per your needs.
- You can also directly through Forms to add the add-on, go to ‘More’ at the top right corner, go to Add-on > ExtendedForms > Install it.
- If you have installed the Extended Forms Addon correctly, then you must see the Extended Forms in the Addons Menu. Click on the puzzle-shaped icon.
- Click on the Extended Forms Addon then on Configure.
The ExtendedForms settings box will appear at the bottom right of the page. You can configure most of the settings in the newly opened Settings Box, but here we have to dive further to see how proctoring in Google Forms will work.
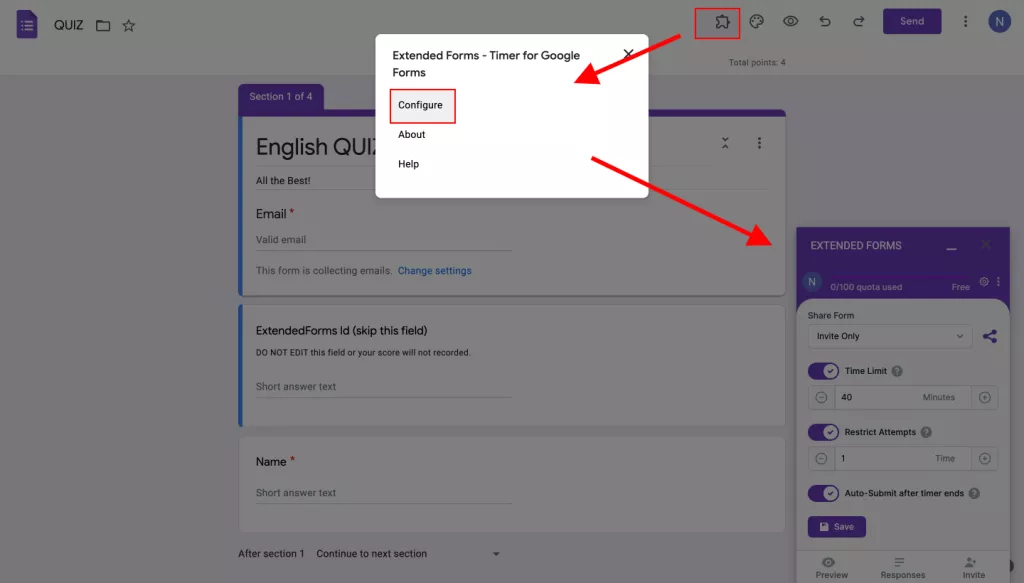
To get the full view of the Extended Forms Settings hit the ‘Responses’ in the configuration box to navigate to the Extended Forms Website.
Step 2: Proctor in ExtendedForms
- You are now taken to that particular Form page in the Forms section.
- Click on this icon ‘፧’ and go to ‘Form Settings.’
- A Form Settings dialogue box will appear with different settings applied to the form.
- You’ll see the ‘Proctor’ feature, navigate to it and you’ll see three options to enable.

- Full Screen – If you enable it, it will track whether users are giving exams in full screen or have minimized the screen. If respondents exit the full-screen mode while giving the exam is still running, it will affect their scores.
- Tab Switch – If you enable this tab, you will be able to detect whether the user switches tabs while the exam is running.
- Camera Snapshot – this as well all know will take random snapshots of a user taking the exam and it is necessary to provide webcam permission from the exam taker.
Once you are done with it, Update the settings, then preview and share the form.
Let’s preview the form and see how proctoring in Google Forms works.
So, once you have shared the form with your audience and they open it – a welcome message will be shown, you’ve to click on ‘Get Started.’
- Once you click on that, a pop-up will appear that says ‘Proctor is Active’
Respondents are to go through a series of proctor features that you enable.
Are you a business owner who wants to create forms? Read, Creating Business Forms Using Google Forms (7 Simple Steps)
- Click on the ‘Next’ button it will show the full-screen mode option, then again click on the next button
- The ‘Do not switch tabs’ statement box will be shown (you cannot switch tabs while giving exams),
- Further, will be the ‘camera snapshots’ option, click on the ‘Enabled’ option and then allow the camera settings from the pop-up box that will appear on the top. The app will be able to take your camera shots randomly at intervals (based on the time duration).
For example, if your test/quiz is 2 mins then the feature will take at least 2 snapshots of your face. The first will be during the start of the form and another while you are giving the form.
- Once you have taken the snapshot, the process will be done and your exam will be started.
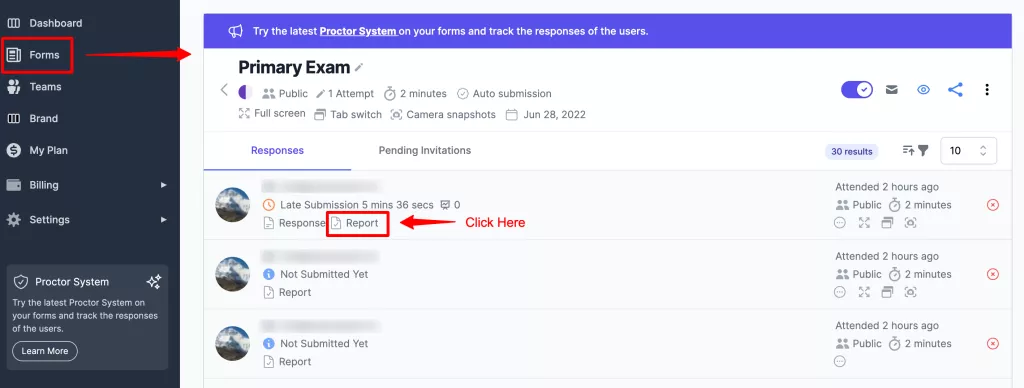
So, after your respondents have completed and submitted the test, you’ll see it in the ExtendedForms dashboard > Forms section > in the particular form.
Under the Responses tag, under every response submitted, you’ll see – the ‘Response’ and ‘Report’ options.
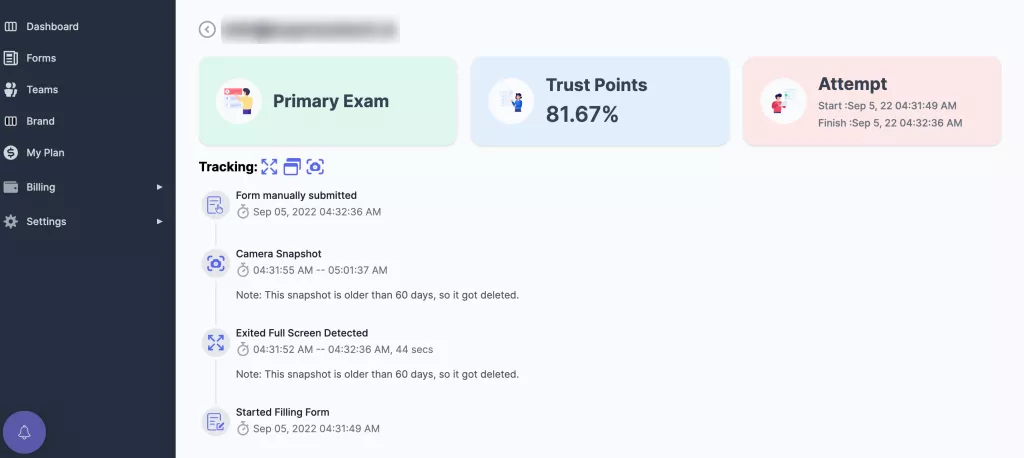
Click on the View Report option and you’ll see all the tracking details of the particular respondent.
- You will see the exam name, trust points (that show how much % the respondent has given the exam without cheating), and attempts.
- The user (invigilator) can see when the form was started and submitted,
- Further, camera snapshot(s) will be shown and when were they taken
- Then, if respondents had switched tabs, in the report, you can see that as well as for what time limit.
That is how the proctor system in extended forms works and how you can prevent cheating while conducting online exams/quizzes.
Wrapping Up
The proctoring feature in Google Forms, enhanced by ExtendedForms, offers a sophisticated way to conduct assessments. With added timer functionality, it’s easier than ever to manage various types of evaluations.
This guide explains how the proctor system in ExtendedForms works. Beyond just convenience, it ensures a fair and controlled testing environment. Try it out and share your thoughts on this innovative feature in the comments. Your feedback helps us continually improve and adapt to your needs.
If you like reading this blog, read our detailed guide on How to Add a Hyperlink to Google Forms. (7 Simple Steps) .

1
Your comment is awaiting moderation.
1
Your comment is awaiting moderation.