Have you ever wondered what conditional logic quizzes are? Or ever want to make conditional questions in Google Forms? Either way, we’ve got you covered! Google Forms conditional logic is a fantastic feature that elevates the process of filling out the form.
Conditional logic quiz adds a whole new level to interactive quizzes. It has taken over the internet and there are quite a few reasons for it. This guide will teach you everything that you should know about conditional logic and how to create Google Forms conditional questions.
Sounds good? Then, let’s get right away into it.
In this Article
Prefer watching over reading? Watch the video here.
Key Takeaways
- Conditional logic helps make forms simple and concise to take by hiding questions irrelevant to specific answers.
- Using conditional logic questions has its sets of benefits, it is personal, interactive, and different from a standard quiz.
- To make conditional questions in Google Forms, start by setting up a Google form, and adding different sections.
- Then, to add the conditional logic feature, go to the ‘Section based on answer’ option in a specific question, and add appropriate sections to each option. Check the outcome by previewing it and then share the form.
What is Conditional Logic?
Conditional logic a.k.a Branching or Skip logic helps make your form more straightforward and concise, by hiding questions that are not relevant to specific answers. In simpler words, when a respondent answers a form/quiz question, the succeeding questions depend upon the answer given to the former question.
To make it uncomplicated, here is an example of how conditional logic questions are created. For example, the main question asked is – Do you own a car? Then there are two options for this question – Yes and No.
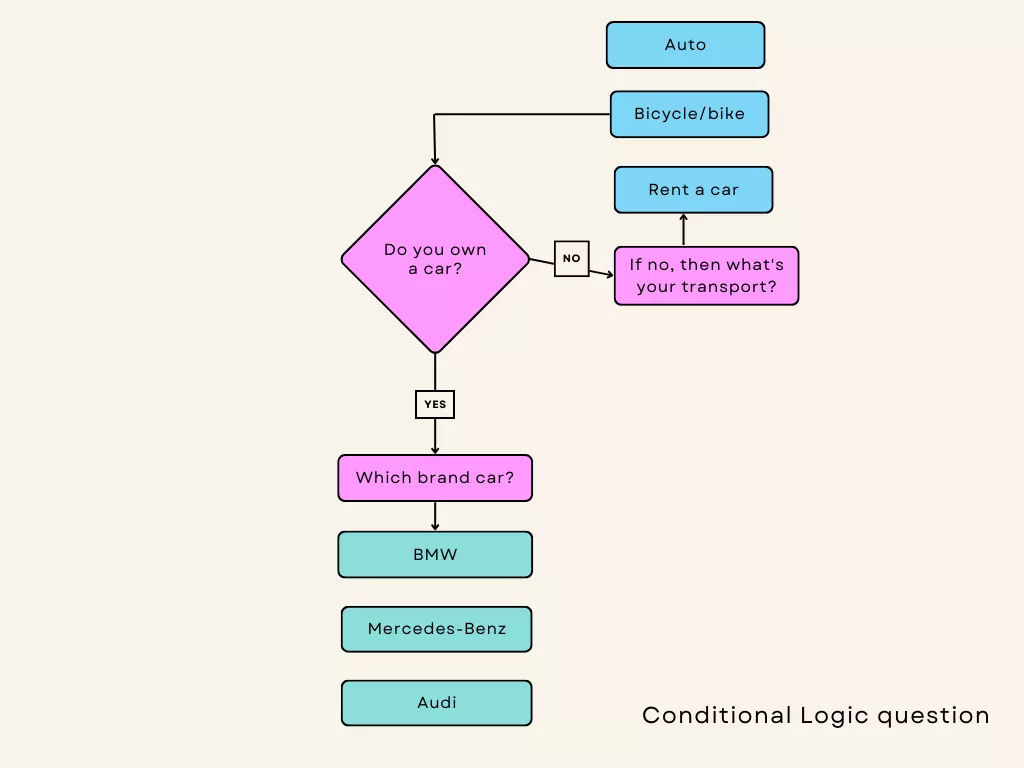
Based on the answer opted by the respondent it will lead to its respective question. If yes, then which brand of car? If not, then what transport do you use?
How to Add Conditional Questions in Google Forms
Now let’s see how to create the steps for setting Google Forms conditional questions. You can create conditional questions in Google Forms for any use case whether it’s for a customer feedback survey, RSVP, event registration, or anything else.
Just follow these steps to make Google Forms conditional questions.
Step 1: Setup the Form
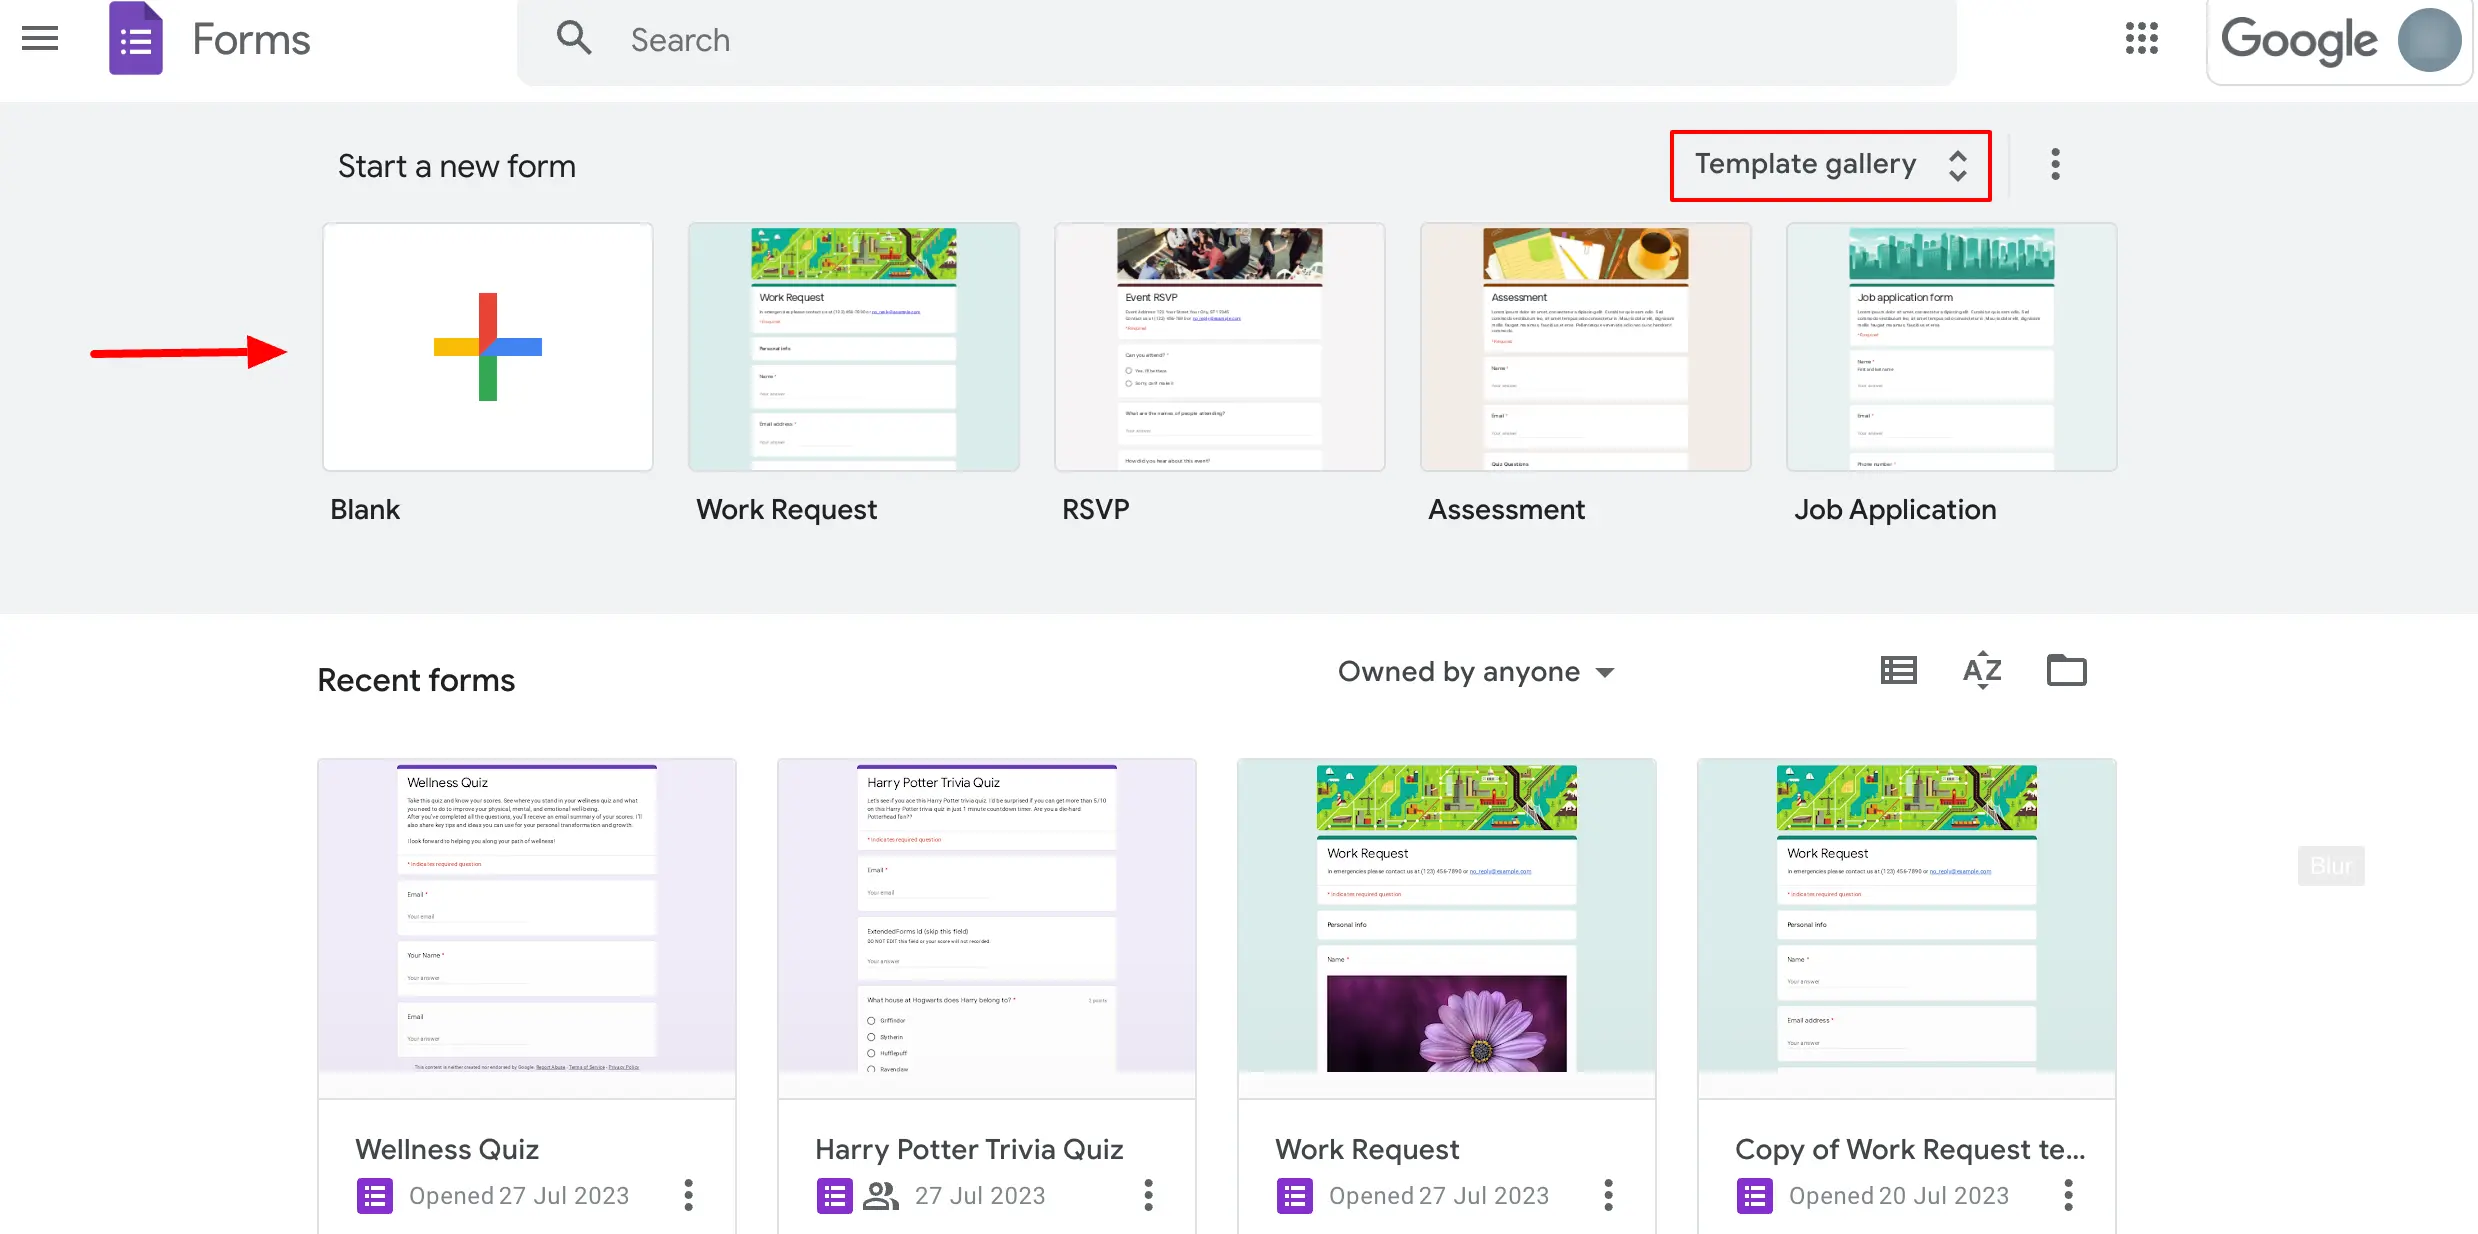
Google Forms has a template gallery to choose from, otherwise, you can also go with the ‘blank quiz.’
- Go to Google Forms, click on the ‘Template Gallery’ or select ‘Blank Form/Quiz.’
- If you have selected a template, then you’ll find a few pre-added questions that you can modify, to show nested questions in Google Forms we will have to first add different sections.
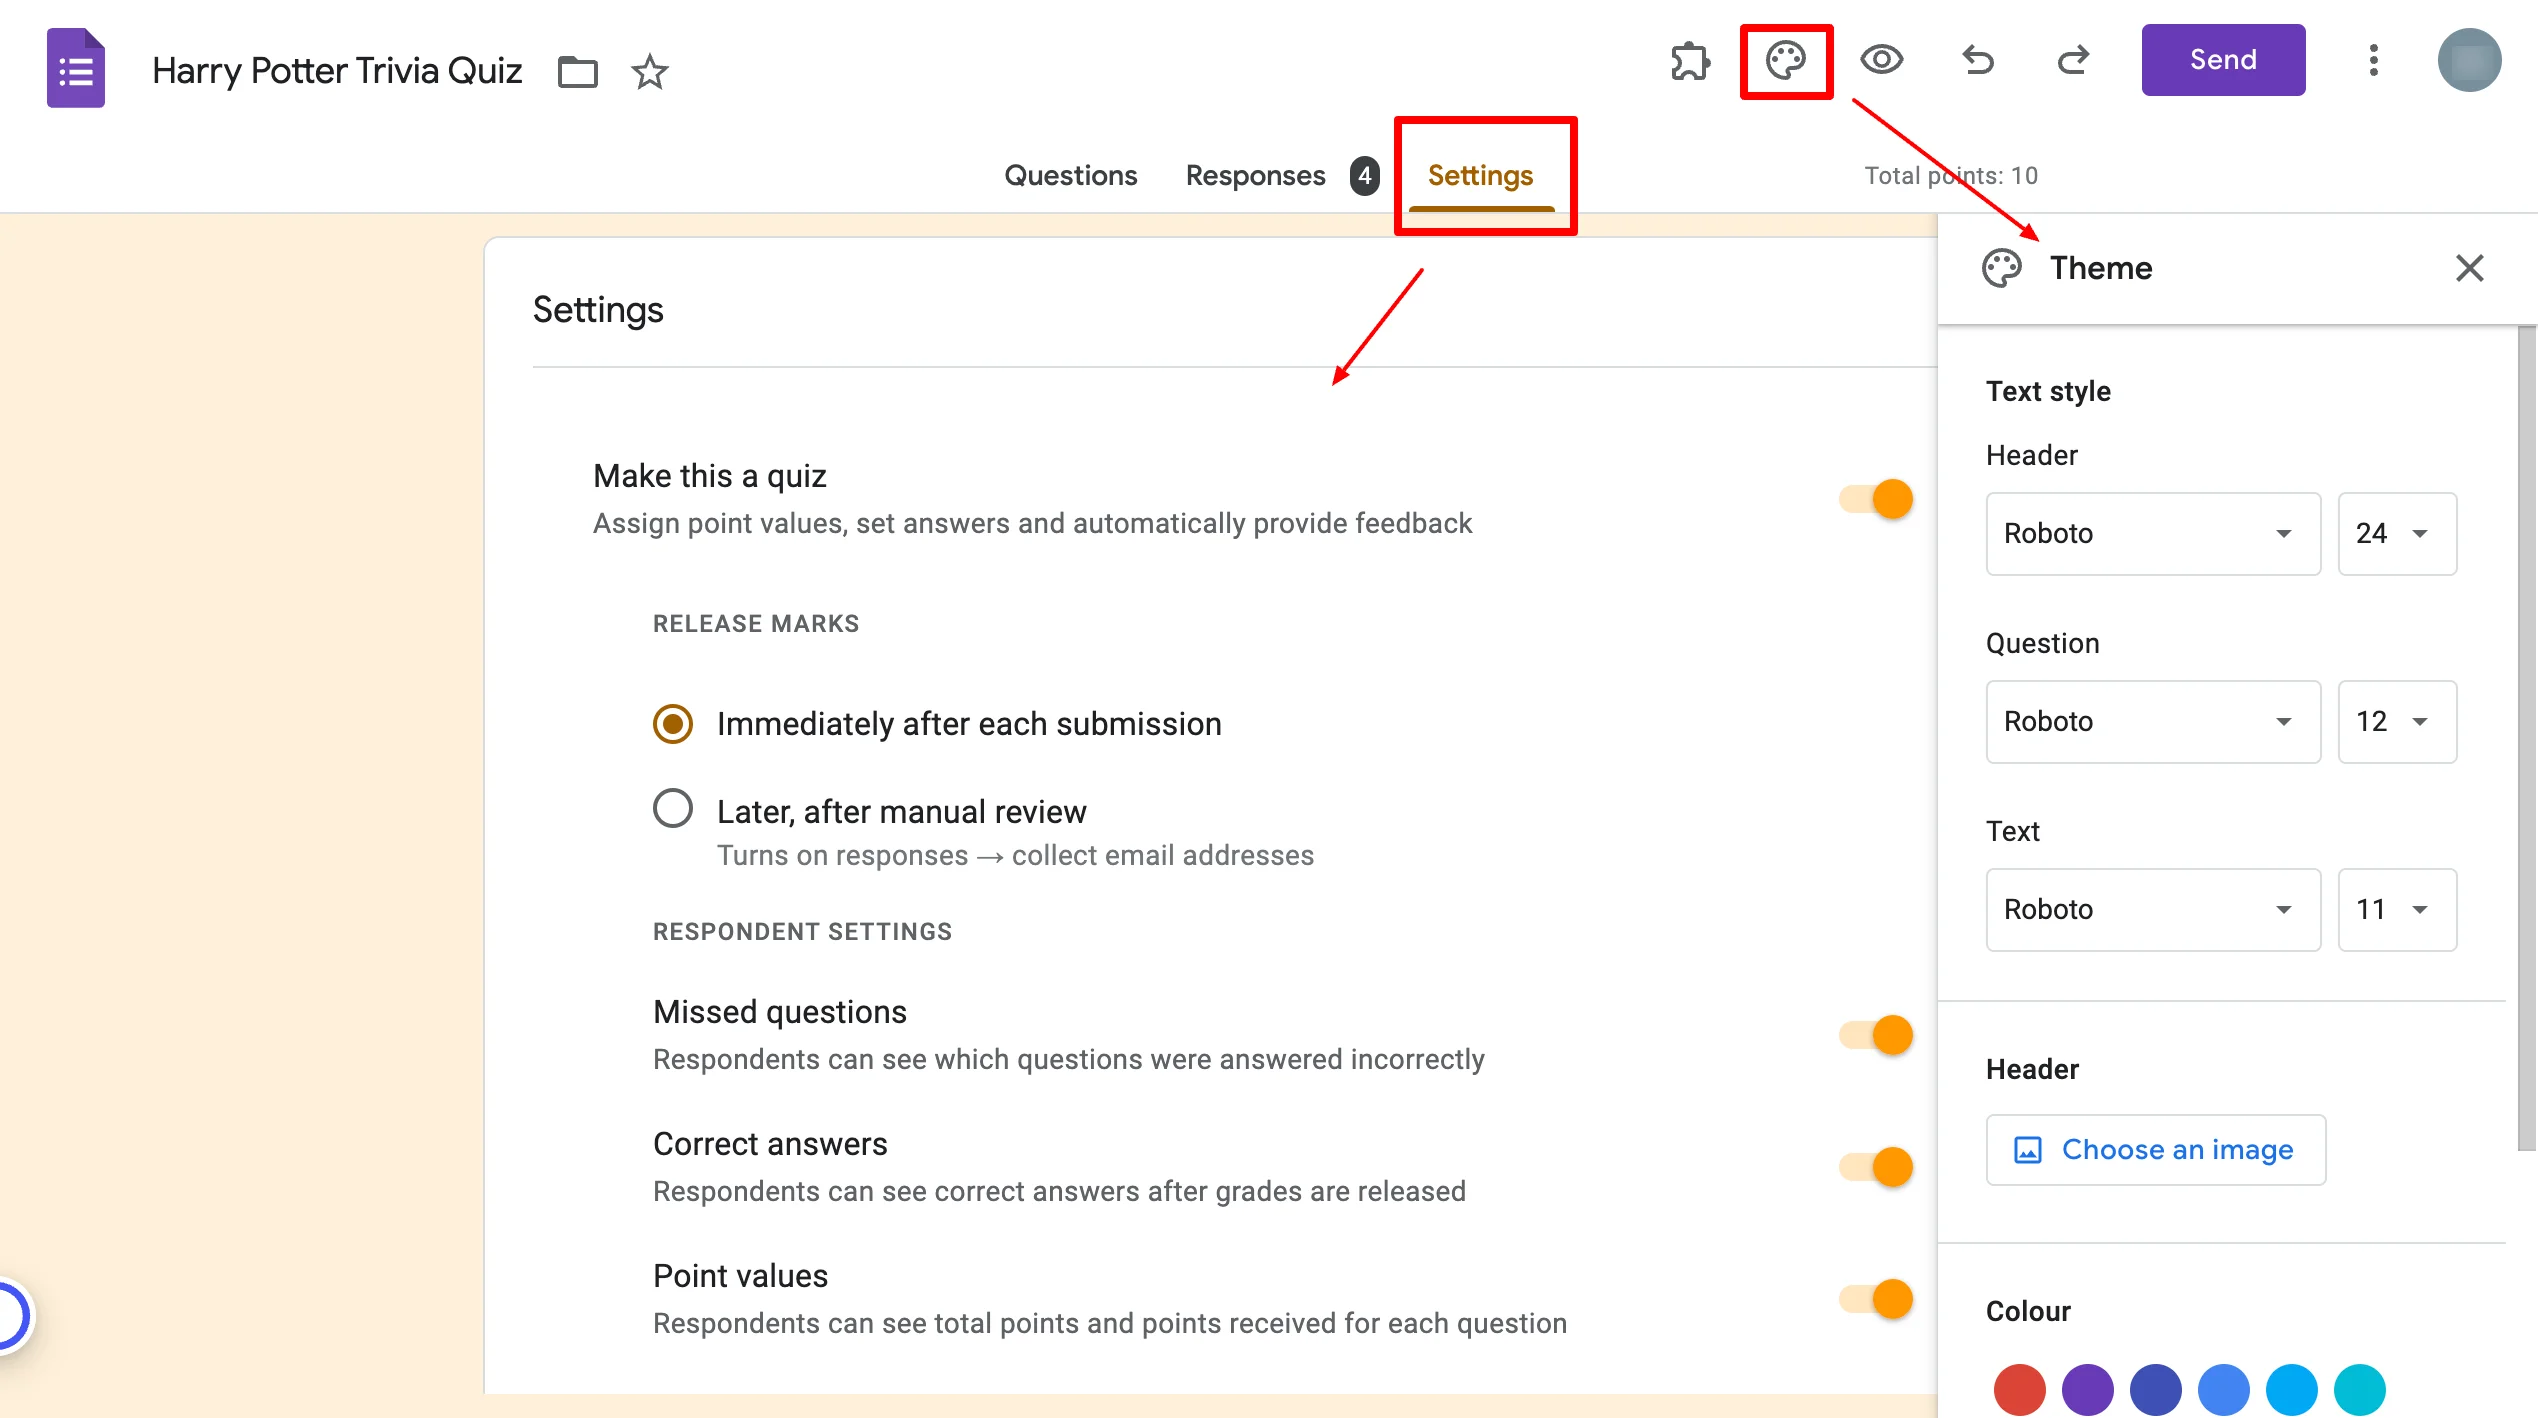
- Before that, you can configure settings and customize your Google forms, though you can also do it towards the end. To configure settings go to the ‘Settings’ tab and to customize the form navigate to the “Customize Theme” option.
Want to create business forms for your business? Read, Creating Business Forms Using Google Forms (7 Simple Steps)
Step 2: Add Sections
So, we will be creating different sections with various questions to lead onto. To make the process a bit easier and clear to understand we are going to explain it with the help of an example.
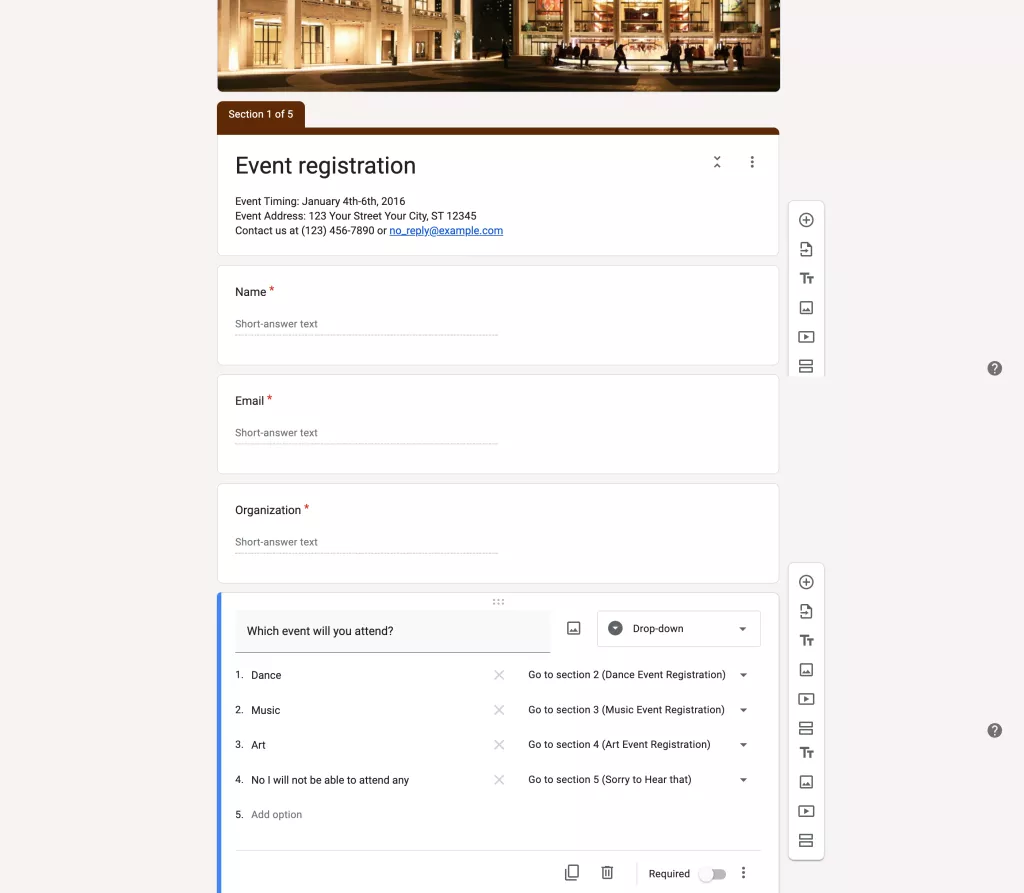
For instance, you want to create an event registration form and there are going to be different events. We will create different sections based on the events, like –
- Section 1: User Details followed by an event to be attended,
- Section 2: Dance Event,
- Section 3: Music Event,
- Section 4: Art Event.
Creating sections will organize your form and you can set the form to show or jump to the sections & questions based on answers. So the first section (default present) will be collecting participants’ details and asking which event they want to attend and leading them to that.
Let’s start by adding sections before adding conditional questions.
- Click on the ‘Add Section’ button (the last option) in the floating toolbar menu to the right of the question field.
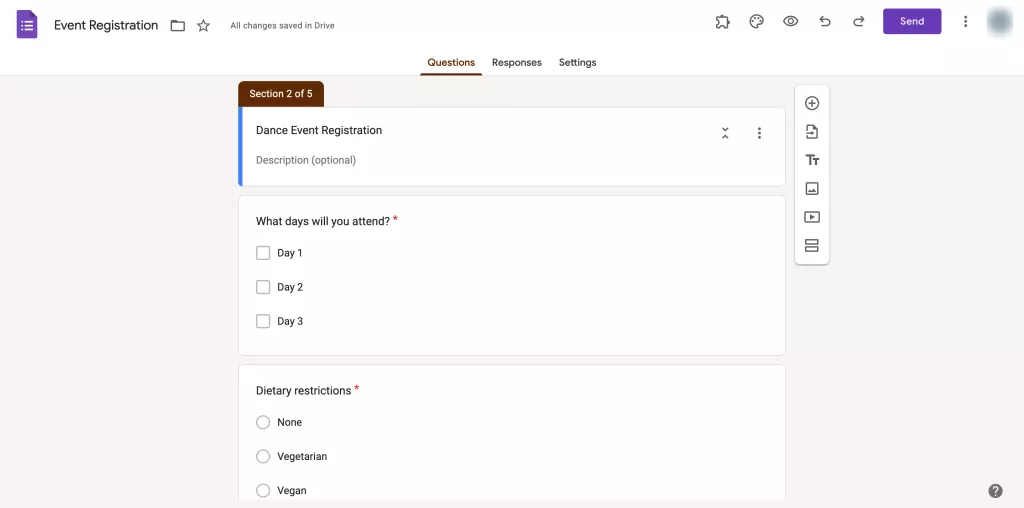
- On adding the new section – Name the section (compulsory) and description of the section to make it more clear (optional)
- Now add questions into that section related to that particular event registration, feedback, etc.
- Then do the same thing for the other two or more sections.
You’ll have a total of four sections, the first section as mentioned above is related to user details and will have a ‘follow-up section’ question.
Step 3: Add Conditional Logic
Now that we have successfully created each section, it’s time to use the conditional dropdown feature. Follow these steps to add Google Forms conditional questions.
Note: Logic Conditional branching in Google Forms will work for only multiple-choice and dropdown-type questions.
- Select the question you want to apply conditional logic to and click on this symbol ‘፧’ at the bottom you’ll see options, select ‘Go to section based on the answer.’
Here, we have selected the ‘Which event you will attend?’ question for logic conditioning.
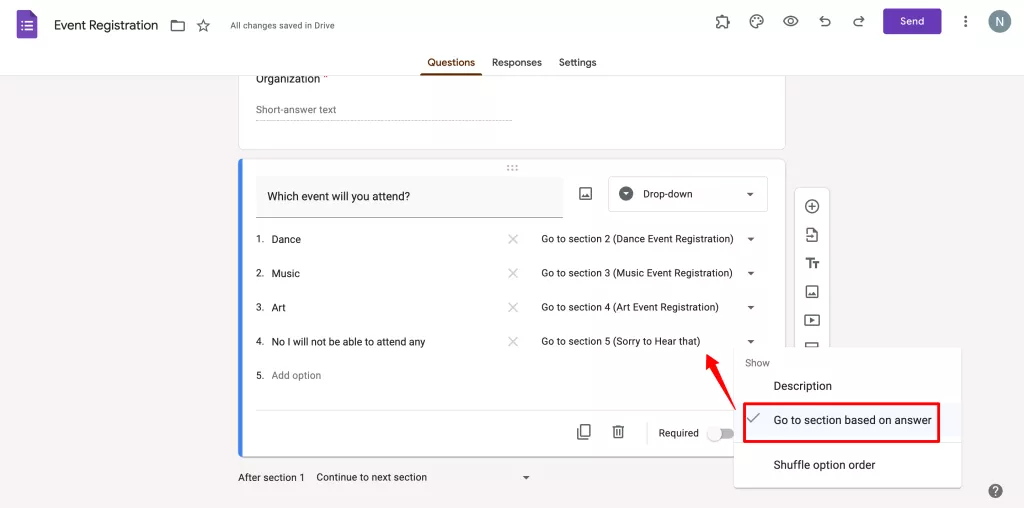
- After selecting that, you’ll see dropdown options beside each choice.
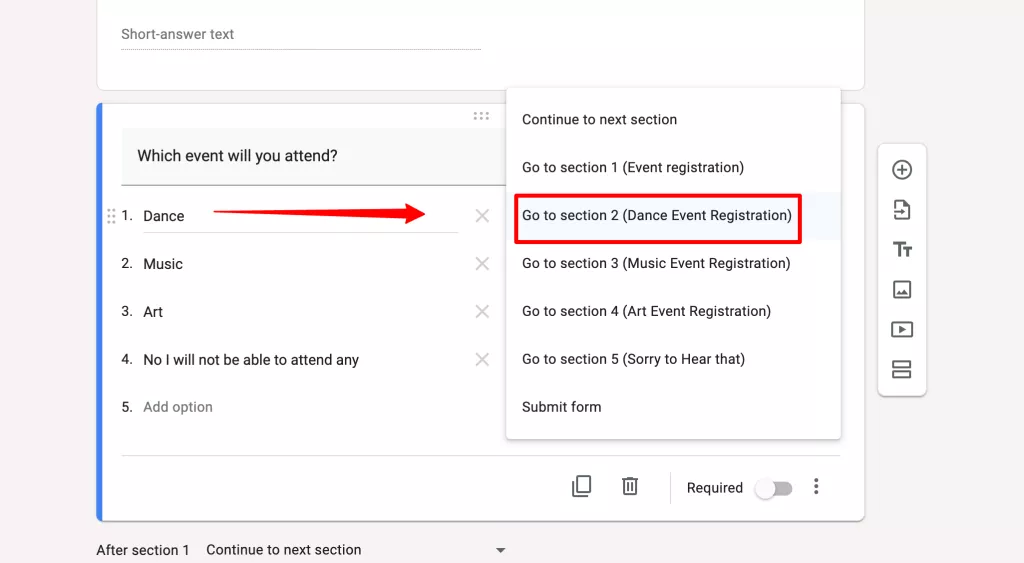
- You’ll then have to choose from the dropdown which section you want your respondents to be led to if they choose that particular choice answer.
Here, you can see I have selected ‘Section 2 Dance Event Registration’ to be led to for the first option, the user will be taken to that section. So forth, we have to follow through the other options (see the below image).
Looking for an easy way to add hyperlinks to Google Forms? Read How to Add a Hyperlink to Google Forms? (7 Simple Steps)
Step 4: Preview the Output
Once we have successfully created Google Forms conditional questions, it’s time to check the output. To preview the Google form, click on the preview button at the top navigation bar.
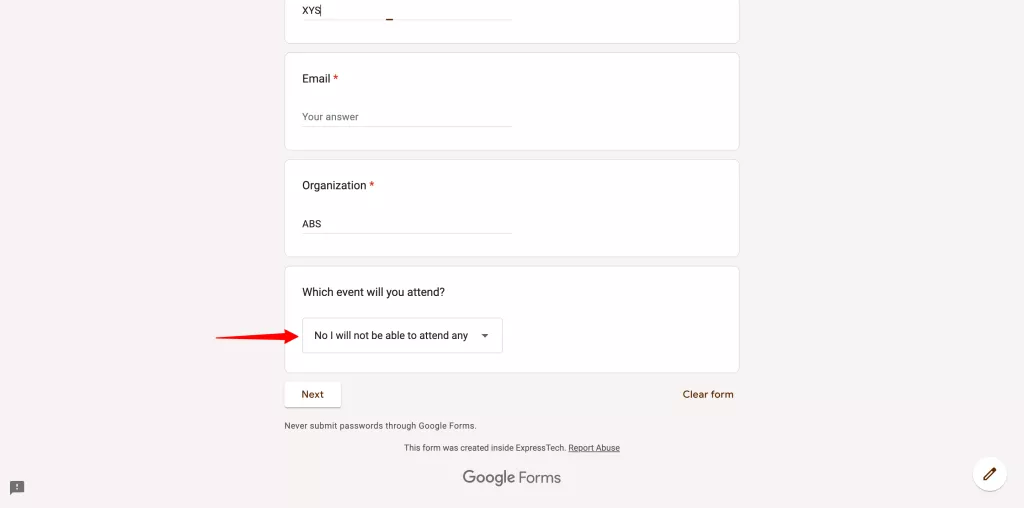
- Fill in the details, and select any of the options from the section 1 question – ‘Which event will you attend?’ We have chosen – ‘No I will not be able to attend any’ option here.
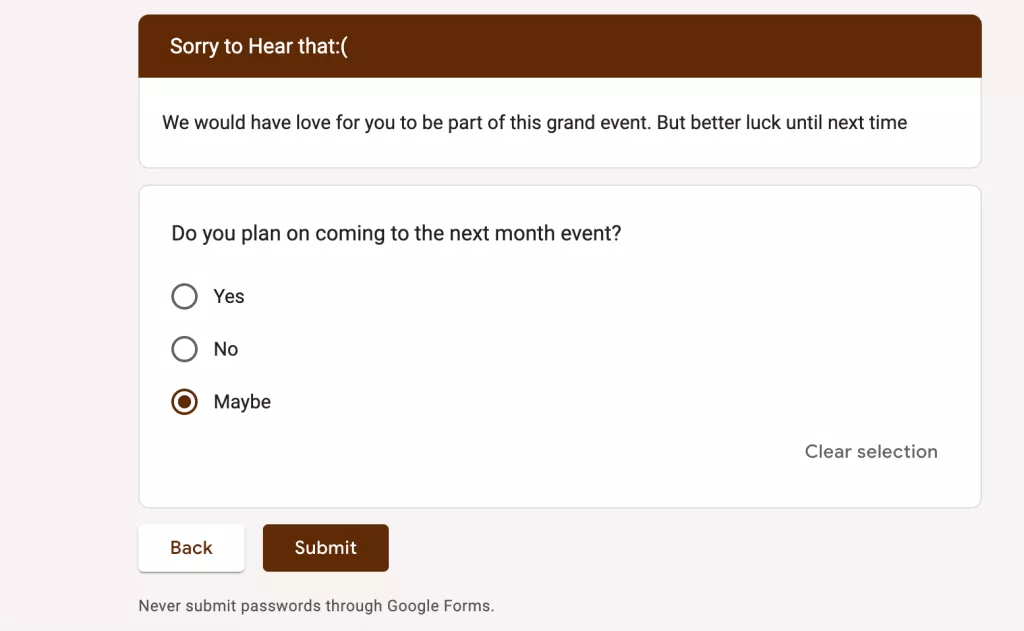
- It will directly lead us to the ‘Sorry to hear that’ section i.e, the last section.
- Once, you are satisfied with your form, send it via email, copy the link, or embed HTML to your webpage.
This is how you add conditional questions in Google Forms. It is the most simplified way to create conditional logic in any online form.
Why make Conditional Logic Questions?
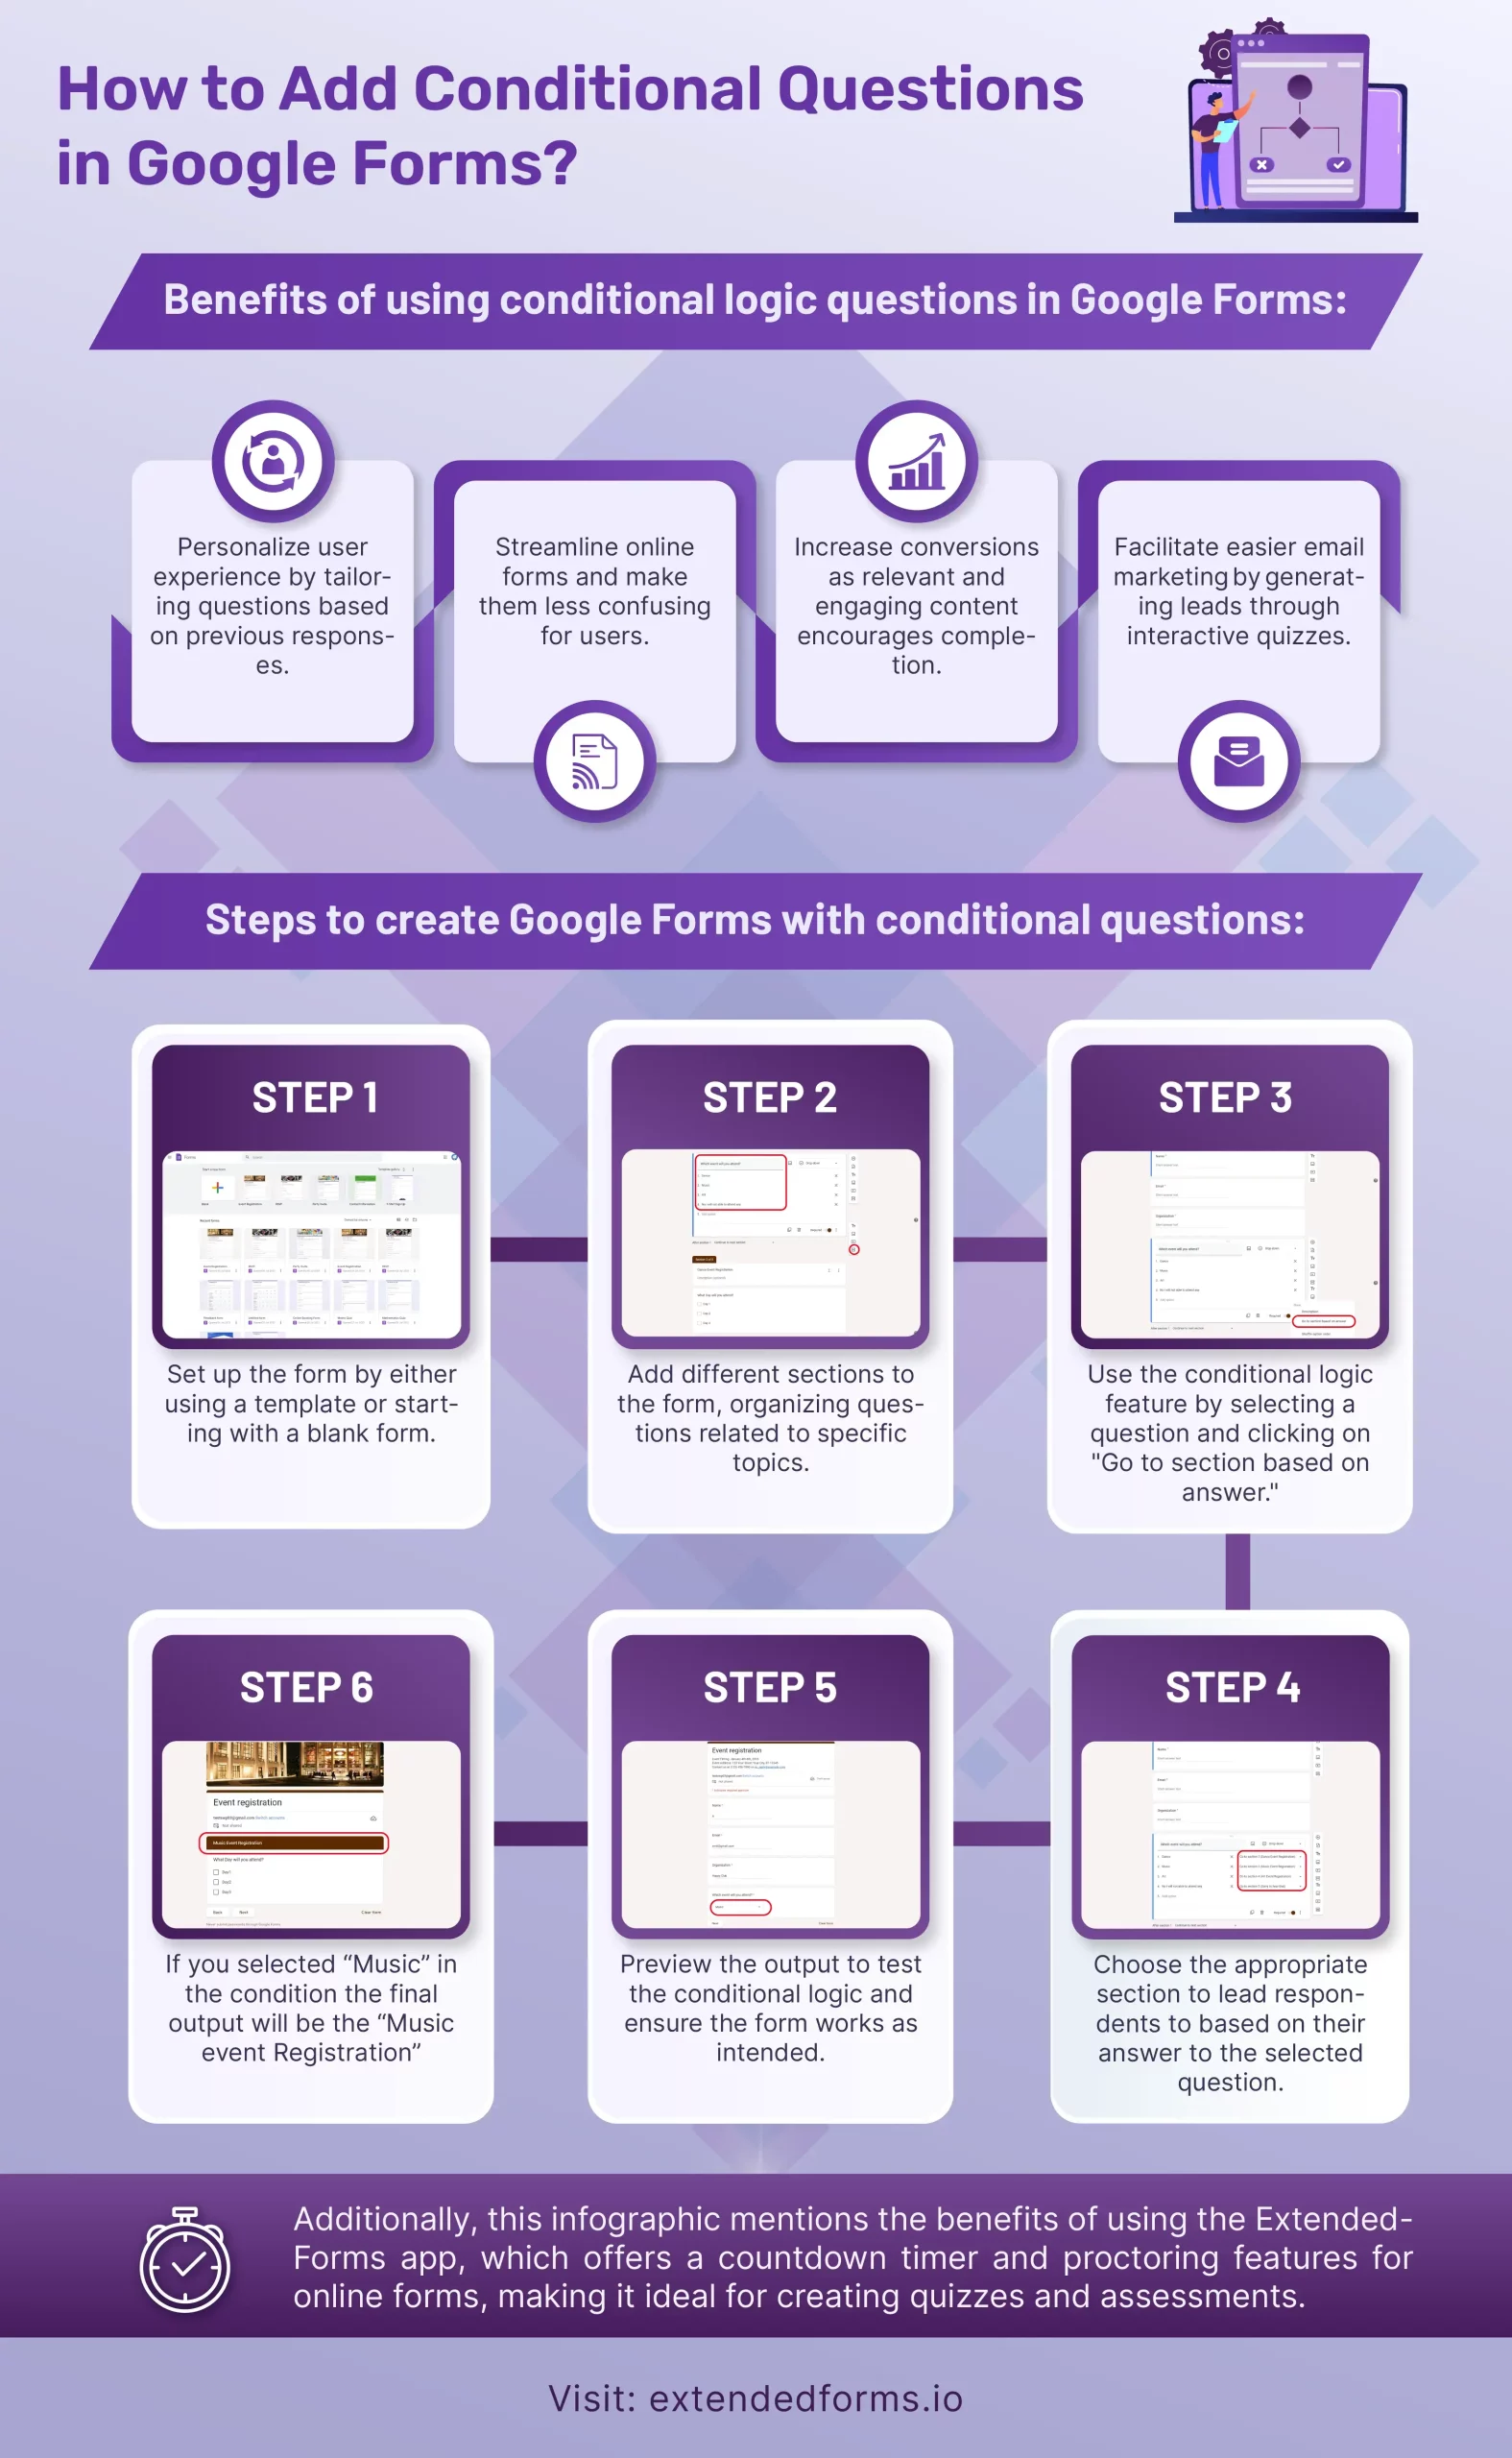
The conditional logic quiz is personable, interactive, and different from a standard quiz. Here are a few reasons for you to know why you want to create a Google Forms conditional questions quiz.
1. Personalize User Experience
How fun and special it feels when someone or something is dedicated to you or personal for you, right? Similarly, a conditional logic quiz is engaging, unique, and personal. It creates a personalized user experience for everyone taking the quiz/survey.
2. Streamline your Online Forms
Conditional questions in Google Forms/any online forms make it less confusing and more digestible for users by hiding irrelevant fields.
3. Increase or Better Conversions
If your content is relevant, the form is interesting and unpredictable, you are maximizing the chances of users completing the form. Your forms can be shorter, but more precise and less overwhelming. It will translate into better conversions and turn more leads.
4. Easier Email Marketing
A conditional logic quiz is a perfect way to boost your email subscribers. But how? For starters, an Interactive quiz is a lead-generation machine.
The results of quiz-takers can be directly implied to create your follow-up regime. You can safely send your best resources, content, and services.
Crafting a Timer Google Forms
Planning to create a test or quiz in Google Forms? Not without the ExtendedForms app! It is one of the best countdown timer and proctor apps for your online forms needs. You can install the app free from Google Workspace Marketplace, configure the settings hassle-free, and share it with your students.
ExtendedForms is one of the best Google timer add-ons, not only do you get the feature of a timer in a non-timer tool but also an automated proctoring feature to prevent cheating from anywhere.
The app has more features like an auto-submit quiz, classroom integration, customization, a custom welcome message in different languages, and so much more. It gets better and better with regular updates and new feature launches. You can check out the add-on yourself and try out the free version.
In Summary
In this blog, we covered a bit of everything related to conditional logic, what it is, its benefits, and how to create conditional questions in Google Forms. It is a quick steps guide to read, understand, and follow when you want to make Google Forms conditional questions yourself.
Want to create timer-based Google Forms? With features like a countdown timer, proctor settings, negative marking, and team management, ExtendedForms helps you streamline the assessment process and enhance overall learning.
If you like this detailed guide, you can also consider reading How to Allow Multiple Domains for Form Sharing With an Organization. and How to Add Tables in Google Forms? [2 Ways].