Google Forms is a versatile tool often used for surveys, but it’s also handy to conduct online tests. However, it lacks a built-in timer, which can be a limitation for educators. But, here’s the good news – you can overcome this limitation.
You can add a timer to your Google Forms using a Google Workspace Marketplace add-on. The ExtendedForms timer add-on can be a game-changer for educators conducting online exams. In just four simple steps, you can set up online exams using Google Forms with a timer.
This will help you manage the test duration and ensure a fair testing environment for your students. Let’s explore how to create online tests with Google Forms using the ExtendedForms add-on. But before that let’s see a few tips for teachers.
Table of Contents
How to use Google Forms for conducting online tests?
Here is an easy guide on how you can create a Google form timer test. So, let’s not waste any time and directly get into the steps.
1. Set Up Google Forms for Test
If you don’t have a Google account, sign up for free. Go directly to Google Forms or head over through Google Drive > Forms.
You can either select the ‘Blank Form/Quiz’ or choose from pre-built templates. Scroll down to the Education section and you can choose from any one of the given.
If you want to make your Google form platform into an online test quiz (so that you can easily assign point values and feedback) then instead of selecting ‘blank form’ choose ‘blank quiz.’ Or you can change the form into a quiz from the ‘Settings’ and enable the ‘make this quiz’ option. Tadaa!
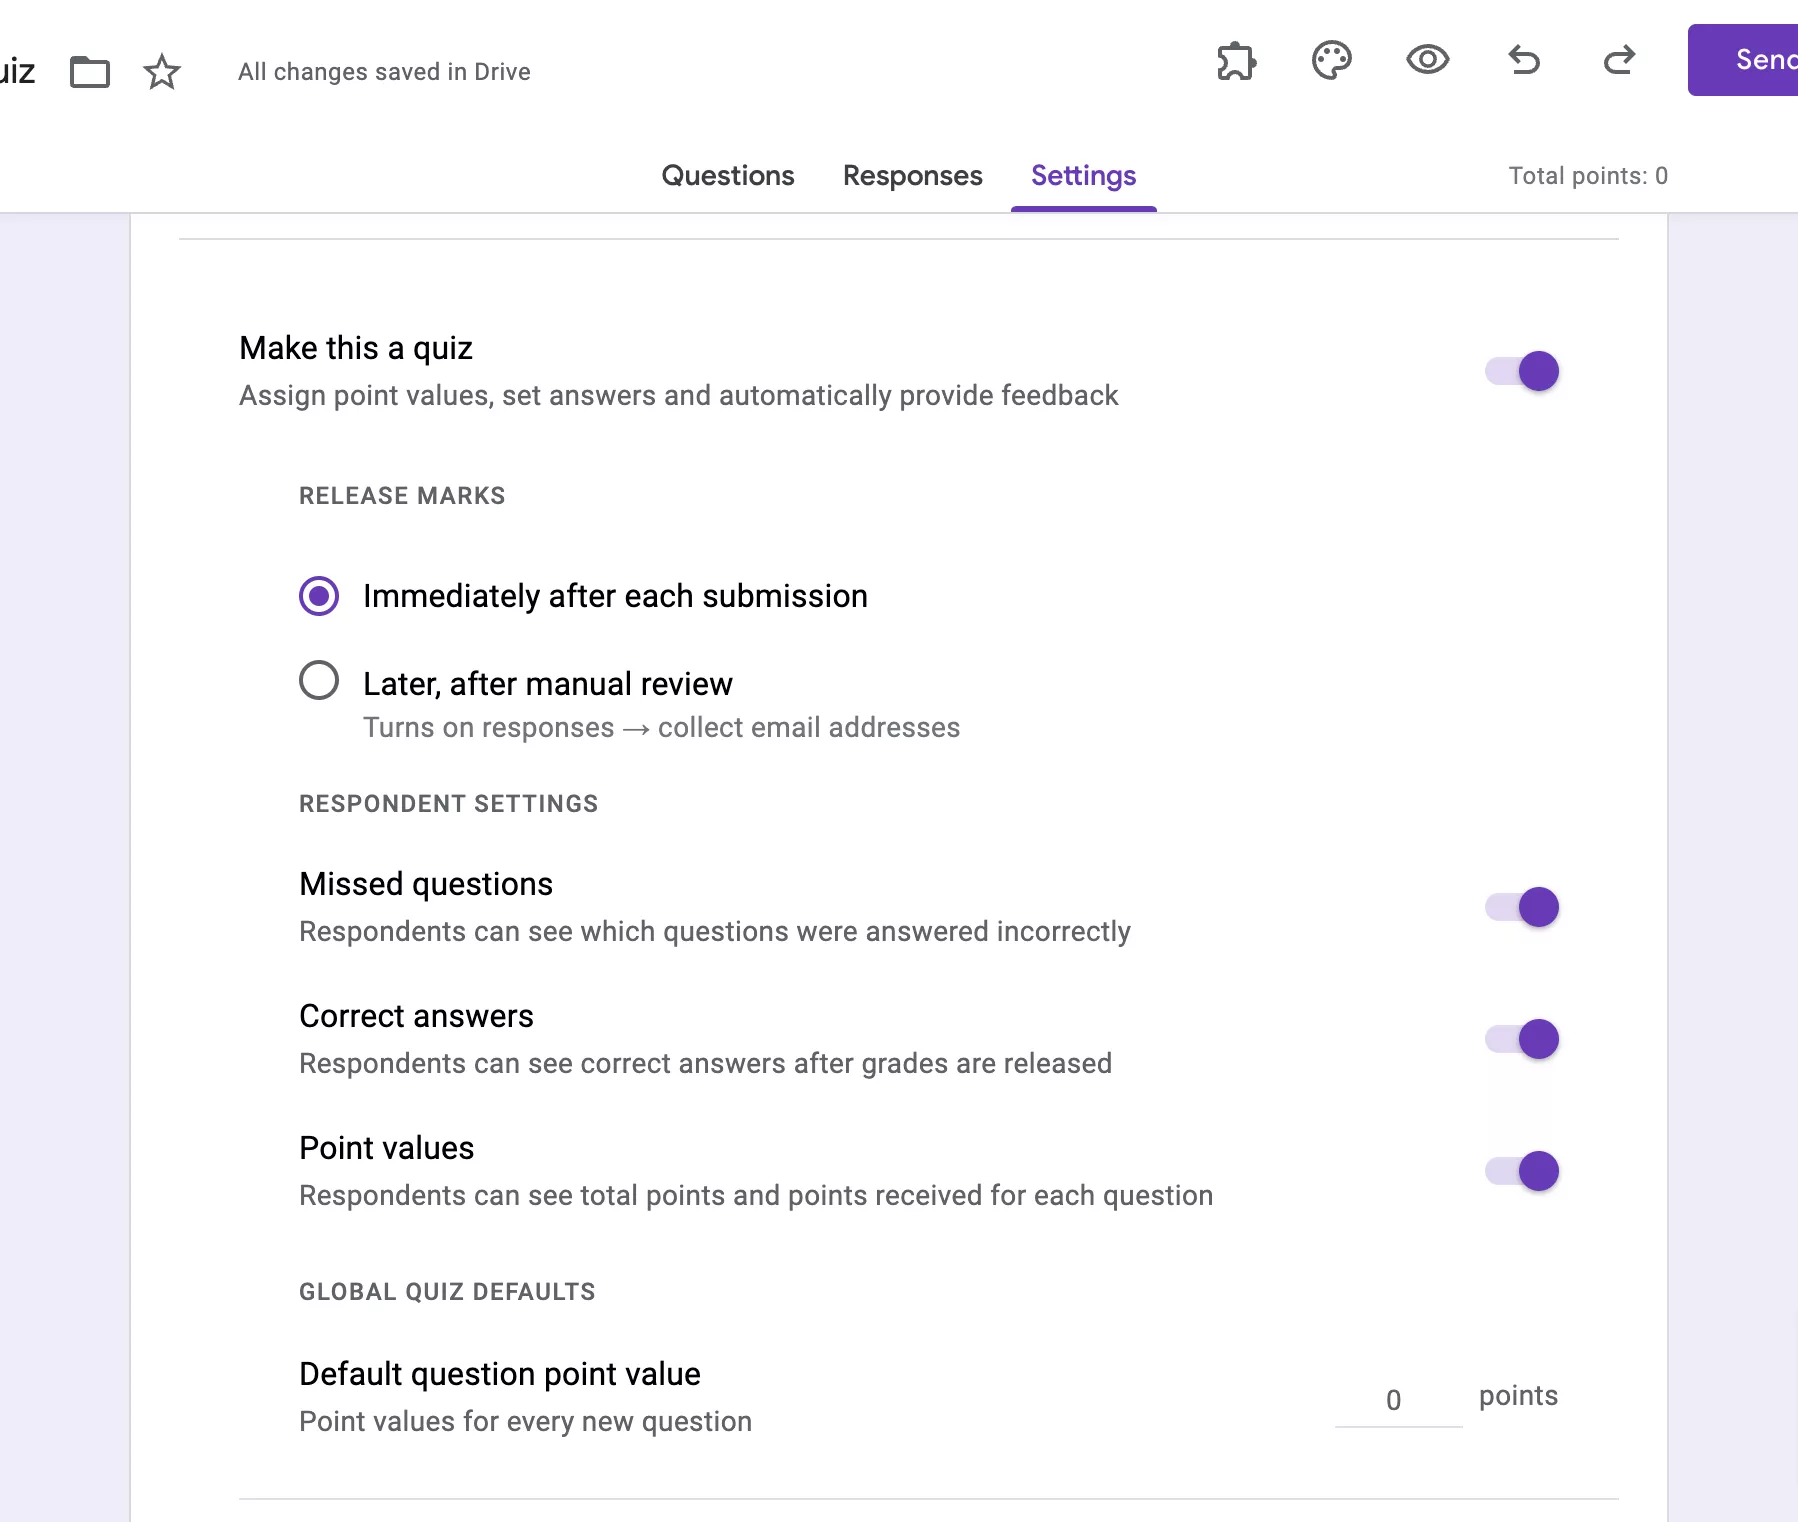
In ‘Settings’ you’ll see various other options to customize like – the ‘Responses’ Settings,’ ‘Presentation’ tab, and Defaults settings. You can collect email addresses, limit per response, show a progress bar, enable default questions, etc.
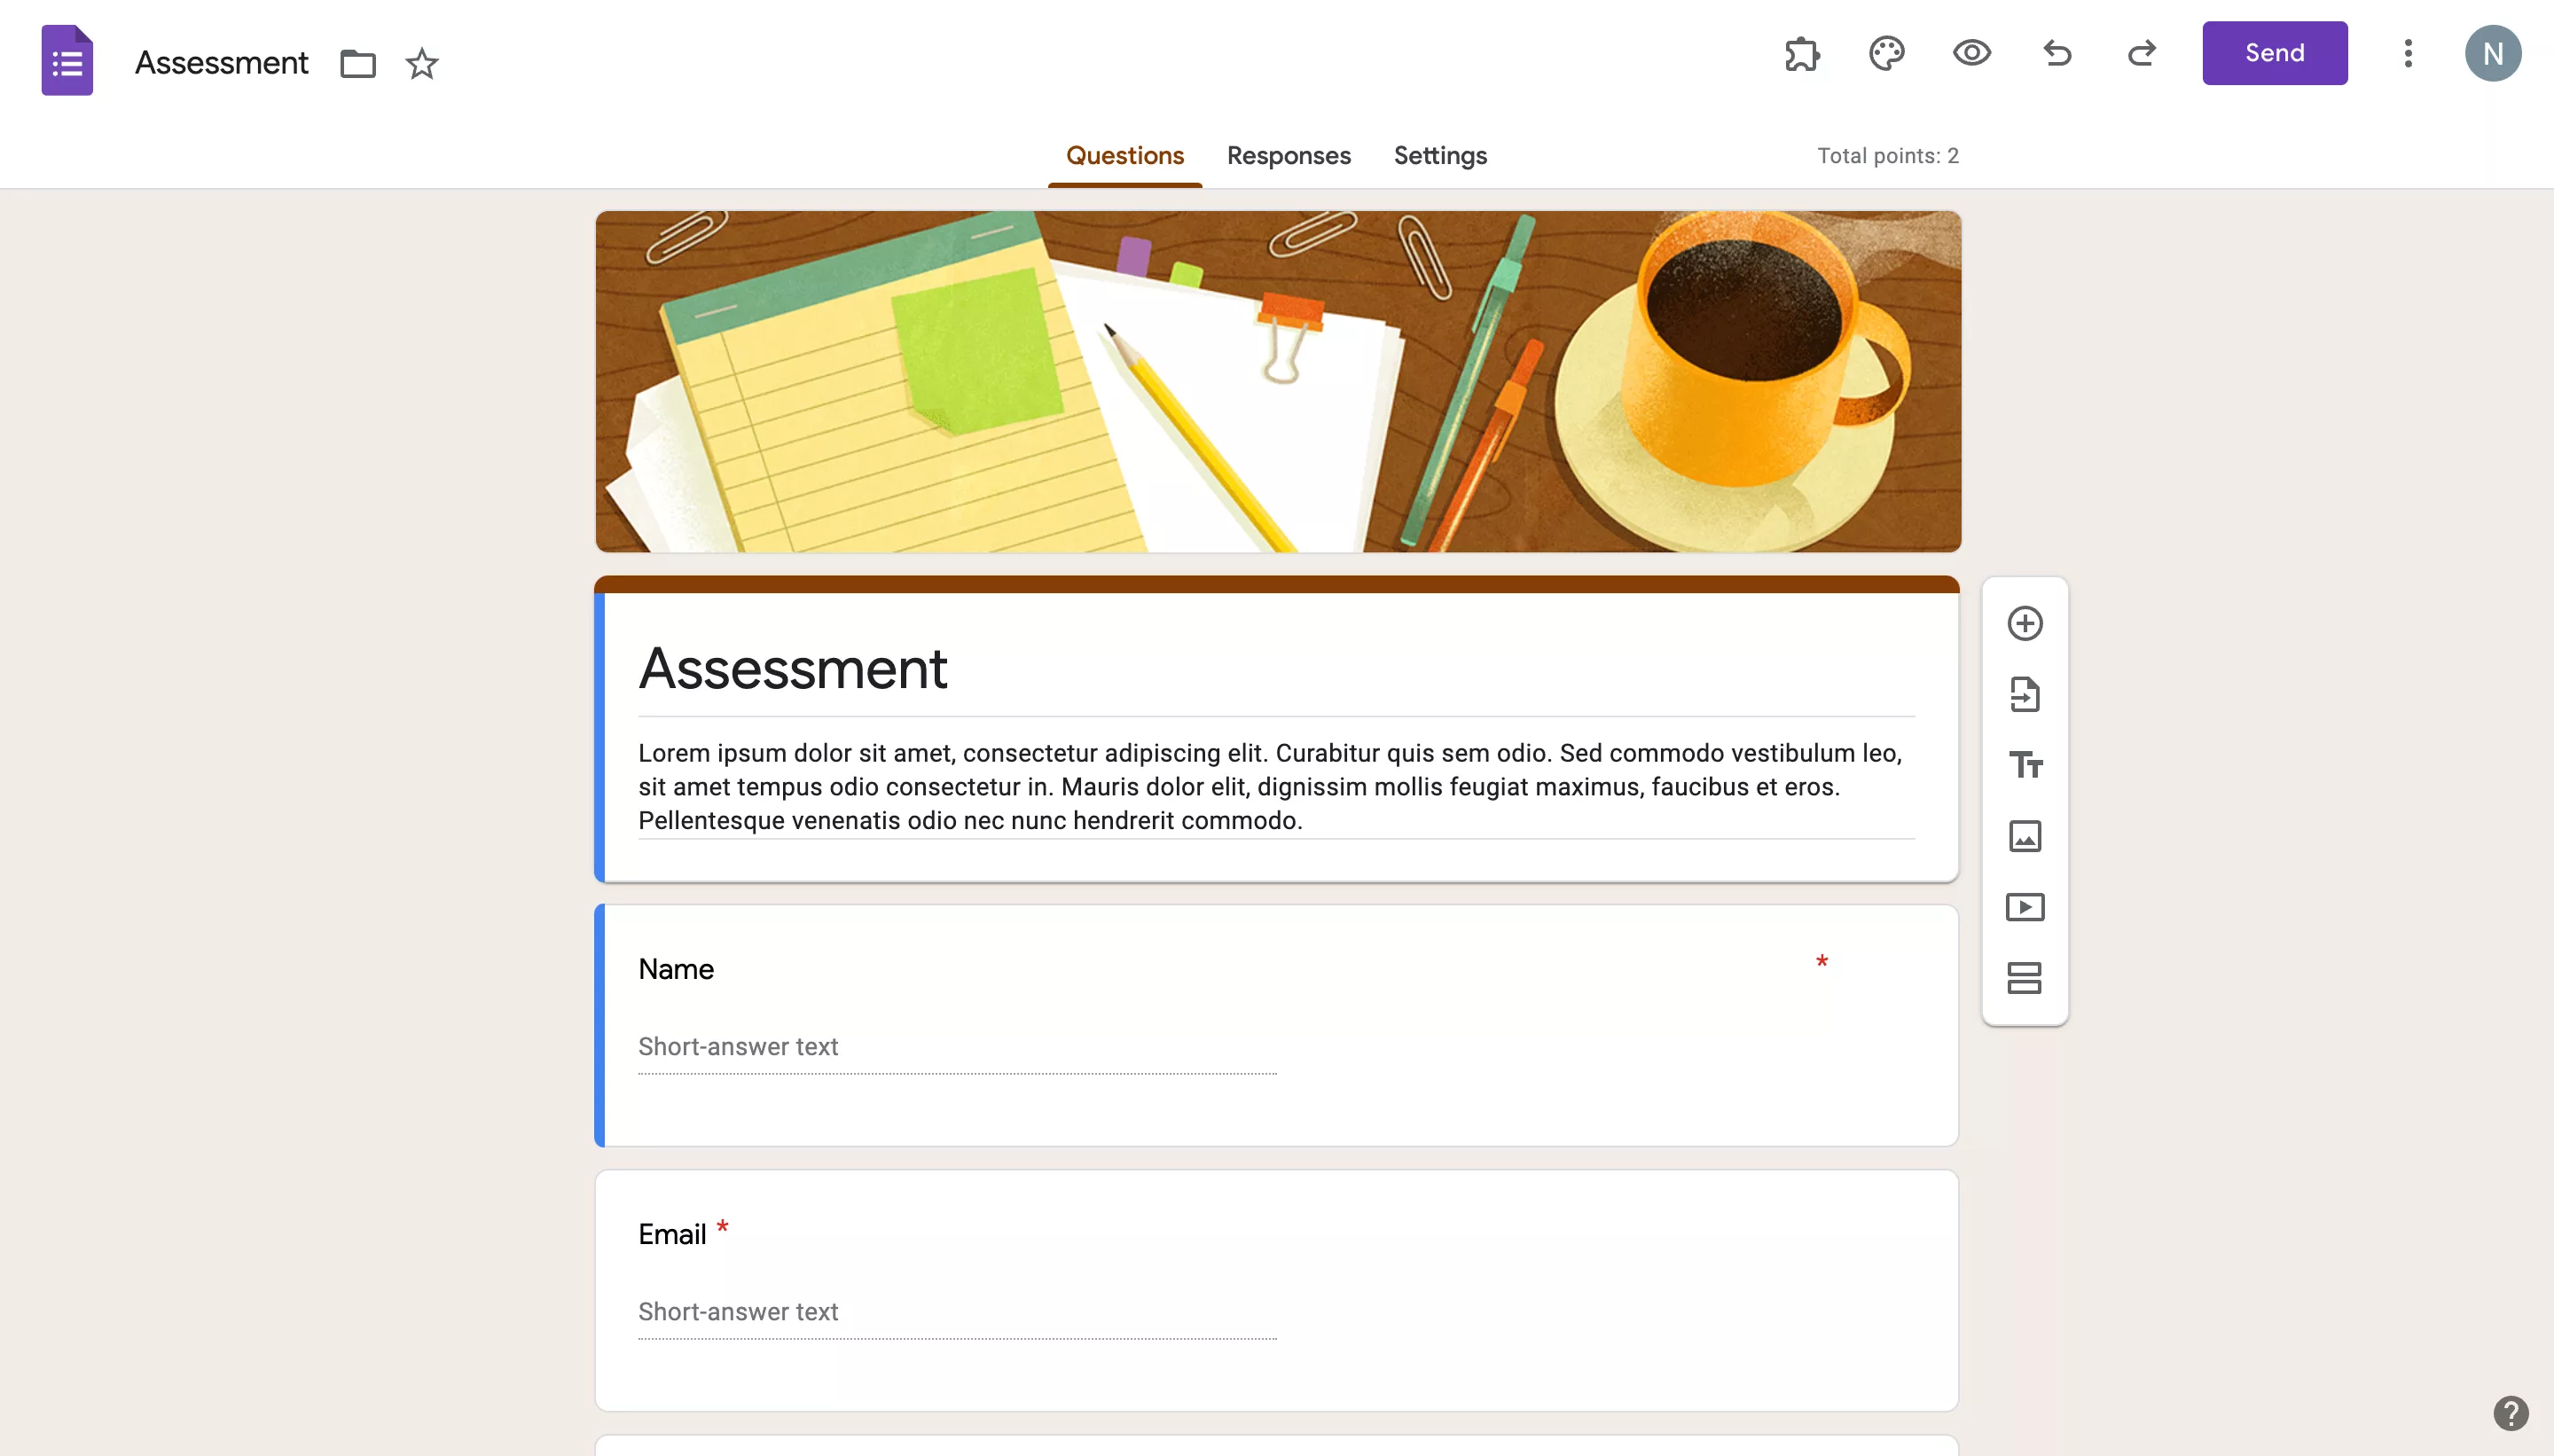
Now moving to the main part of creating a Google form test i.e, Q&A. Beforehand, give a title and description to your form. Below that, you’ll see an email question, if you’ve enabled email addresses in the settings.
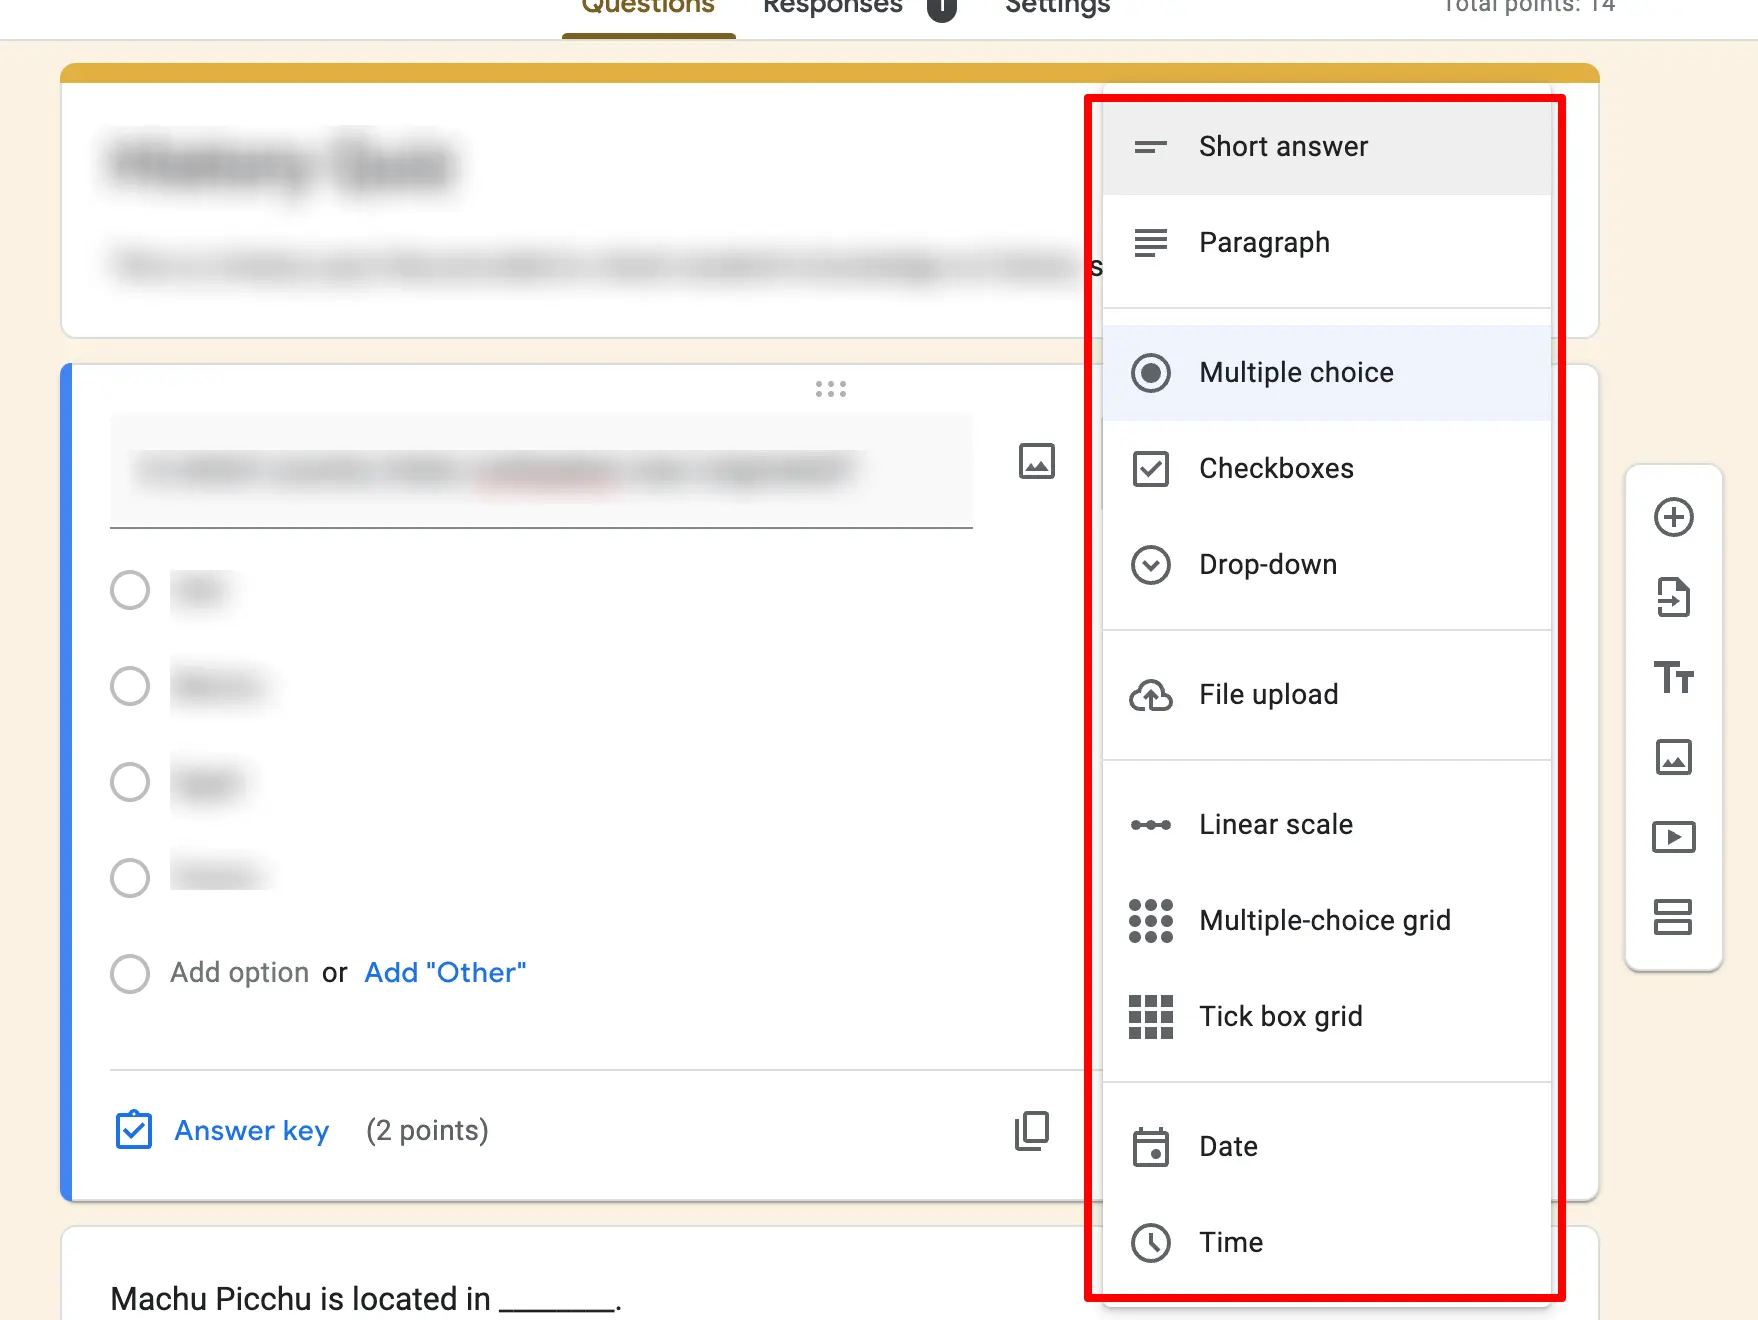
With the Q&A format, the tool offers various question options, including multiple-choice, dropdown, and linear scale. Besides, you can also add videos, and images, and can import questions. Further, you can add sections to make it organized.
2. Customize the Google Form
This step is optional if you are not interested in customizing your test, then move further to the next step. However, the basic settings are part of customization and must be done (as we did in the 1st step).
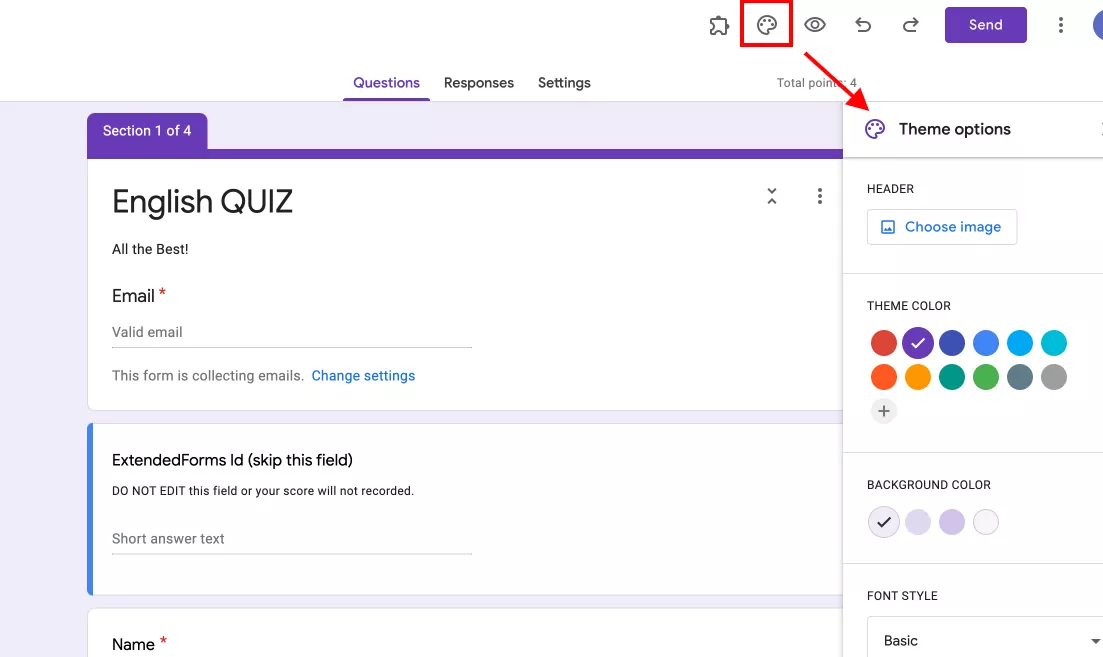
Further, if you want to change the basic look of Google Forms, then navigate to ‘Customize Theme’ on the top navigation bar. You will see a dialog box with ‘Theme options’, from there you can change the background color, font style, and add the header image, and theme color.
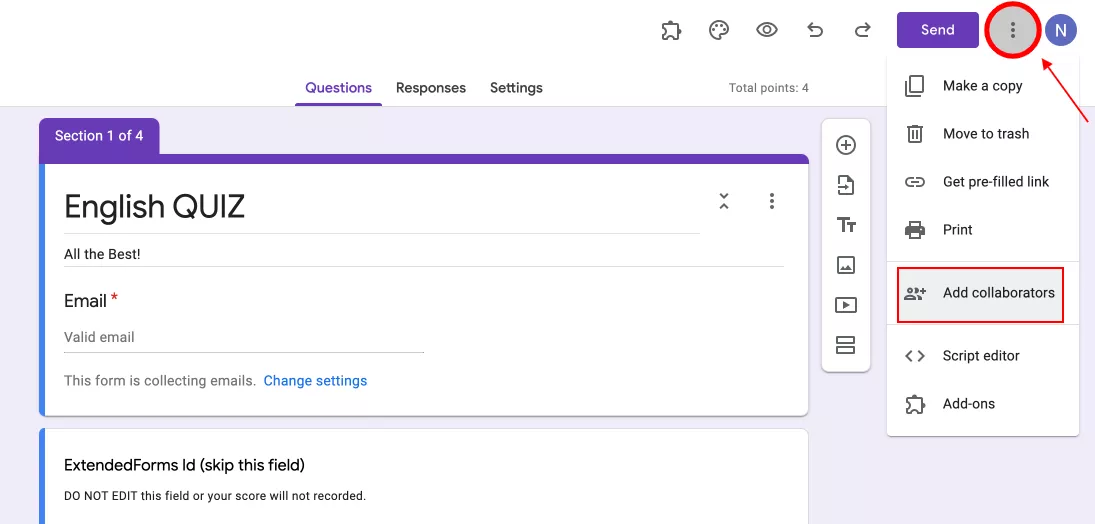
Apart from this, if you want to collaborate (e.g.: editors, teachers) with whom you want to share the online test then you can do so by navigating to “፧,” > ‘Add Collaborators’ and add another person’s email-id or copy the link and make it accessible to all.
Moreover, if you want to collect responses in one place, then go to ‘Responses’ and click on the ‘Link with Sheet’ icon. A Google sheet will be formed and the form will be linked to it.
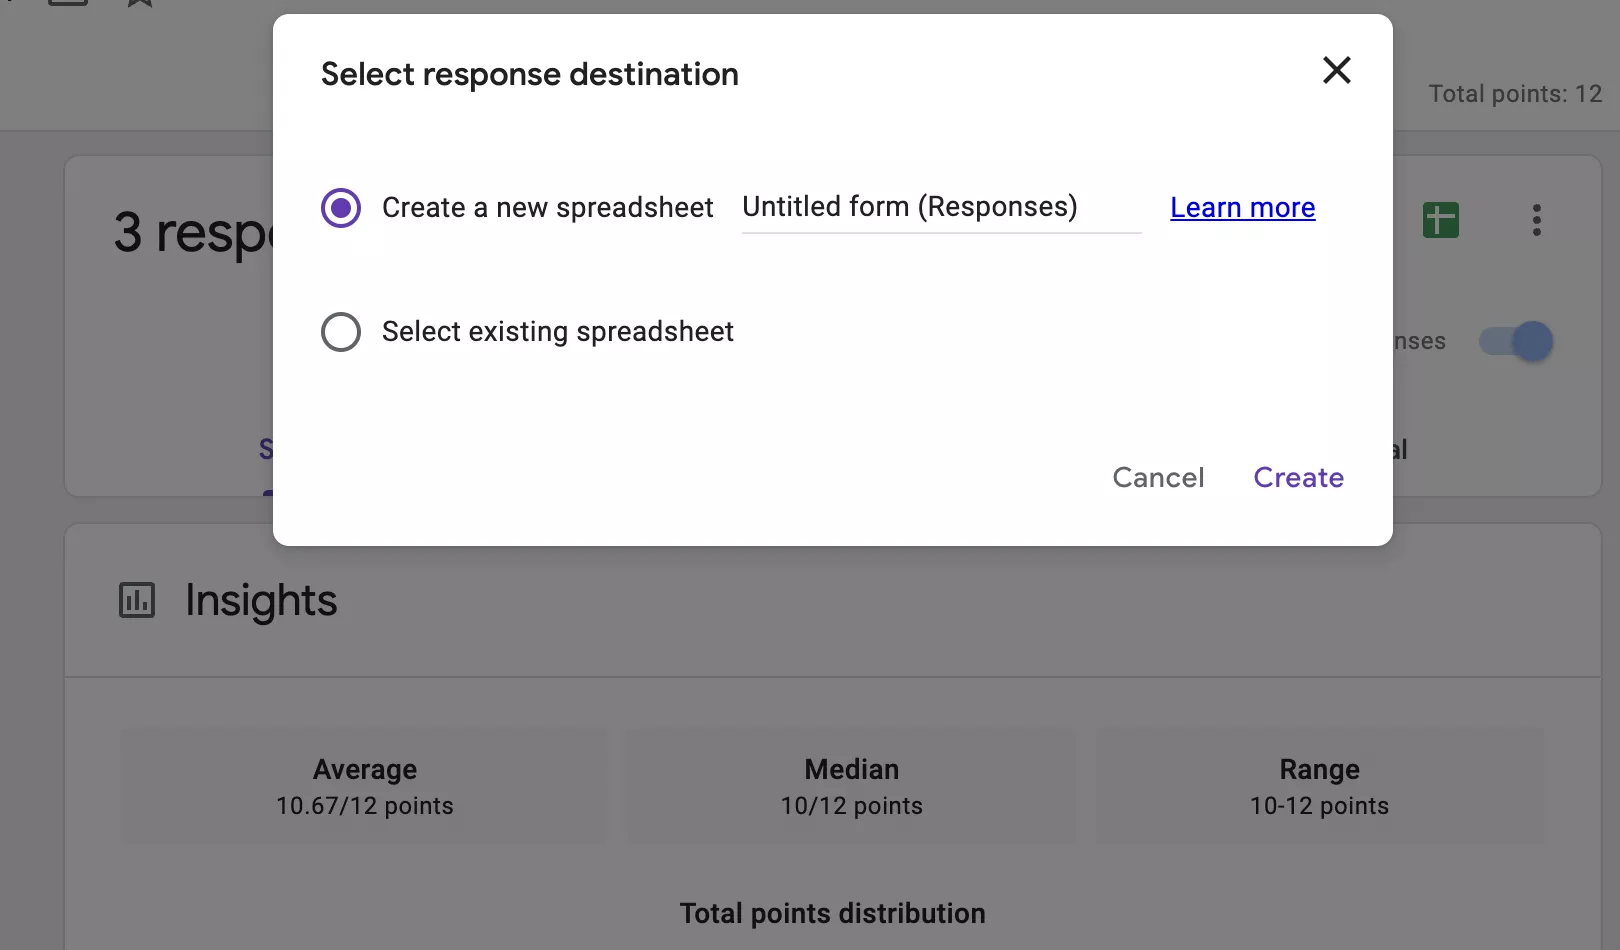
Apart from that, you can choose to link the form with previously created sheets by tapping on the ‘select response destination’ in the ‘፧’ menu option in ‘Responses’.
3. Add & Configure Timer Add-on – ExtendedForms
So, this step is to add and configure the Google timer add-on. ExtendedForms can turn your Google forms into quizzes and timer tests with an integrated one-click countdown timer. You can not only add just timer to your quiz but can add a proctor for real-time invigilation and track responses along with submission time.
Moreover, it has a classroom integration feature through which it’s easy to link your class works with ExtendedForms easily. Apart from this, it has the feature of exporting CSV files, and customizing welcome and invitation messages (these are part of pro plans).
Now to start with, we have to first download the online exam addon.
- Go to ‘Add-ons’ through the ‘፧’ More option,
- Then search for ExtendedForms and install the extension.
- Once installed, you’ll see a puzzle-shaped icon on the top bar of the page (if you can’t see it, then refresh the page once).
- Click on ExtendedForms > Configure and a dialogue box will open on the right of the page. (If you can’t see the configure option, I suggest you refresh the page again and try).
Note: Make sure there are no warnings if you see any, then click on “Fix Settings”
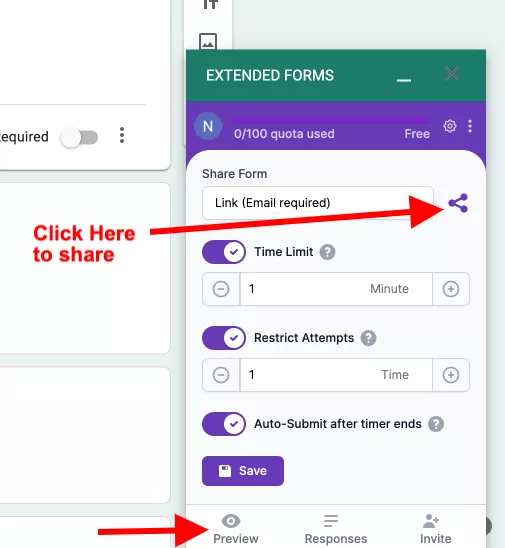
In the settings, you’ll see, the ‘Share Form’ dropdown box, you can choose from different options to share a form with respondents. Further, from here you can add the countdown timer. Then, in “Restrict Attempts, you can limit the responses (especially if you don’t want students to fill in multiple times).
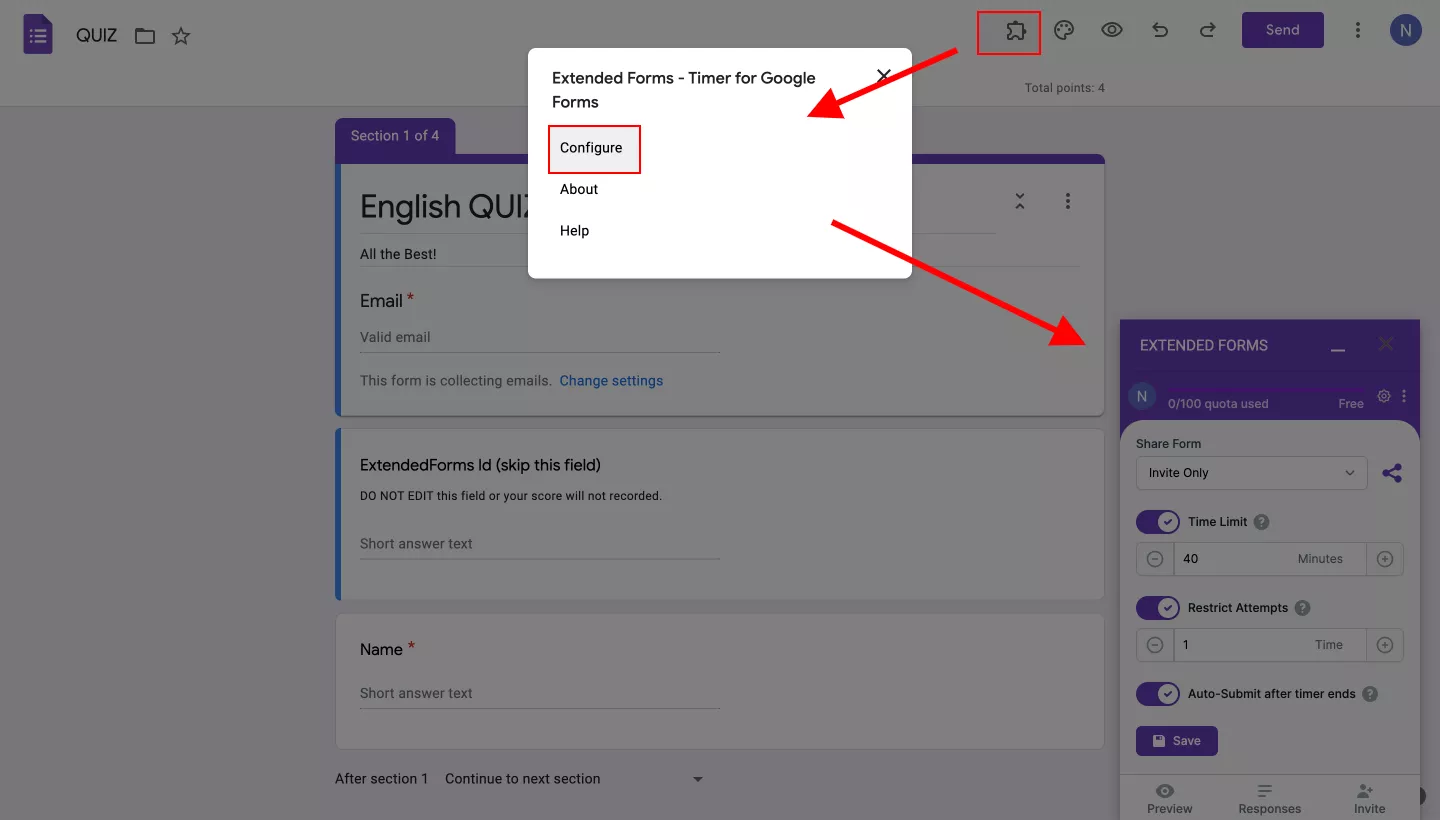
You can also enable or disable ‘Auto-Submit after time ends as per your requirement, in an online test it’s best to enable this option. Don’t forget to hit the “Save” button to save the settings.
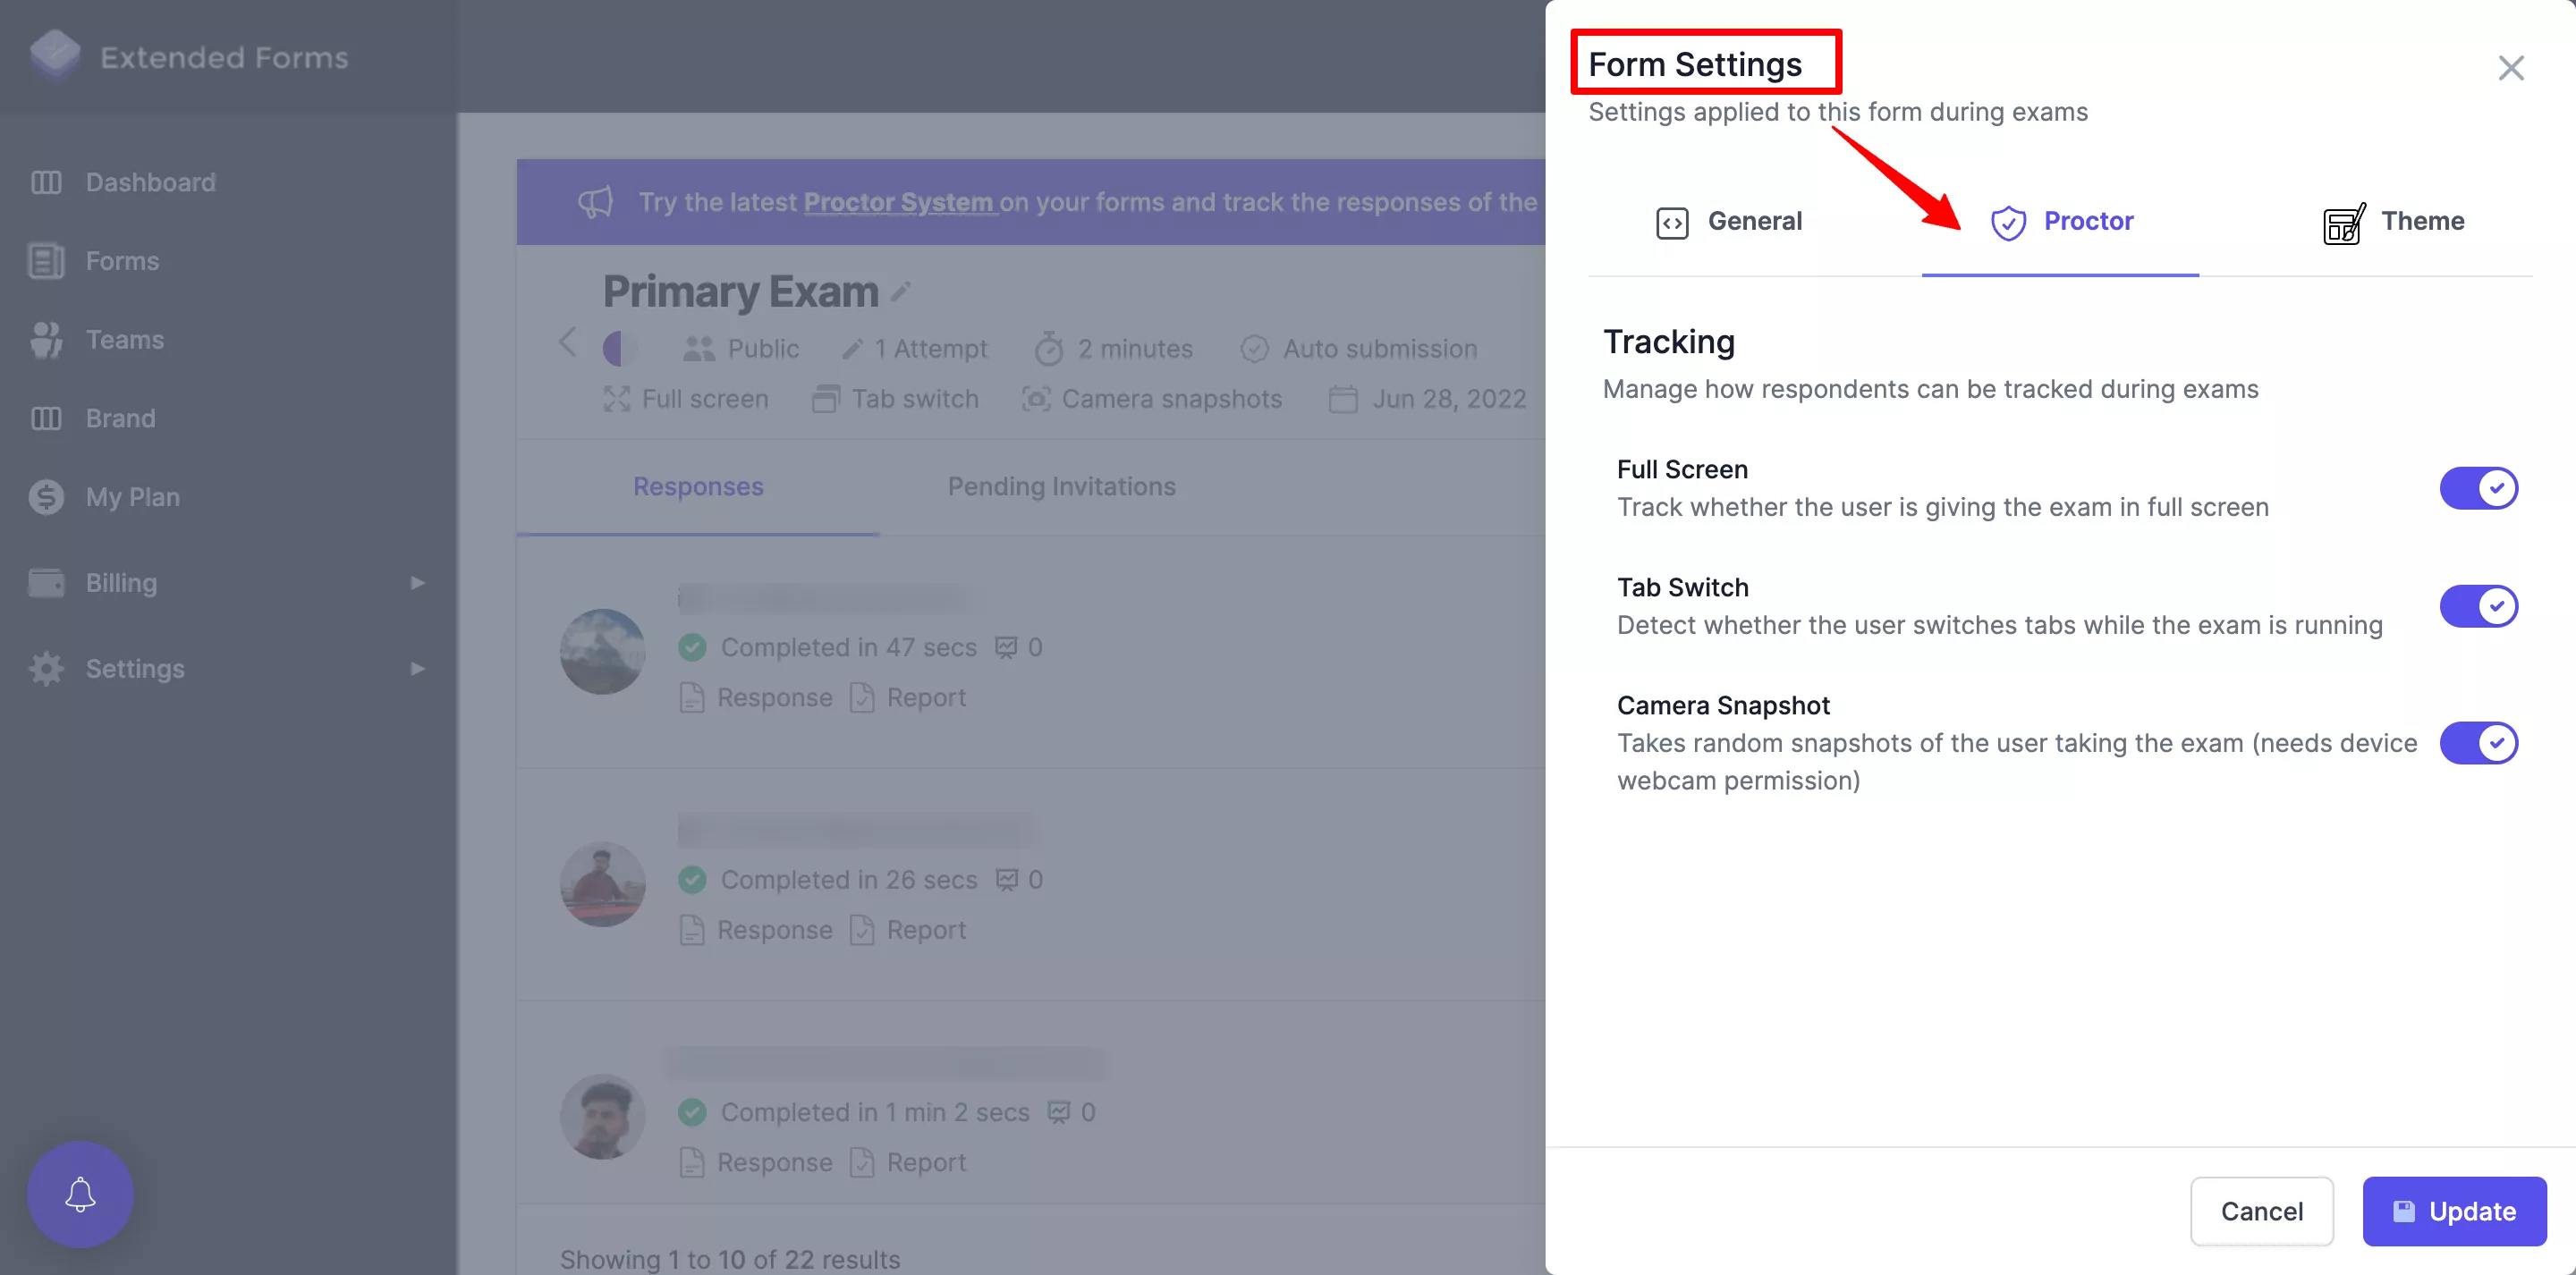
Besides, you can through the ‘Responses” option go to ExtendedForms main settings page, and under the ‘Form’ section see all the responses and pending invitations. To enable the ‘Proctor’ feature, click on the ‘⋮’ > Form Settings > Proctor, then enable all the tracking options and update.
Apart from that, you can invite people through the ‘Invite’ option in the ExtendedForms dialogue box, it directs you to the ExtendedForms settings page where a pop-up box will appear to send invitations.
4. Preview & Share with your students
Once everything is done, it’s time to share it with your audience. To see the Google Forms timer quiz, you have to preview it through ExtendedForms settings. Click the ‘Preview’ button on the ExtendedForms settings box to see your Google Forms test.
Then share it by clicking on the share form link and the link will be copied. You can through the ‘Invite’ option also share it with people, you’ve to add all the email ids. Voilà! You have added a Google Forms timer and created a test to share.
Tips for Conducting Online Tests (for teachers)
Google Form is a versatile tool that is and can be used for multi-purposes including consumer market research, exams, feedback forms, and more.
It is very useful for teachers to conduct tests for students, especially when the time calls for online education. However, there may be essential tips & tricks to use while conducting online tests with Google Forms.
So, before diving into the steps to conduct online tests with Google Forms, here are some tips that you must use while creating the test.
1. Disable multiple response settings
If you face the issue of multiple responses by an individual, then you can limit the response. Go to ‘Settings’ > Responses > Enable Limit to 1 response. You can limit the responses through the Restrict Attempts option in the ExtendedForms add-on.
2. Shuffle each question to make it different sets for students
To make it a bit challenging for students and so that there is less probability of cheating you can shuffle questions order. To do so, go to Settings > Presentation > Shuffle question order. If you want to shuffle the answer order then you have to click on the symbol ‘፧’ in question fields > shuffle answer.
3. Enable response validation
If you face an issue where students add mindless responses then, you can enable this field. Create a question, then go to the ‘፧’ icon in the question field and choose response validation. Then, specify the validation for eg – text & email, also you can add custom error text that will be shown to students if they make such sort of an error.
4. Add timer (or any) add-on
This is the biggest issue faced by teachers, but not anymore. You can add a timer third-party app/add-on or any other app for Google Forms. Just hover over ‘፧’ on the top bar, go to ‘Add-ons’, and select Google form timer like – ExtendedForms.
Wrap Up
We are at the end of our article. I hope this blog has helped you understand how to conduct online tests with Google Forms. These steps can make a great Google Forms test or quiz for students. Besides, with the help of the ExtendedForms timer add-on, the limitation of the no-timer has been removed.
The ExtendedForms add-on for Google Forms is a great alternative and does not come with any complexity of configuring it. It is a productive way to turn your unscheduled forms or quizzes into a scheduled, countdown timer test, quiz, or assessment.