When businesses are choosing a form app or website, there seems to be a perception regarding Google Forms – it is too basic. It’s unfortunate, as this form builder is a strong tool if you know all its features or tricks of it. Here are a bunch of advanced Google Forms tricks that enhance the Google Forms capability and functionality.
Today, almost every business, and institutes opt for online form builders to collect data and survey information. Digital form is a better alternative to the tried and tested pen-paper method, which is quite time-consuming.
Google Forms is a popular and even one of the most-used digital forms for most businesses. Now, let’s try to look at all the Google Forms tricks or features for yourself while I explain here.
Table of Contents
Advanced Google Forms Tricks
Note – We have this article for you in video format. If you are interested in watching the video, you’ll find all the features in Google Forms. Just check out our video below!
This article may change your opinion if Google Forms is not your go-to form maker. Many interesting and advanced features are hidden inside the software.
You may not find them unless you know what you’re looking for. Or you might sometimes fail to know the purpose of it. Let’s move further and look into the different Google form tips and tricks and advanced features:
1. Insert Multiple Sections or Pages
The very first Google Forms tricks is to create multiple sections or pages. Creating long forms for any purpose can be a bad idea. However, you can make your form manageable and well-organized for respondents, by adding multiple pages through inserting sections.
It will allow you to segregate your form into different sections with different categories, making it more approachable for respondents.
You can also in the form description, mention how many sections there will be so that respondents will not be going blindly in the form.
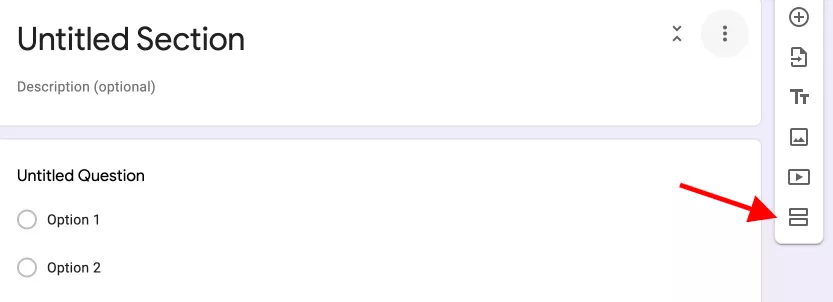
Go to the last block on the floating sidebar and click on the two vertical boxes symbol ‘Add Section’ button from it. A new section will be presented, you can add a title and description to each section.
This is the best way to separate certain kinds of questions or for specific types of respondents.
2. Auto-Grade Your Quiz
Another Google Form tricks is specifically for educational institutes or anyone creating quizzes. You might be well aware of the use of the form for the Google Forms test and quiz.
However, you might or might not be so in tune with the advanced features of the quiz. That is, you don’t have to grade students manually anymore, Google Forms can do it automatically for you.
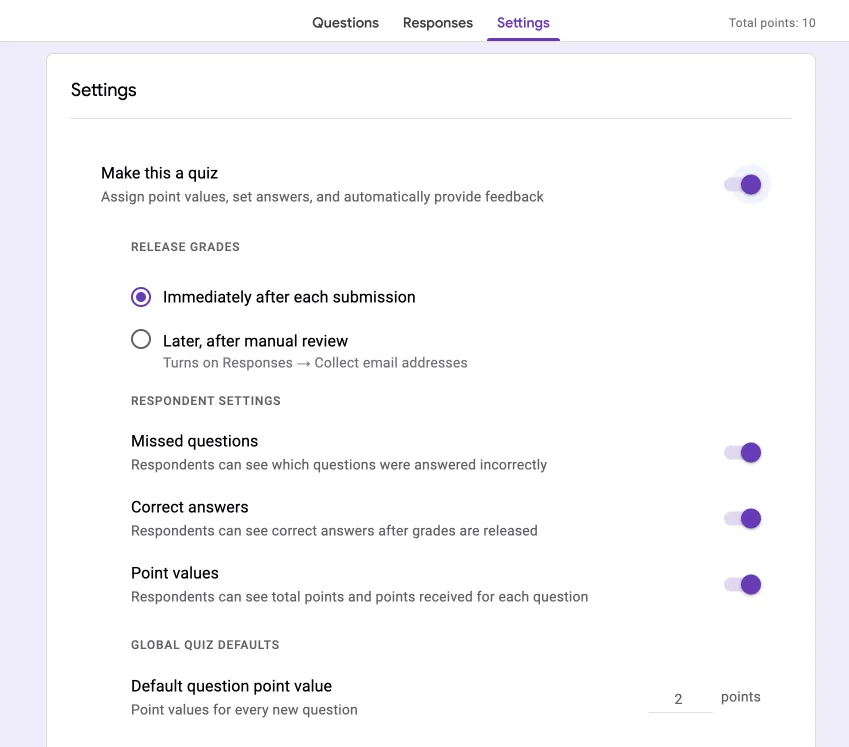
You can make a quiz through the pre-built Quiz template under the ‘Education’ template. Or to set this up, you can switch to the ‘Settings’ tab and enable the ‘Make this a quiz‘ option.
Further options will then appear beneath it, like whether you want respondents to see their grades immediately after submission, enable point values for each question, and more.
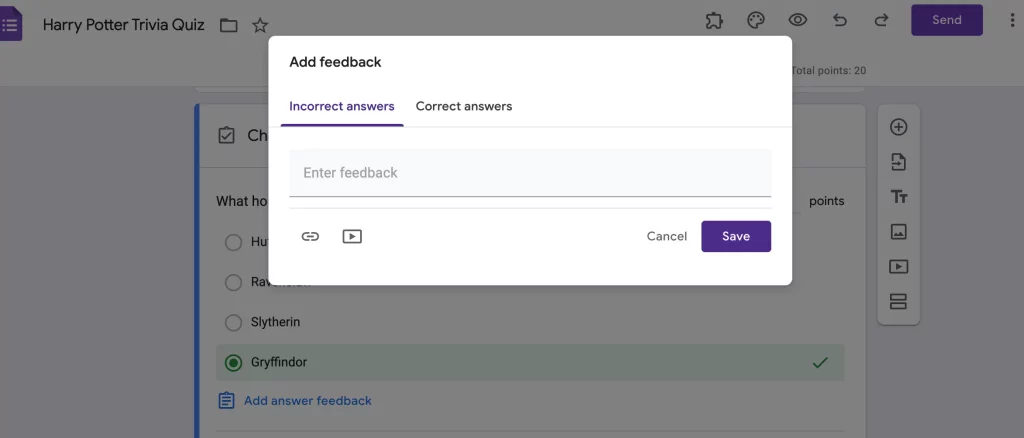
Besides, you can either set default point values or assign point values individually for each new question. Moreover, provide feedback for correct and incorrect answers.
To connect Google Forms with Google Sheets, read How to Connect Google Forms to Google Sheets. (Explained in 2 ways)
3. Select Response Destination
If you are a Google form user, then you will know that your form responses can be saved in a Google spreadsheet (aside from responses in the form). Besides, if you are new to Google Forms, then this Google Form advanced features is something to look for.
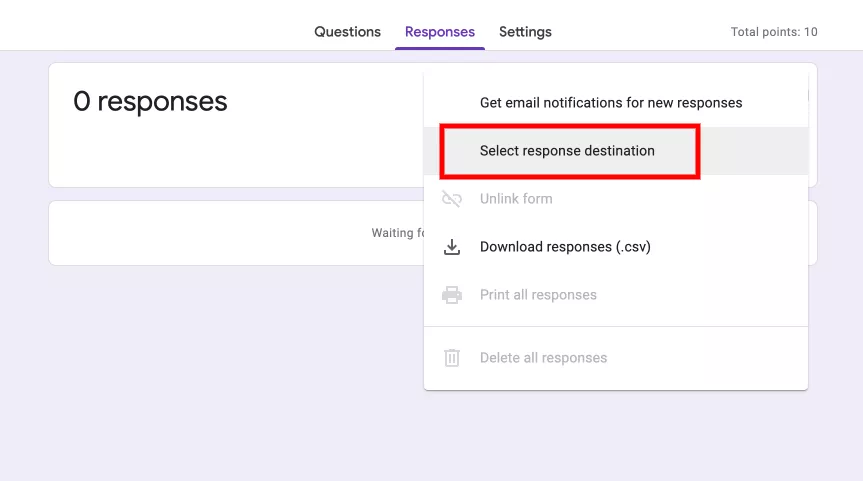
To choose a response destination;
- Head over to the ‘Responses’ tab
- Click on the three-dot icon – ‘፧’
- Then, click on the ‘select response destination.
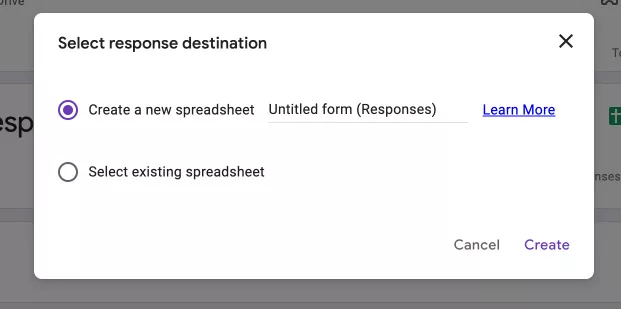
Here, you can create a new spreadsheet or save your responses as another tab to an existing spreadsheet that you can choose from the pop-up window that will appear for Google Sheets.
Apart from this, if you want to link your form responses to Google Sheets then directly click on the “Link to Sheets” icon under ‘Responses.’ Or to download to your device, go to three-dots > Download responses (.csv).
4. Receive Email Notifications for Submissions
In just two clicks, you can set up the email notifications for submissions, – Go to Responses > three-dot icon menu, and select ‘get an email notification for new responses’.
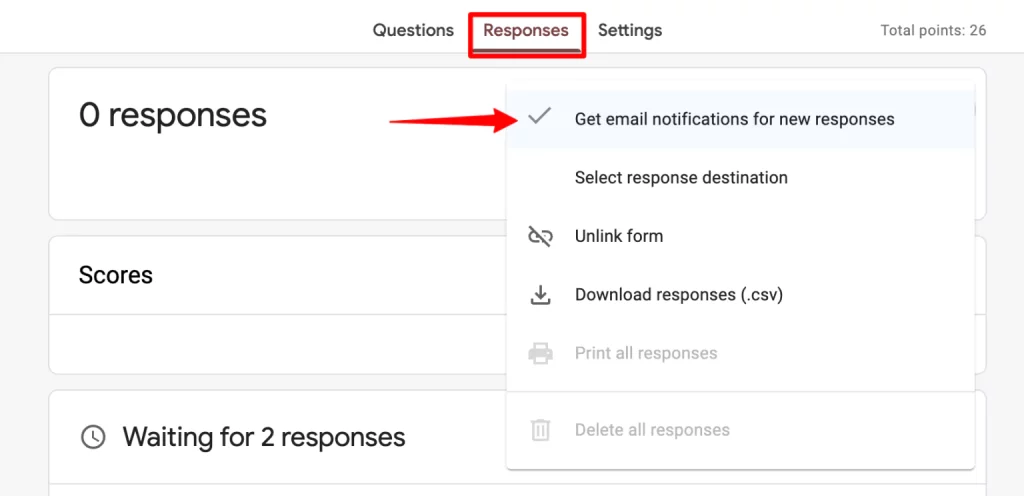
You’ll get the responses on the email address that you have used to log in to your Google Forms or G-drive.
Pro tip: Don’t try this Google form trick if you will receive or expect to receive tons of responses. This feature lets you stay updated with all the responses you have received every time a new response is submitted. Of course, it will flood your inbox, but on the good side, you’ll stay alert with every response.
5. Add Conditioning Logic
Sometimes you don’t want every question to be answered by every respondent. That’s where one of these Google form tricks comes into the picture. Conditioning Logic or Logic Branching is a showy way of describing that based on the answer participants give, they will be redirected to a complimentary and particular question.
For example, if you choose a ‘hair’ option then you’ll be redirected to the Hair section. You’ll automatically skip other questions/sections that are meant for a specific category.
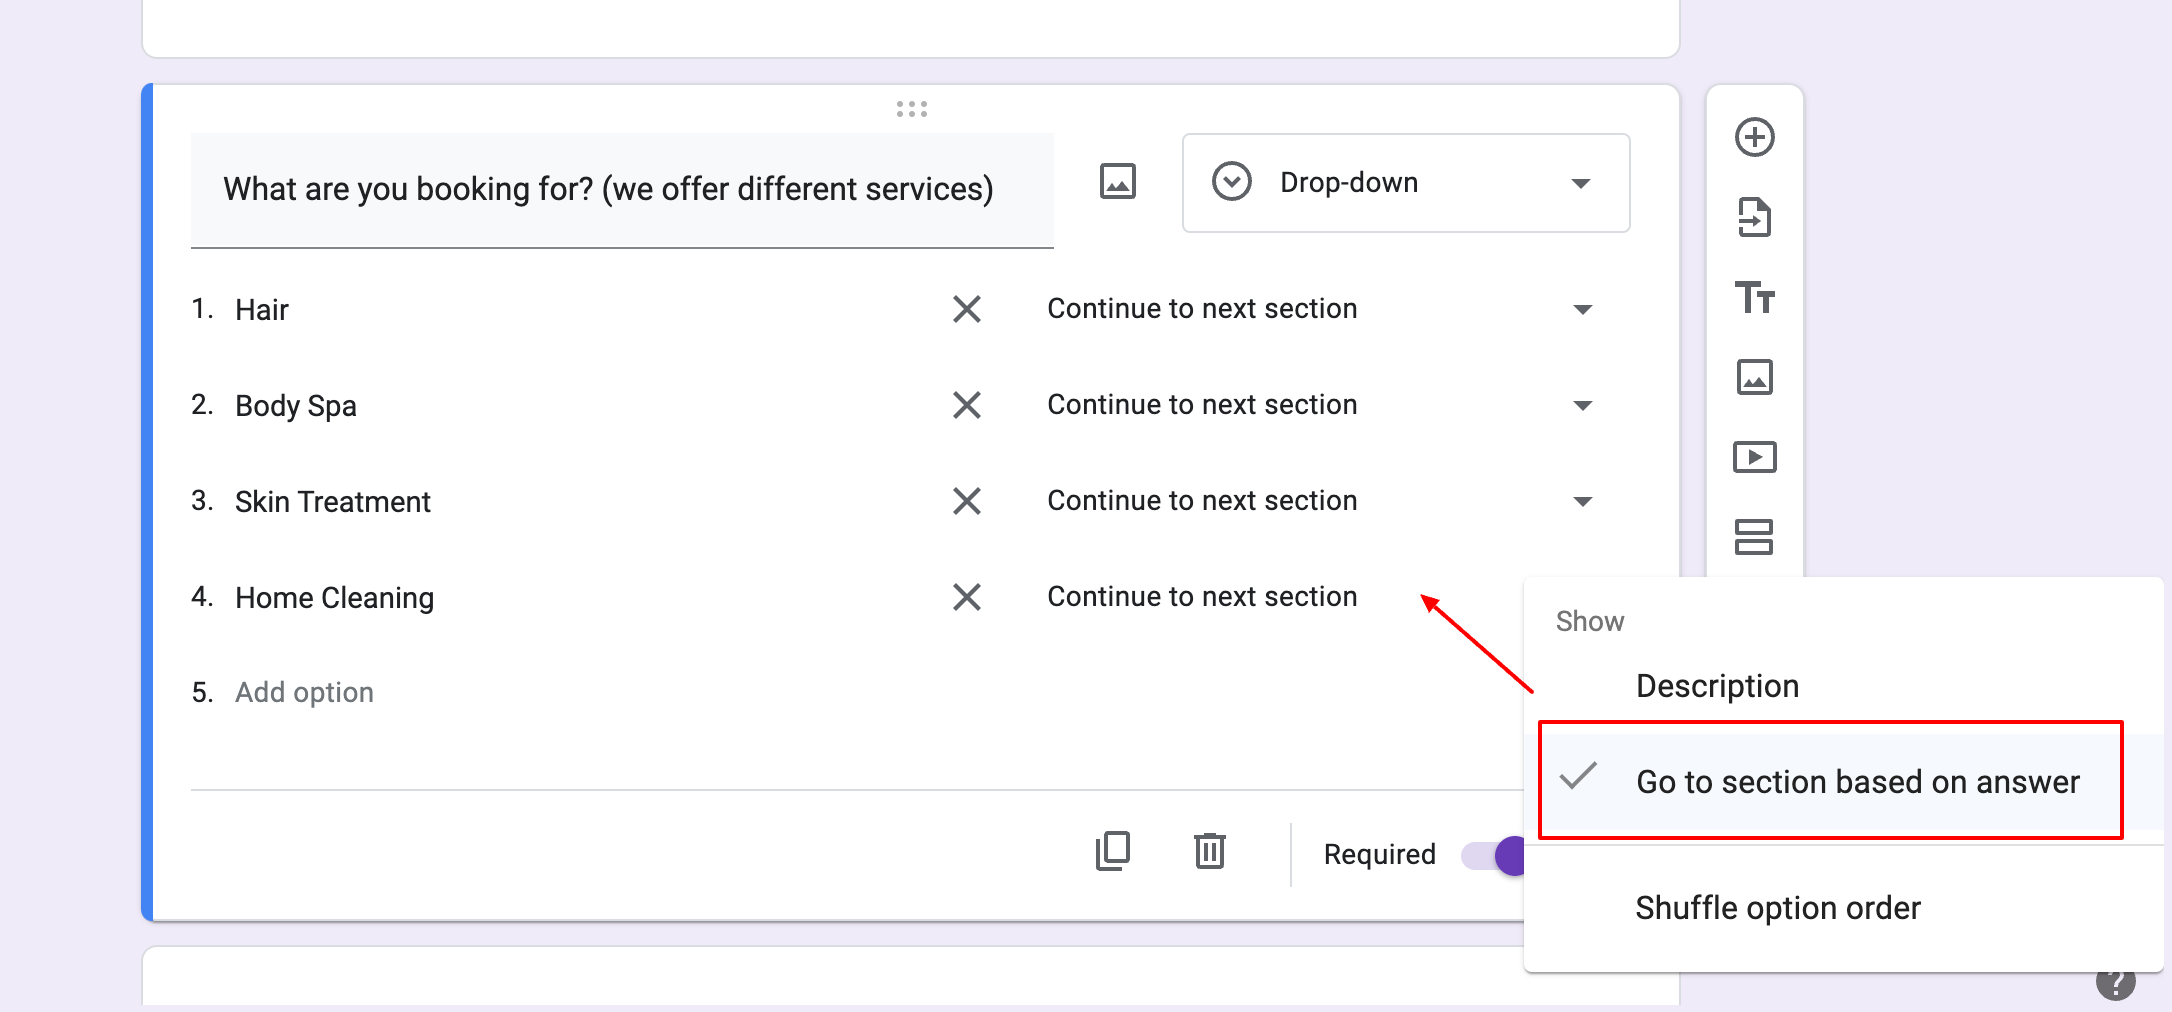
You must keep in mind that only for multiple-choice and dropdown-type questions can you add conditioning logic. Now moving further, click on the ‘More’ (three-dot icon) at the bottom right corner of every question and select ‘Go to section based on the answer.’
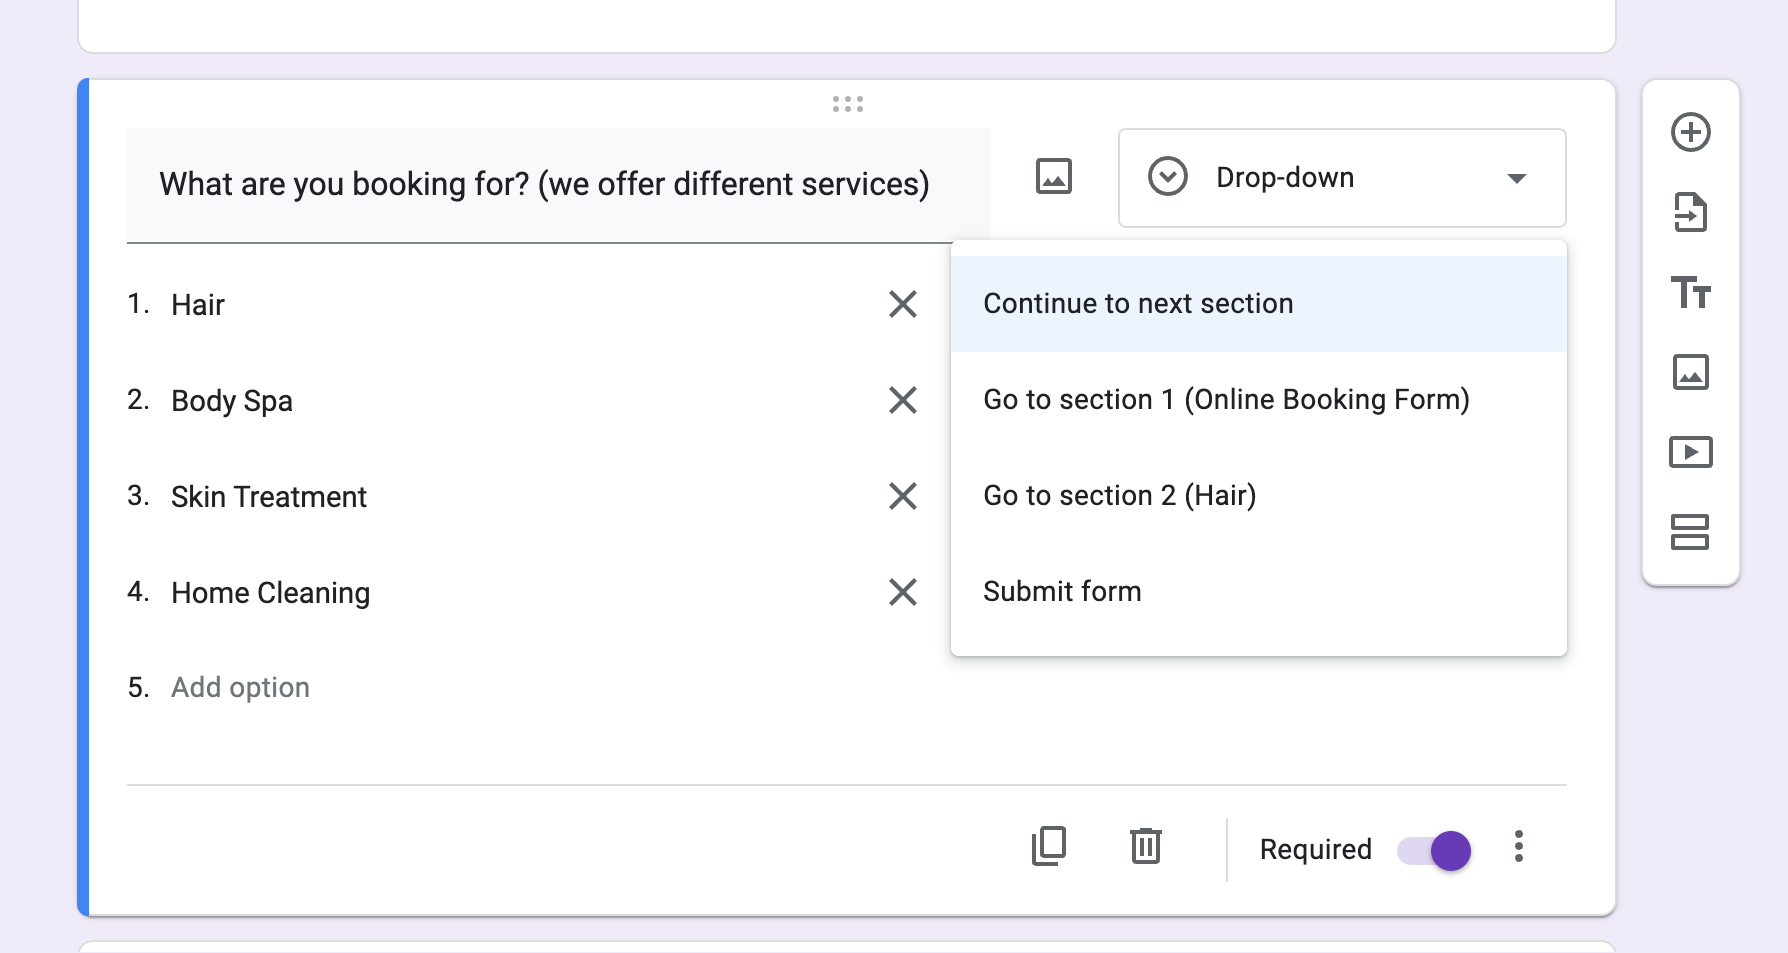
Then select from the dropdown box beside each option where you want them to direct if opted for the particular answer. You can also have them submit the form instead of going further.
Looking for extensive customization of the timer in Google Forms? Read, ExtendedForms Unveils: Customized Timer Themes.
6. Use Scripting
If you know how to code and know how to write a script or want to utilize one that you might have found on the web. Then, there’s a way! There are no scripts and Google Forms doesn’t support scripts per se, but it does have the feature to use scripting if you like.
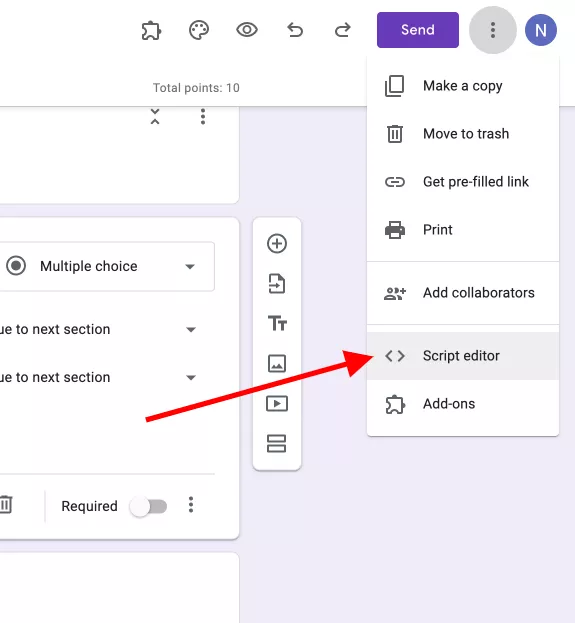
Click on the Menu icon on the top-right, and go to Script Editor. It will open up to the ‘Apps Script’ tab, you can enter your script on the clean slate.
Besides, you can also add a library and add a service, once you are finished, just click on the disk icon and save the project. You can also head over to the Google Apps Script page for some needed help or examples.
7. Add Collaborators
One of the cool Google Forms tricks is its advanced feature is to ‘add collaborators.’ Google Form is flexible when it comes to sharing. It lets you invite others to be co-editors of your form or simply to collaborate with form building.
This Google Forms trick is the best-advanced feature, especially if you are a teacher or researcher working with your partner together.
You can easily add your partner and let them be part of the form and responses and they can edit it as well. For that, go to the ‘More‘ option at the upper right corner, select ‘Add Collaborator’, and add their email IDs or copy the sharing link.
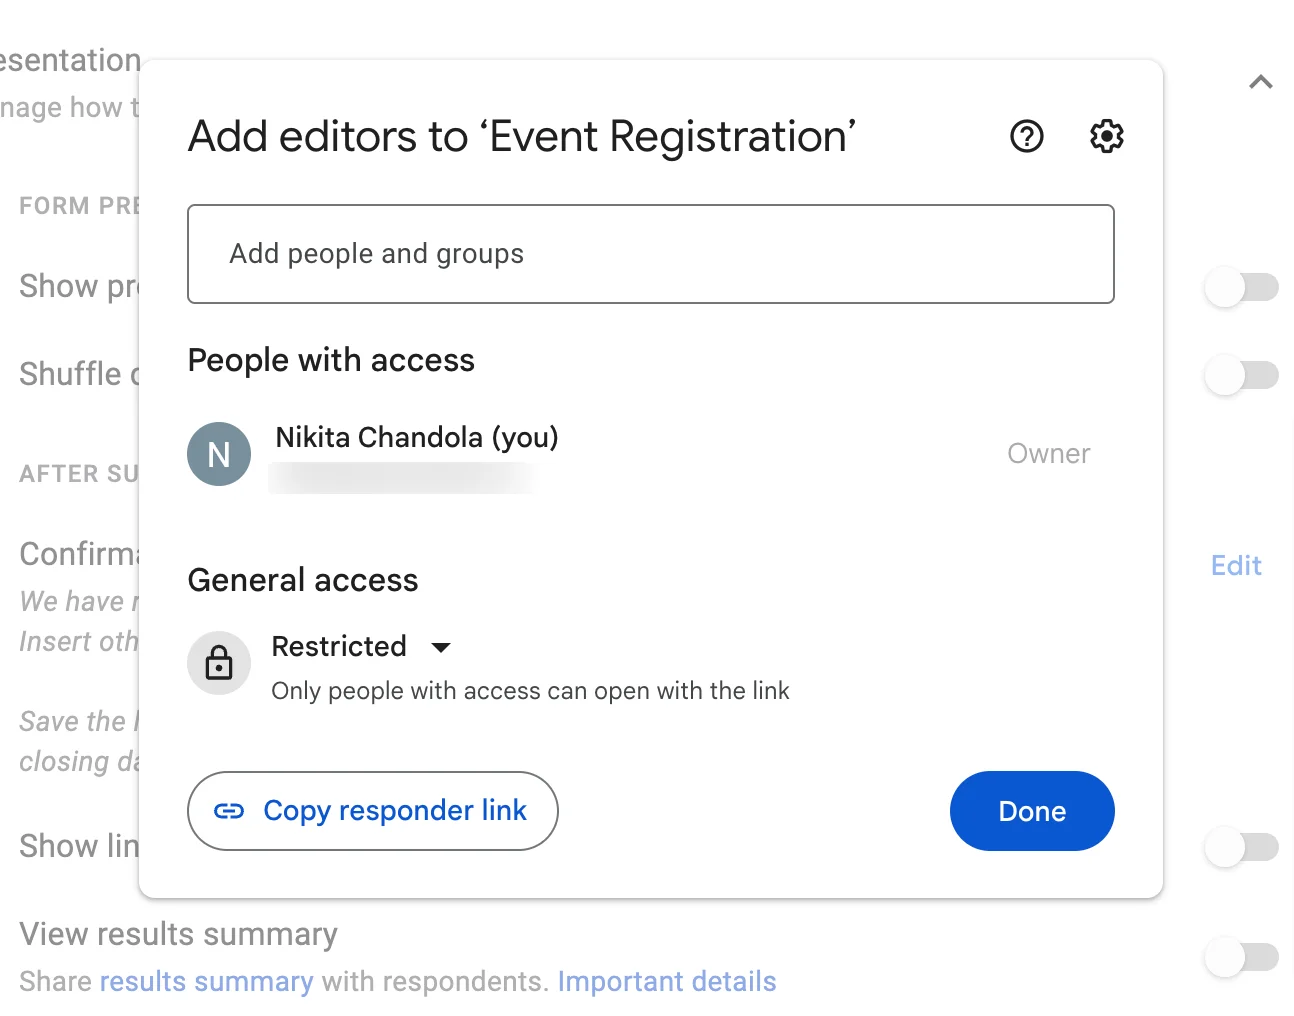
The admin can also prevent editors from changing access and adding new people. Just go to settings (gear shape) in the add collaborators and disable the option.
8. Embed iFrame to use as a contact form
If you have noticed that there are many websites with a ‘Contact Us’ form webpage and want something like that. Then, it can be easily done through Google Forms. If you want to use Google Forms to create a contact form for your website or another purpose, then this Google Forms trick will be useful.
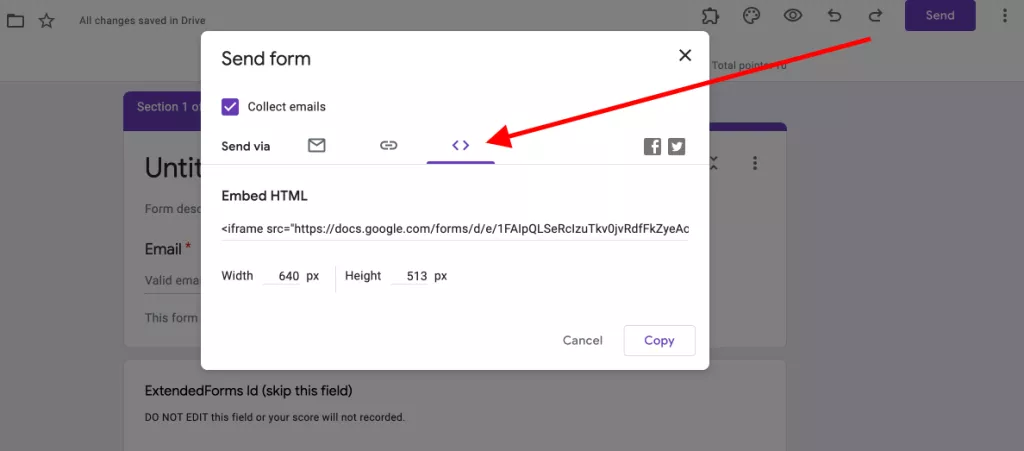
Go to the ‘Send’ option to begin with, then navigate to the Embed (< >) icon. Adjust the height and width of the frame, if you like, and click on Copy. You can paste the code, into your webpage.
9. Get a Pre-filled Link
If you want to send a form with pre-filled answers, then this feature in Google Forms is the one. The pre-filled form makes a big difference for people who want to fill them out quickly. It assists in the time spent on the completion of the form.
For instance, you might want to save the respondent sometime when moving in a multi-form flow, where you will pre-fill some similar or duplicate fields on the next form by using content from the first form. Like, in case of contact details.
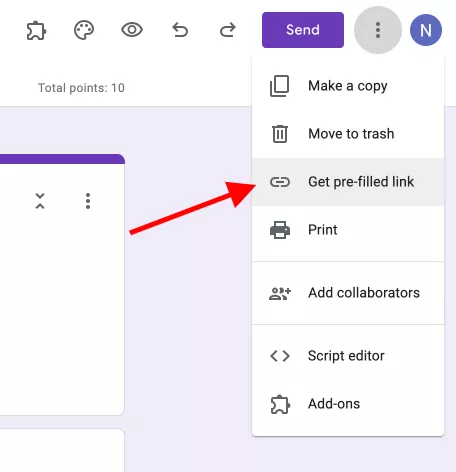
To give it a try, follow these steps:
- Click on ‘More’ in the top right corner, go to Get a pre-filled link,
- Then fill the form out like your respondents would and click on Get Link.
- You’ll see the share link message at the bottom, click on ‘Copy Link’ and paste it wherever you want.
10. Advanced it up with Google Form Add-ons
Last but not least Google Forms tricks is to use Add-ons. What makes G-suite tools excellent and advanced is the ‘Google Workspace Marketplace,’ where you can find tons of add-ons available. It’s easy to install add-ons for different purposes and make your Google Forms advanced.
You can do so by clicking on ‘More’ in the upper right corner and going to Add-ons. A pop-up window will open with add-ons that work with forms. Check them out and install any of them. Once you have added any add-ons, you’ll find them at the top of the form in puzzle shape.

Add-ons will help you to work more efficiently and create automated systems. There are many good add-ons, here is the one that I know:
ExtendedForms is the best timer for Google forms, add a one-click countdown timer and turn your Google forms into Google tests and quizzes. It comes with many features like automated proctoring, custom branding, and team management – add unlimited users or team members to your Google domain.
Further, the ExtendedForms come with an intuitive dashboard where you can see a responses graph that shows responses over a duration, respondents’ status, and average response time.
You can also, customize invitation messages and welcome screens. Apart from that, it offers you the ultimate benefit of Google Classroom Integration.
It has easy configuration and easy shortcuts that will let you configure the most-used settings inside Google Form, and automatically log in to the dashboard via the in-app settings window.
There are so many other Google Form add-ons that you can check and use to make Google Forms more advanced.
Concluding Everything
These are the 10 advanced Google form tricks and tips for pro users. There are other basic yet advanced features like adding confirmation messages, sharing result summaries with respondents, showing a progress bar, shuffling question order, and more.
Check all these Google Forms tricks or Google Form advanced features by yourself. And if you find any other tips or tricks then do share them with us. We would love to hear what you have!
If you like reading this blog about Google Forms tricks, also read our detailed guide on How to Create a Question Bank in Google Forms. [In 2 Ways] and How to Make Google Forms Accessible? [In 4 Steps]