
There are plenty of ways to make good use of Google Forms. The most obvious ones are surveys, tests, and quizzes, but apart from that, you can also use forms for creating event registrations or such cases. This post will tell you how to use Google Forms for registration for webinars or any events.
You can create Google forms for registration for various different reasons like registering your attendees for an event or understanding your attendees’ preferences, etc.
Google Forms is a great online form builder for various things and using Google Forms for registration is one of them. We will discuss the benefits of online registration and the process to create one in 6 easy steps guide, so let’s get into the article.
In This Article
Prefer “watching” over reading? You can find a video version of this tutorial here. Otherwise, just scroll down and keep reading!
Benefits of Online Event Registration
Here are a few advantages of using online registration forms or systems –
- Saves Time: It saves time for both organizers and participants. For organizers, you don’t have to spend much time collecting and sorting form data. On the other hand, it is easier for participants to sign up for any event online from anywhere.
- Secures Online Payment Processing: It can help secure online payment processing and allow attendees to pay online registration fees from anywhere conveniently.
- Enhances Marketing Efforts: Online registration improves marketing efforts, with the help of the collected contact details of participants you can notify them of future events and track their responses or actions.
- Facilitates Custom Report Building: It helps you build custom, in-depth reports based on the insights you obtain. About every aspect of an event, ultimately shapes how you plan & market any upcoming events for better reach.
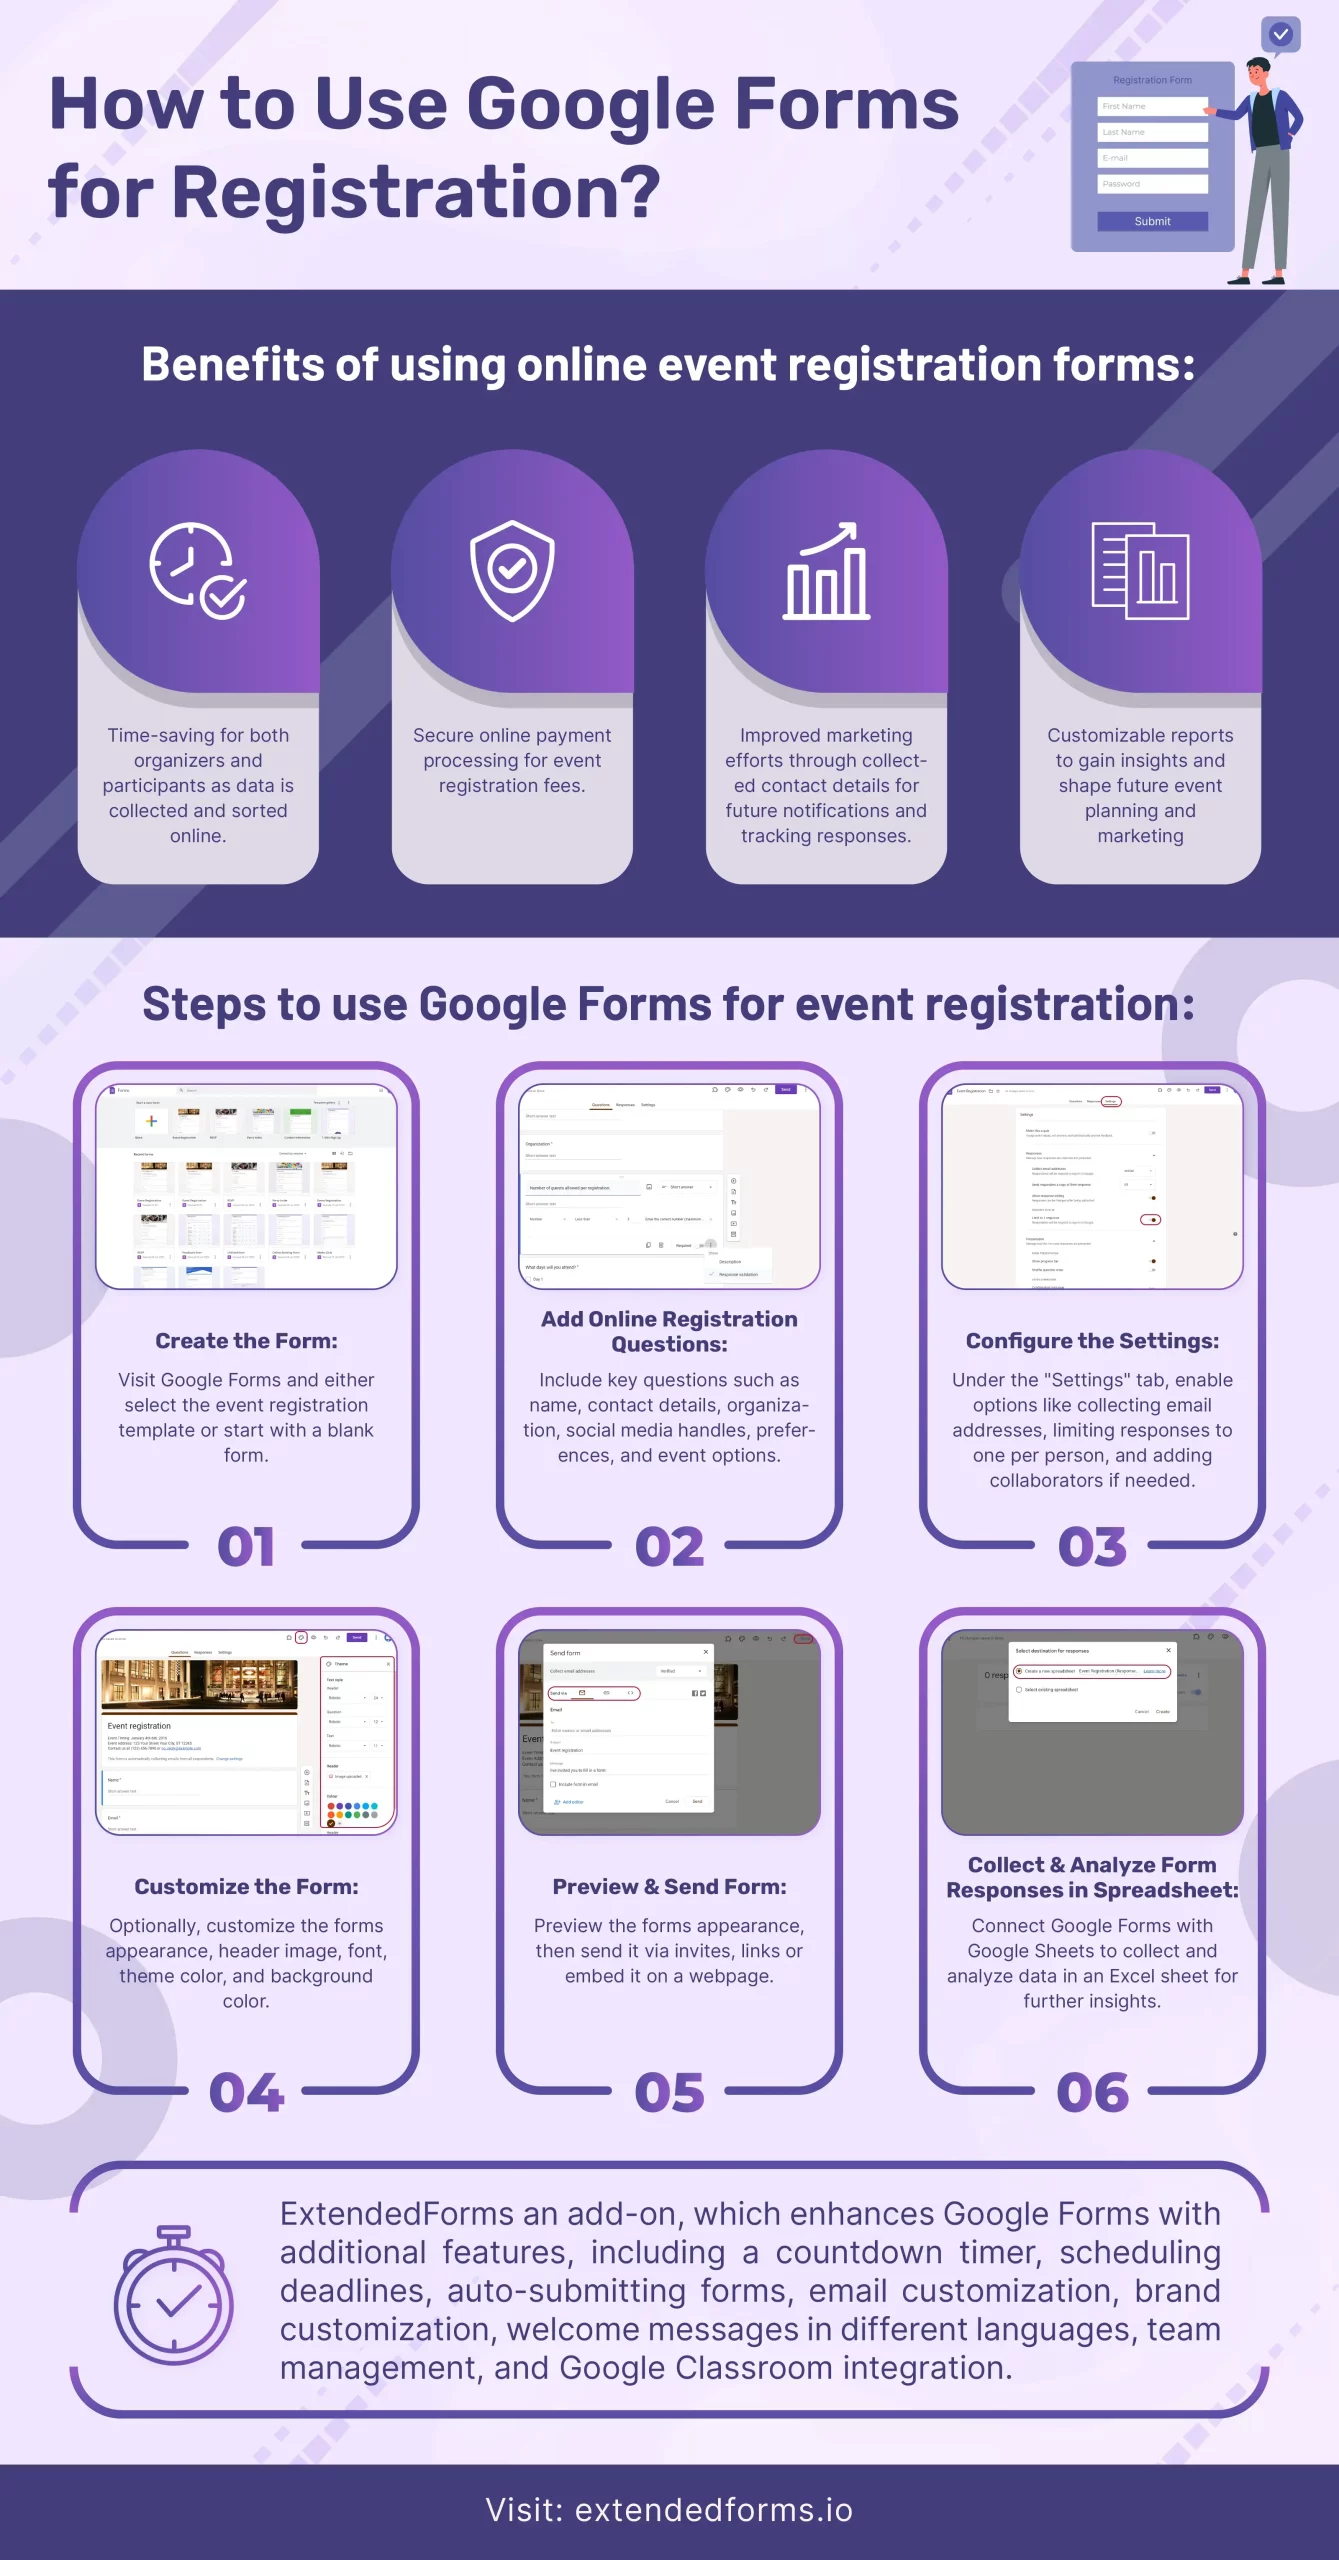
Steps to Use Google Forms for Registration
Here are the steps to follow if you want to use Google Forms for registrations;
Step 1: Create the Form
To create Google Forms for registration you must navigate to Google Forms site, or go through the G-Drive > Google Forms and select the event registration form template.
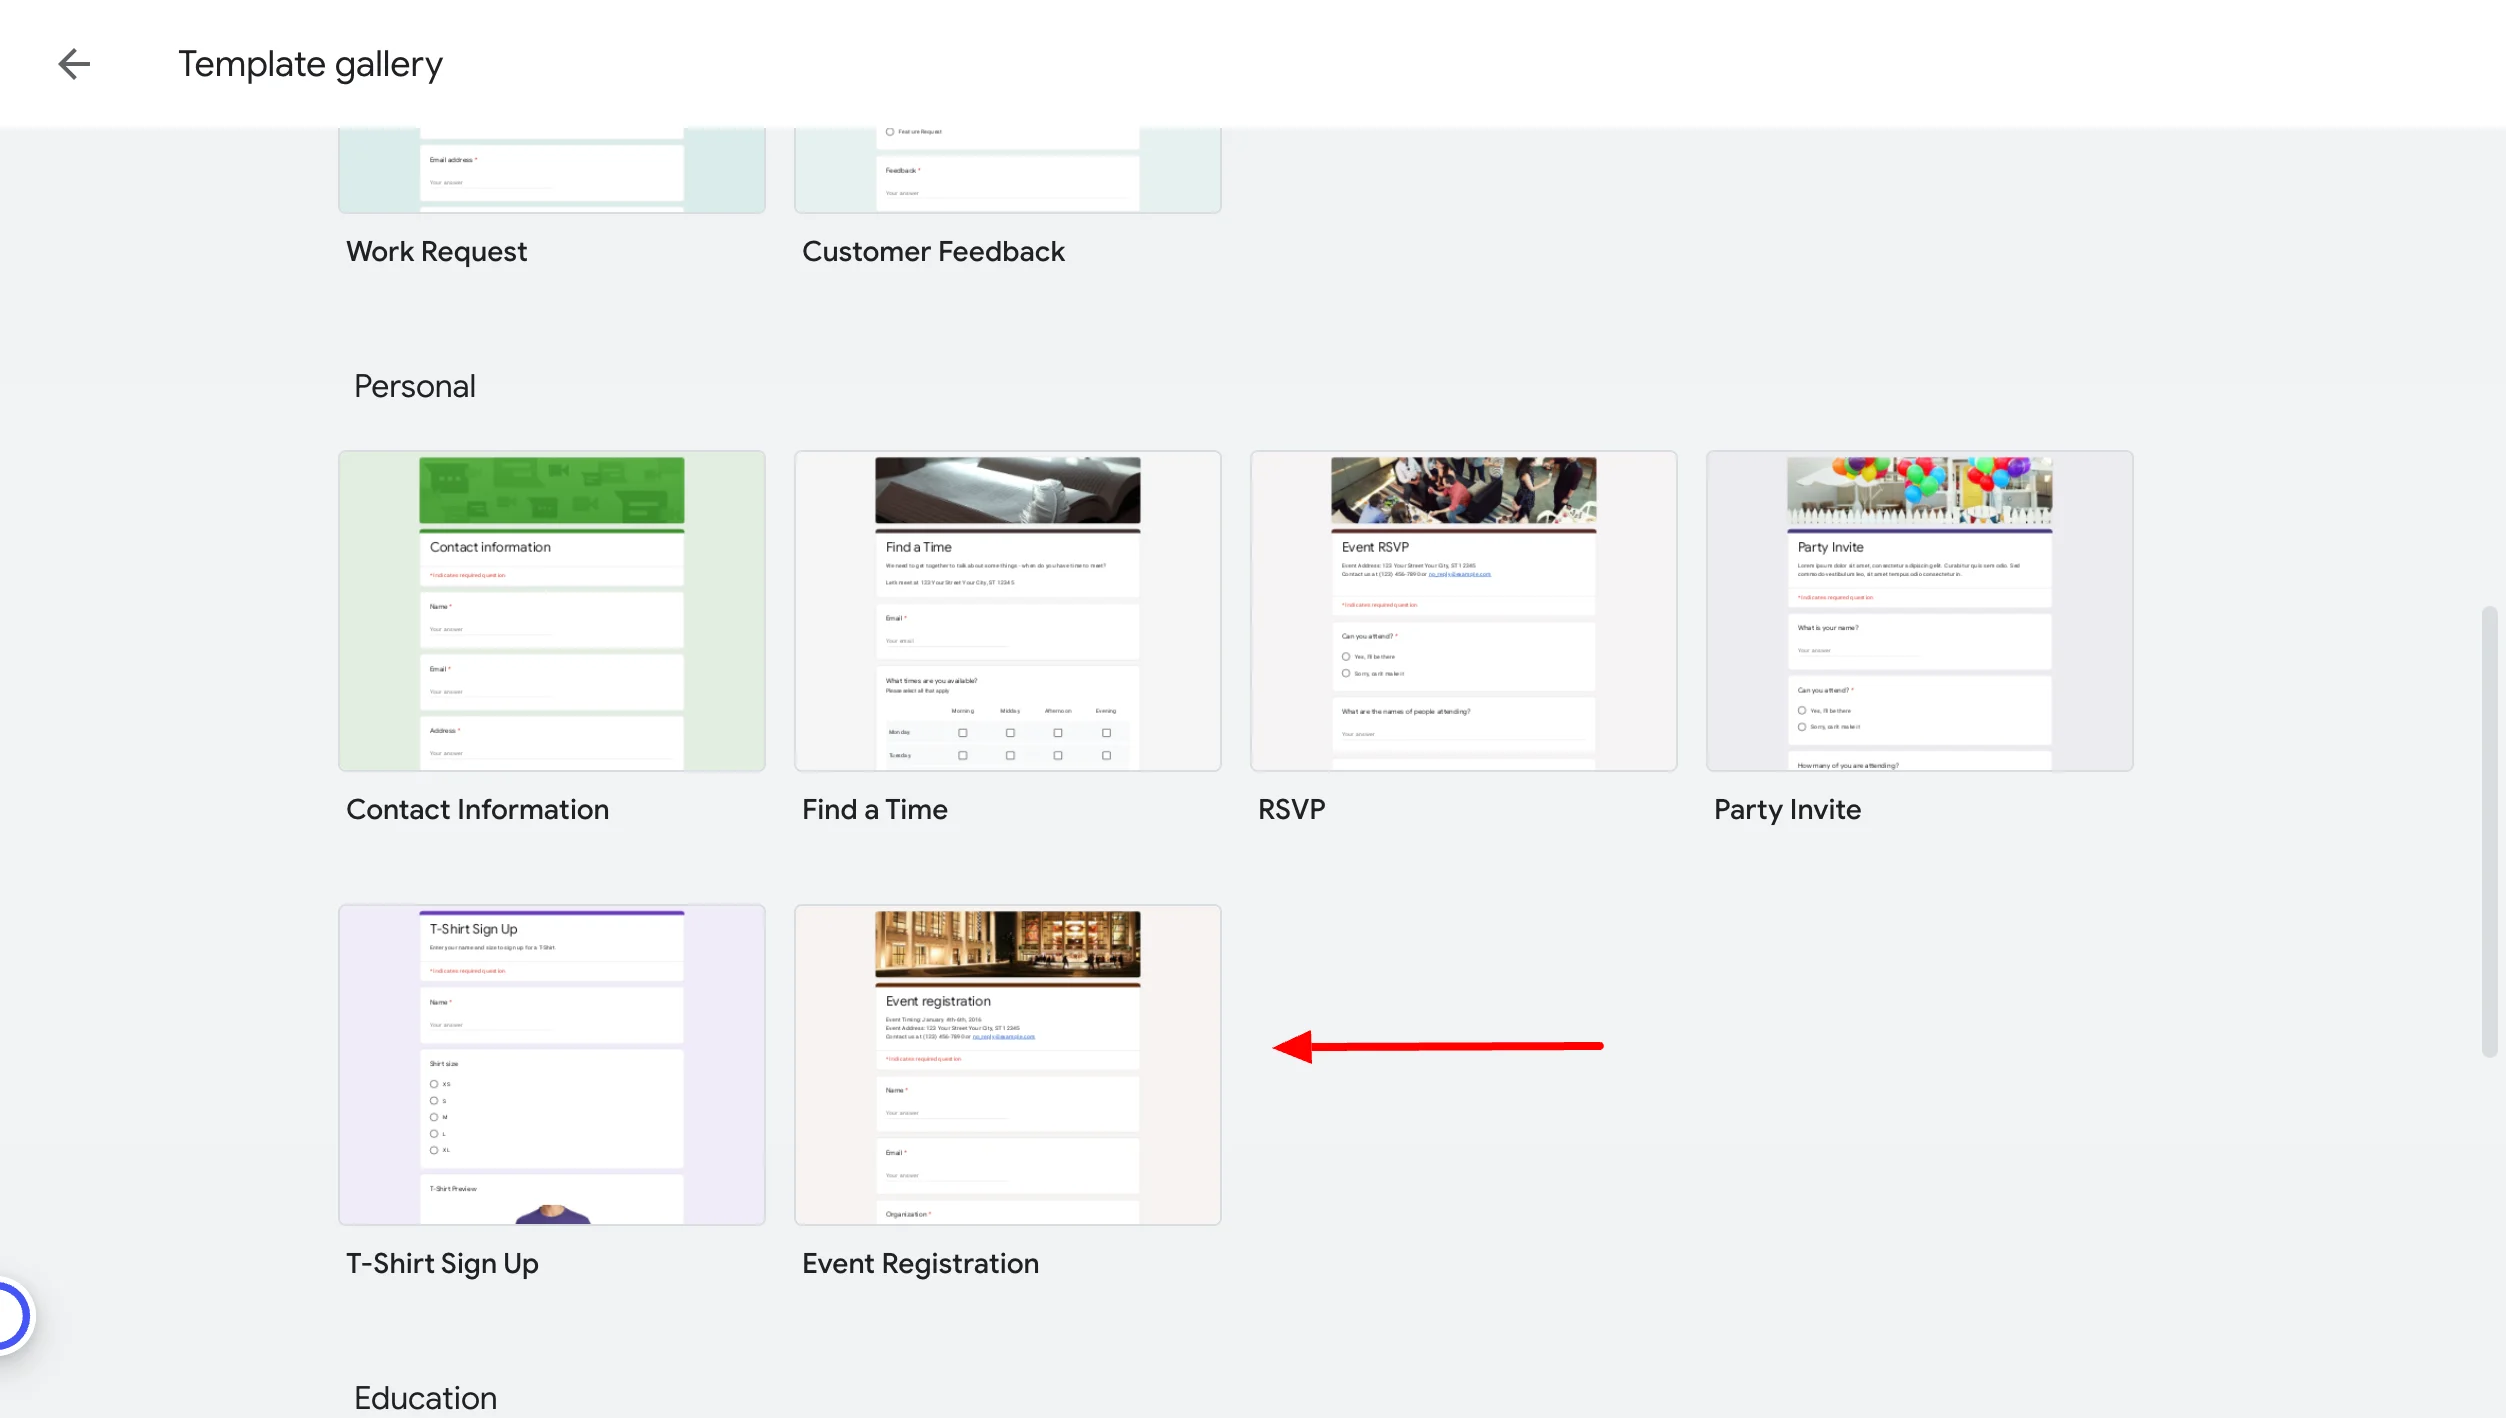
- Alternatively, you can even choose a ‘Blank Form’ for that matter, by clicking on the ‘Blank” below ‘start a new form.’
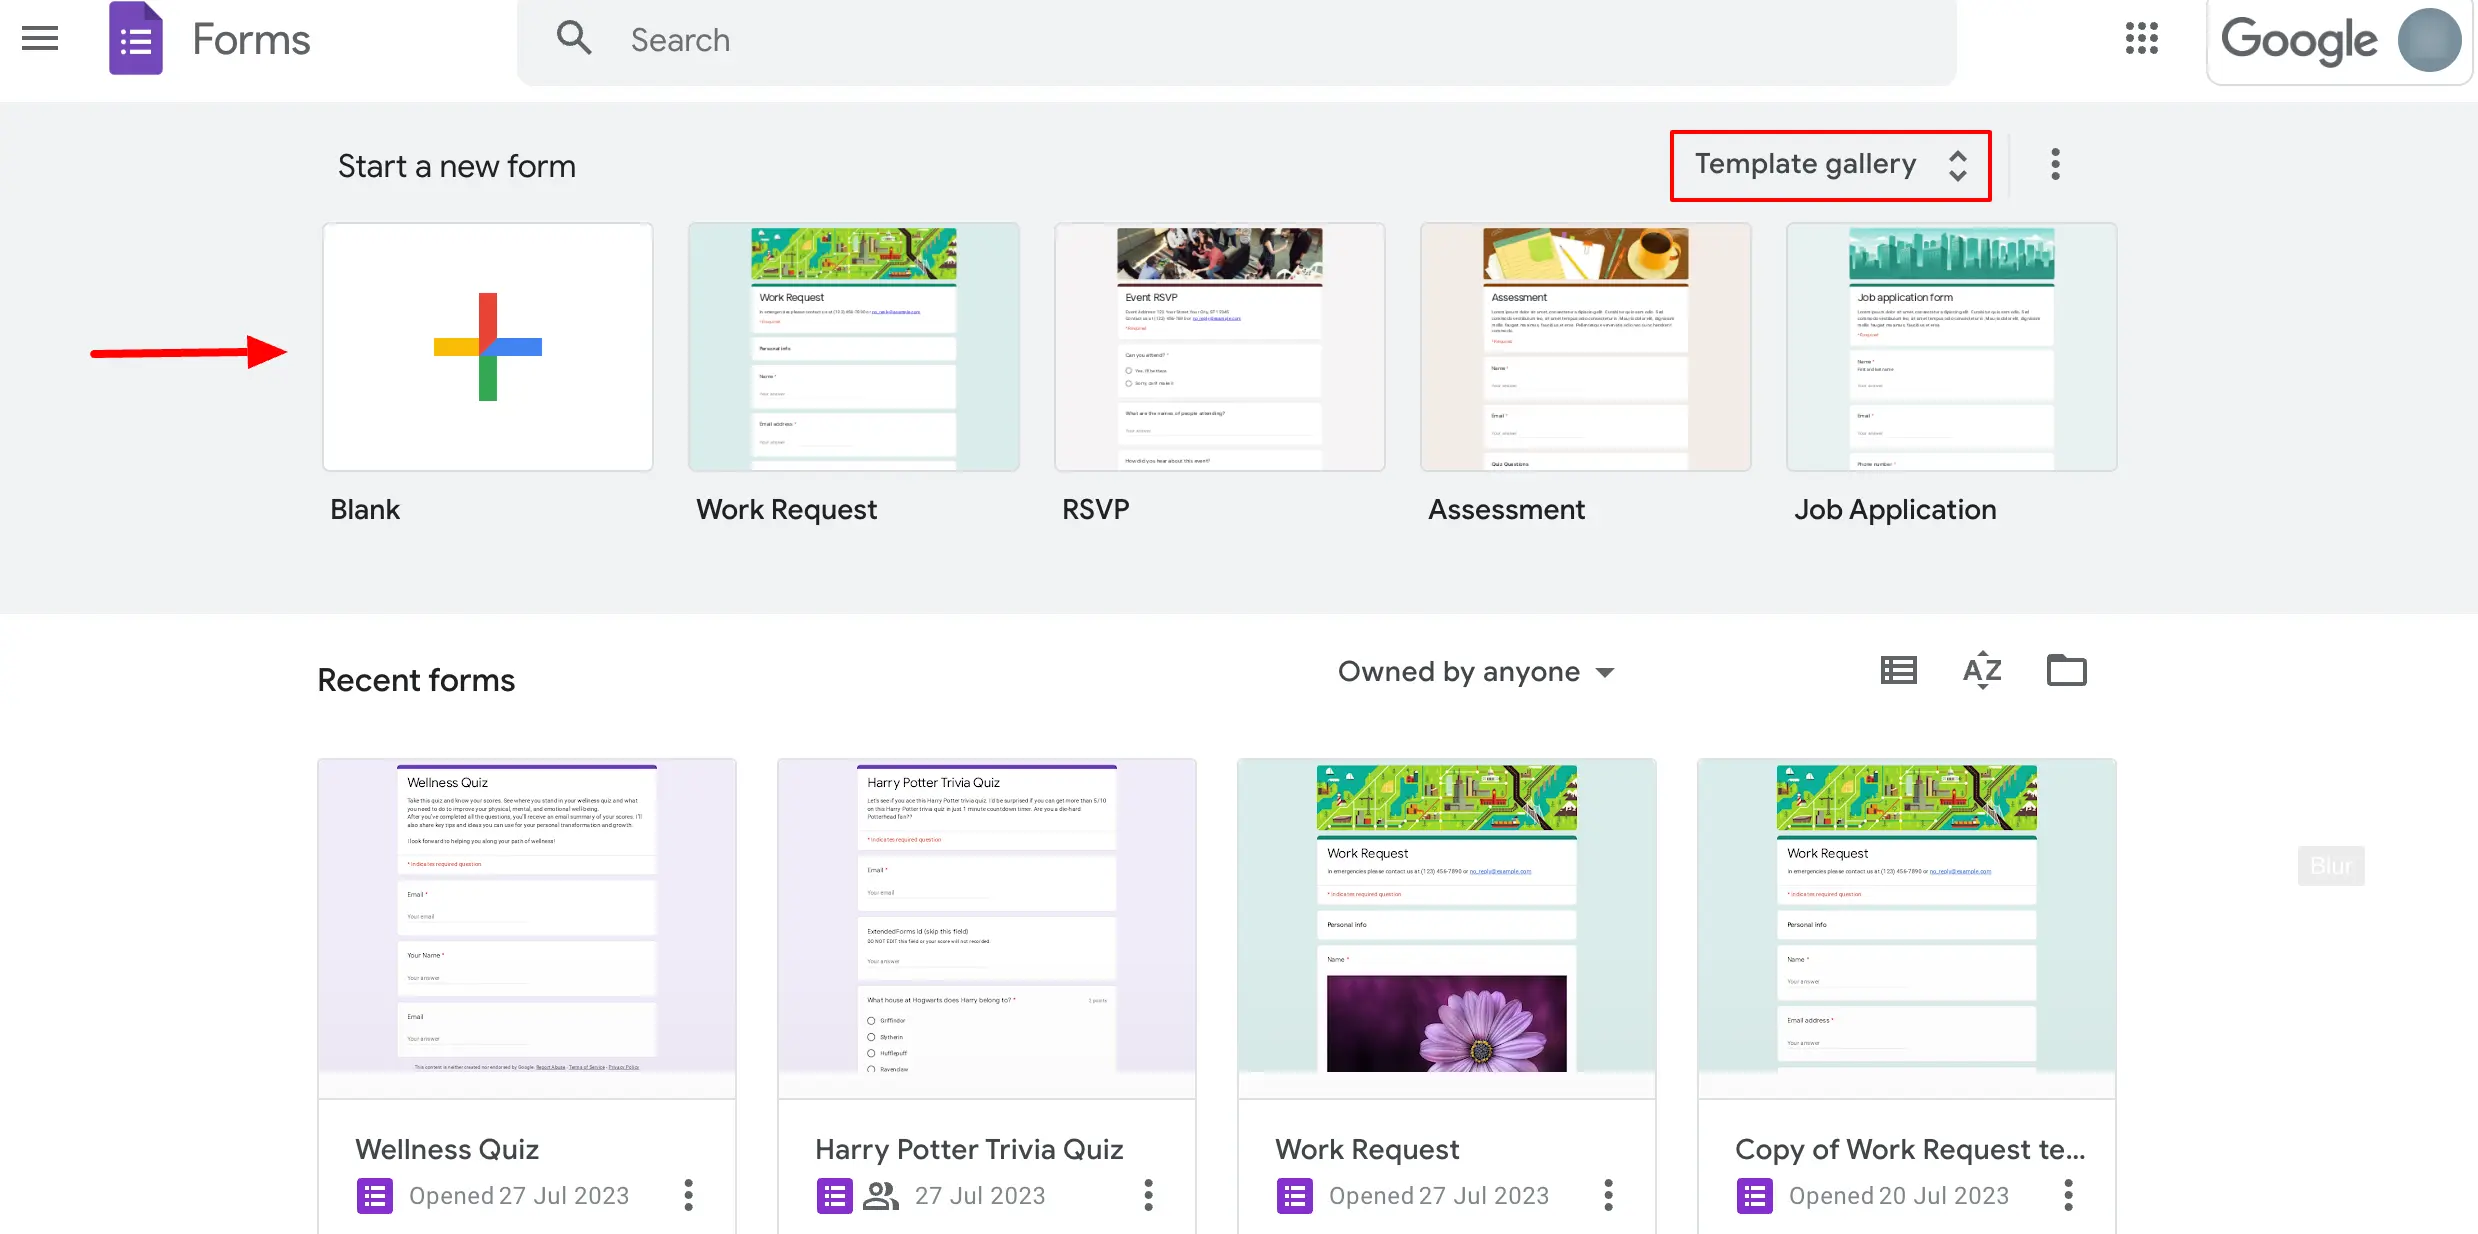
It will open up a form with pre-made questions and a header image that you can modify easily. I will explain that in further steps.
Looking for extensive customization of the timer in Google Forms? Read, ExtendedForms Unveils: Customized Timer Themes.
Step 2: Add Online Registration Questions
So, the next step is to add questions to a registration form. If you select the online registration Google Forms template, you will see a few pre-added questions. If you find them appropriate then that’s perfect, you can add more.
Enter an appropriate title and description that’s relevant to your event. However, here are some key questions to consider if you want to collect the information for webinars or any event.
Question Types for Event Registration Form:
- First & Last Name
- Contact Details – Mobile No. & Email-id
- Name of their organization
- Social media handles
- Any food allergies or dietary restrictions?
- Session and event preferences
- Which event will you be attending/participating in? (if there is more than one event happening)
For questions, click on the specific question tab and it will expand & give you options to modify. Select the question and make your changes.
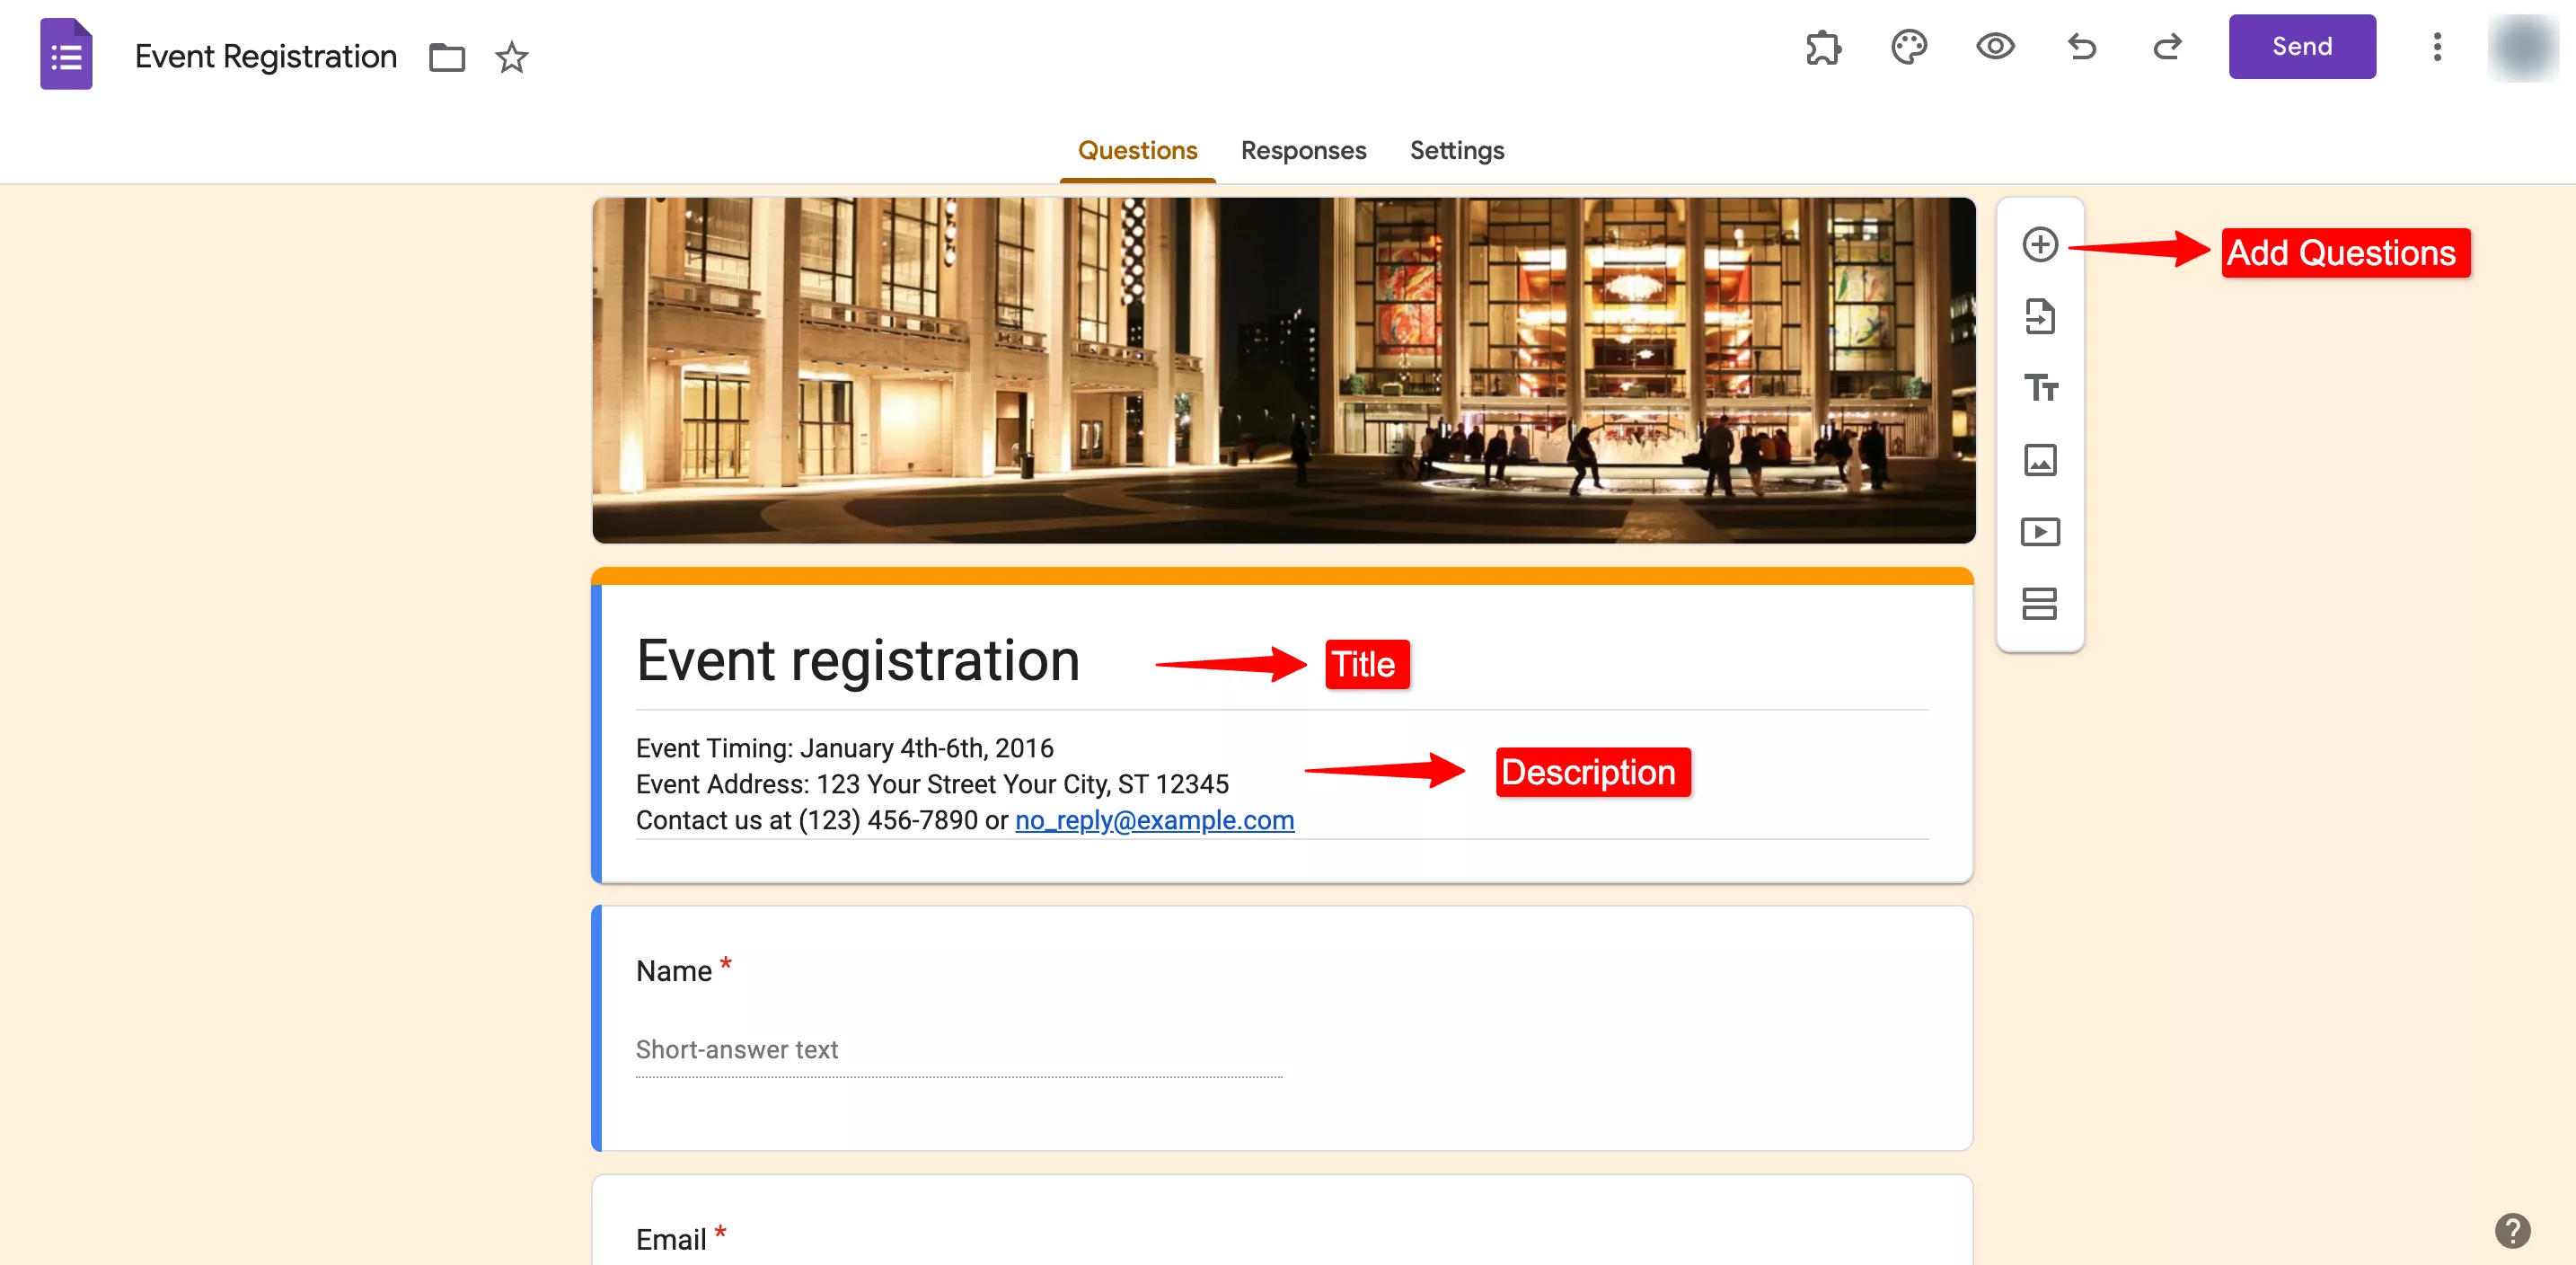
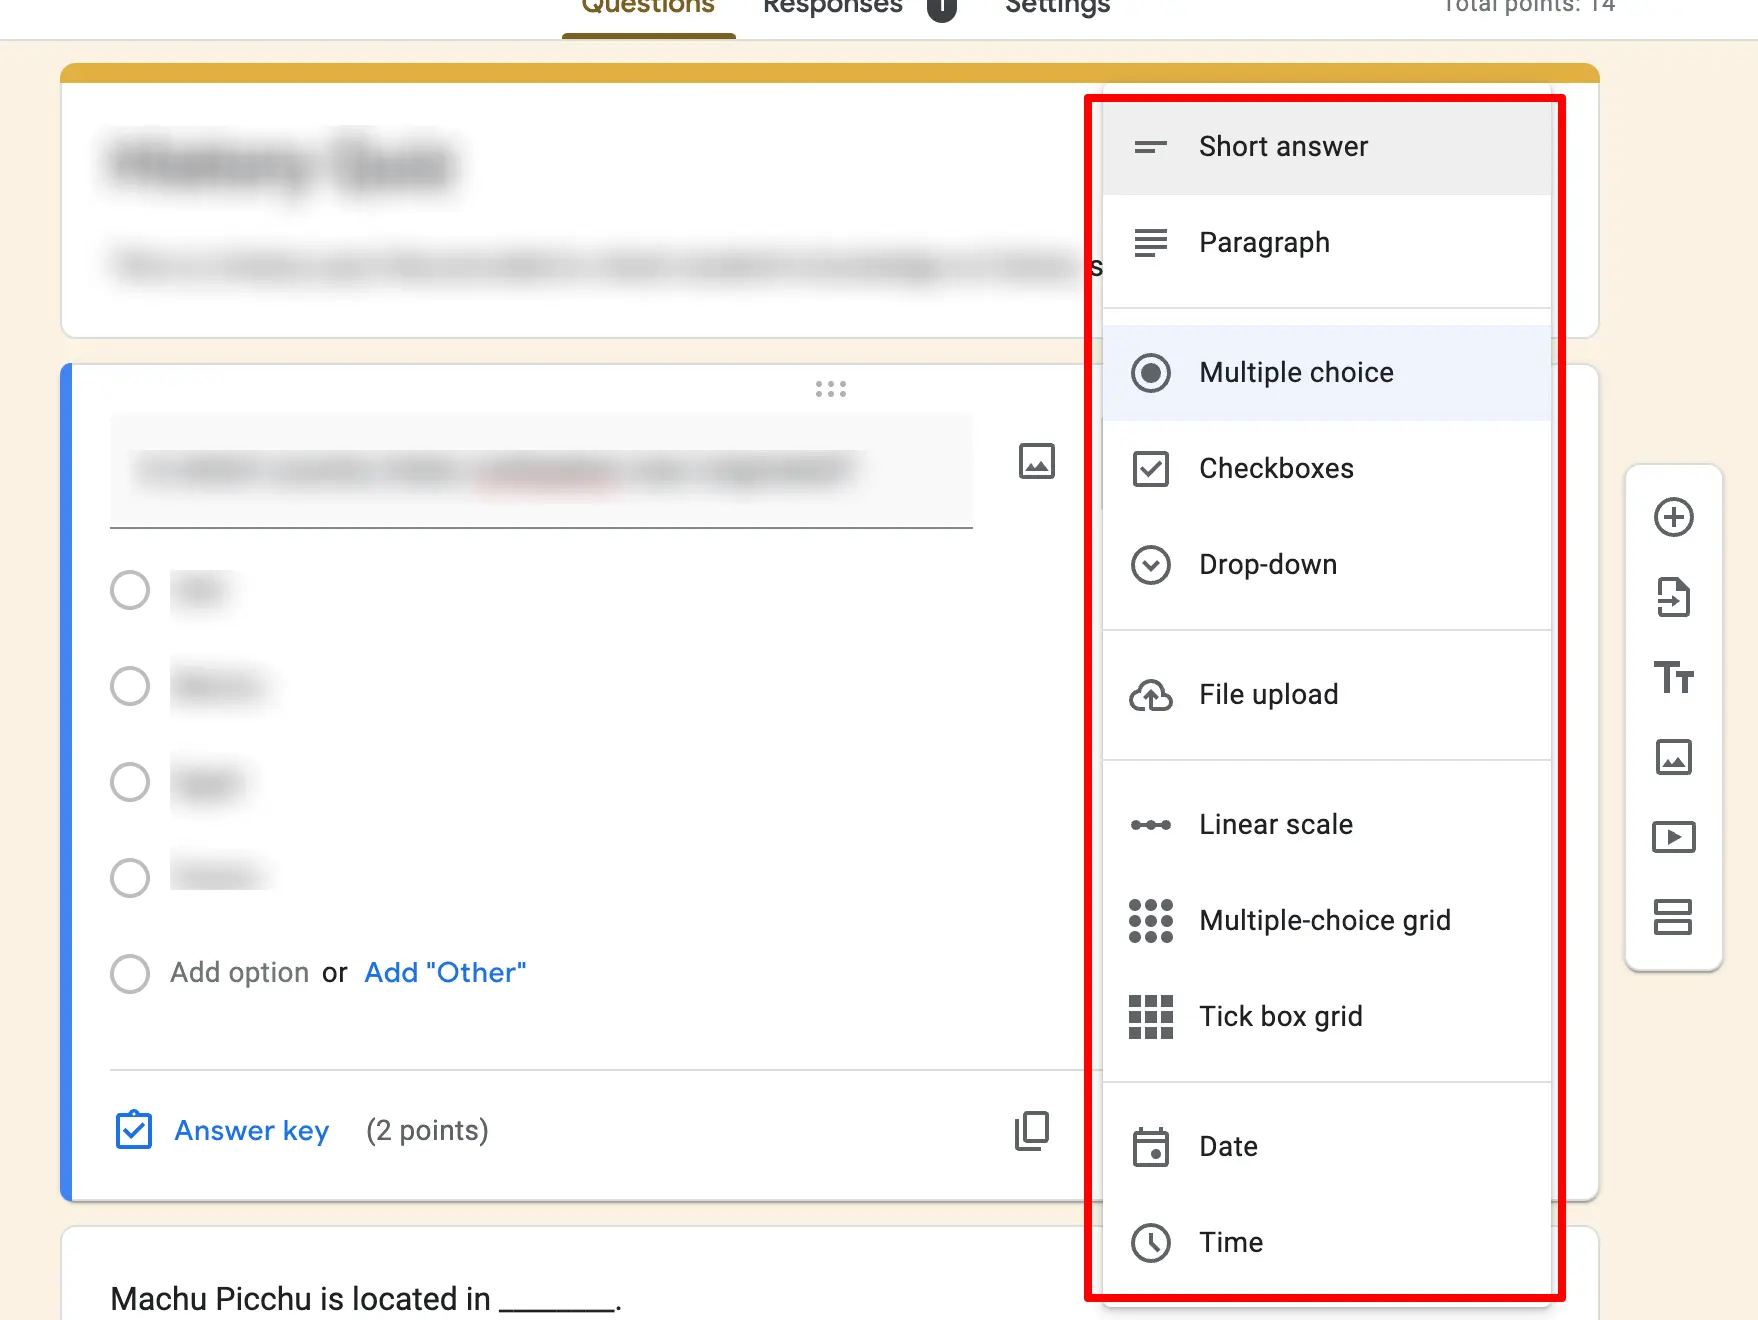
To add a new question click on “Add a new question” (⨁ icon) on the floating menu next to the question tab. Google Forms provides various question formats that you can view in the dropdown in the question tab.
Google automatically selects the answer type based on your question but you can change it from the dropdown menu.
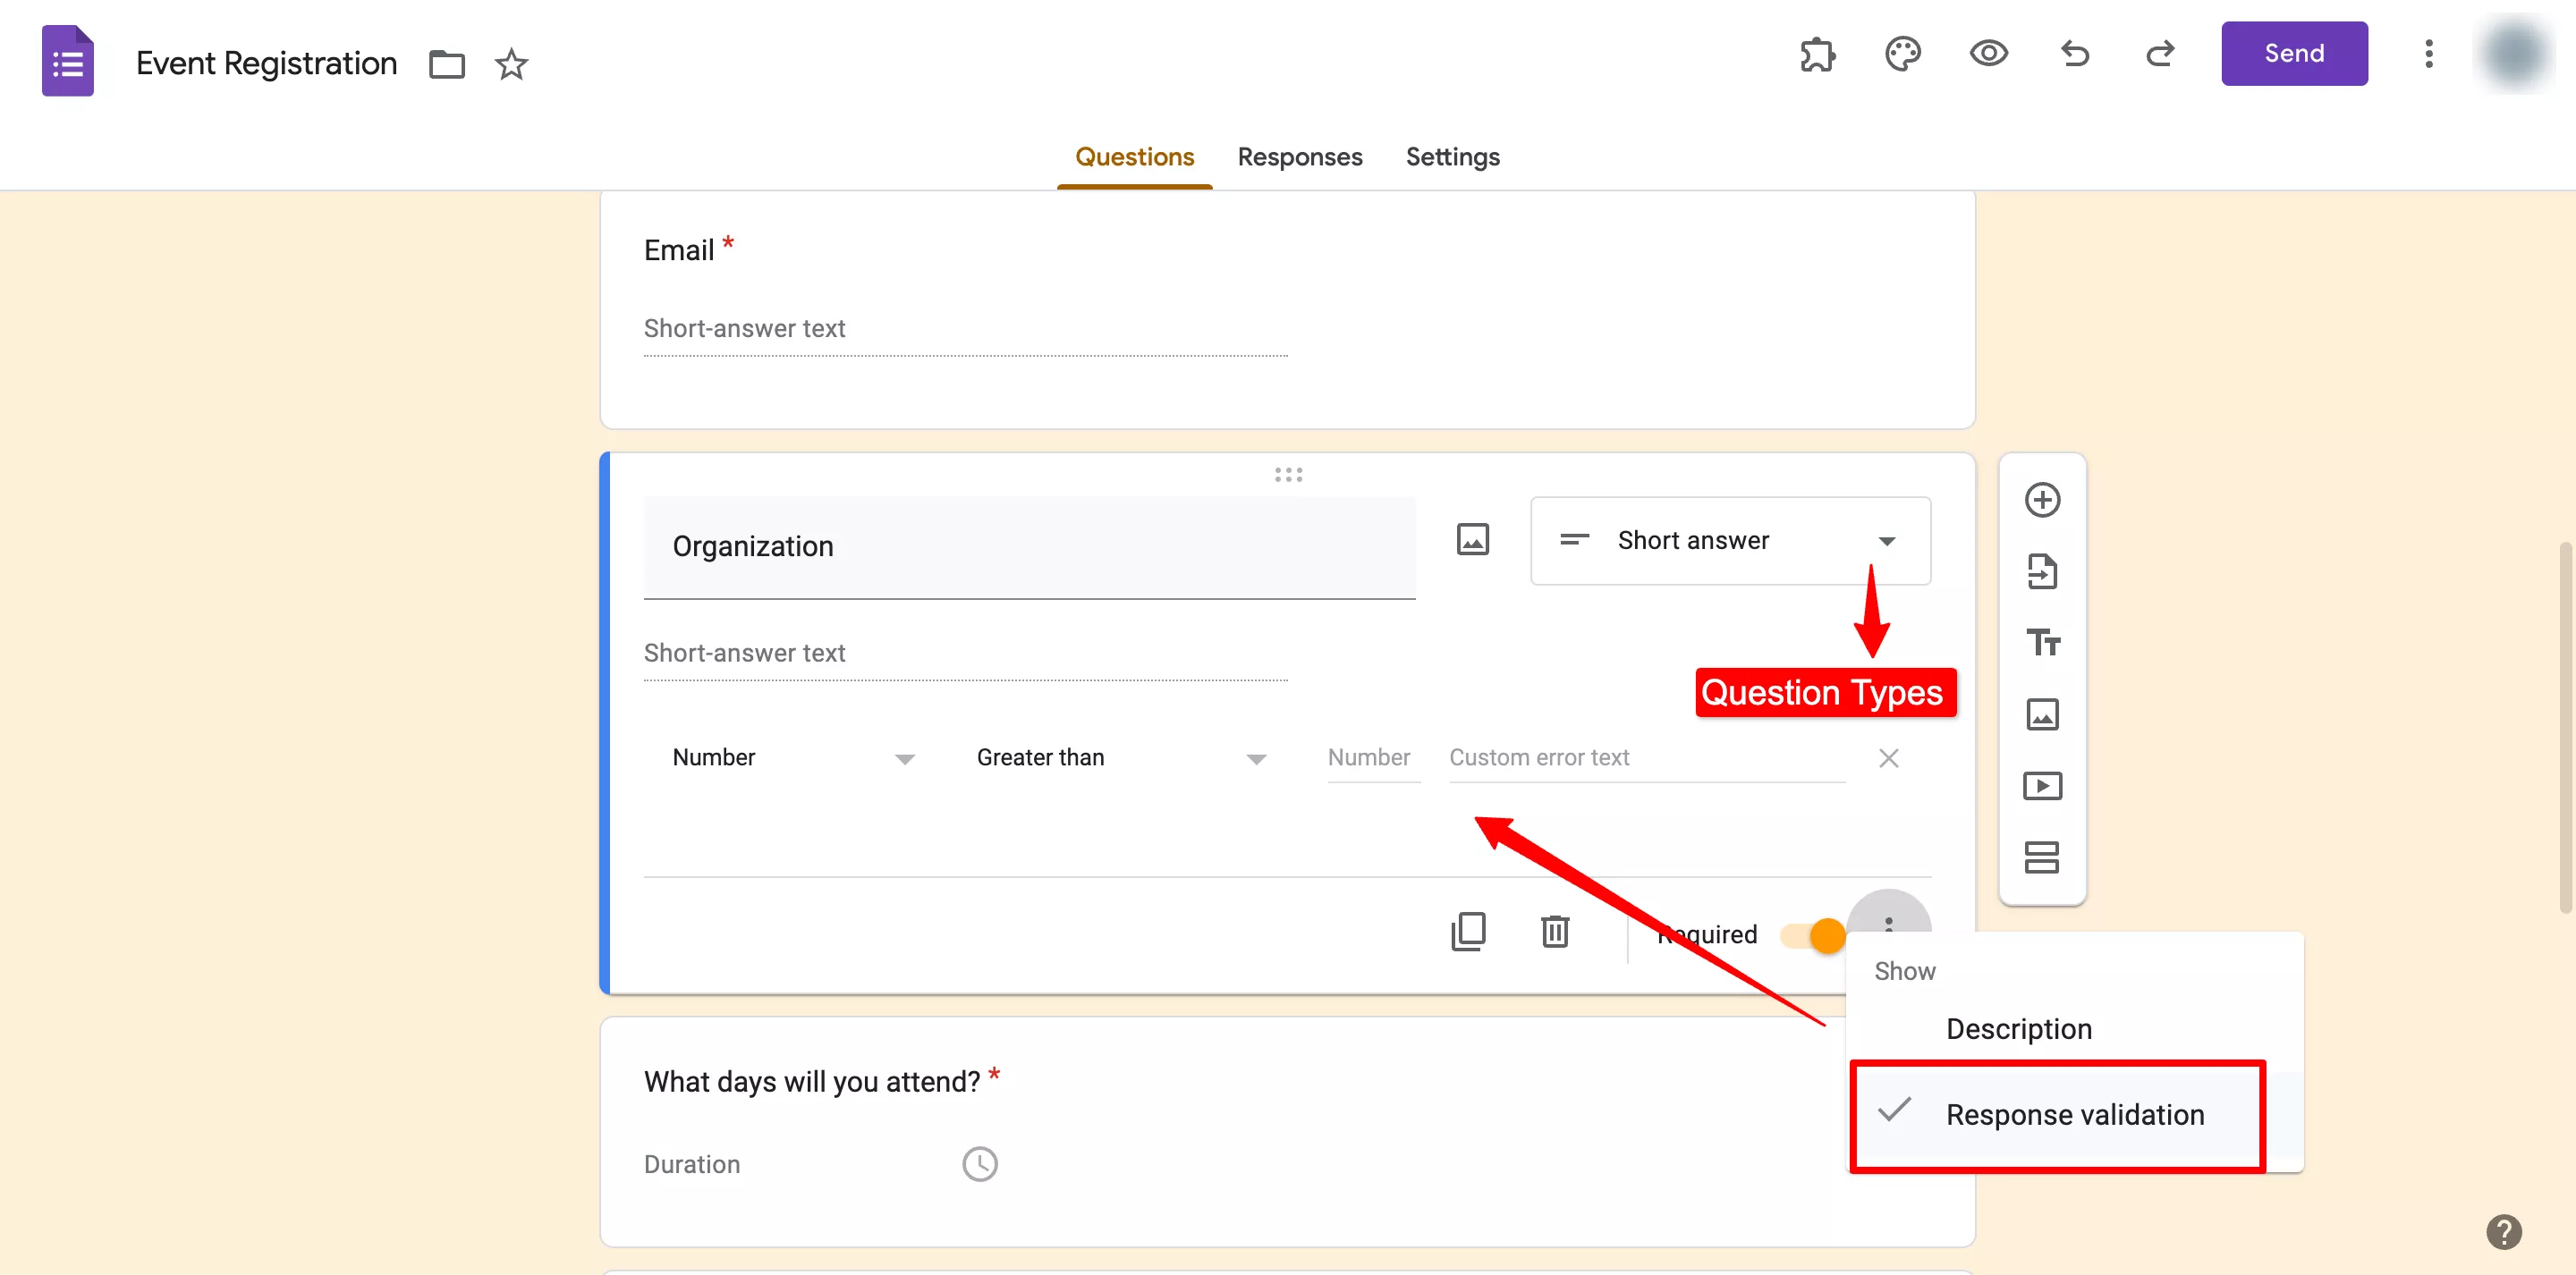
Further, you can duplicate the questions, trash them, and even make them required. Apart from that, you can ‘respond to and validate’ your short/long paragraph questions.
You can create answer validation for numerical, text, regular expression, or length and add custom error text that your respondents will see if they don’t write answers based on a certain category. Click on the ‘፧’ at the bottom and select ‘Response Validation.’
Step 3: Configure Settings
Once you are done adding questions, it’s time to tweak the settings of Google Forms for registration. Go to the ‘Settings’ tab, where you can configure all the form settings. For example, under the ‘Responses’ option, enable the ‘collect email addresses’ option because they are needed for further communication.
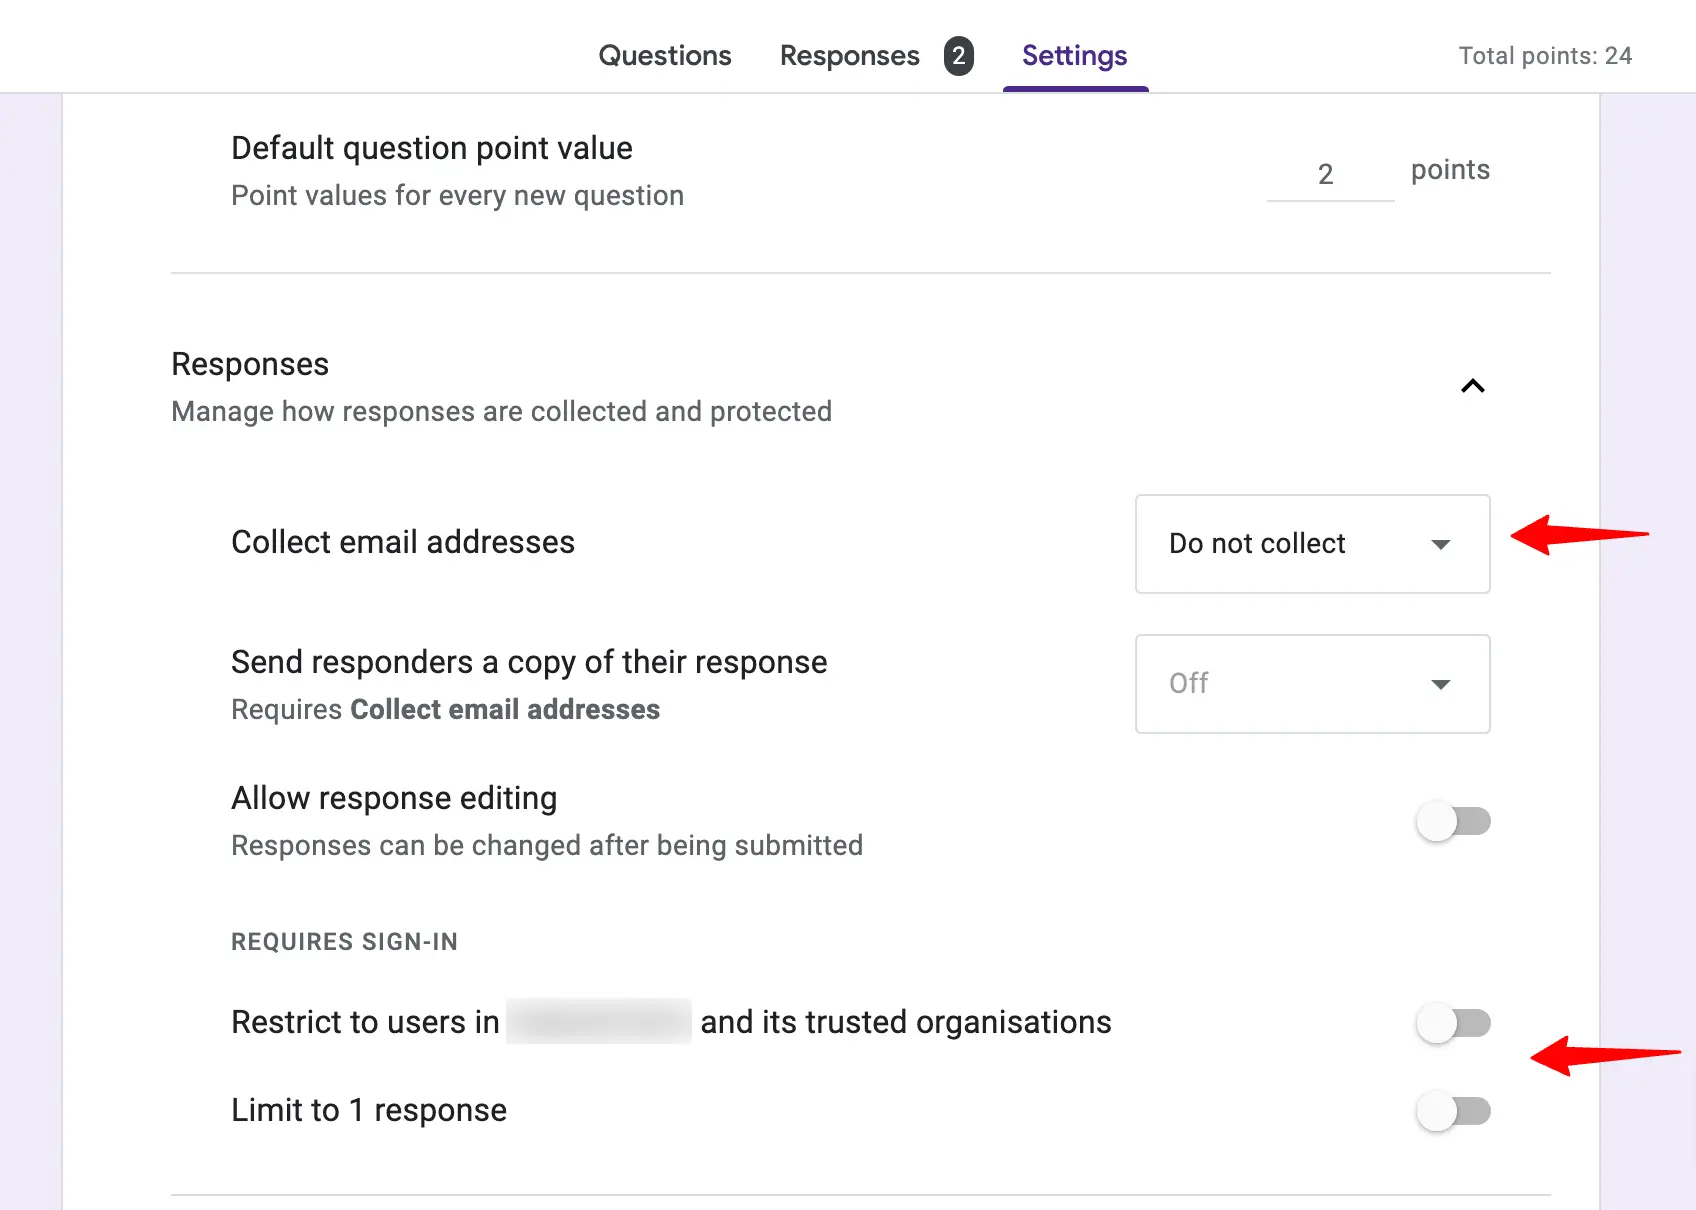
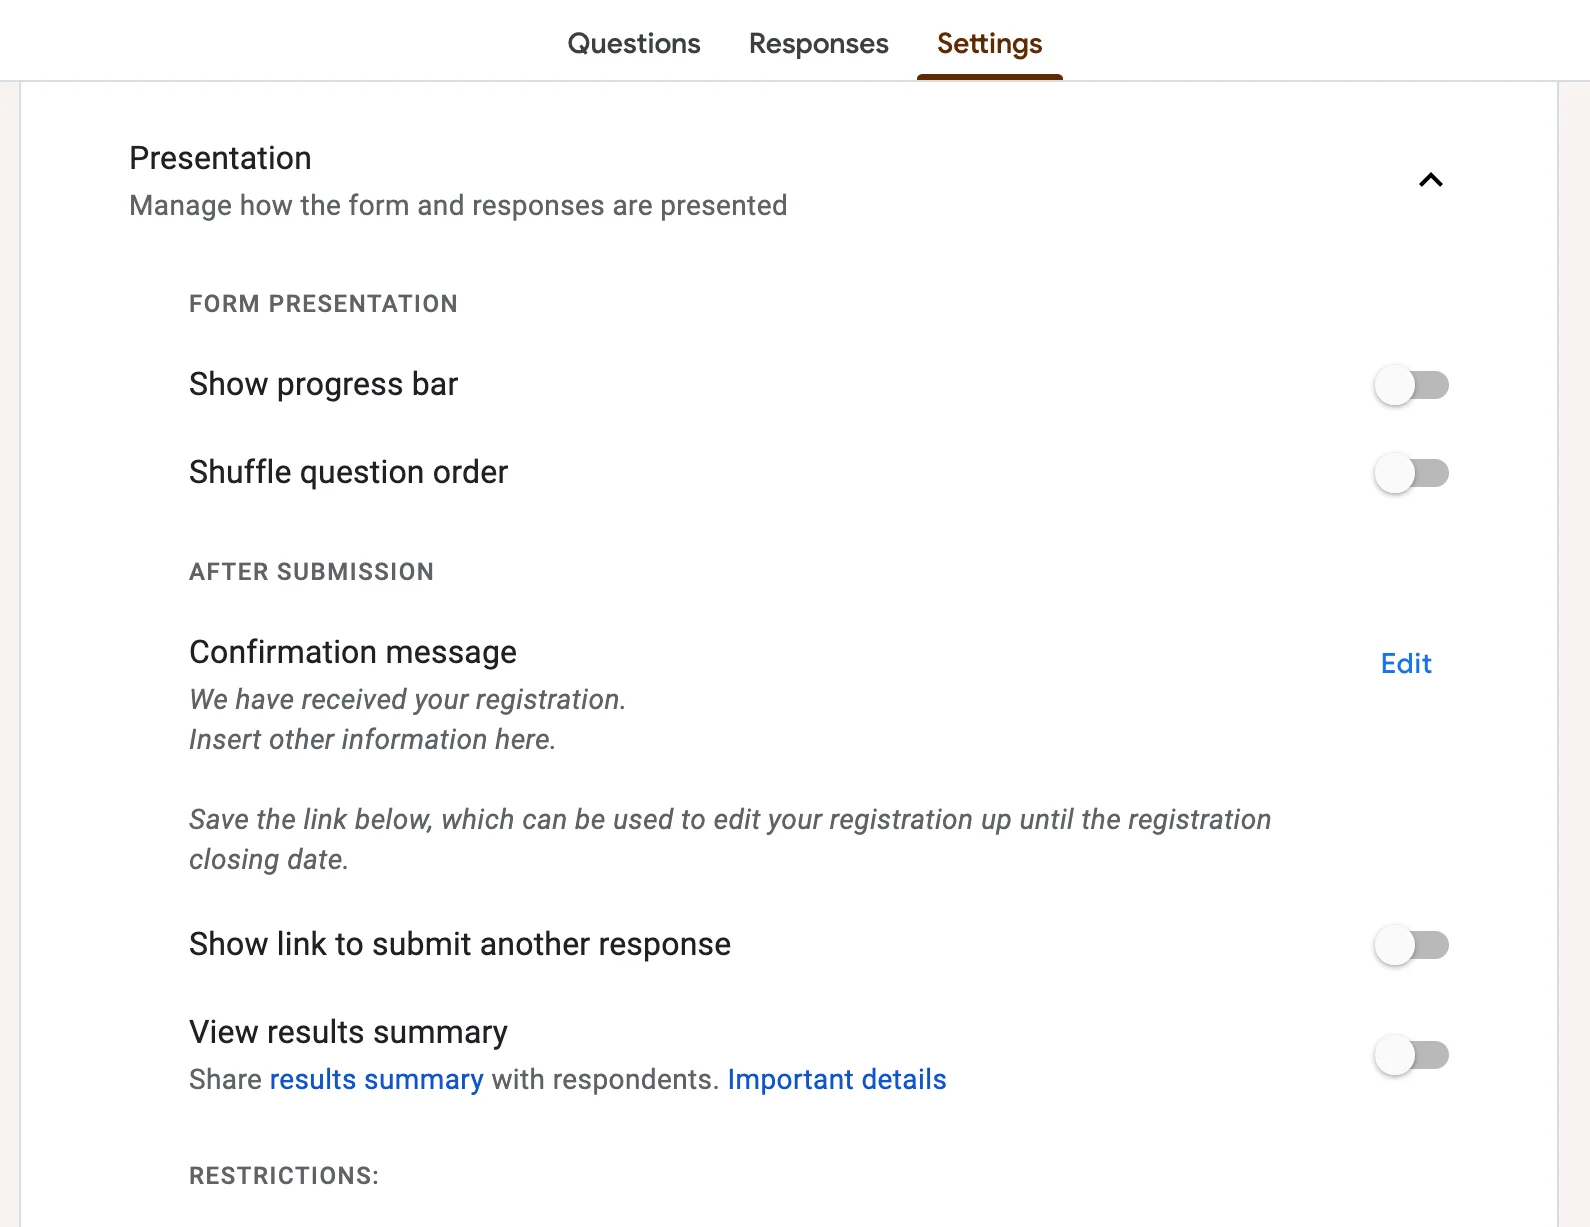
Then, you can enable the ‘limit to 1 response’ option as well. Under the ‘Presentation’ option you can edit the ‘confirmation message which will be seen after submitting the form. You can also make all your questions default by enabling the same option.
Step 4: Customize Forms
This is an optional step, Google Forms for registration template is quite well-built in itself. However, if you want to make changes to the form like header image, and theme color, then you can do so under the ‘Customize Forms’ option.
Click on the Customise Theme at the top bar in the color palette icon. A theme dialogue box will appear on the right side. From there, you can choose the text style and font size for the header, questions, and text (description), there are limited fonts to choose from.
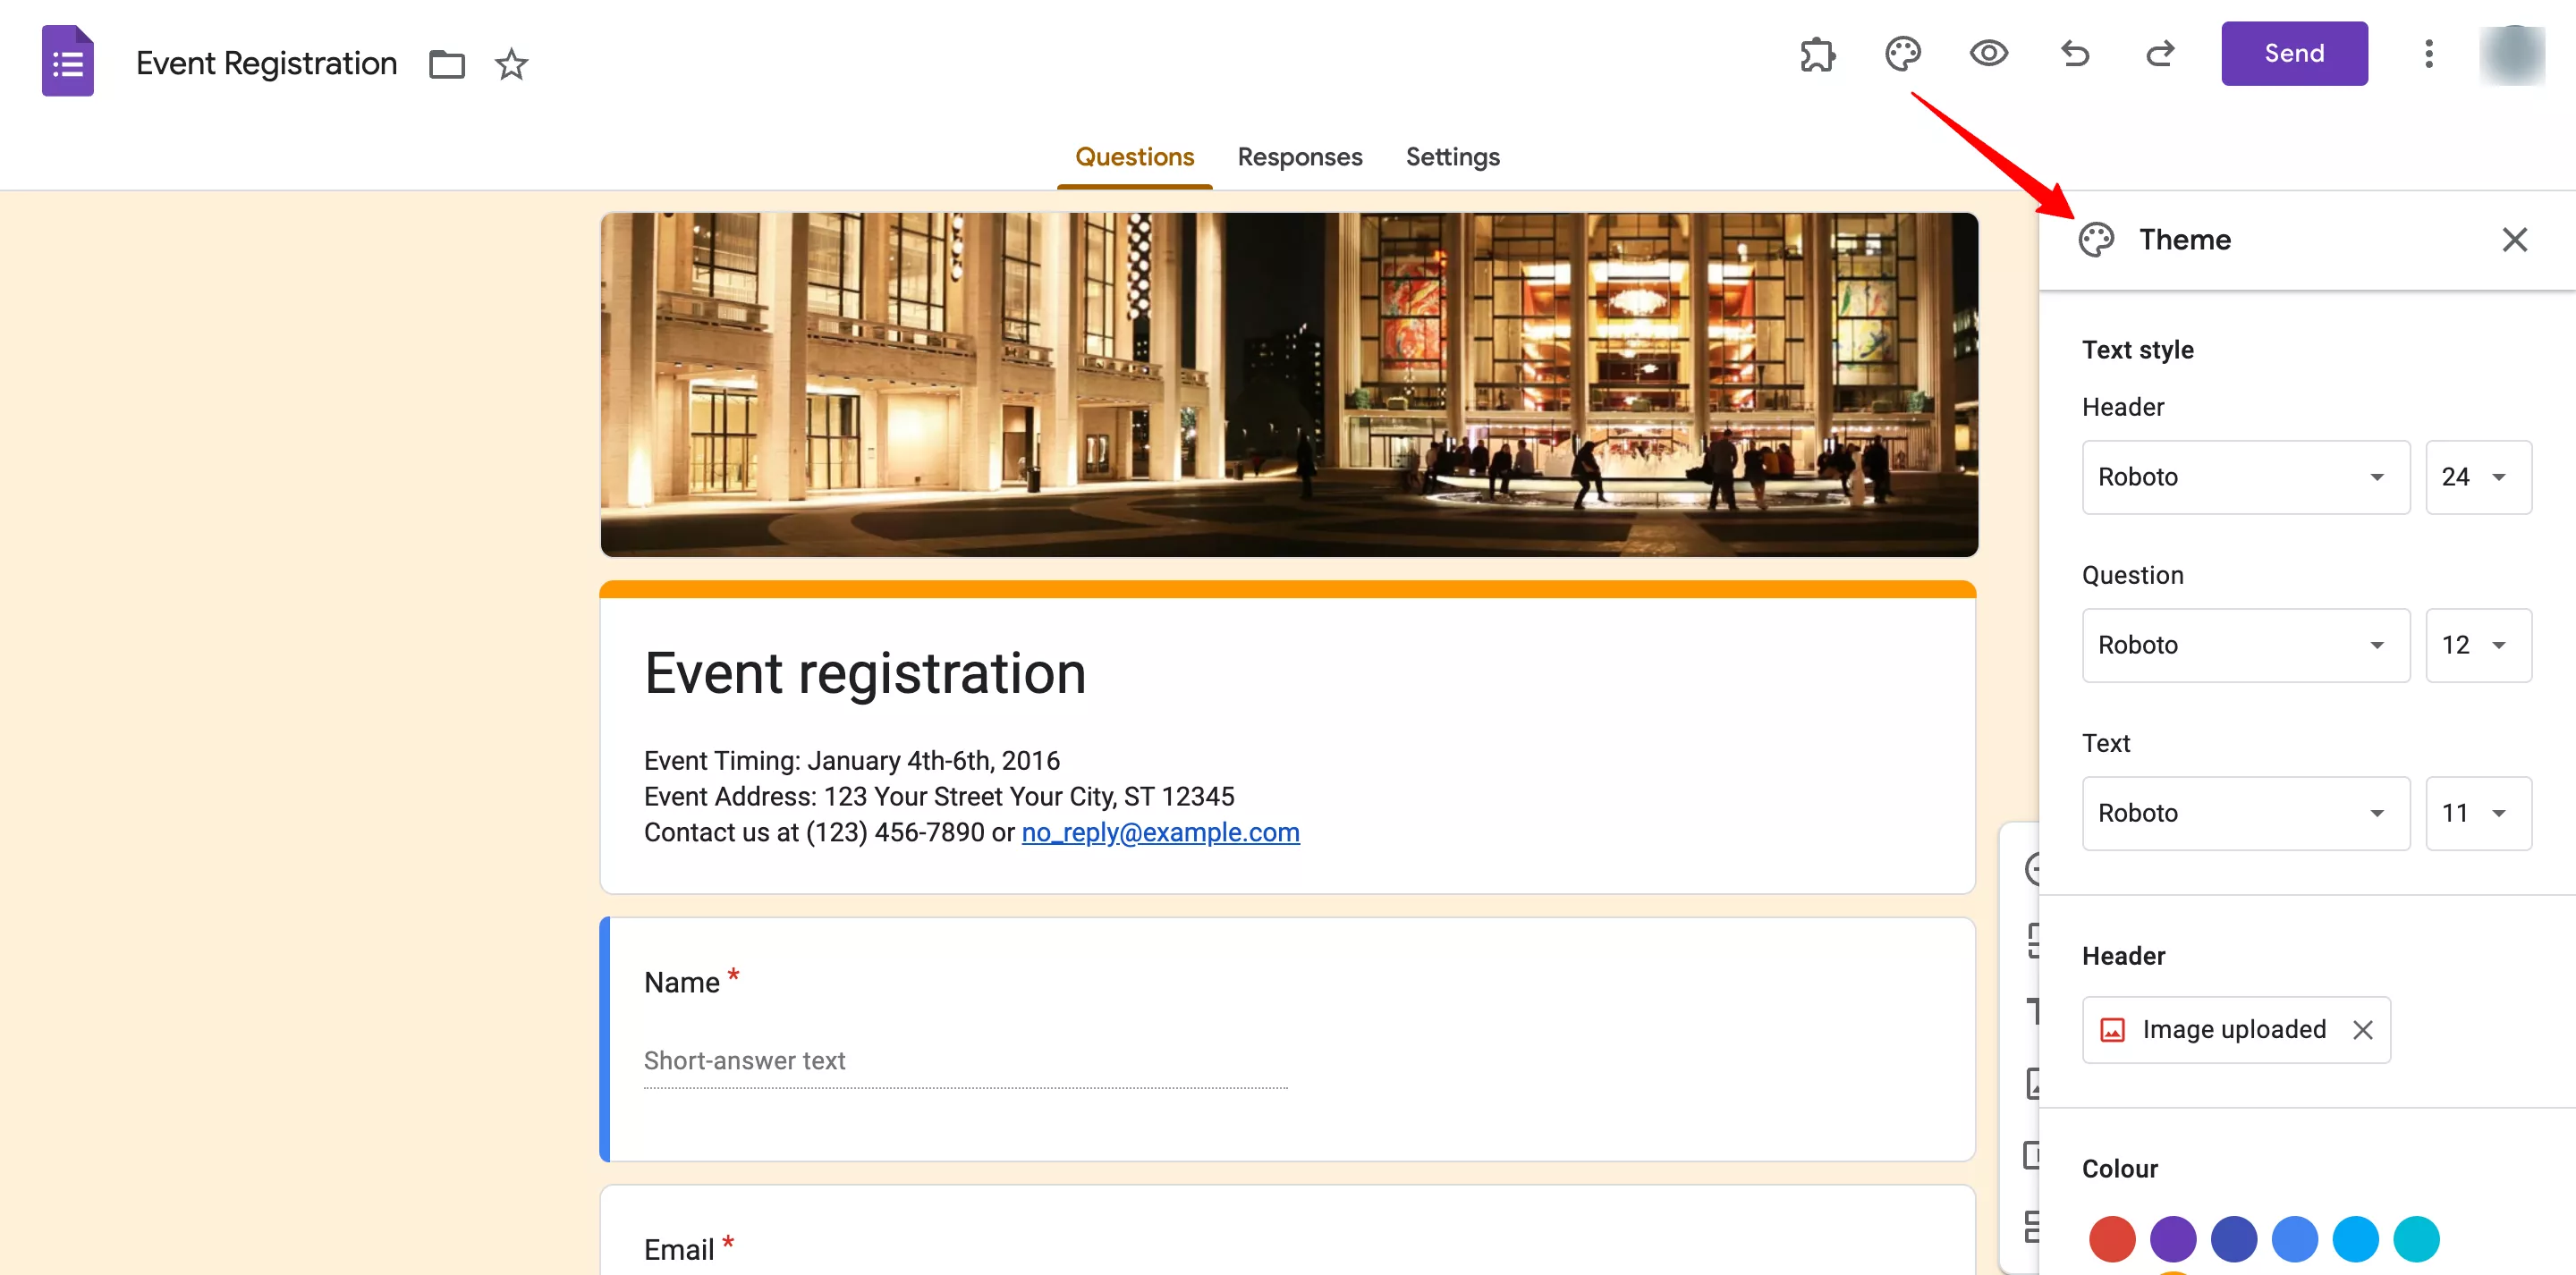
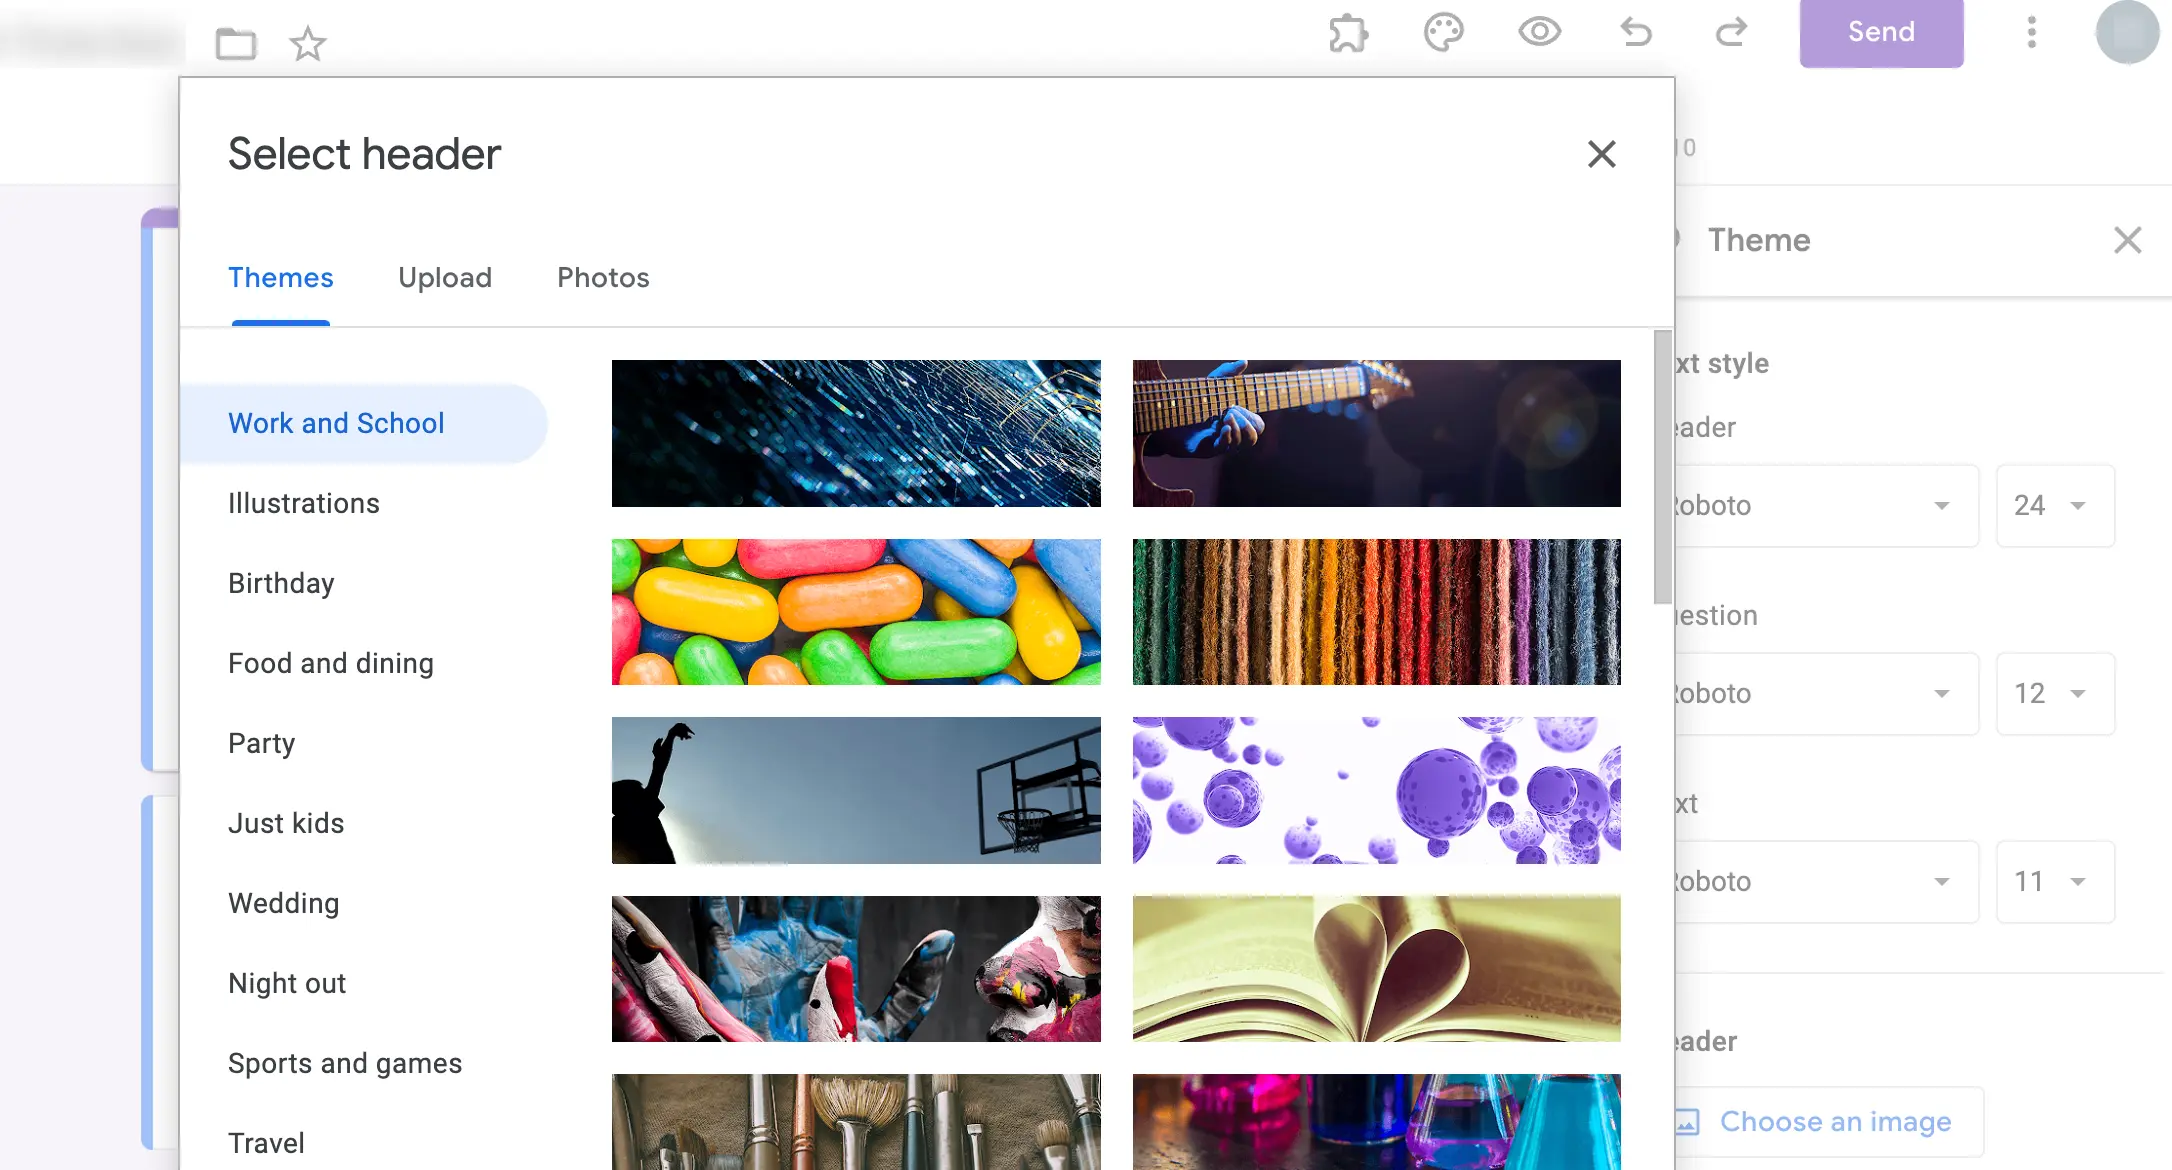
Furthermore, you can choose your own header image, either selecting it from the present theme options or uploading it from your device. Then, add a custom theme color and background color effect.
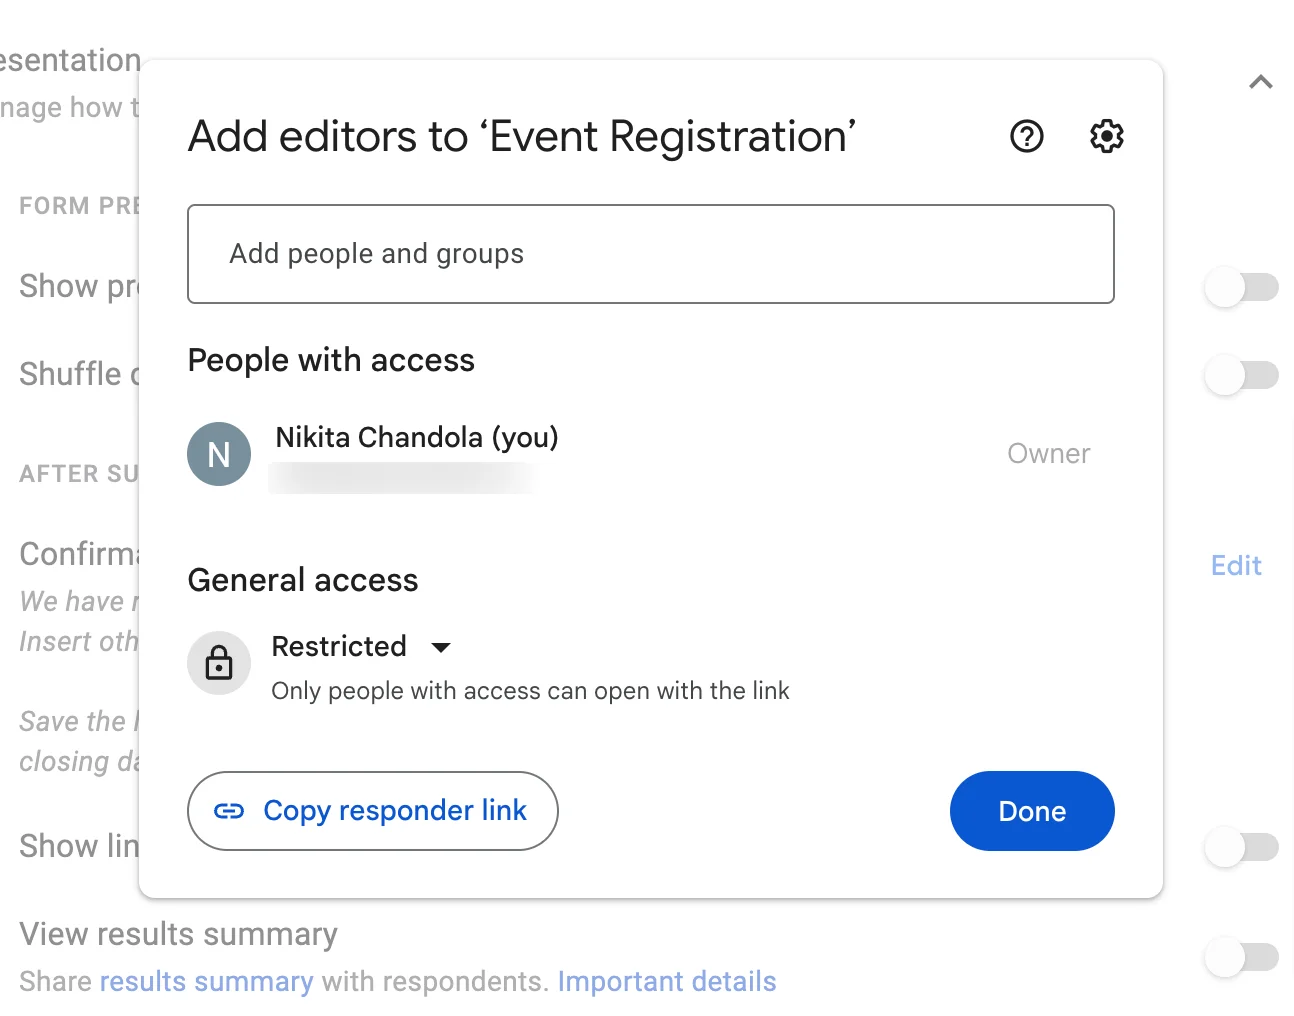
Further, if you have a team for an event/webinar and want to share the form responses with them you can add them as a collaborator.
To do so, go to the ‘More’ option at the top right corner with this icon – ‘፧’ and click on ‘Add Collaborators.’ Add people with Google accounts and then they will also be able to access your form.
Step 5: Preview & Send Forms
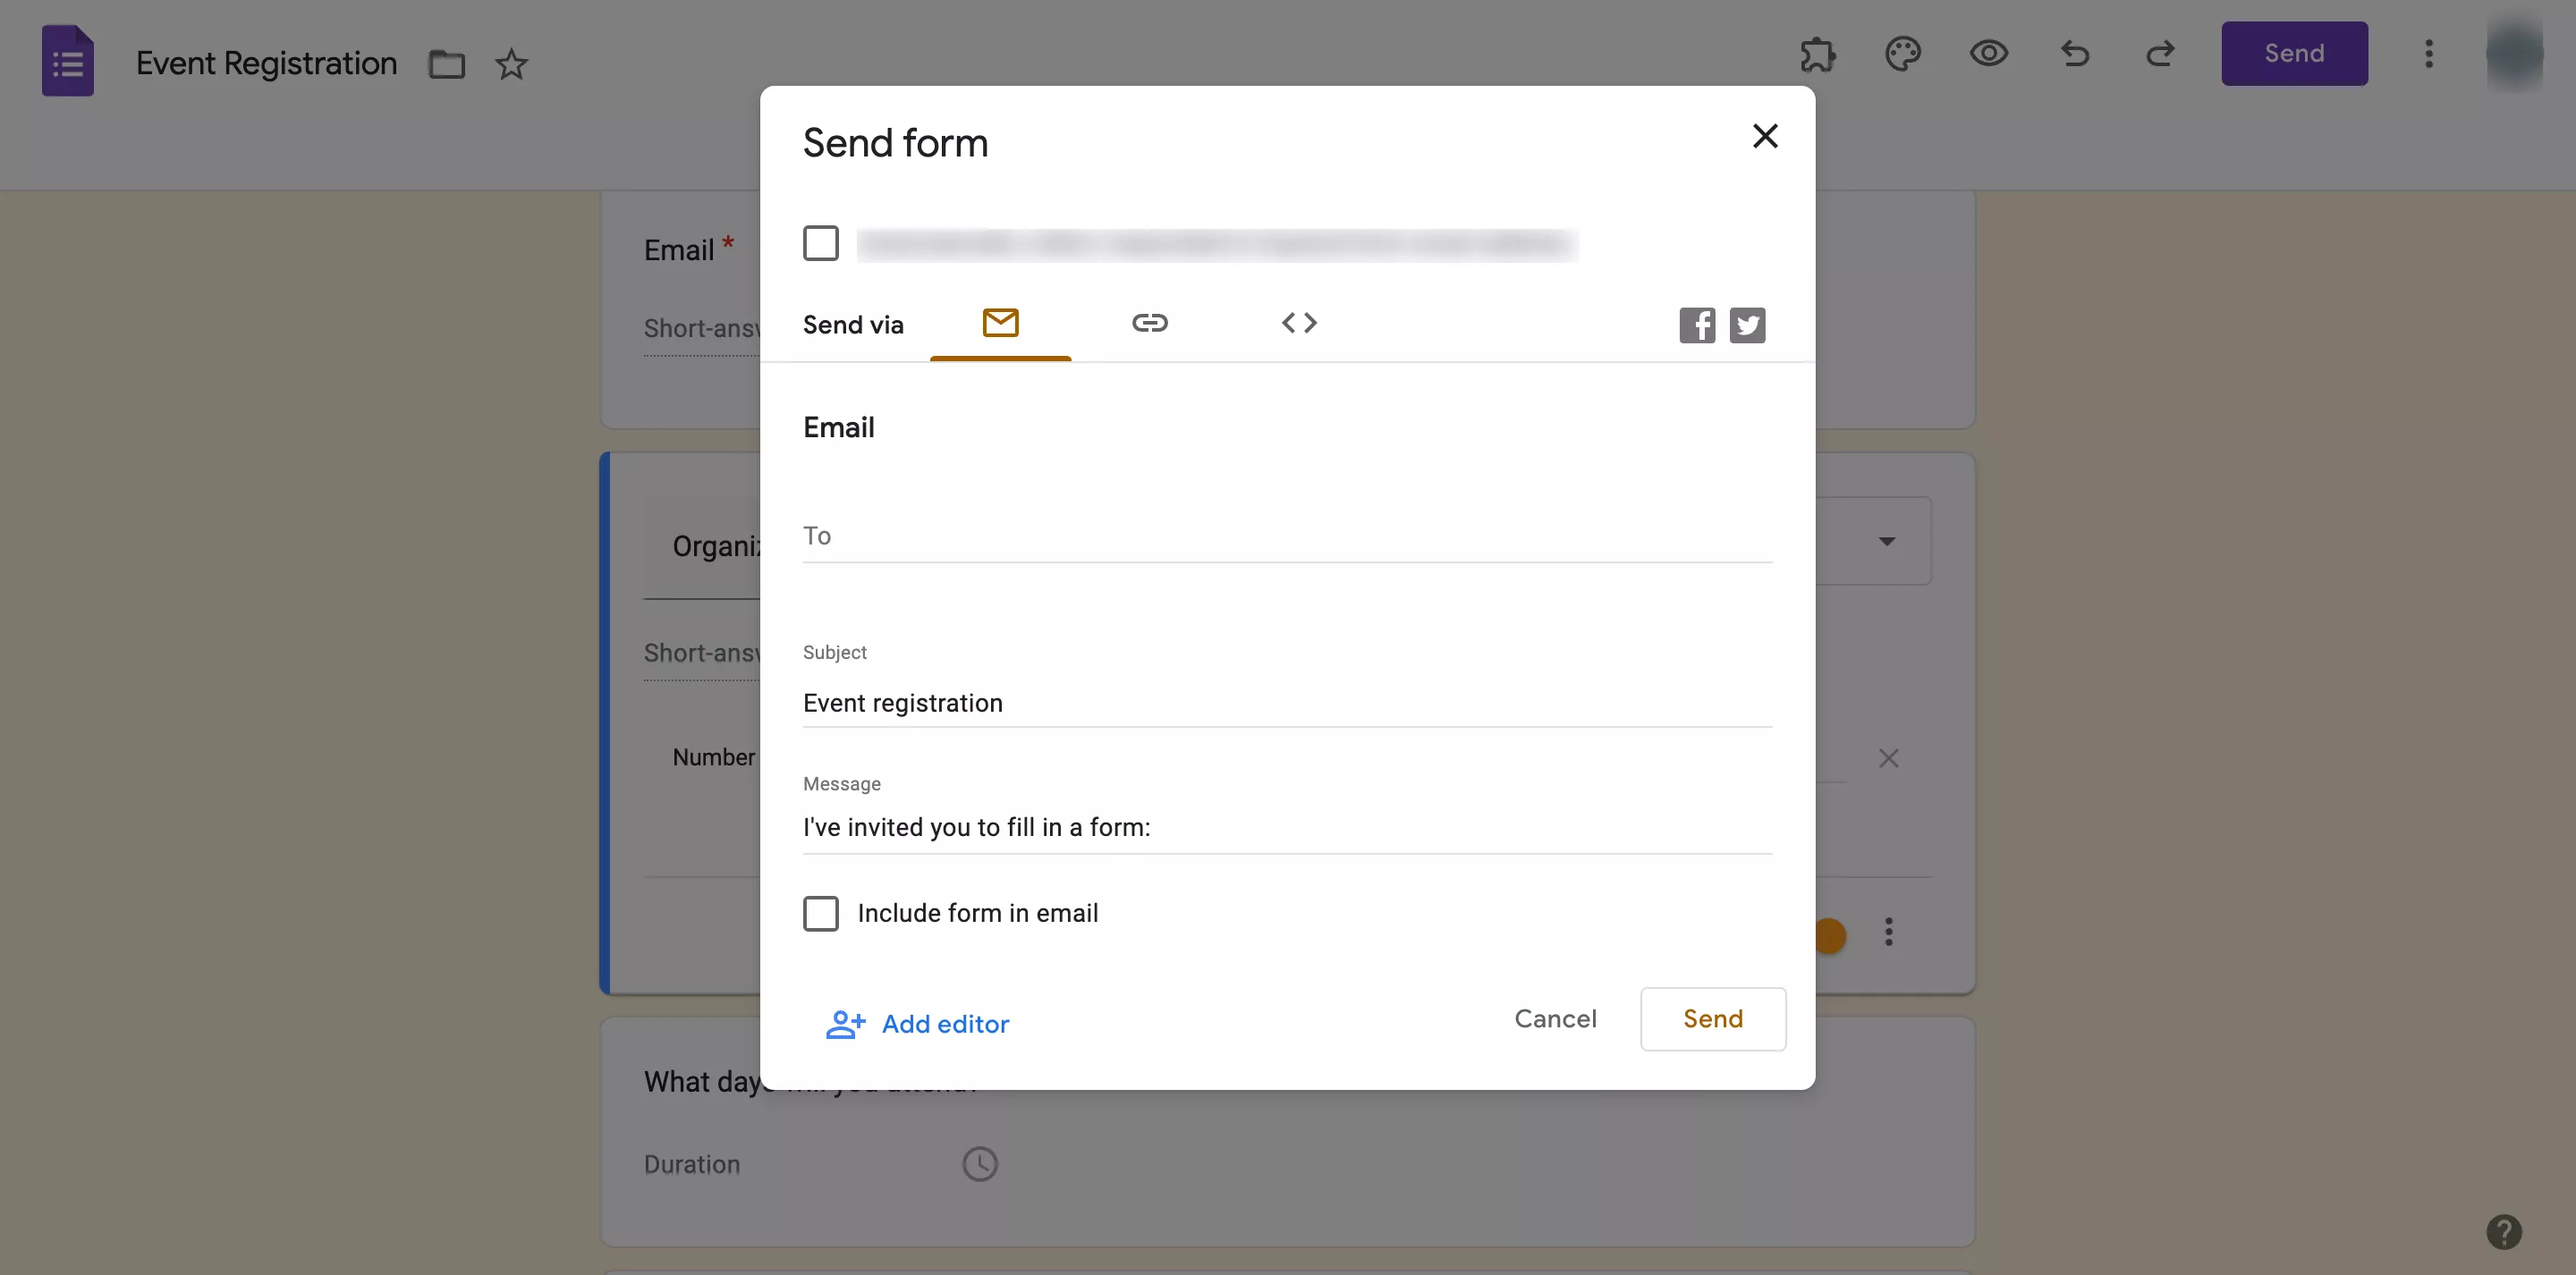
Once all the above steps are done, it’s time for you to preview your form to see how it’s looking. Just click on the ‘eye’ icon at the top bar to preview the form. Then to share the form, click on the ‘Send’ button.
If you are using your business Google account, then you’ll get an option of – automatically collecting respondent’s company email addresses, you can enable that option if you want to default collect email-ids.
You can send forms, either through invites, links, embedded HTML (add it to your webpage), or social platforms.
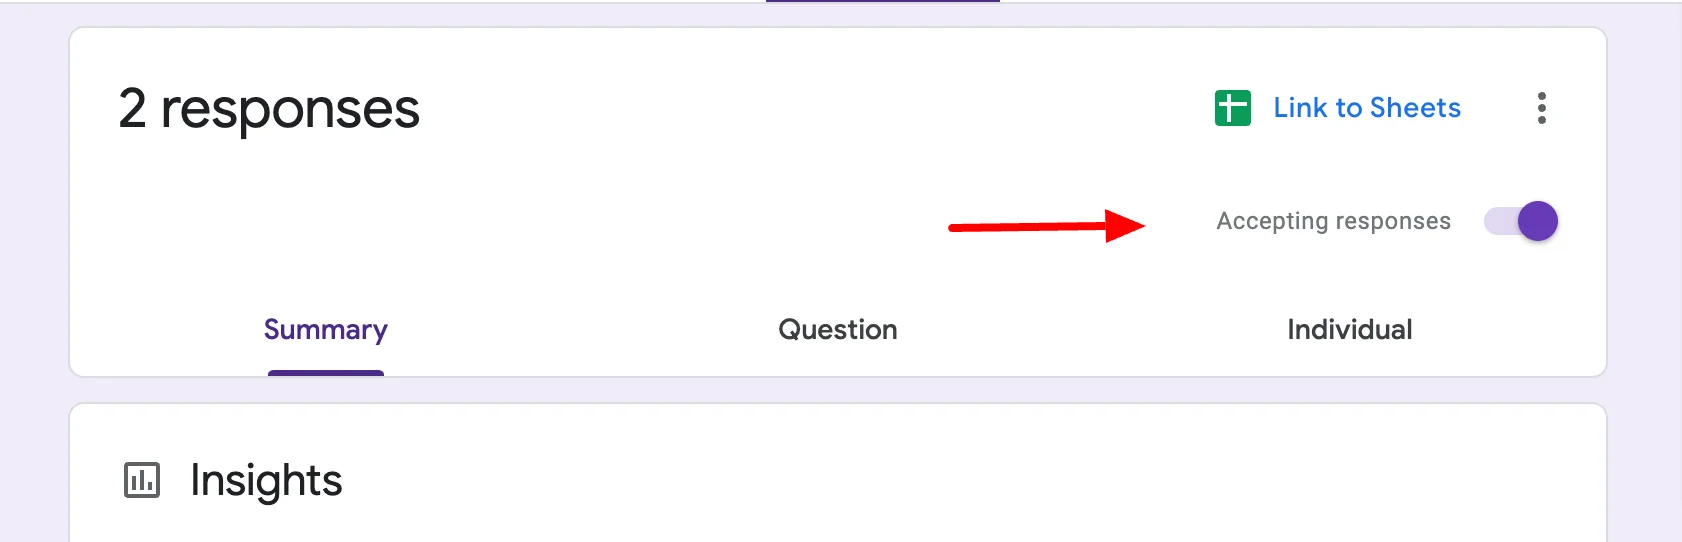
Also, once your deadline is over you can also stop accepting responses, in the ‘Responses’ tab you will see an option of ‘accepting responses’ just disable it, Google Forms will then not accept any further responses.
Step 6: Collect & Analyze Form Responses in Spreadsheet
The last step here is that you can connect Google Forms with Google Sheets so that you can collect data in an Excel sheet and you can share that sheet with anyone. It will help you to analyze the attendees further and based on that data, you can work on making your registration process easier.
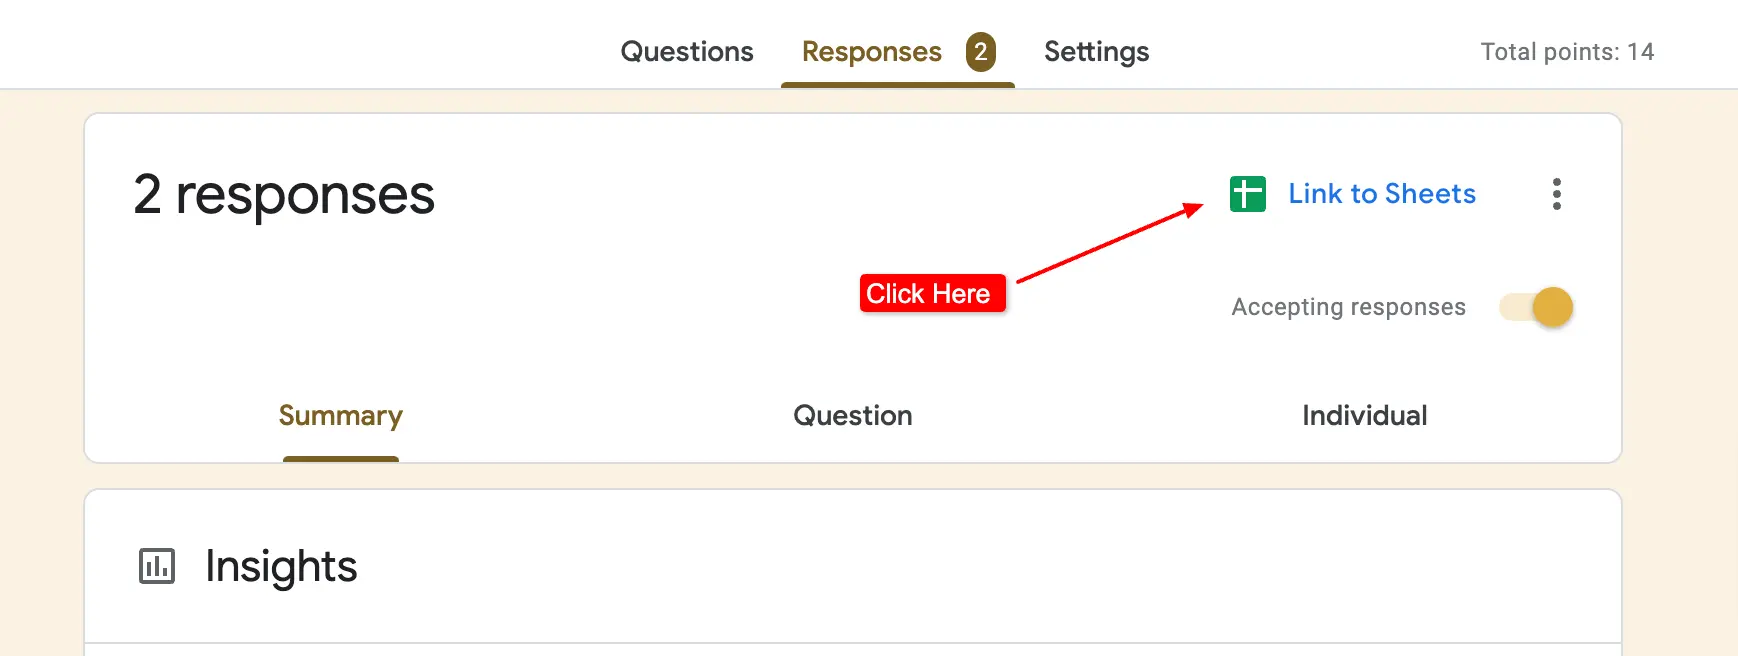
- So, for that, go to the ‘Responses’ tab in Google Forms,
- Click on the spreadsheet icon and a new sheet will be made
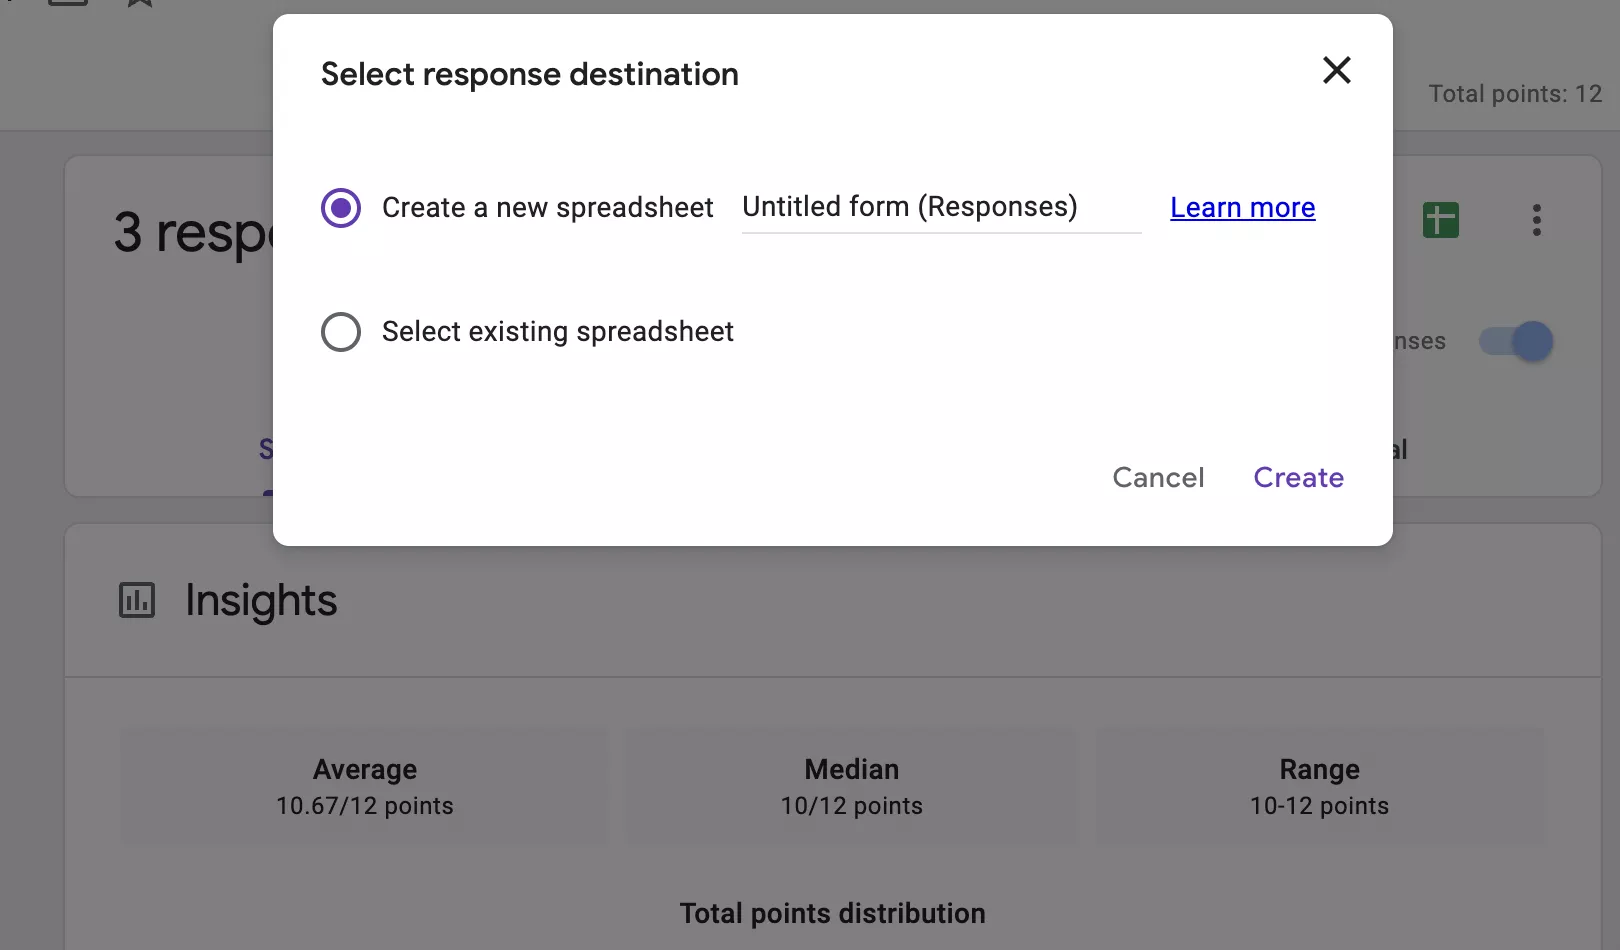
- You can also select the response destination, click on three dots,
- Navigate to the ‘select response destination,’ create a new sheet, or add it to any previous ones.
Bonus Tip – Add Timer Add-on in Your G-Forms
Now that you’ve created a Google form for registration! What if I tell you that you can add deadlines to your Google Forms, add a countdown timer (especially if you are creating quizzes or tests), auto-submit form, and customize your brand, all with this one add-on? Quite interesting, right? It is the ExtendedForms add-on.
ExtendedForms is a timer Google Forms add-on that not only adds a timer to your forms but also schedules deadlines (start & end dates). It has different features apart from the mentioned ones like, email invitation customization, brand customization, and adding welcome messages in different languages.
You can also create a team, add team members, and even assign the role of team manager. You can check out the website and try its free version which will not include every feature but you can always upgrade the plans.
Frequently Asked Questions
What is the online registration form?
An online registration form is a way to collect registration information for any events like webinars, seminars, concerts, etc., and contact attendees for further information, and even for registration fees. Besides, the purpose of the online registration system/form is to be able to register & connect with attendees from anywhere with ease and plan out events.
Can I use Google Forms for event registration?
Yes, Google Forms is great online software to create online registrations for any sort of event, because of how easy it is to build out fields and send out invites quickly. Additionally, you can customize the look & feel of the form, and match it with your branding with the help of add-ons that give you extra flexibility with your form.
How can I create an online registration form for free?
There are various ways to create an online registration form, however, Google Forms is one of the best tools for creating an online registration form for free. It is an easy-build tool, that has a pre-built template for event registration.
Concluding Everything
This step-by-step guide has explained how to use Google Forms for registration. It is the most uncomplicated way to create an event registration with Google Forms to send to attendees. Even if you are not familiar with Google Forms and its features, you’ll get the hang of everything within minutes. With this post, I have just made your learning experience a bit easier.
Besides, do you know you can also create job application forms in Google Forms, it is as easy as this one to create. Besides, Google Forms is used by many recruiters to create an initial screening interview process, it helps them streamline the overall selection process. Google Forms is a really helpful tool to create any sort of form! Do you want to know how to use Google Forms for recruitment? Then check out this article – How to use Google Forms for Recruitment? (6-Step Guide), How to Create a Question Bank in Google Forms. [In 2 Ways] and How to Make Google Forms Accessible? [In 4 Steps]