Creating an auto-submit quiz is a valuable functionality that streamlines the submission process without requiring additional effort on your part. This blog post will provide a guide on implementing the auto-submit feature in Google Forms.
The auto-submit feature proves particularly beneficial for timed assessments, enabling the automatic submission of Google Forms after the designated time limit has elapsed.
It’s essential to note that while responses won’t be automatically saved (but that’s not an issue in Google Forms, as answers are automatically saved), any answers provided or attempted by respondents will be promptly submitted.
This feature is especially advantageous for online tests or quizzes, eliminating the need for physical invigilators to collect answer sheets once the allotted time has expired. Now, let’s delve into creating an auto-submit Google Forms quiz.
Table of Contents
Steps to Create an Auto-submit Quiz
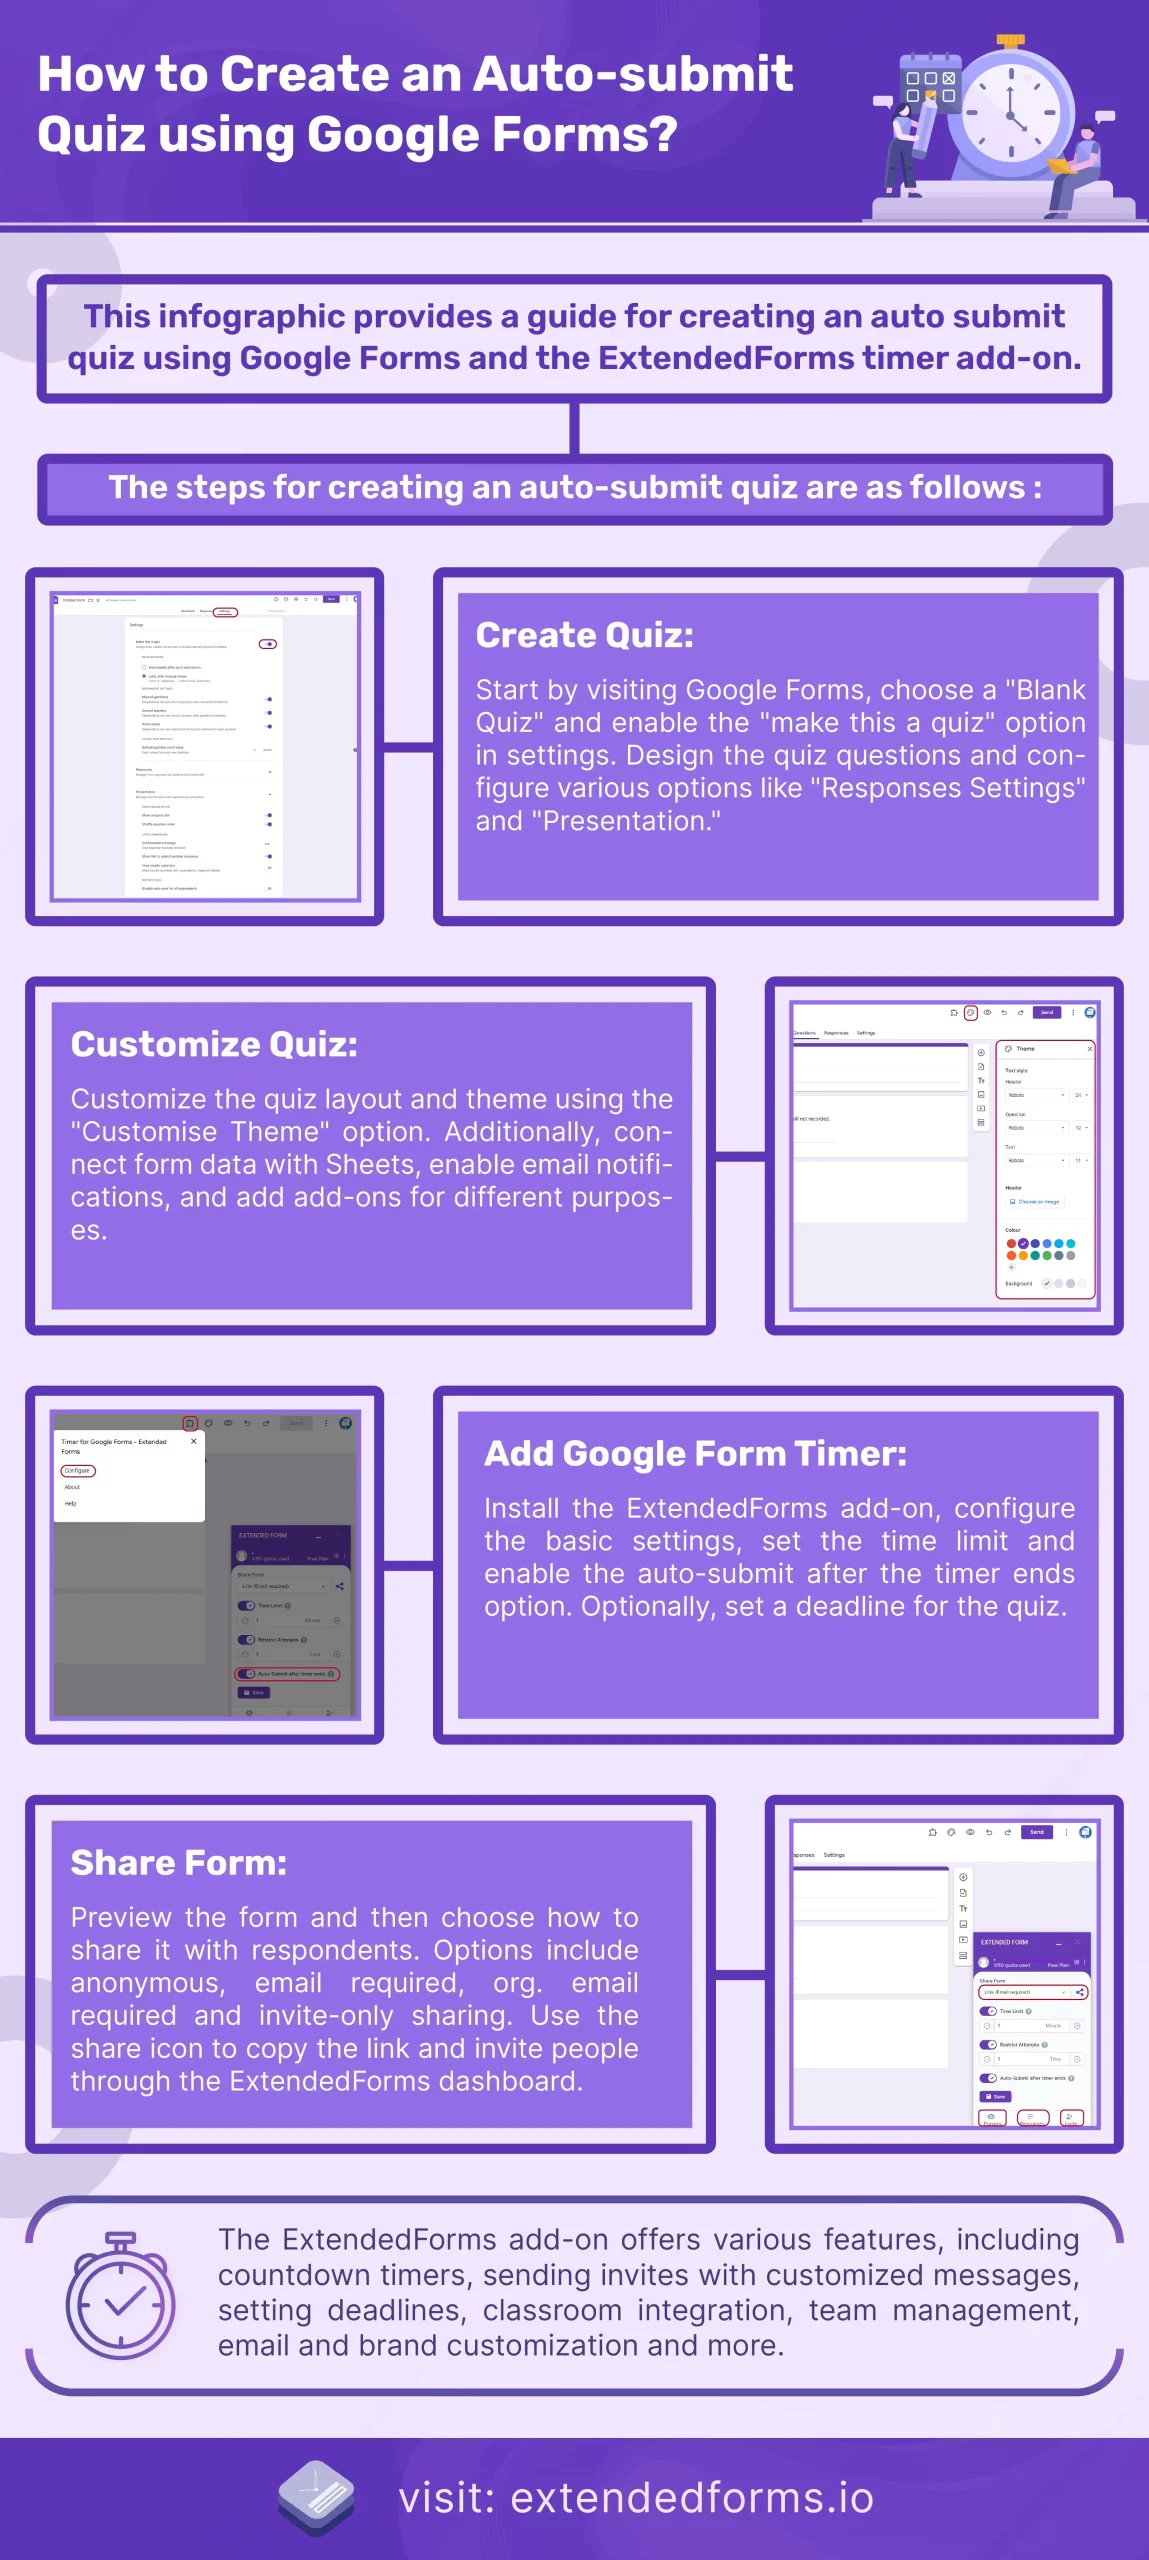
1. Create a Quiz
Let’s start with first creating the quiz, you must first visit the Google Forms site, or go through the G-Drive > Google Forms procedure and select the ‘Blank Quiz’.
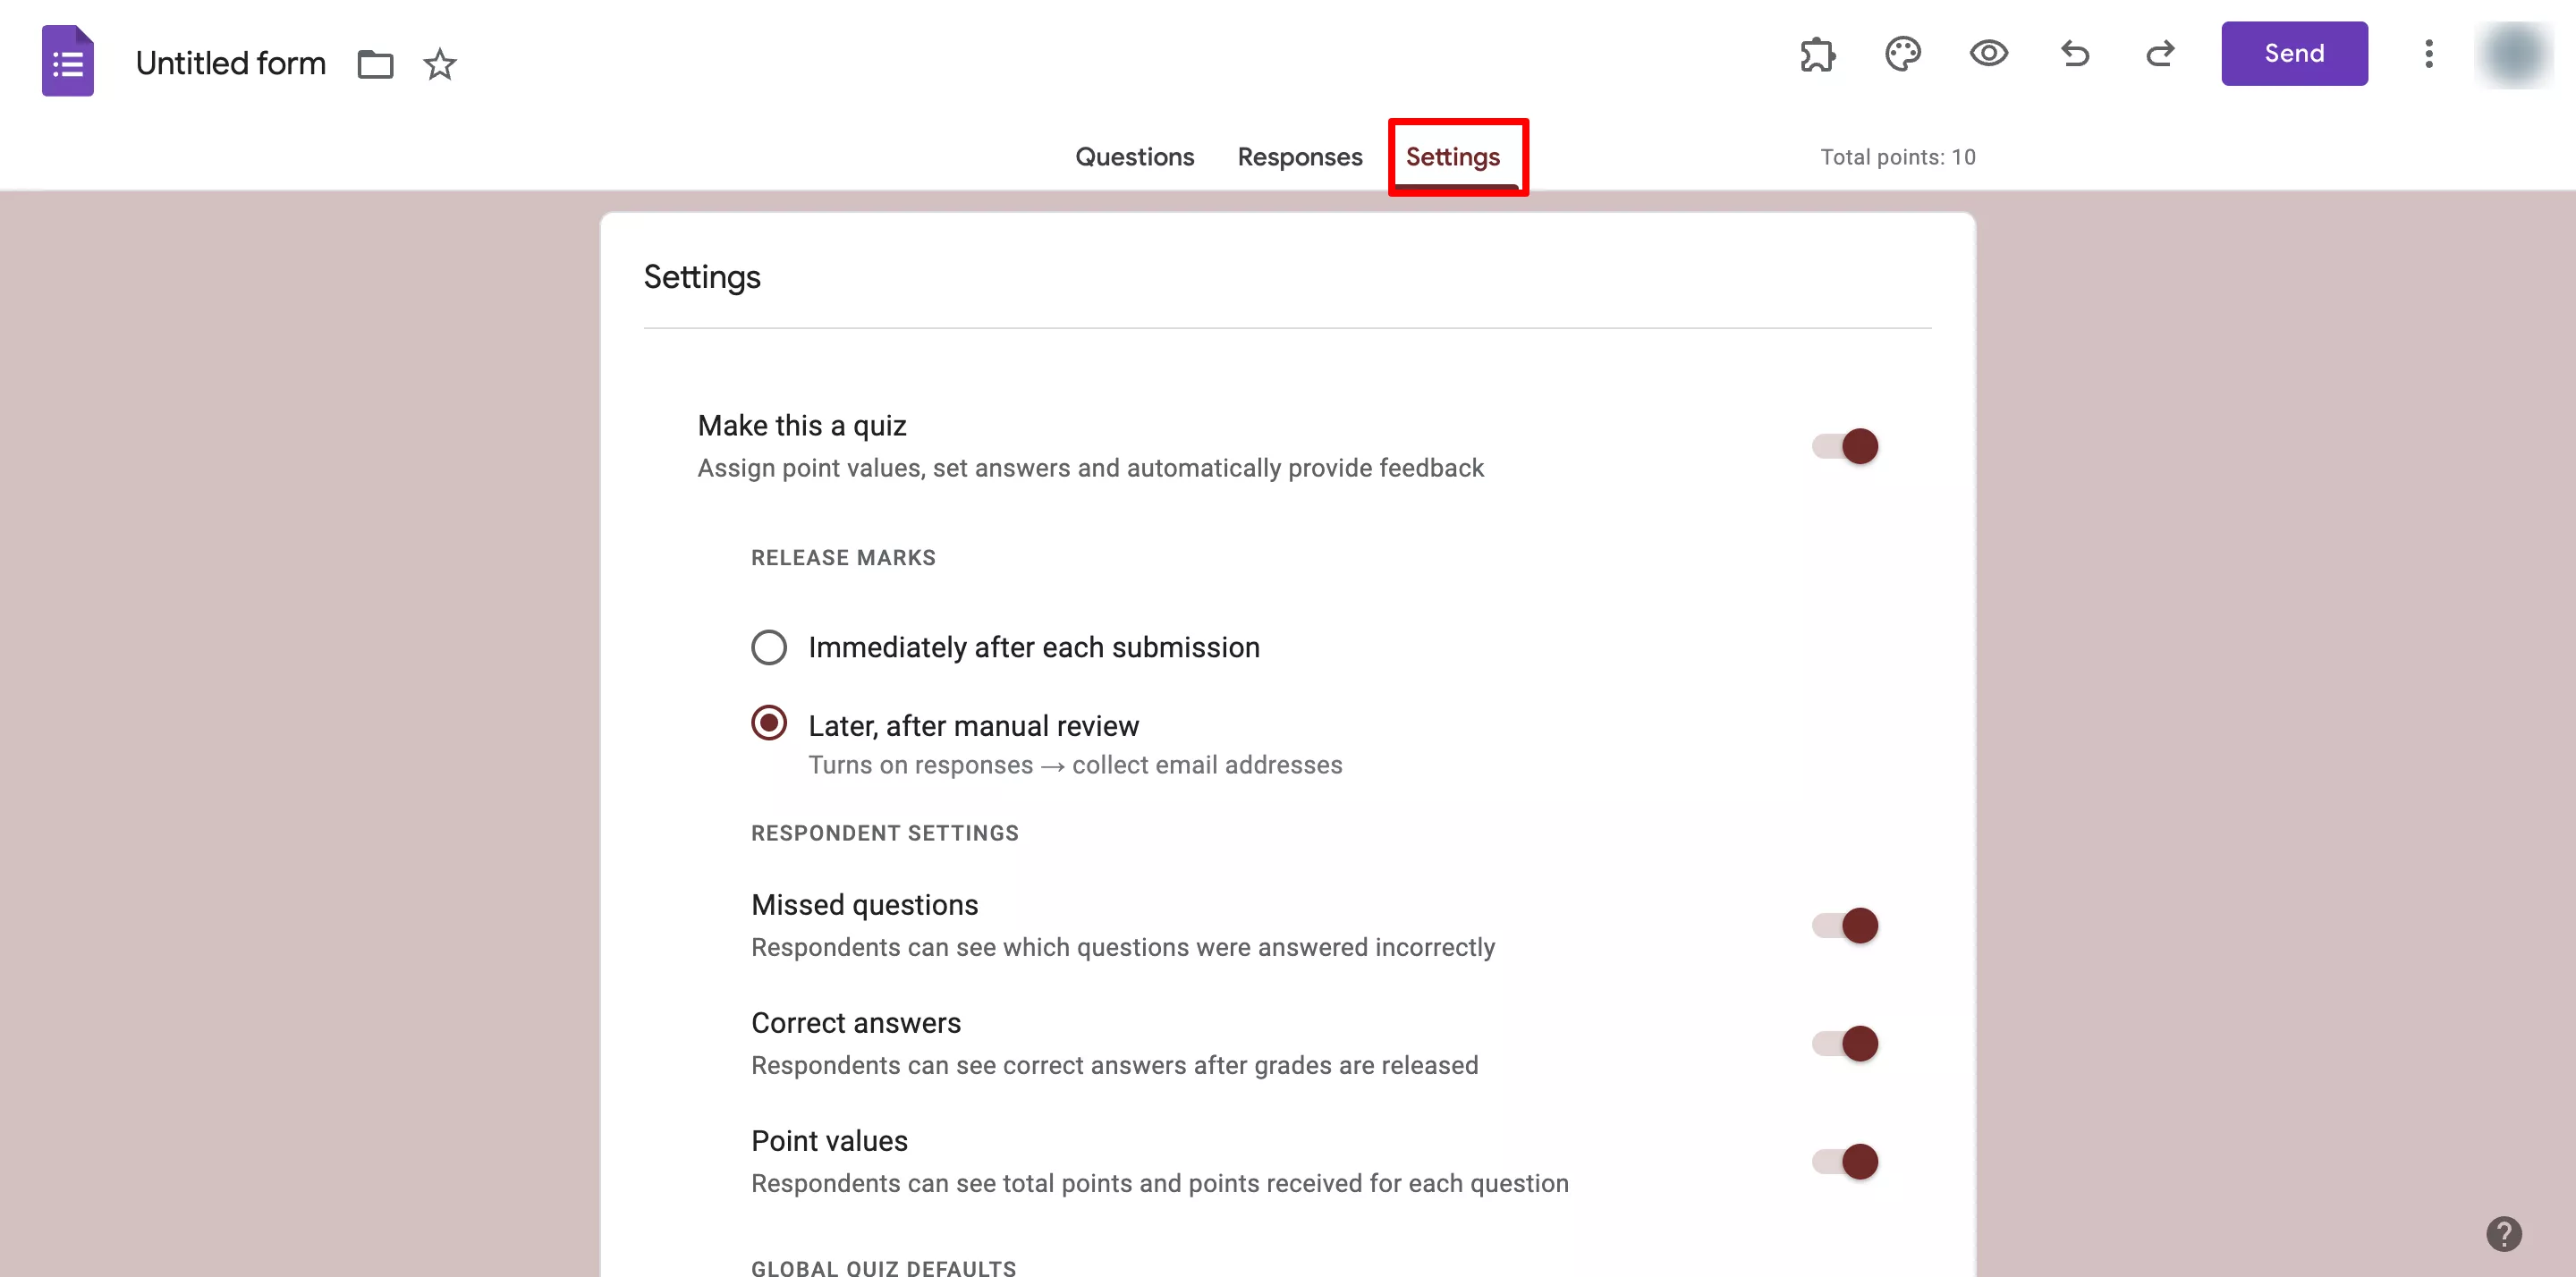
- Besides, if you choose a ‘Blank Form’ for that matter, you can convert it into a quiz from the Settings.
- Go to ‘Settings’ and enable the ‘make this a quiz’ option. Then you can also configure ‘release marks’ and ‘respondents settings.’
- You’ll also see various further options to configure like the ‘Responses’ Settings,’ ‘Presentation’ tab, and Defaults settings.
- Google Forms allows you to design questions with different question types. Choose smartly your Q&A type, whether yes/no, multiple choice, or you can add images and videos.
- Besides, if your question needs a short description, click on the icon ‘፧’ at the bottom right corner of the question tab to Show > Description.
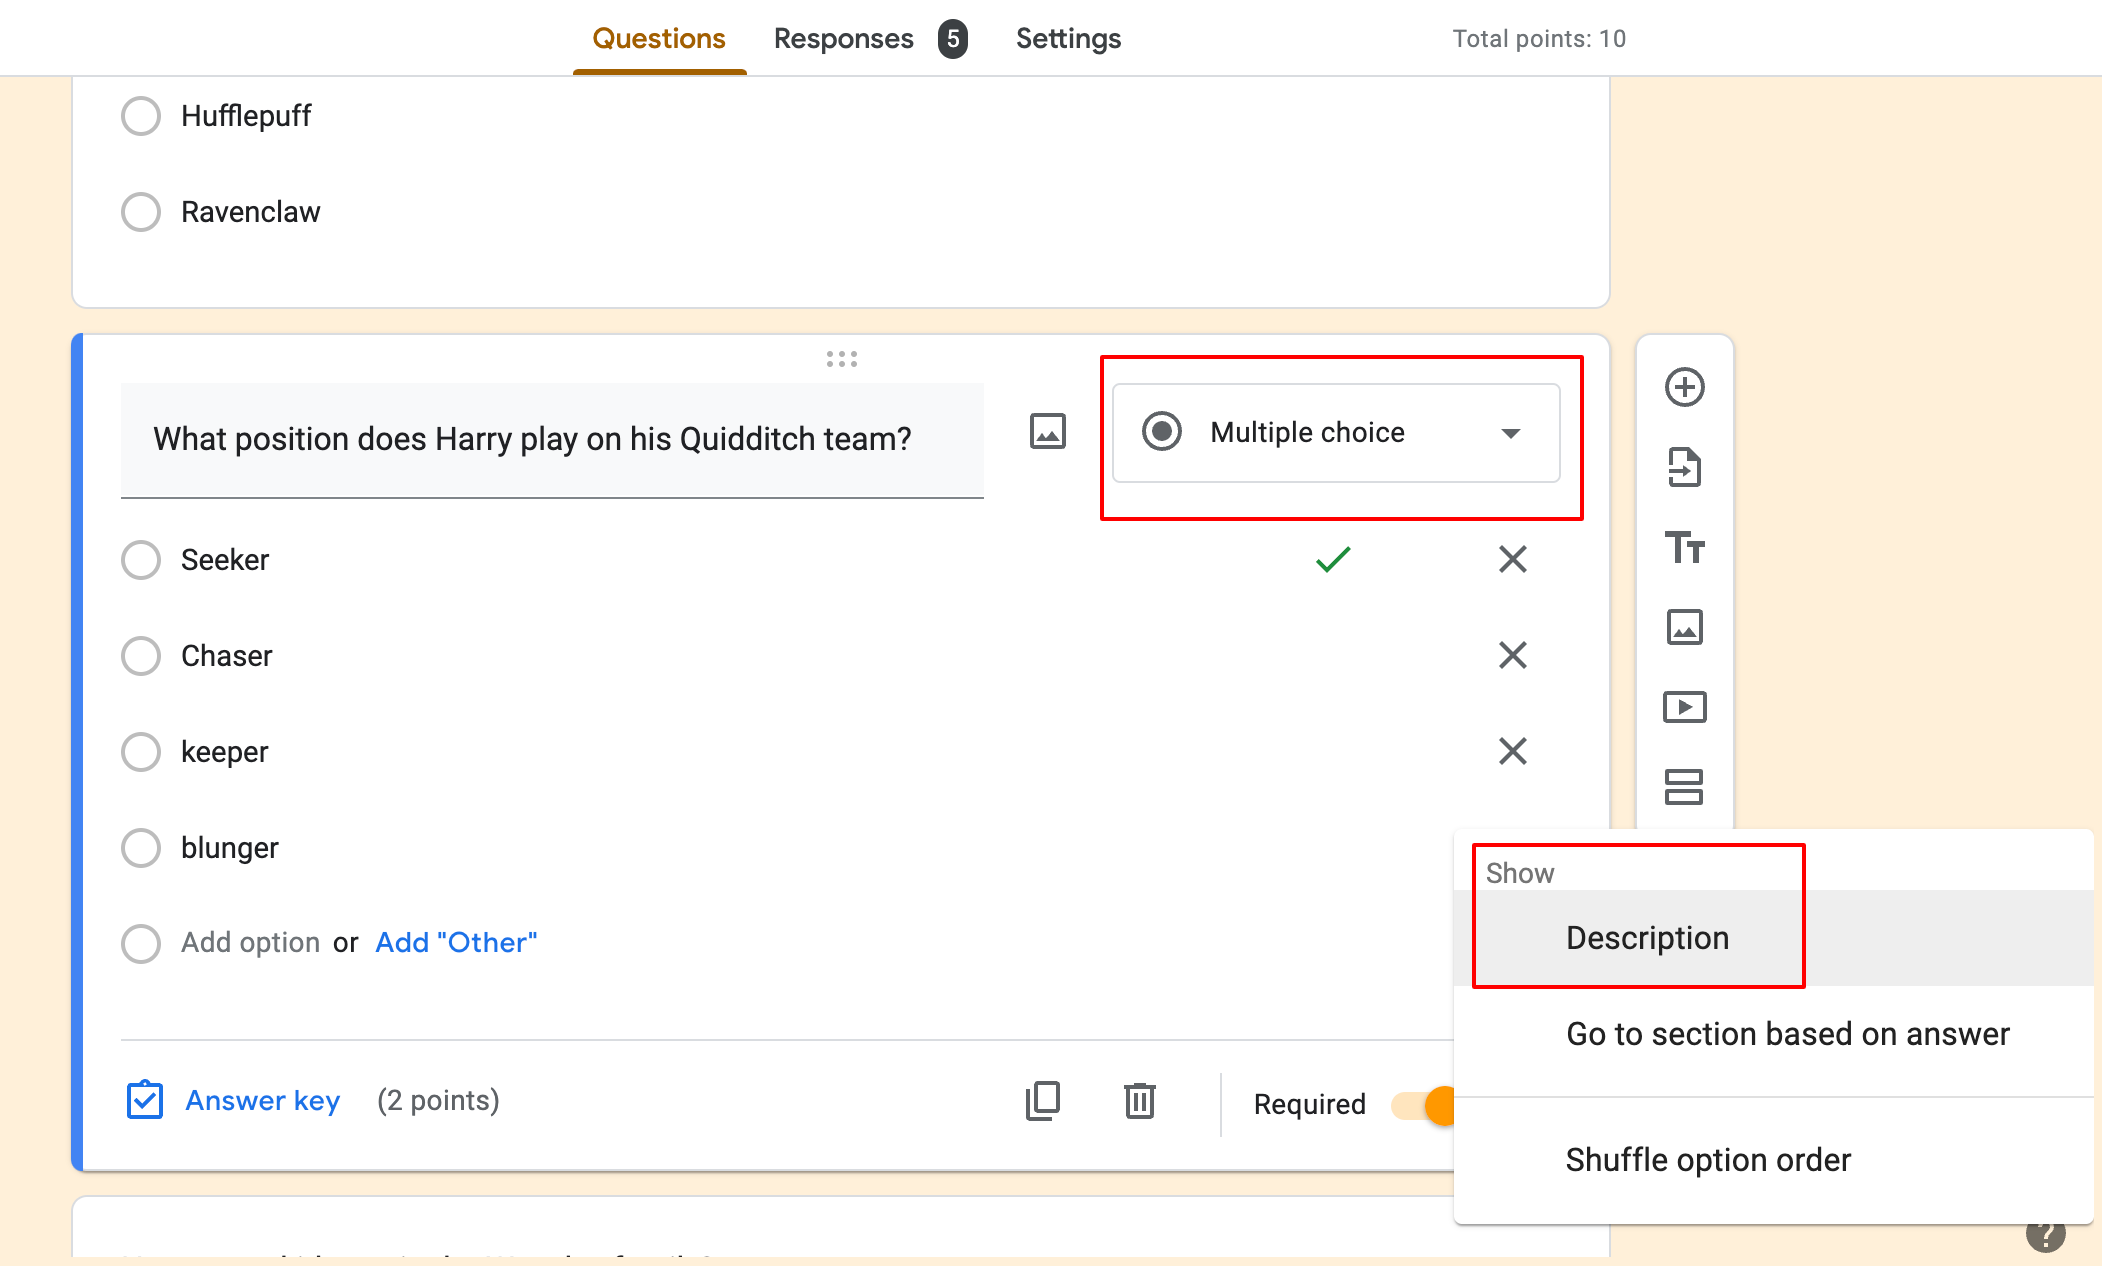
- You can also give respondents the option to go directly to a particular section based on their answers. Go to this icon ፧ at the bottom of the question box and choose the ‘go to section based on the answer.’
2. Customize Quiz
Once you have created the quiz, it’s time to customize your quiz. Configuring Settings is a part of customizing, it is more of a customizing Google Forms layout. So, as we have done that in the create quiz part, we will move to customize Google Forms themes.
- To begin with, go to the ‘Customise Theme’ at the top. A theme dialogue box will appear on the right side, from their add header image, change text style, font size, and add theme color.

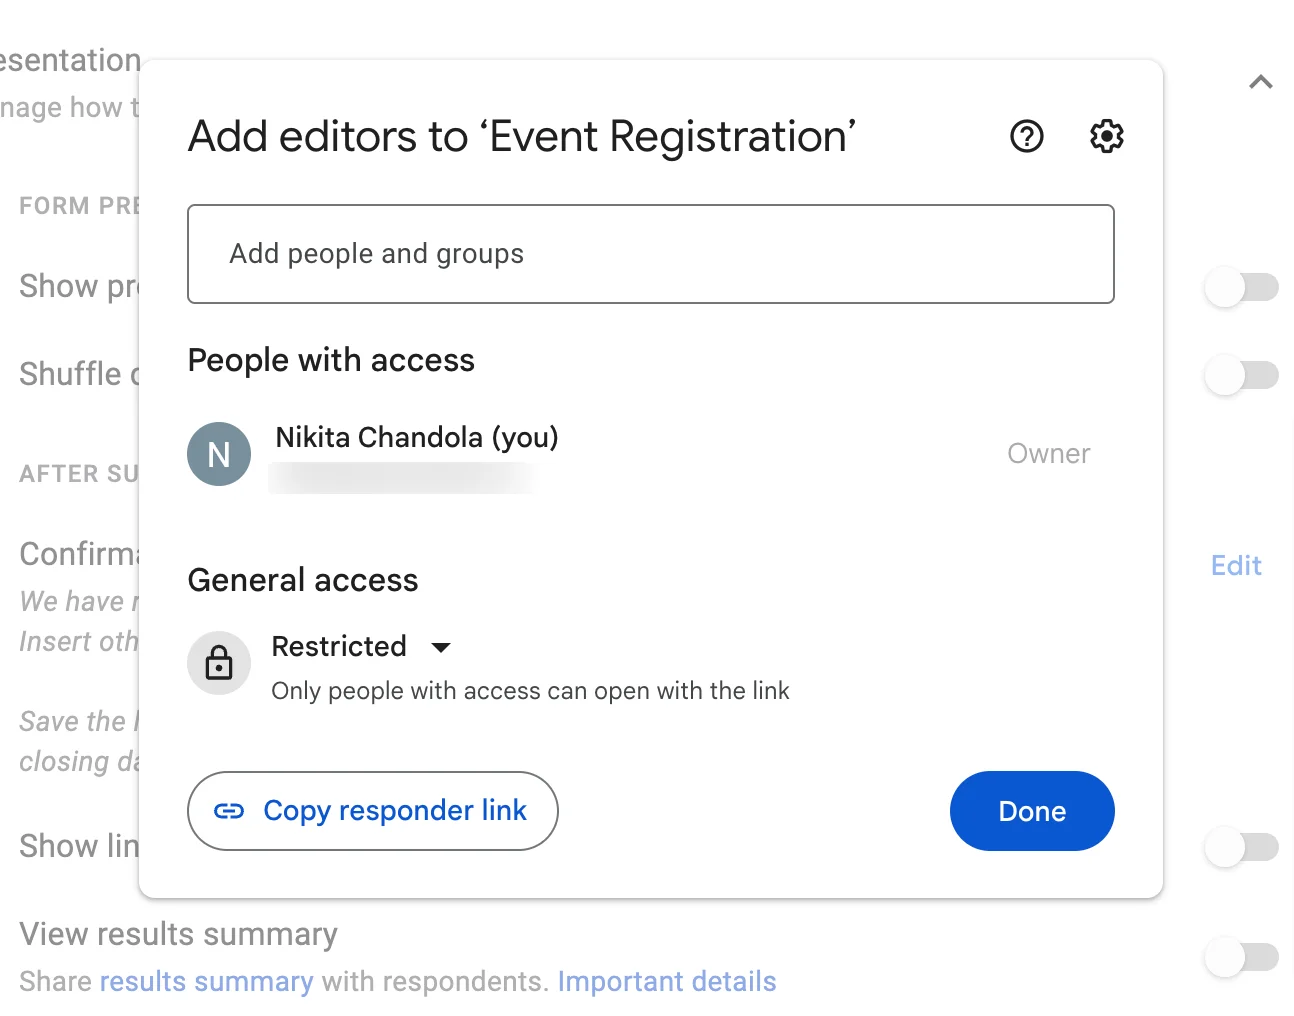
- Further, you can add a collaborator that can also access your form. Go to the More option at the top right corner and click on ‘Add Collaborator.’
- A pop-up box will appear in that add people that have a Google accounts. Besides, you can copy the editor link and paste it on any platform.
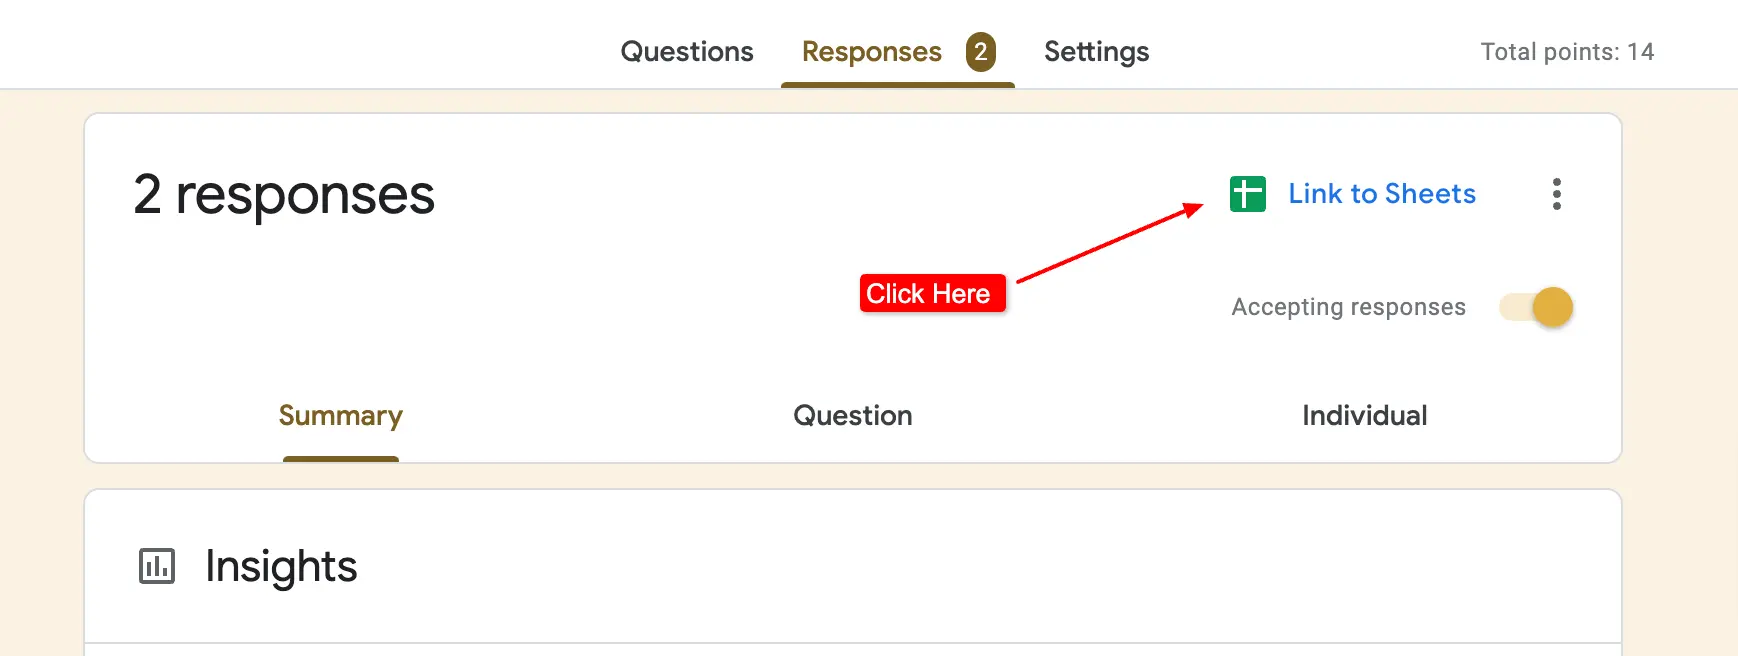
- Apart from that, if you want to connect form data with Sheets then that can be done by linking the Form to Sheets. In the ‘Responses’ tab, click on the ‘Link to Sheets‘ icon, and a spreadsheet will be created.
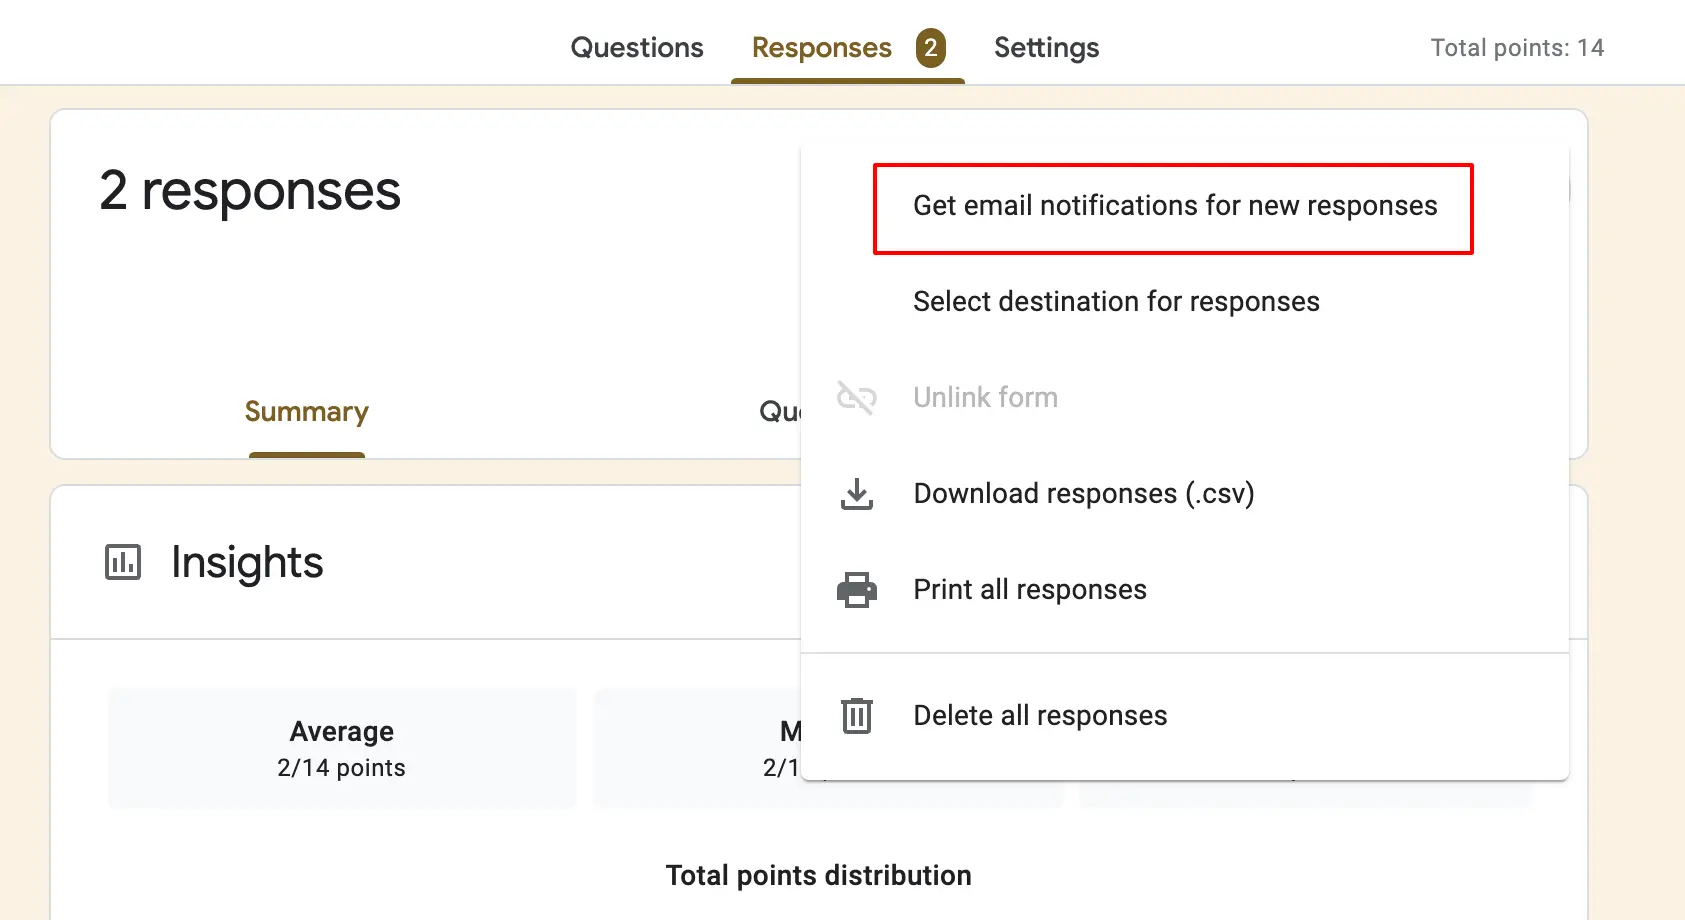
- Plus, you can select the response destination, click on three dots, and then the select response destination option. Further, you can select from a new sheet or existing spreadsheet.
- If you want to get email notifications for every response then click on three dots and enable that option. Once the deadline is over, you can also stop accepting responses, in the Responses tab you’ll have the option, to disable it.
- To further customize your form, you can add add-ons for different purposes whether it’s for productivity, communication, or utility use cases. Go to the ‘More’ option, navigate to the ‘Get Add-ons,’ and add apps of your choice.
Want to create a voting poll? Read How To Create A Voting Poll In Google Forms? (7 Simple Steps)
3. Add ExtendedForms Timer
As we discussed above, adding an add-on can enhance your Google Forms usability. As this is an auto-submit quiz we’re talking about, adding a Google form timer is called for. Your form will have a countdown timer and it will be created into an auto-submit quiz.
So first, we have to install the add-on i.e, ExtendedForms.
- Go to the ‘Add-ons’ option in the ‘፧’ More at the top right corner, search ExtendedForms, and install the app.
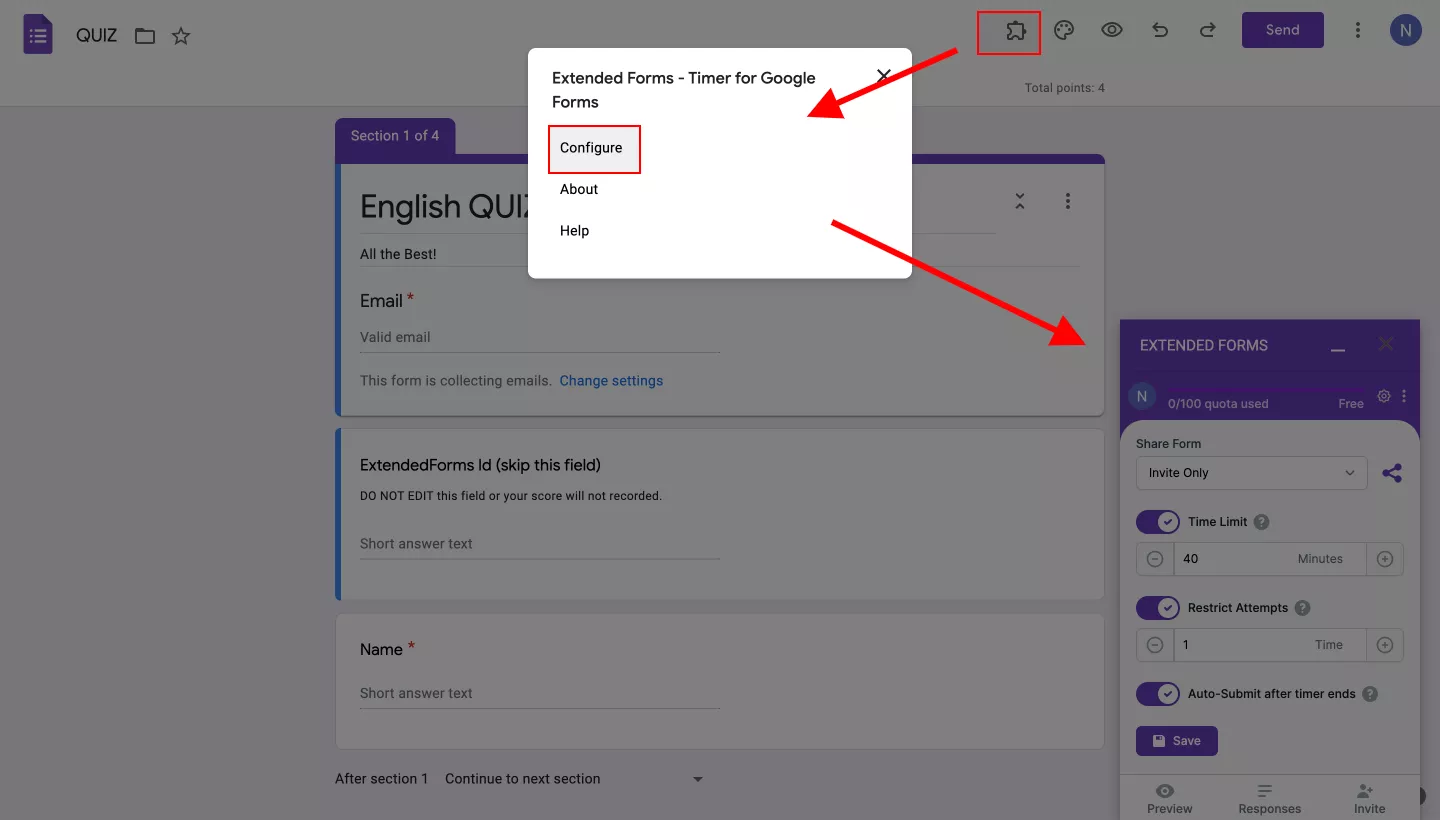
- Once the app is installed, you’ll see a puzzle shape icon at the top, click on it, go to ExtendedForms > Configure and a settings box will appear on the right side of the form.
[Refresh the page once if you can’t see the puzzle icon. The same goes for the ‘configure’ option, if you can’t see it, refresh the page.]
Create Auto-submit Quiz
- Then we have to configure the timer & auto-submit settings. Set the time limit and restricted attempts (this option will not be available in ‘anonymous share’)
- Then ‘enable the auto-submit after the timer ends’ option. Basically, it will be default enabled in the settings, so you don’t have to do much.
- ‘Save’ the settings and you’re done.
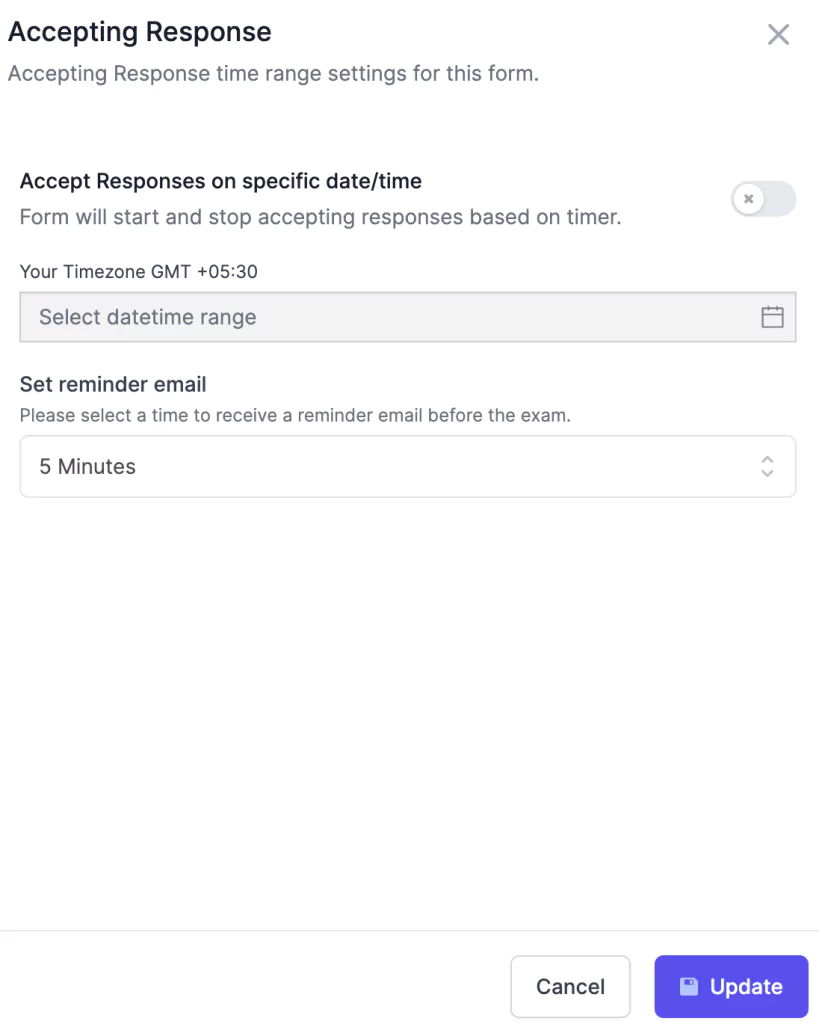
If you want to add a deadline (start & end dates) for an auto-submit quiz, then follow these steps.
- Click on the ‘Responses’ option at the bottom of the settings.
- It will lead directly to the Forms page of ExtendedForms
- From there, click this ‘፧’ icon and go to the ‘Form Settings.’
- You’ll see that the auto-submit option is by default enabled.
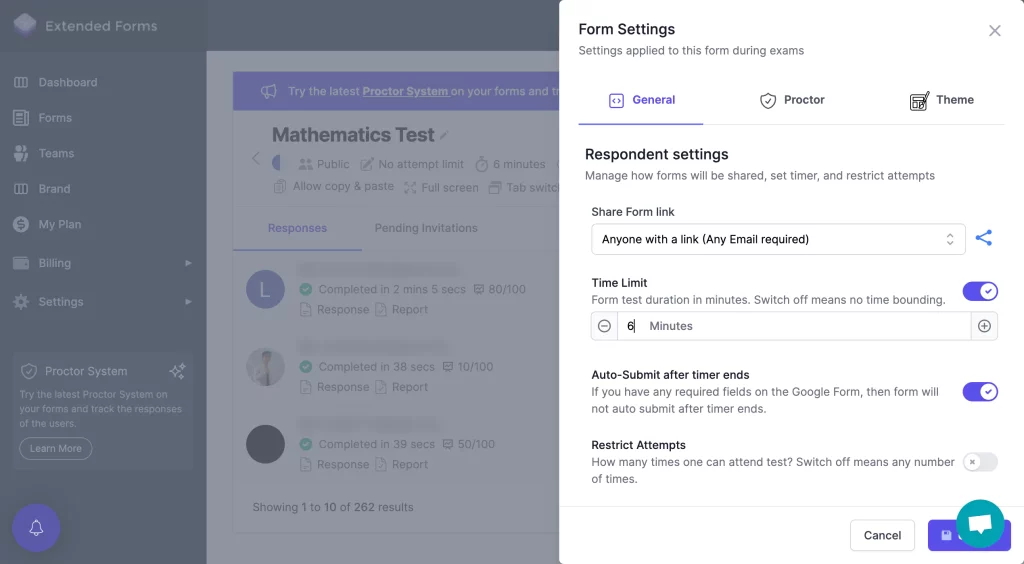
- Then coming back, from the More option, go to Accepting Response settings, choose the date-time range, save the settings, and you have added a limitation timeline to your quiz.
Just like that, an auto-submit quiz is ready to be submitted to your audience.
4. Share Form
- Once all the above steps are done, it’s time for you to preview your form to see how it’s looking. And if satisfied, share the form with your audience. Just click on the ‘eye’ icon at the top bar to preview the form.
- Then to share the form, click on the ‘Send’ button. You can send forms three ways, either through invites, links, or embed HTML.
Note* The above steps were the default way to share Google Forms, however, we are using ExtendedForms so we will focus on the below steps.
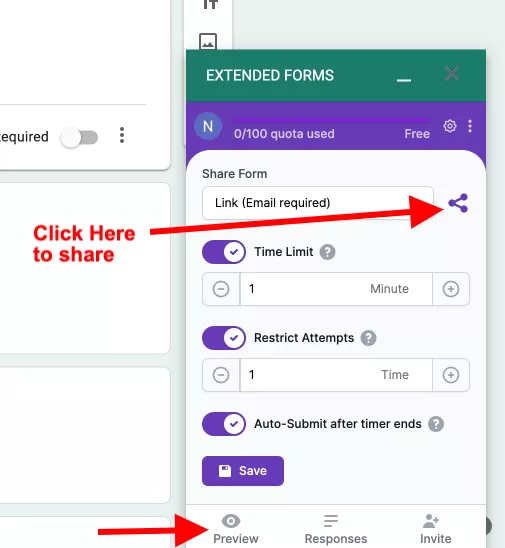
- In the settings box, you’ll see the preview option at the bottom, click on it to see your auto-submit quiz preview.
- Then to share the form, you get different ways to share – anonymously through link, email required, org. email required and invite only.
- Click on the share icon beside the option and the link will be copied, you can paste it anywhere. However, if you select the ‘invite’ only option then you’ll have to click on the ‘Invite’ button at the bottom.
- It will direct you to the ExtendedForms dashboard area, where you’ll see an Invitation pop-up dialogue box opened. Add email-ids, write an invitation message, and send the invites.
ExtendedForms
ExtendedForms is one of the top timer apps of Google Forms in Google Workspace Marketplace. It lets you add a countdown timer within seconds and comes with no pesky configurations.
Other than hassle-free settings, you get other features to set like – auto-submit, sending customized invitations, a welcome message, and even setting a specific date/time for the forms’ deadline.
Apart from these basic features, it includes ‘classroom integration, team management (add teams and manager team role feature), email & brand customization. Furthermore, you can transfer ownership of your account to anyone with the account, including image cropping for your profile, and brand images.
Ready to go one step ahead with your timers in Google Forms? Read ExtendedForms Unveils: Customized Timer Themes.
Frequently Asked Questions
Is it possible to auto-submit Google Forms?
Google Forms doesn’t have the option to auto-submit forms, it can only auto-save responses. However, it does come with add-ons or you can add extensions that will help you to create an auto-submit quiz/test. One of the add-ons is ExtendedForms, with the help of that app you can enable the auto-submit feature.
How do I automatically submit a Google Form after the time limit?
So, you can automatically submit a Google Forms once the time limit is over, you have to enable that option. We can do that with the help of the ExtendedForms app, you get the auto-submit feature.
Is Google Form auto-submitted after timeout?
If there are any required fields left to be answered, then the form will not auto-submit after the timer ends. So, it’s essential to fill out all the required questions, however, if you’ve not answered the unrequired ones then it can auto-submit after the timer ends.
Wrapping Up
In this article, we explored how to create an auto-submit quiz using Google Forms. The ExtendedForms app simplifies this process with its unique functionality, including a built-in countdown timer.
You can try the ExtendedForms app with its trial version, and if it meets your needs, their paid plans are quite affordable. These plans also include top-up quotas, allowing you to upgrade anytime without altering your existing subscription. Beyond the auto-submit feature, ExtendedForms enhances the overall user experience by providing seamless integration and real-time monitoring, ensuring smooth and efficient assessments.
If you like reading this blog auto-submit forms using Google Forms, also read our detailed guide on Best Google Forms Test Maker: ExtendedForms and How to Make Google Forms Accessible. [In 4 Steps].