As we delve into the intricate art of form creation, mastering the incorporation of tables emerges as a crucial skill for enhancing data organization and presentation. In this guide, we will explore the ins and outs of “How to Add Tables in Google Forms,” shedding light on two distinct methods to integrate tables into your forms.
Tables not only enhance the visual appeal of your forms but also play a pivotal role in streamlining data entry and analysis. From clearly presenting survey responses to simplifying the submission process for respondents, tables prove to be a versatile tool.
Table of Contents
Two Ways Guide to Add Tables in Google Forms
Join us as we delve into the straightforward steps of incorporating tables into your Google Forms. Learn the conventional method directly within Google Forms, mastering the art of table insertion effortlessly.
But that’s not all – we’ll also unveil a streamlined alternative, utilizing an add-on for a more dynamic and customizable table-building experience.
1. Add Tables through Multiple-Choice Grid
So one of the ways to add tables in Google Forms is through multiple-choice grid question type. It is as close as possible to having a Google form table question without using any external add-ons or extensions.
This may not be proper Google tables but it works in most cases. Let’s pull out the strings and talk about it;
Step 1 – Setup Questions
- Open a Google Form, title your form, and start adding the questions. For that, we have to choose the ⨁ icon from the floating toolbar and a new question tab will appear.
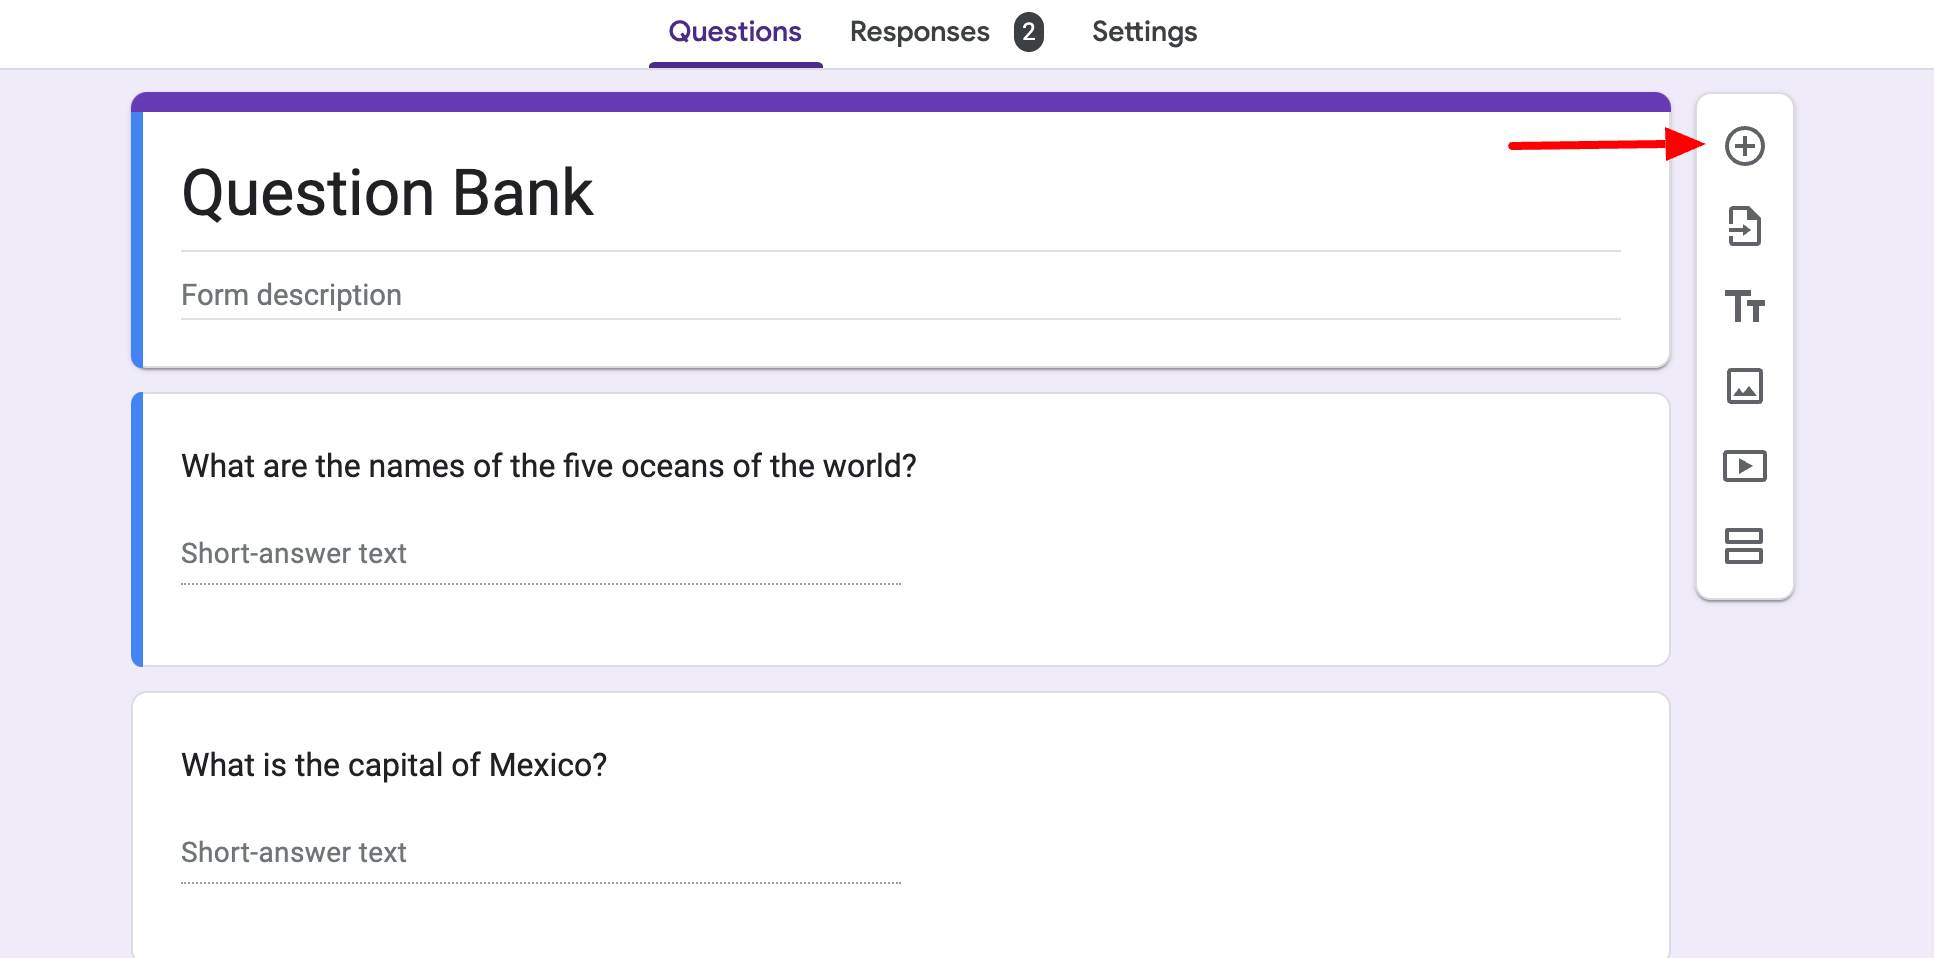
- As soon as you do that, you can add a question and choose from the question type dropdown to select what type of question it will be.
Step 2 – Add Table format
- Click on it and choose ‘Multiple-choice grid,’ you’ll get rows and columns as options. Besides, it also has a ‘tick box grid’ question type that is a checkbox question in table format.

- Start filling them out, you can utilize rows by adding different questions and columns with answer choices.
Step 3 – Preview Form
- Once you’ve added the table question, preview it and you’ll see that the question style format is similar to tables.
- If you’ve chosen a ‘multiple choice grid,’ then participants can only select one answer per row. But for the ‘tick box grid’ participants can choose multiple answers in a single row.
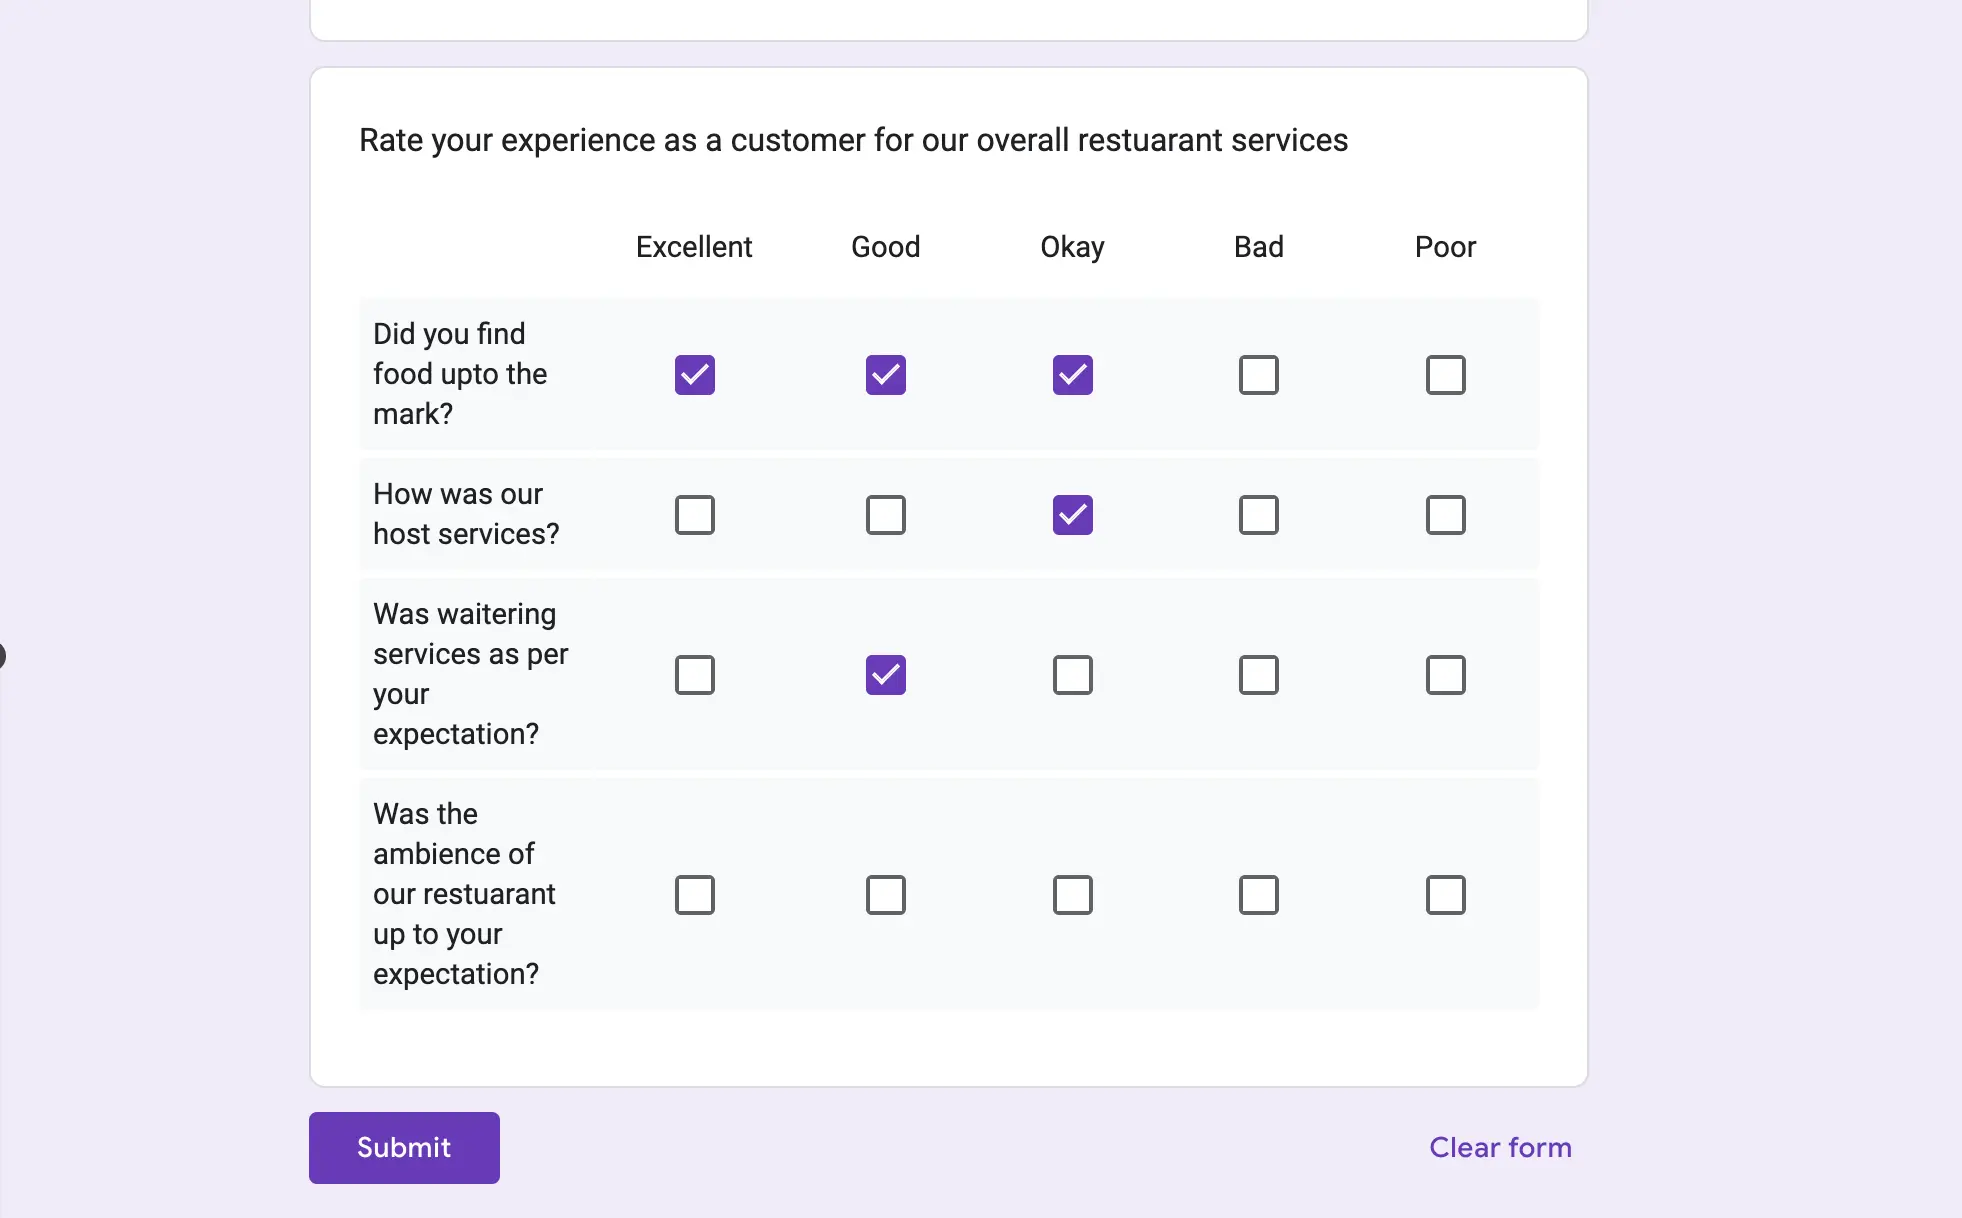
Now go ahead and give it a go! This type of question type format is sort of usual in surveys but you can add these tables in Google Forms for any use.
2. Insert Tables through Add-on
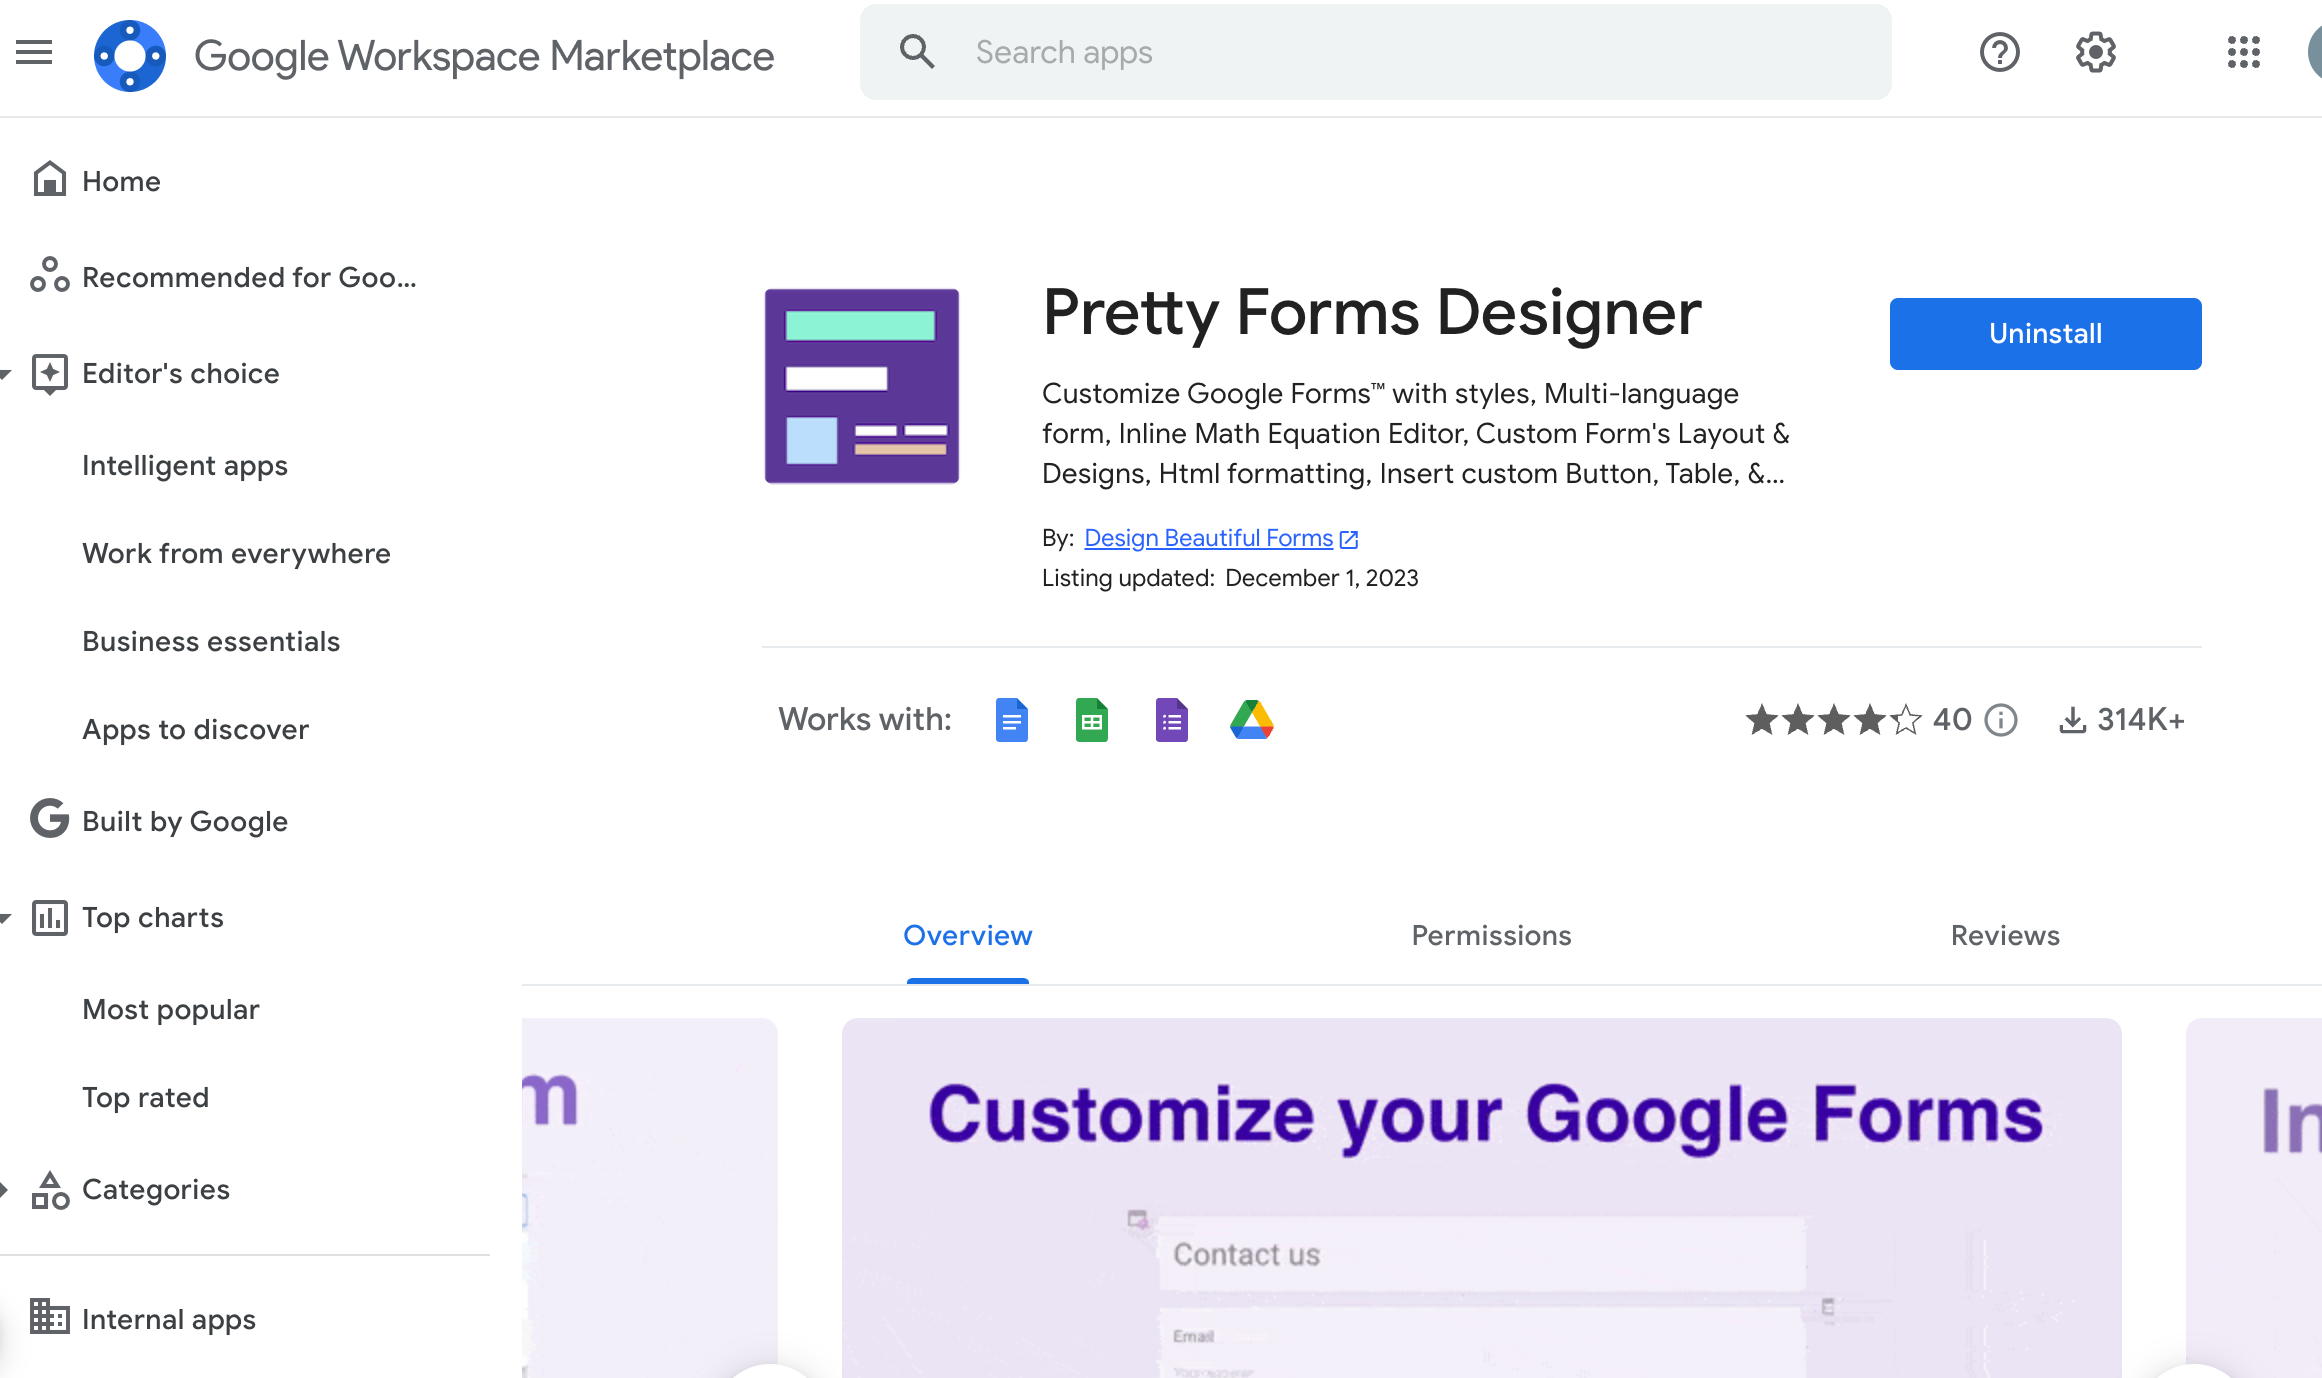
Another way to insert Google form table questions is through the Pretty Forms Designer add-on. It provides a user interface to customize the look and feel of existing Google Forms. Through adding tables, integrating Google Translate option, multi-language support, and more.
Let’s go through the steps to learn how to insert tables in Google Forms through this add-on.
Step 1 – Install Addon
- Install the Pretty Forms Designer add-on from Google Marketplace. You’ll find the add-on in Google Forms, click on the Add-ons icon > Pretty Forms Designer > Open Forms Designer
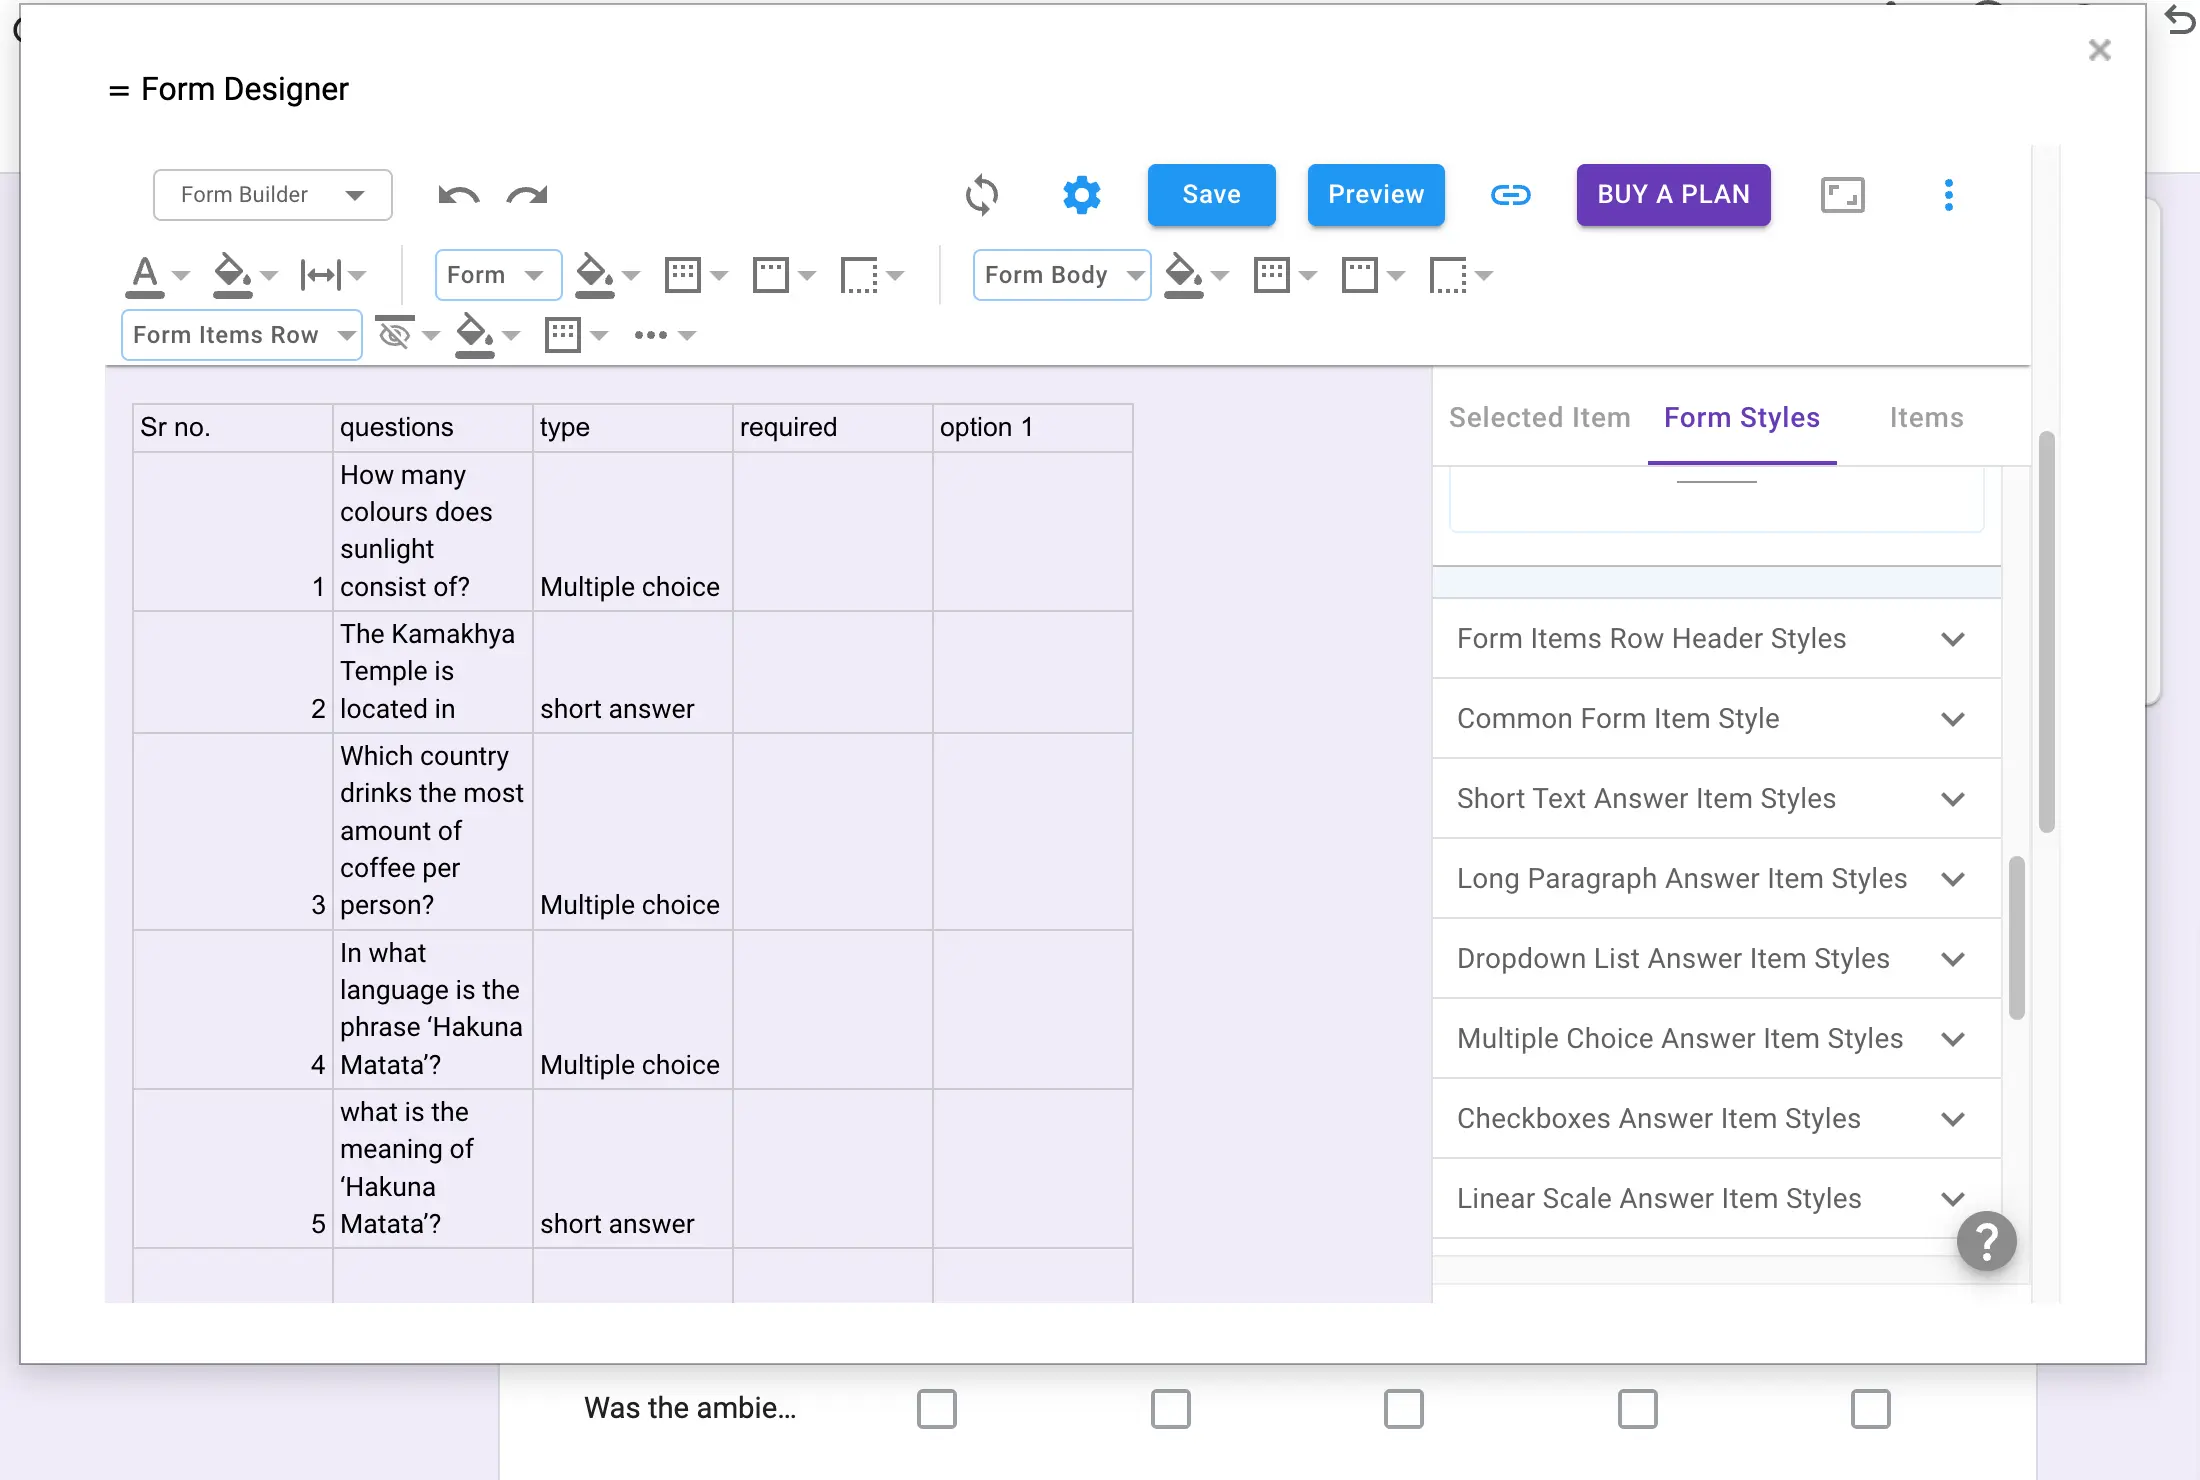
- Now, let’s jump to your Google Sheets, create a table you want to add to your Google Forms, then select it and copy.
Step 2 – Insert Table
- Go to Form Designer in Google Forms, and choose a theme, your Google Form will be shown in the editor. Now you can insert the table that you have copied from the Sheet.
- Select a question field where you want to add the table. And paste the table in that field and customize the table and form accordingly.
Step 3 – Customize Form
- You can customize a selected item and form styles by personalizing the theme, form banner style, section header style, and so much more.
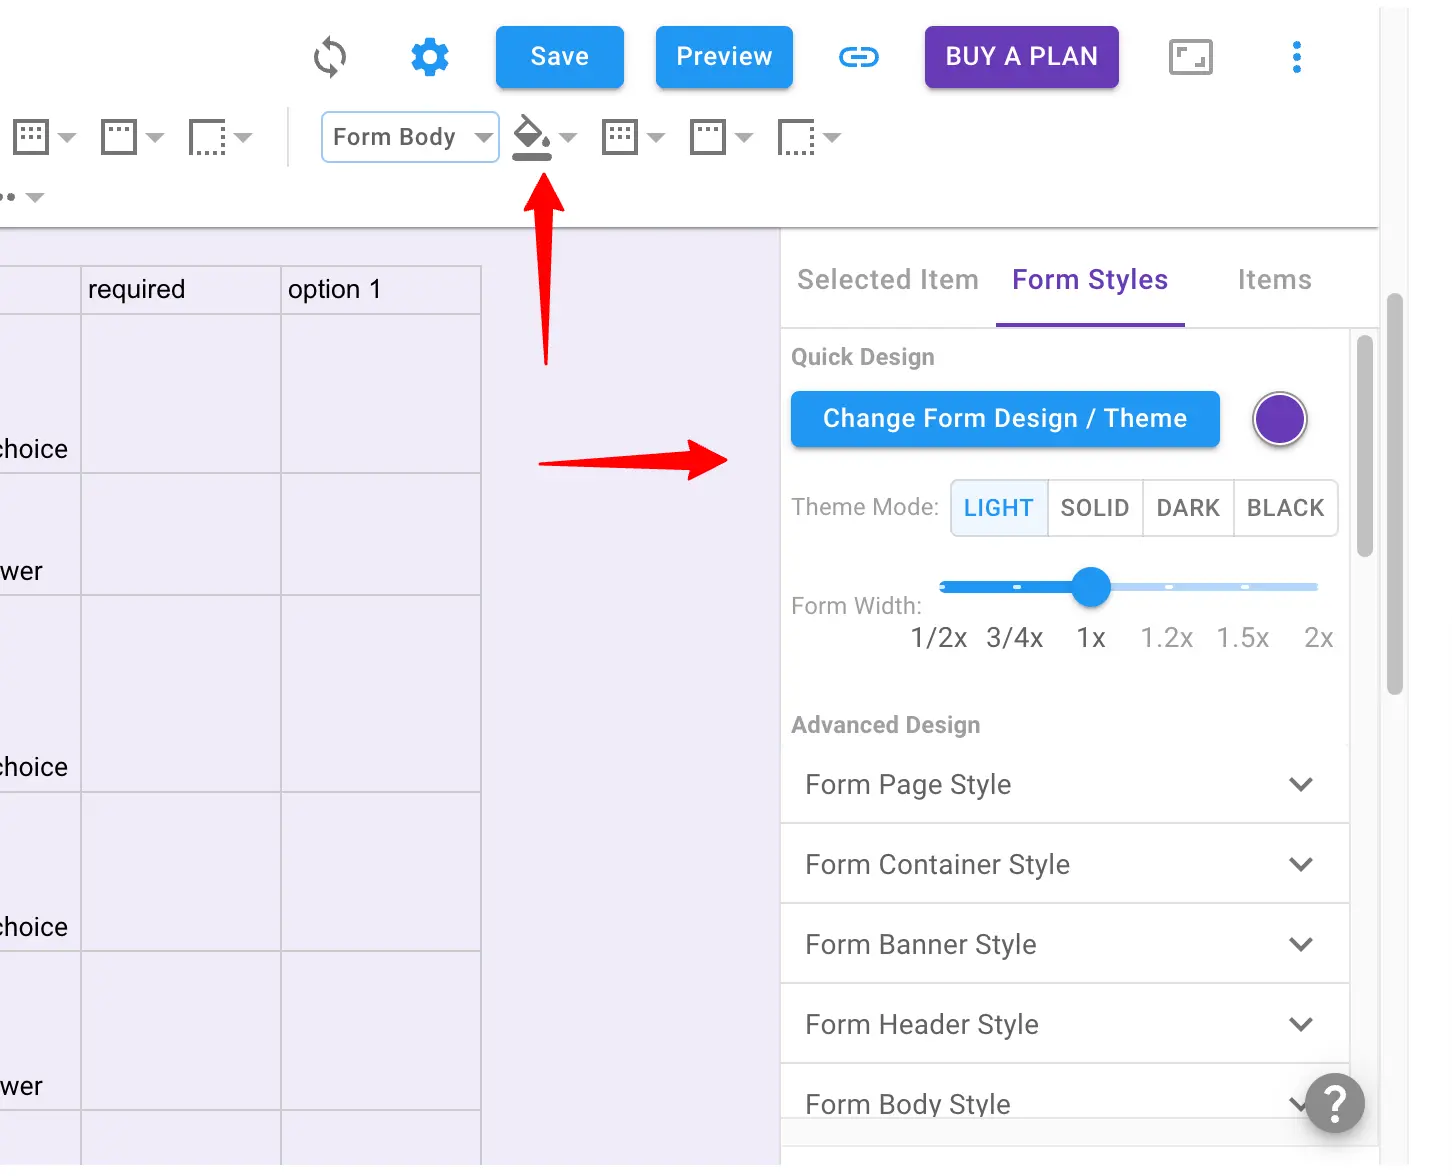
- Besides, you can change the form structure through basic customizations like filling form background, changing the form page width, or row width, etc.
Step 4 – Save and Share
- Once the customizing part is done, save the form and preview it from the Form Designer editor page itself.
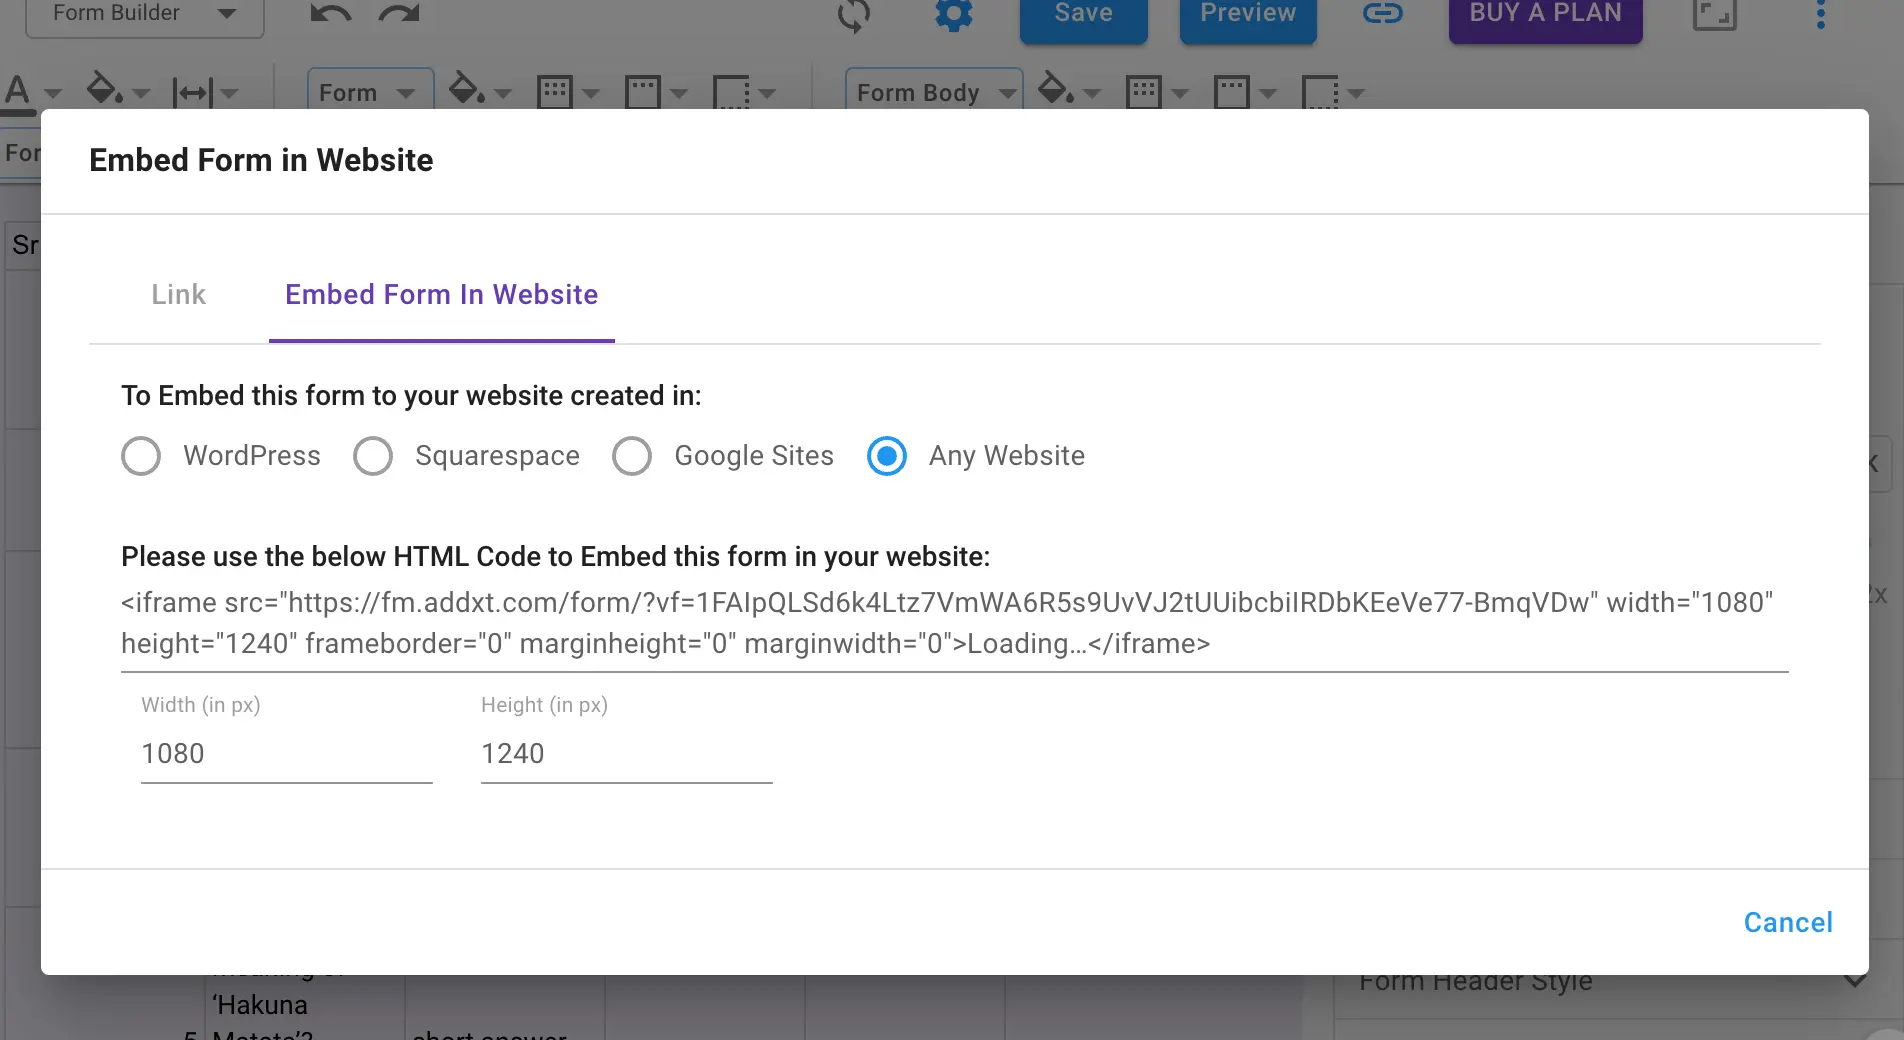
- To share the form with the participants, click on the “🔗” icon beside the Preview button. Either, you can copy the link and share or you can embed the form in a website.
That’s another way through the Pretty Designer addon to add tables in Google Forms. It’s a simple process to go over and you can easily add tables in your question, description, or the question title section.
Wrap Up
In conclusion, incorporating tables into your Google Forms is a game-changer for efficient data organization and user-friendly surveys. Whether you opt for the traditional in-form method or the versatility of an add-on, the benefits are undeniable.
So, go ahead, experiment with tables in Google Forms, and elevate your form-building prowess to new heights! In terms of add-ons, ExtendedForms, in particular, empowers with enhanced customization options for Google Forms.