Looking for an easy way to share Google Form results? This guide is all you need.
Google Forms is a powerful tool for collecting information and conducting surveys. But what happens after you collect all those responses? Sharing the results can be just as important as gathering them. Whether you’re collaborating with a team, presenting data to stakeholders, or sharing insights with participants, knowing how to share Google Form results effectively is crucial.
In this guide, we’ll walk you through five easy steps to seamlessly share your Google Form responses with others.
Table of Contents
Why Share Google Form Results With Others?
Sharing Google Form results isn’t just about transparency; it’s a strategic move that amplifies the value of the data you collect. Here’s why it matters across different scenarios:
- Team Collaboration: Keeps everyone on the same page with real-time data.
- Better Decisions: Helps back up choices with solid evidence.
- Engage Participants: Shows people their input actually matters.
- Stakeholder Buy-In: Makes your reports clear and convincing.
- Smooth Project Management: Spot issues and track progress easily.
- Build Trust: Creates a culture of transparency and accountability.
- Keep Improving: See trends and measure what’s working over time.
Steps to Share Google Form Results
Step 1: Create a New Google Form
The very first step to share Google Form results is to create a new Google Form. Go to the Google Forms website and click on the (+) icon to create a form from scratch. You can also select from the pre-built templates and edit them according to your requirements.

Once you have created the new form, don’t forget to name it. Keep a small and concise form name that resonates with the purpose of the form. Also, you can add a brief description about the form in the description field.
Want to make a personality quiz to understand your audience? Read, How to Make a Personality Quiz in Google Forms. (5 Simple Steps).
Step 2: Add Questions and Their Responses
Now that your form is ready, it’s time to add questions. Click on the “+” icon to add a new question. Google Forms supports various question types, including short answer, multiple choice, checkboxes, and dropdown menus. Choose the appropriate format based on the information you want to gather.
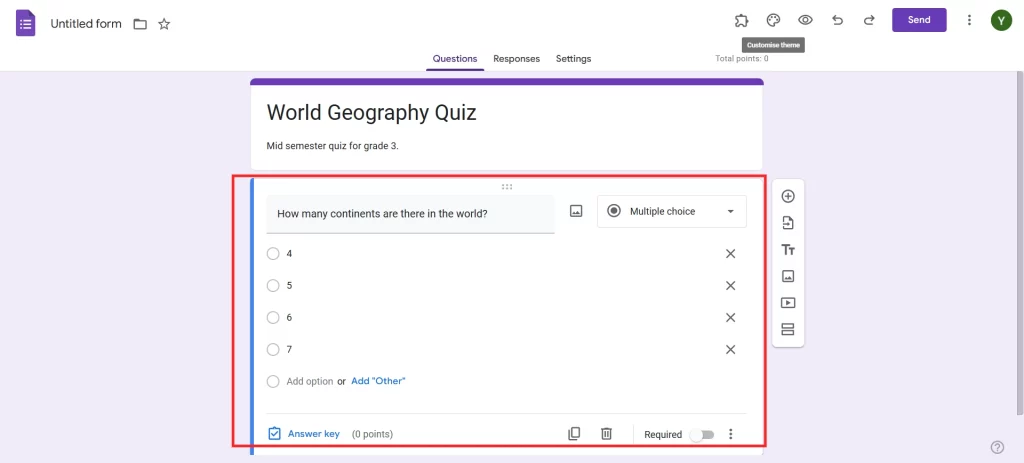
As responses start coming in, they’ll be automatically saved. Ensure each question is clear and concise to avoid confusion. You can also set certain questions as mandatory by toggling the “Required” switch. This ensures that you gather all the essential information before sharing the results.
Step 3: Navigate the ‘Responses’ Tab
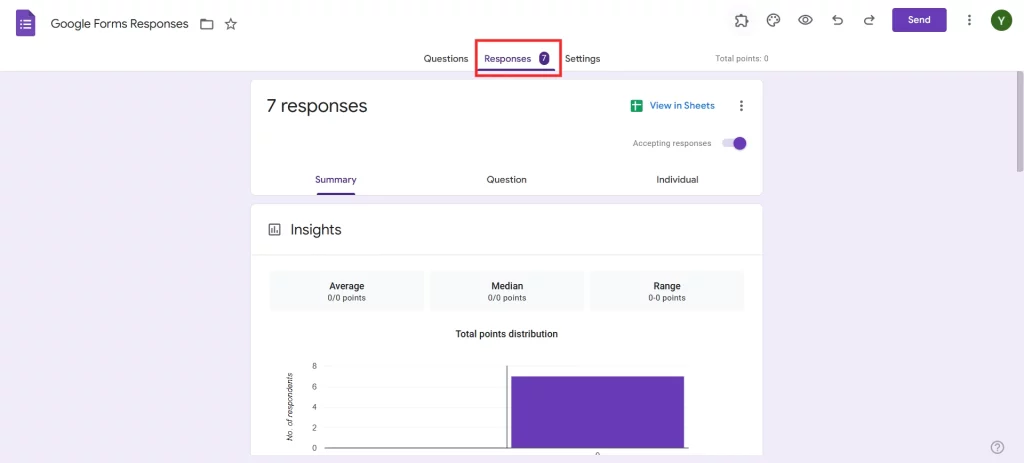
Once your form starts collecting responses, you can view them by clicking on the “Responses” tab at the top of the form. This tab gives you a summary of all responses, showing charts and graphs for quick analysis. You can also view individual responses or see them in a list format.
Step 4: Link Your Google Forms to Google Sheets
To share results effectively, you’ll often want to link your Google Form to Google Sheets. This allows you to manage, filter, and analyze data more flexibly. To link your form to a spreadsheet, go to the “Responses” tab and click on the Google Sheets icon. You’ll have the option to create a new spreadsheet or link to an existing one.
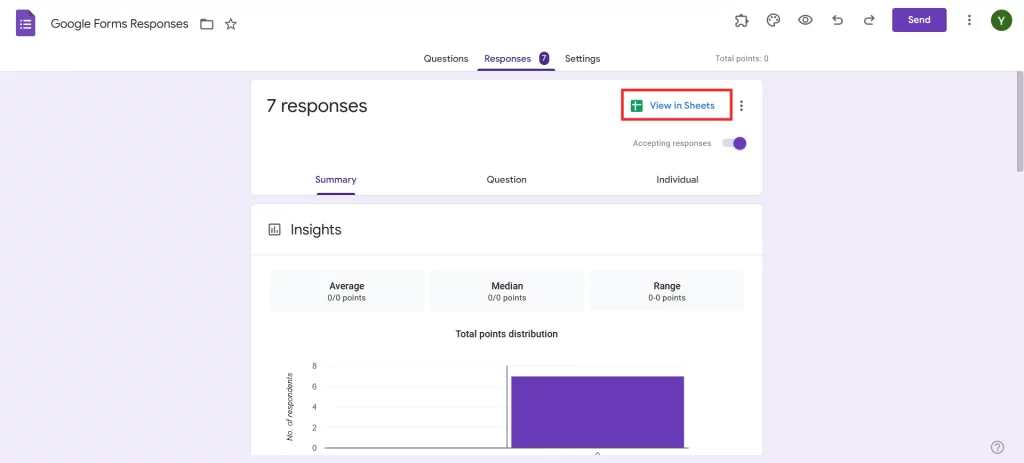
Once linked, all new responses will automatically populate the spreadsheet in real time. This step is important for sharing because it allows you to clean up and organize data before presenting it. You can also apply filters, create charts, and use Google Sheets functions to derive deeper insights.
Are you a business owner and want to understand the preferences of your customers? Add ranking questions in your Google Forms. For more details, read How to Add Ranking Questions in Google Forms. (6 Easy Steps).
Step 5: Share Google Sheet
Now that your responses are organized in Google Sheets, it’s time to share the results. Click on the “Share” button in the top right corner of your spreadsheet. Enter the email addresses of the people you want to share the results with and set their access permissions. Options include “Viewer” (can view but not edit), “Commenter” (can comment but not edit), and “Editor” (can make changes).
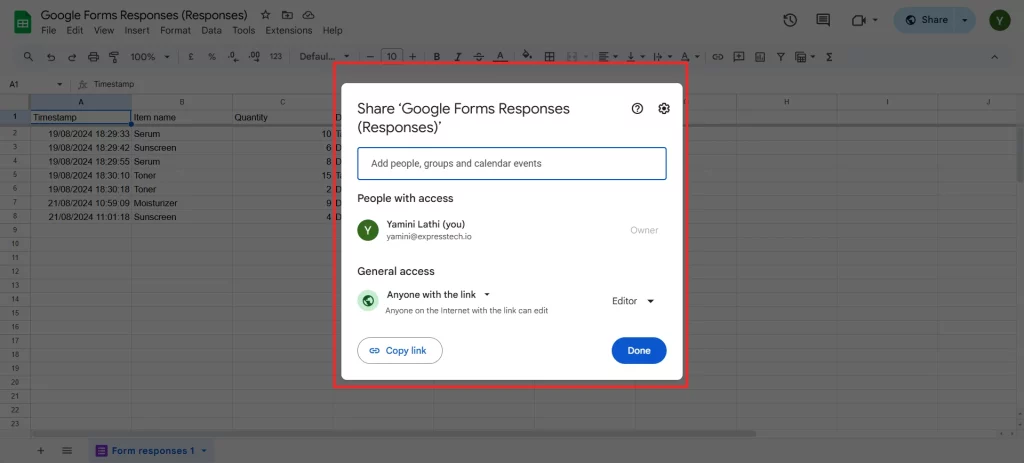
For broader access, you can also create a shareable link by clicking “Copy link” and adjusting the permissions accordingly. If you’re sharing with a larger audience, consider setting the access to “Anyone with the link” and choosing “Viewer” permissions to prevent unauthorized edits.
Final Thoughts
Share Google Form results not just for transparency but also for turning data into meaningful action. Whether you’re working with a team, presenting to stakeholders, or engaging participants, sharing results keeps everyone aligned and informed. It’s more than just sharing numbers; it’s about connecting people with the story behind the data.
If you liked reading this blog on how to share Google Form results, also read our detailed guide on How Do I Make a Google Form Public? (6 Easy Steps) and How to Create a Liability Waiver Form Using Google Forms? (3 Minutes Easy Read).
