
Google Forms is an incredibly versatile tool for creating surveys, quizzes, and feedback forms. But if you need to create a fill-in-the-blank style question, you might be wondering how to do it. Unlike traditional quiz platforms, Google Forms doesn’t offer a dedicated “fill-in-the-blank” question type. However, you can still achieve the same effect using different question types and a few simple settings.
In this guide, we’ll walk you through five easy steps to create fill-in-the-blank questions in Google Forms.
Table of Contents
What Is a Fill-In-The-Blank Question in Google Forms?
A fill-in-the-blank question requires respondents to type in a specific answer instead of selecting from predefined options. This type of question is commonly used in educational tests, training assessments, and surveys where exact wording matters.
Since Google Forms doesn’t have a built-in fill-in-the-blank format, you can replicate it using either the short answer or multiple-choice question types. Both methods allow you to guide responses while maintaining flexibility in your form design.
Let’s dive into the step-by-step process to set this up.
How to Make a Fill-In-The-Blank Line in Google Forms
Follow these five simple steps to add a fill-in-the-blank question to your Google Form.
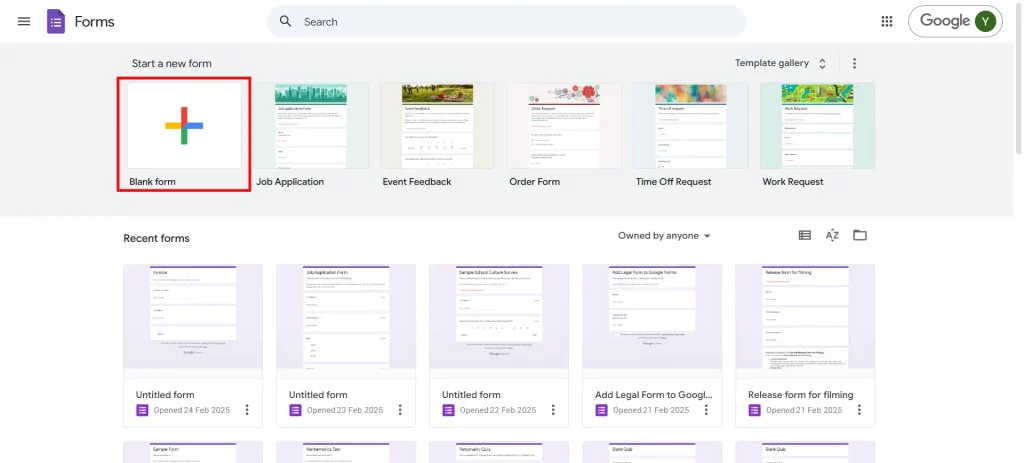
Step 1: Open Your Google Form
Start by going to Google Forms. If you don’t have a form ready, click on the Blank template to create a new one. If you already have an existing form, open it for editing.
Before proceeding, decide on the type of fill-in-the-blank question you need. Having a clear idea of your question format will make the setup easier in the next steps.
Don’t know the meaning of the responders’ input in Google Forms? Read What Does Responder Input Mean in Google Forms? (4 Minutes Easy Guide).
Step 2: Add a New Question
Once your form is open, click on the plus (+) icon in the right-hand toolbar to insert a new question field.
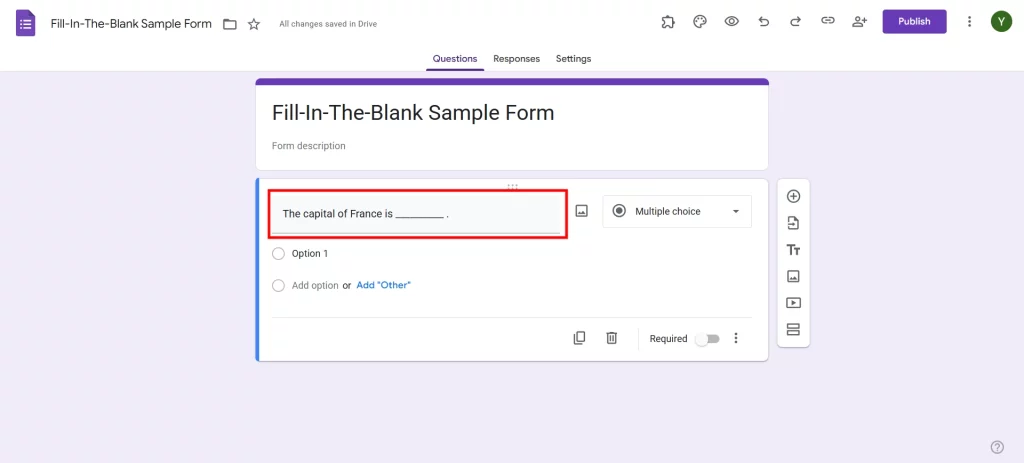
Now, type your question in a way that makes it clear what type of answer is expected. For example:
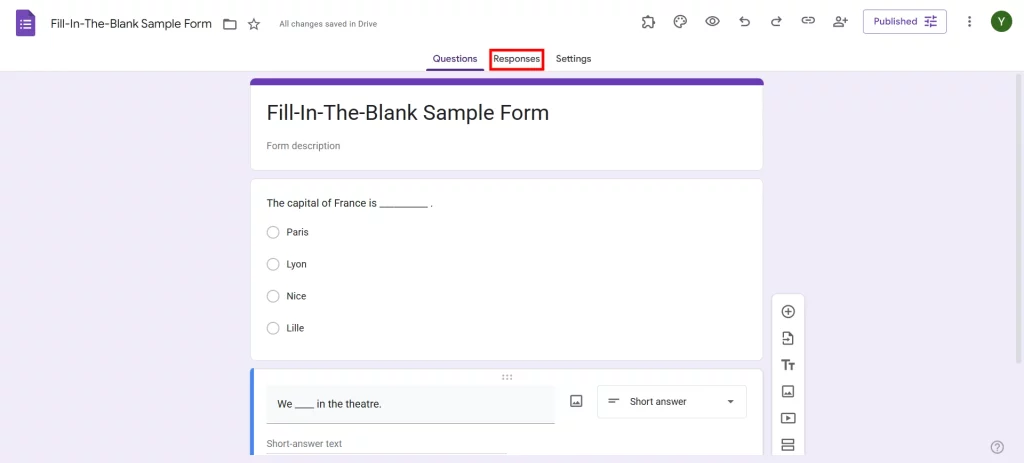
- “The capital of France is _______.”
- “Newton’s First Law states that an object in motion stays in _______.”
Leave a blank space in the question where respondents should input their answers.
Step 3: Choose a Question Type
Google Forms offers different question formats. The two best methods for creating fill-in-the-blank questions are:
Method 1: Multiple-Choice Question Type
This option works if you want to provide a predefined set of possible answers while keeping the fill-in-the-blank structure.
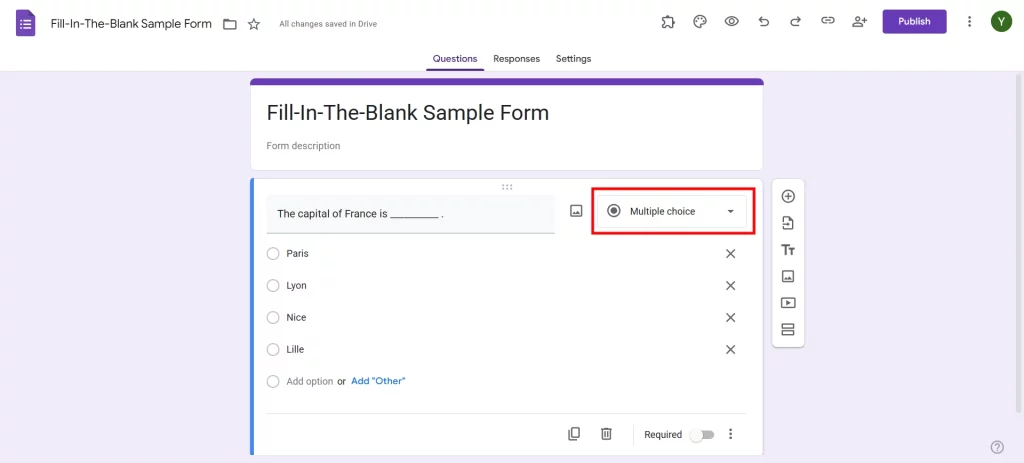
- Click on the question type dropdown and select Multiple Choice.
- Enter the question and list possible answer choices.
- Example: “The capital of France is _______.”
- Paris
- London
- Rome
- Madrid
- You can enable “Go to section based on answer” to add branching logic if needed.
Method 2: Short Answer Question Type
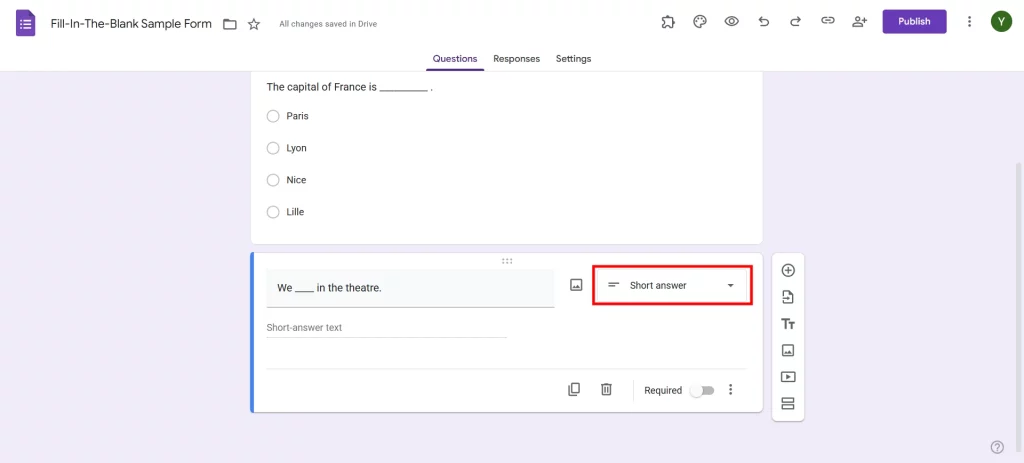
If you want respondents to type their own answers, use the Short Answer format. Select Short Answer from the question type dropdown. Enter your question, ensuring it is worded to expect a specific response.
Own a business and want to build a customer success strategy? Read Guide to Building a Customer Success Strategy (3 Minutes Easy Guide).
Step 4: Finalizing Your Form
After setting up your fill-in-the-blank questions, review your form to ensure everything is structured correctly. Here are some finishing touches:
- Make questions required: Click the Required toggle to ensure respondents cannot skip important questions.
- Add descriptions: Provide instructions under questions for added clarity.
- Customize the theme: Adjust colors, fonts, and images for a professional look.
- Enable quiz mode: If your form is a test, go to Settings > Quizzes and turn on quiz mode to assign points and correct answers.
Step 5: Start Collecting Responses!
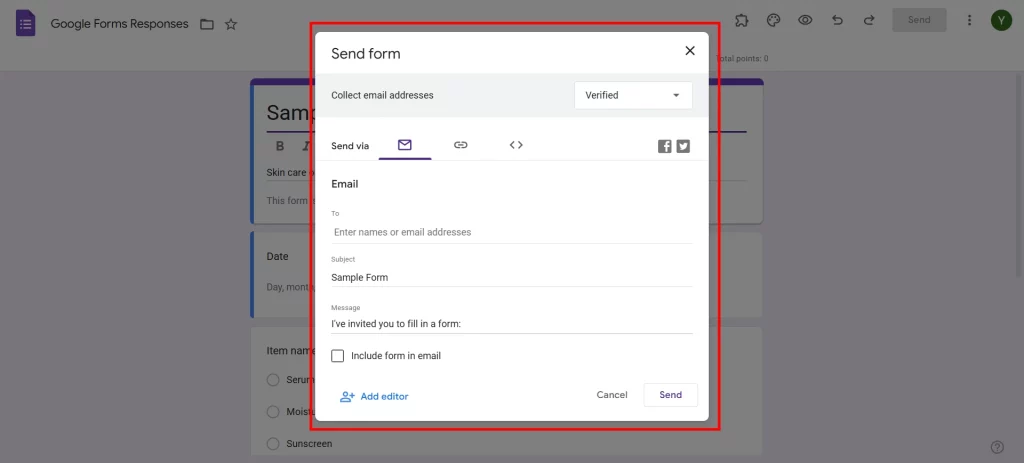
Your fill-in-the-blank form is now ready! To share it and start collecting responses. Click the Send button at the top right. Choose a sharing method:
- Email: Send directly to recipients.
- Link sharing: Click Copy link and distribute it via messaging apps, websites, or social media.
- Embed code: Add the form to a webpage.
Track responses by clicking the Responses tab. You can also export data to Google Sheets for better analysis.
Pro-Tip: Create Timer-Based Google Forms with ExtendedForms
If you’re creating quizzes or assessments in Google Forms, adding a timer can help maintain fairness and prevent extended answer times. Since Google Forms doesn’t have a built-in timer feature, ExtendedForms is a powerful add-on that lets you set countdown timers, auto-submit responses, and control test duration.
With ExtendedForms, you can:
- Set a specific time limit for your Google Form.
- Automatically submit responses when time runs out.
- Restrict multiple attempts to maintain assessment integrity.
- Track real-time progress and manage responses efficiently.
This is particularly useful for educators, trainers, and recruiters who need structured time-based assessments. To integrate ExtendedForms, simply install the add-on from Google Workspace Marketplace, configure your settings, and share the timed form with respondents. Adding a timer ensures a smoother, more controlled assessment experience while keeping Google Forms flexible and user-friendly.
Considering Everything Above
Even though Google Forms doesn’t offer a direct fill-in-the-blank question type, you can easily create one using short answer or multiple-choice formats with response validation. These workarounds ensure respondents provide accurate answers while keeping the form structured and easy to analyze.
By following these five simple steps, you can set up a Google Form that collects fill-in-the-blank responses efficiently. Whether you’re designing a test, training module, or survey, this method will help you capture the data you need.
If you liked reading this blog, also read Boost Your Google Forms With Custom Branding & Timer Features (3 Minutes Easy Guide), How to Number Questions in Google Forms? (5 Easy Steps) and How to Create a Timesheet in Google Sheets? (5 Easy Steps).