Want to create a timesheet in Google Sheets? Read this blog.
Time is one of our most valuable resources, yet it’s easy to lose track of. Whether managing tasks, billing clients, or boosting productivity, tracking your hours can make all the difference.
Google Sheets offers a free, flexible solution for creating a customized timesheet. Unlike expensive apps, it’s easy to use and highly adaptable to your needs.
In this guide, we’ll show you how to design a simple timesheet, format it for clarity, and automate calculations – all in just a few steps.
Table of Contents
How to Create a Timesheet in Google Sheets for Time Tracking?
Step 1: Create a Basic Structure of a Weekly Timesheet Template
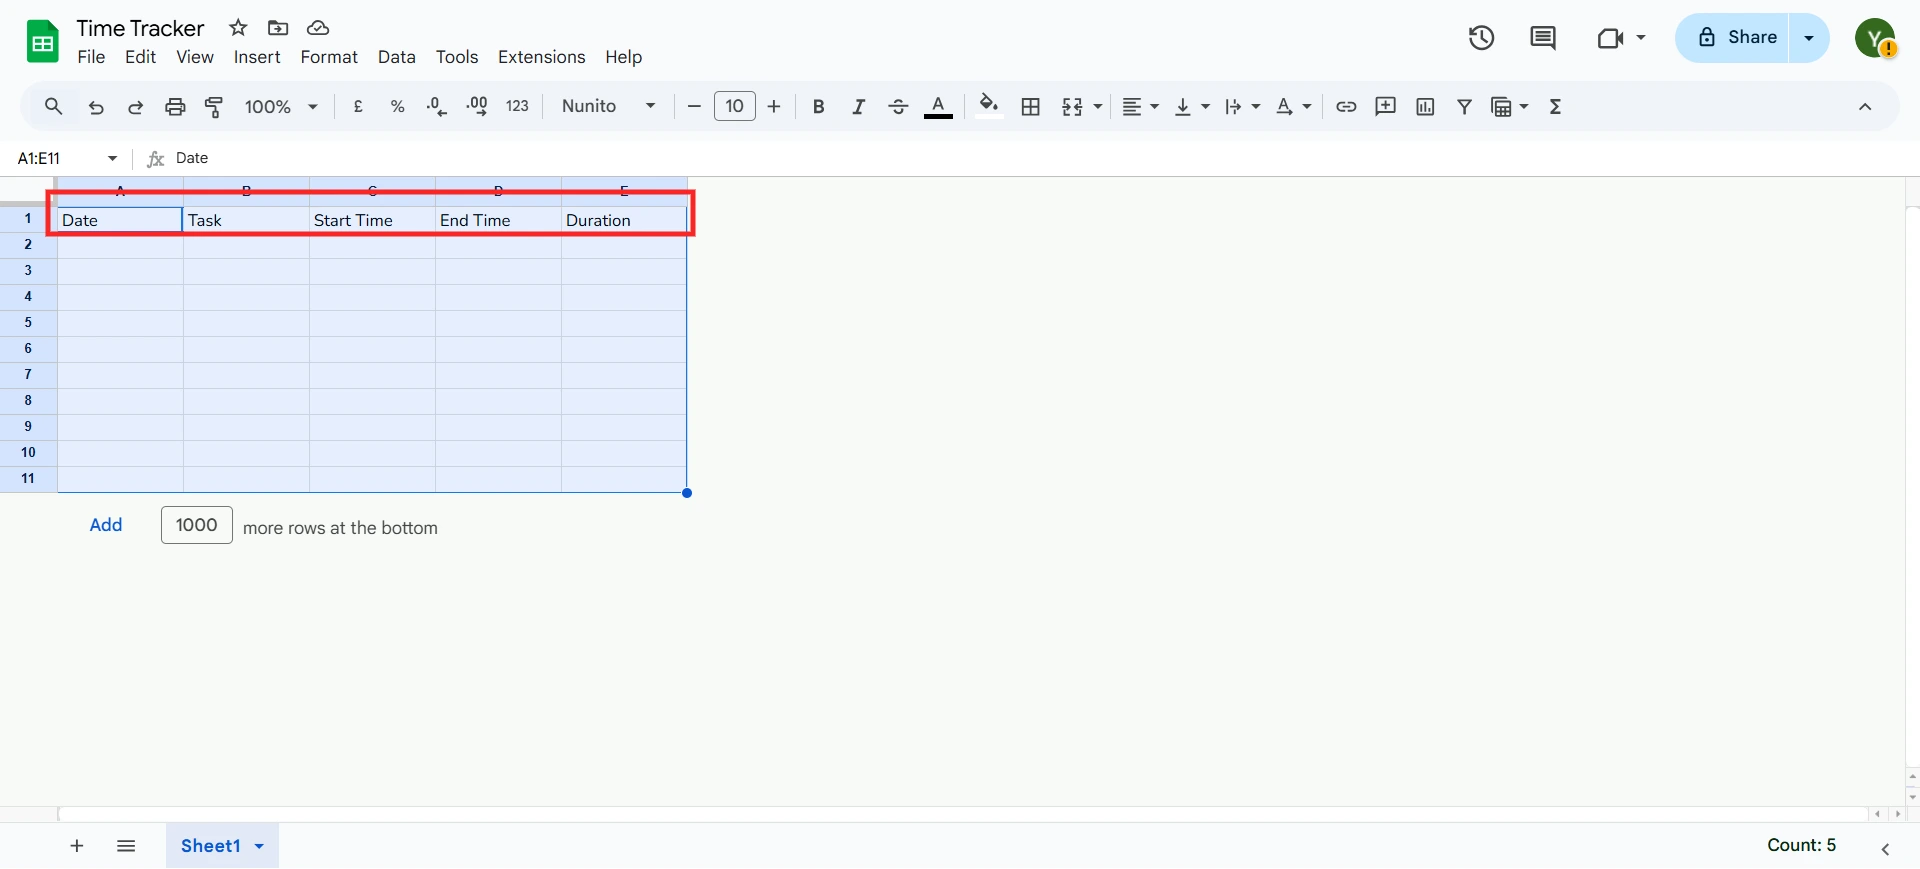
The very first step to create a timesheet is to open a new spreadsheet in Google Sheets. Start by defining the key components of your timesheet. Create column headers like Date, Day, Start Time, End Time, Breaks (in minutes), Total Hours, and Task/Activity Description.

These headers will form the foundation of your timesheet in Google Sheets, allowing you to organize and track daily entries efficiently. Beneath the headers, add rows for each day of the week, from Monday to Sunday. If you need additional space for notes, leave a few extra rows at the bottom. This initial structure gives your sheet the framework it needs to operate as a functional tracker.
Want to delete responses from your Google Forms? How to Delete Responses in Google Forms? (4 Minutes Easy Read)
Step 2: Format the Sheet
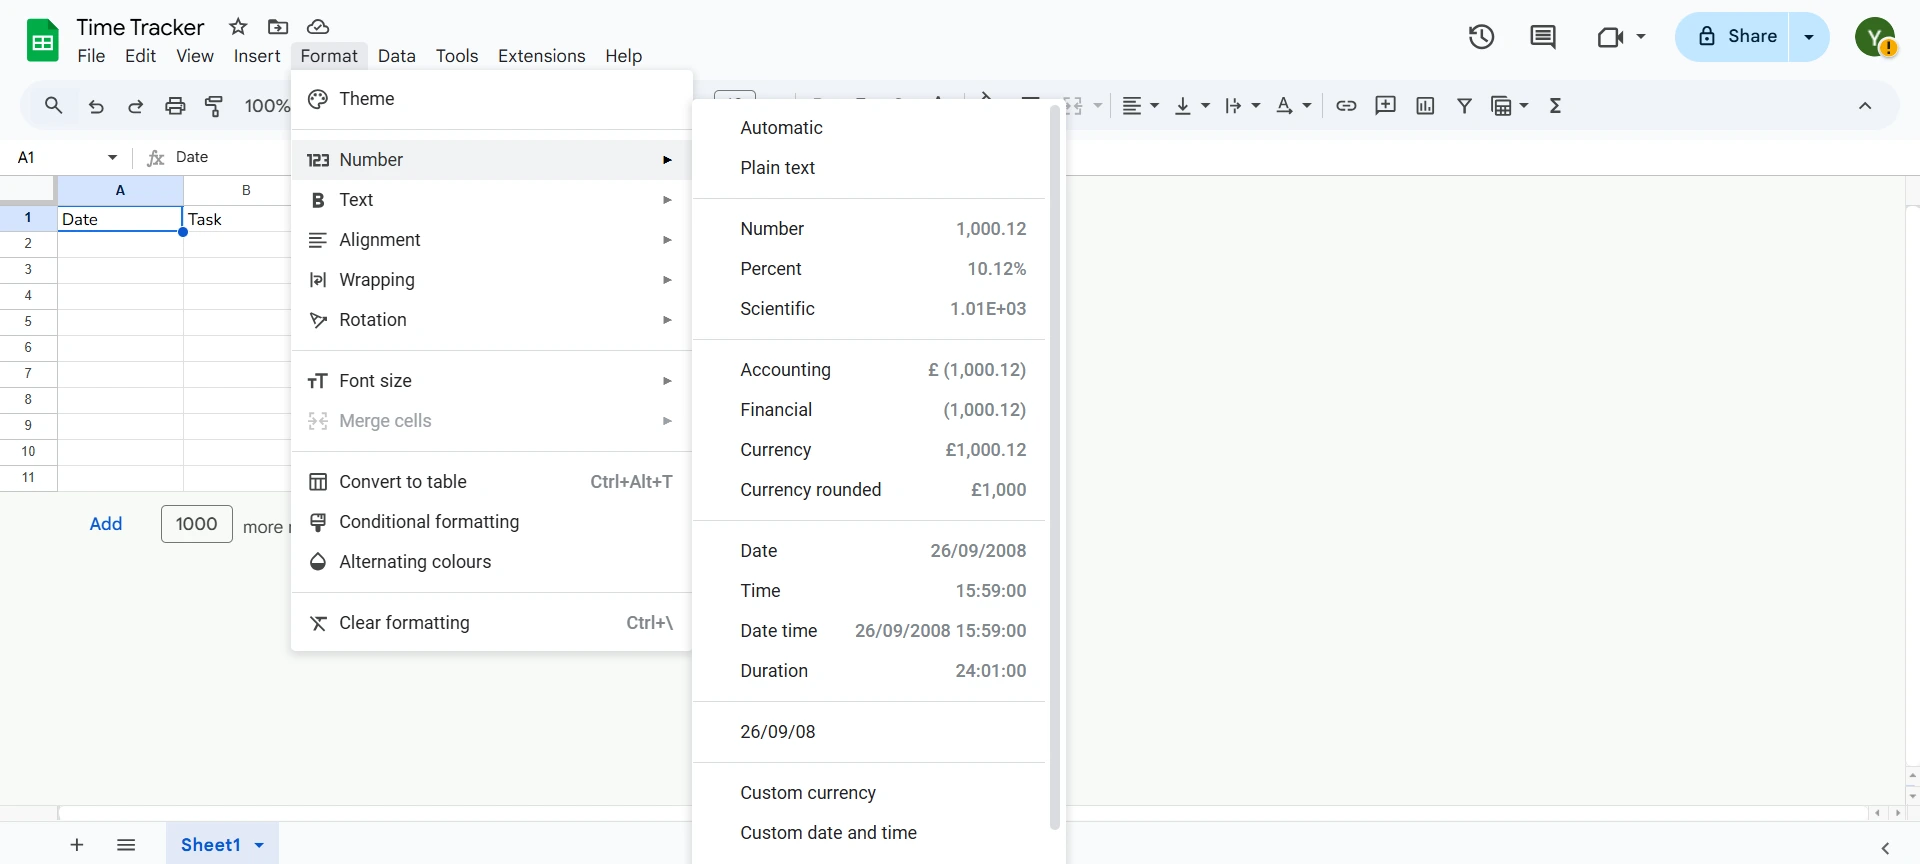
Formatting isn’t just about aesthetics – it makes your sheet easier to read and use. Start by highlighting the header row. Use bold text and apply a light background color to make it visually distinct. Adjust the column widths so all the data fits neatly without being cut off or overcrowded. Adding borders around cells further organizes your data, giving the sheet a polished look.

To minimize errors, use data validation for fields like “Day,” creating dropdown lists with pre-defined options such as Monday, Tuesday, etc. By focusing on formatting, you ensure that your timesheet in Google Sheets is not just functional but also easy on the eyes.
Step 3: Input Daily Activities
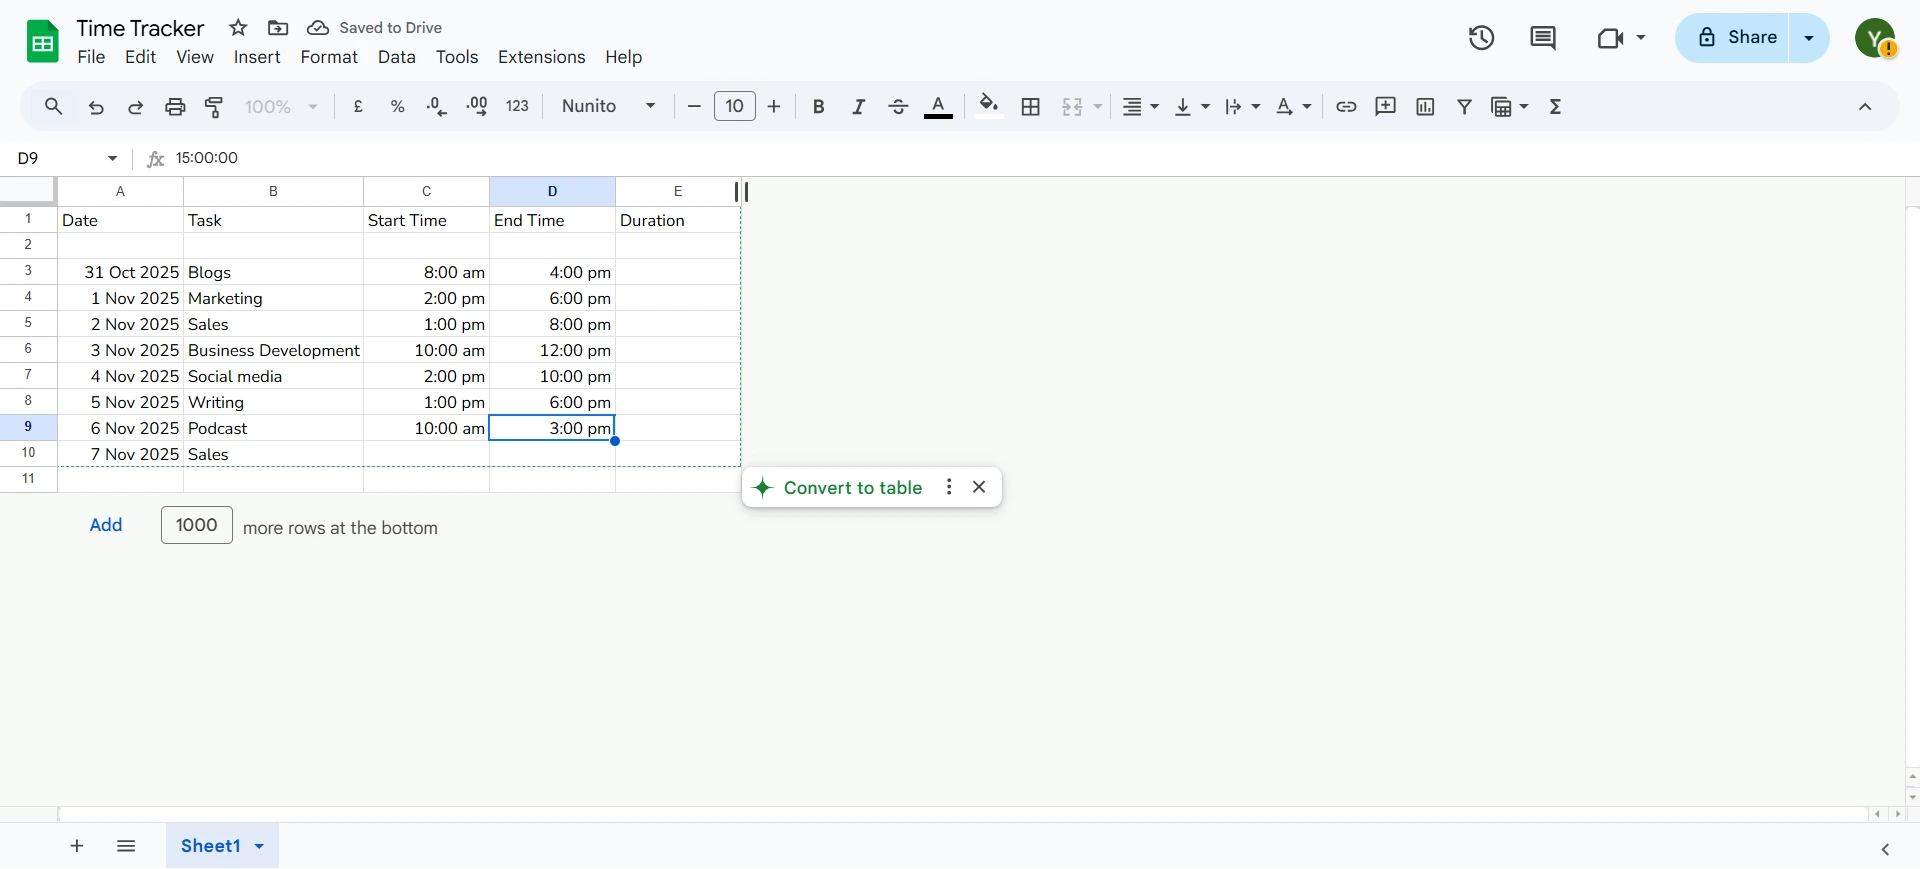
Once your template is ready, start filling in the details for each day. Begin with the date and corresponding day of the week. Then, enter the start and end times for your work or activities. Record the duration of breaks in minutes so they can be accounted for when calculating total hours worked.

Finally, describe the tasks or activities performed during the day in the Task/Activity Description column. This provides a clear snapshot of how your time was spent, making it easier to review your productivity at the end of the week. Keeping this section detailed yet concise is key to effective time tracking.
Don’t know how to add correct answers in Google Forms? Read How to Add Correct Answers to Google Forms. (6 Easy Steps).
Step 4: Calculate Duration
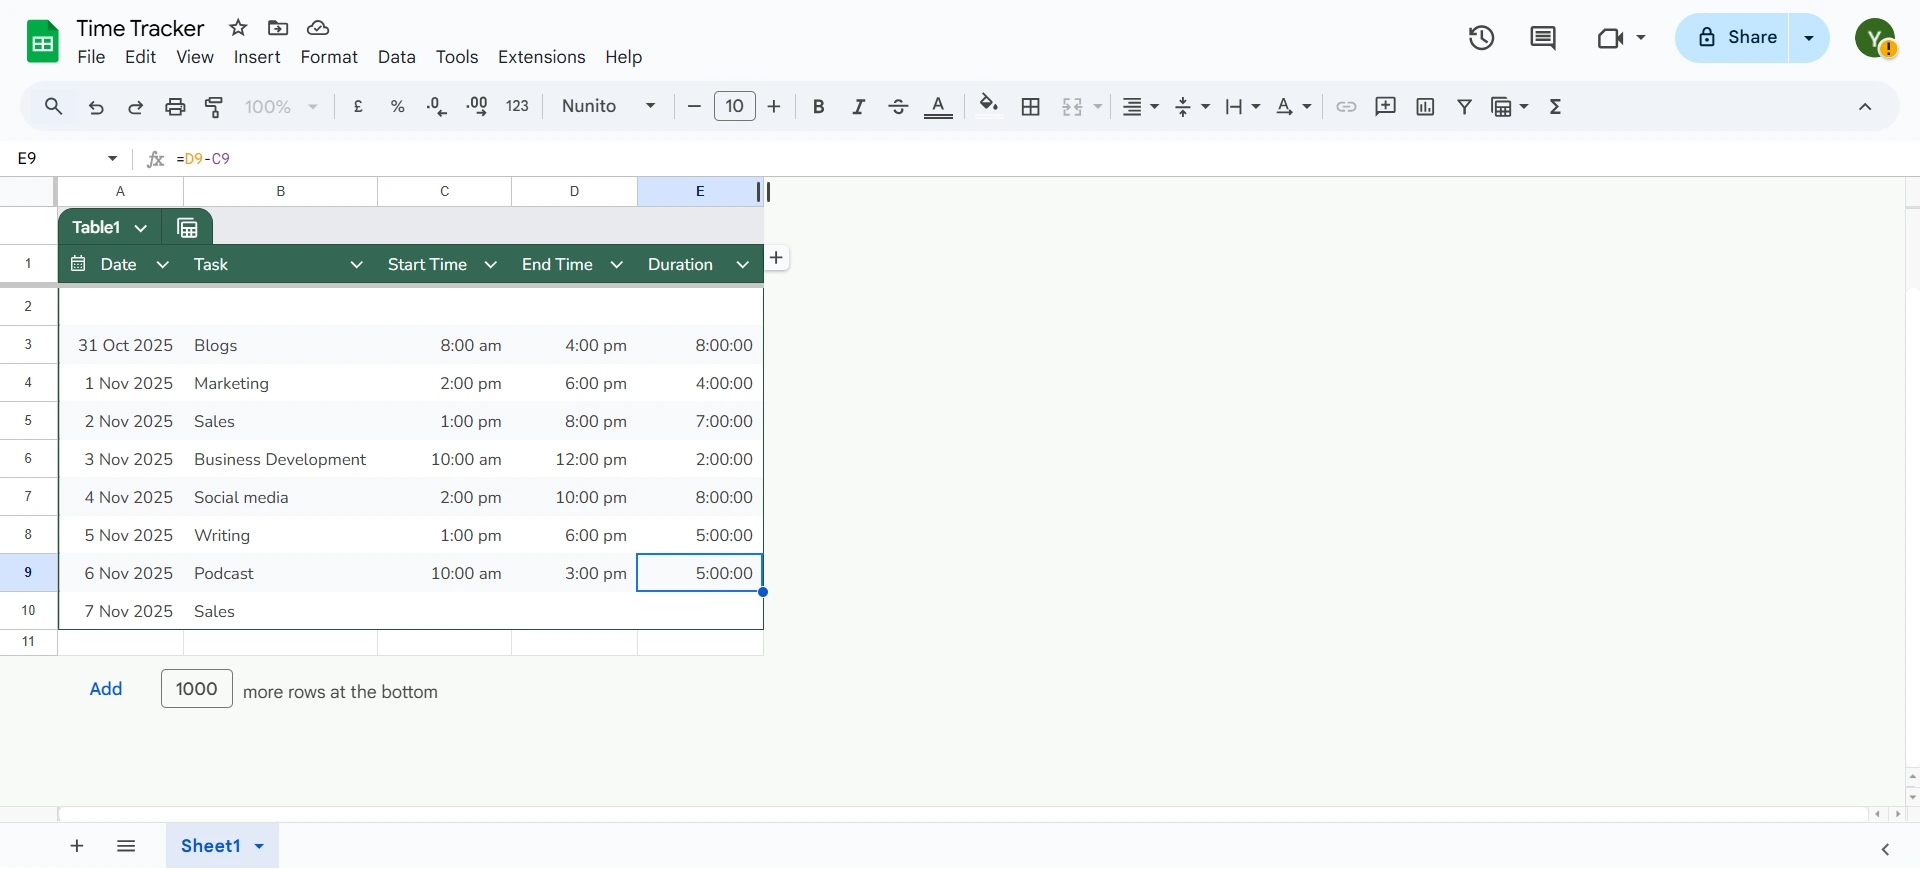
The real magic of Google Sheets lies in its ability to automate calculations. To calculate the total hours worked for each day, subtract the start time from the end time using the formula =((End Time – Start Time)*24)-Breaks/60. This will account for the hours worked and adjust for breaks.

If your activities span multiple days, consider adding a total column at the bottom that sums up the weekly hours. Use the formula =SUM(Cell Range) to calculate the weekly total effortlessly. Automating these calculations saves time and reduces the chances of manual errors.
Step 5: Save the Weekly Time Tracker Sheet as a Template
Once you’ve completed your weekly timesheet, save it as a reusable template. Rename the file as “Weekly Timesheet Template” and save it in a designated folder for easy access. When you need to create a new timesheet, simply make a copy of this template and rename it with the relevant week. This way, you won’t have to build the structure from scratch every time, saving you effort and ensuring consistency in your tracking process.
Why Should You Track Time in a Google Sheets Timesheet?
Tracking time is a small habit with massive benefits. Here’s why using a timesheet in Google Sheets is a smart choice:
- Free and Accessible: Google Sheets is entirely free and available on any device with an internet connection.
- Customizable: You can tailor the timesheet to match your specific needs—add columns, formulas, or even color codes.
- Real-Time Collaboration: Perfect for teams, as everyone can update the sheet simultaneously.
- Insightful: Helps you analyze your time usage and identify productivity bottlenecks.
- Accurate Billing: Ensures precise invoicing for freelancers and consultants.
- Time-Saving: Automate calculations with built-in formulas, reducing manual effort.
Tracking your time in Google Sheets is not just practical; it’s a step toward better time management and smarter decision-making.
In Conclusion
Creating a timesheet in Google Sheets is simple yet incredibly effective. By following these five steps, you’ll have a tool that helps you stay organized, track activities, and manage your time better. Whether it’s for personal use or professional goals, a well-structured timesheet empowers you to make the most of your day.


