Looking for easy ways to boost your forms with custom branding and timer features? This guide is for you.
Google Forms is a popular tool for collecting responses, but let’s face it – the default designs can feel plain and uninspired. If you’re using forms for professional purposes, whether it’s gathering customer feedback, conducting surveys, or hosting quizzes, the look and functionality of your form can make or break the experience for your audience.
Customizing your Google Forms allows you to add a touch of your brand’s personality. So here, in this blog, we will take you through a detailed guide of how you can easily boost your Google Forms with custom branding and timer features.
Why Customize Your Google Forms?
A well-designed form does more than collect responses – it represents your brand and communicates professionalism. Whether you’re creating a feedback form for clients, a survey for internal teams, or a quiz for students, the form’s appearance plays a crucial role in shaping user perceptions.
Customizing your Google Forms allows you to:
- Reinforce Brand Identity: By aligning the form’s colors, fonts, and imagery with your brand, you create a cohesive visual experience that leaves a lasting impression.
- Enhance User Engagement: A personalized and polished form feels more inviting, encouraging respondents to complete it.
- Showcase Professionalism: A thoughtfully customized form sets you apart from others using generic templates, signaling that you value both details and user experience.
In short, customization transforms a simple form into a meaningful touchpoint that reflects your brand’s values and commitment to quality.
Steps to Do Custom Branding in Google Forms
Step 1: Create a New Form and Add Questions
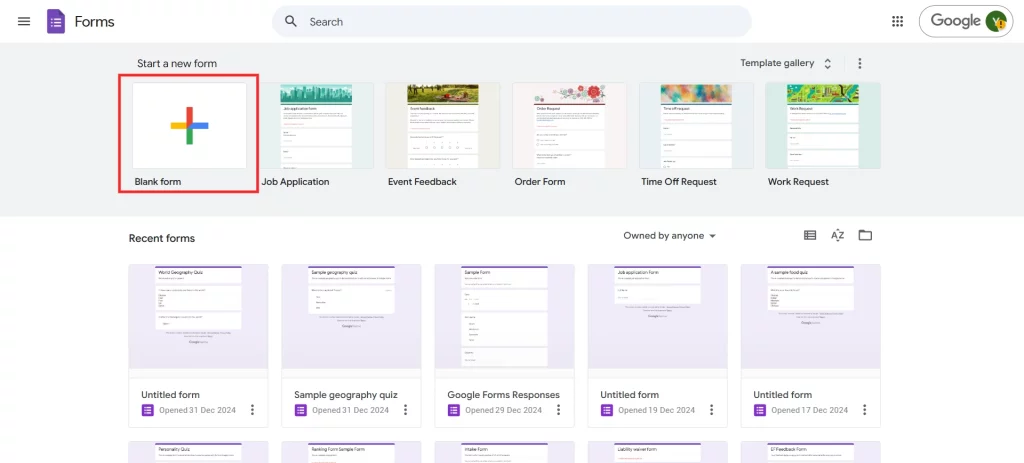
Start by opening Google Forms and clicking the blank form option or choosing a template that fits your needs. Once inside, begin adding your questions. You can choose from multiple question types like short answer, multiple choice, or dropdown. Make sure the content aligns with the purpose of your form to keep it clear and easy for respondents to navigate.
Step 2: Navigate to the Themes Tab
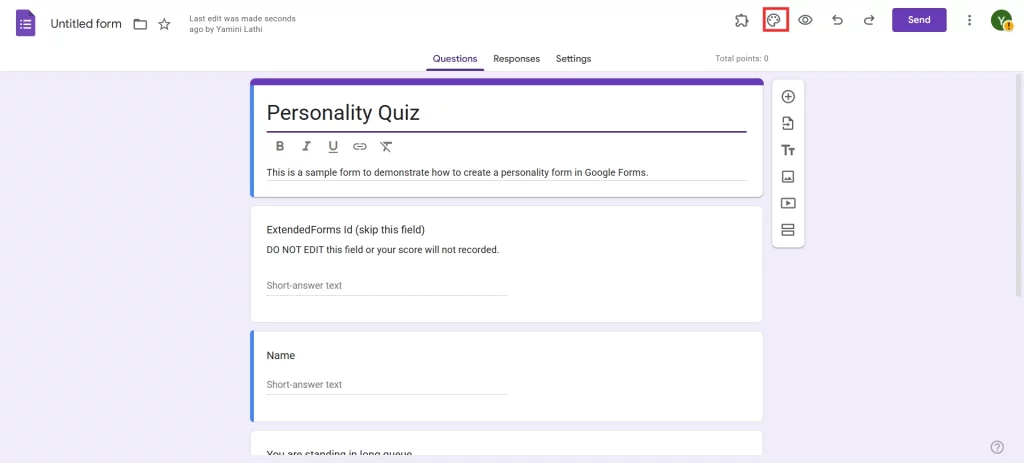
Once your questions are ready, head to the top-right corner of the form and click on the paint palette icon labeled ‘Customize Theme’. The Themes tab allows you to choose a color scheme, select fonts that match your branding, and even upload a custom background image to personalize your form further.
Want to create an order form for your business? Read, How Do You Create a Google Forms Order Form? (4 Easy Steps)
Step 3: Customise Your Form
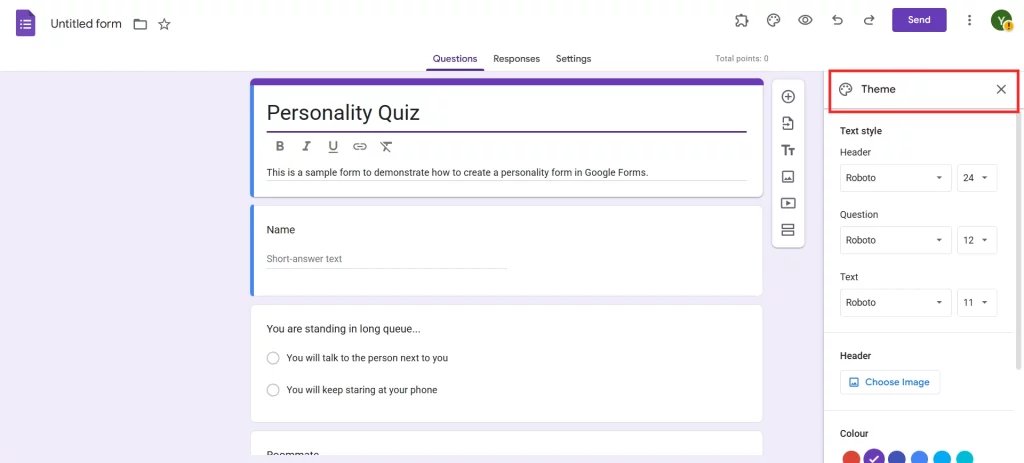
In the Themes tab, start by selecting a primary color that reflects your brand’s aesthetic. Next, choose a font style that complements your branding, whether it’s modern, formal, or playful. Finally, upload a background image that enhances the form’s visual appeal without distracting from the content. Review your changes to ensure everything looks cohesive and professional.
Step 4: Preview the Form
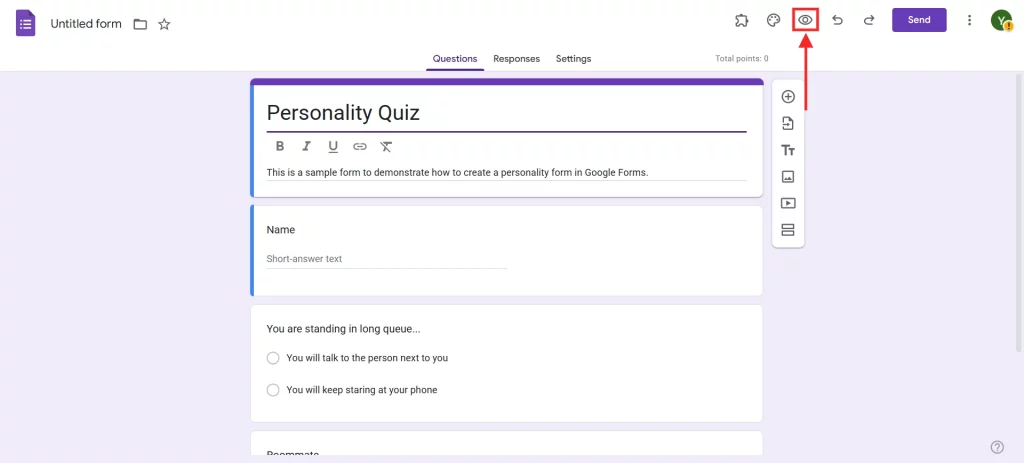
Once you’ve completed your customization, click on the eye icon at the top-right to preview your form. This step is crucial to see how the form appears to your respondents. Check for alignment, readability, and overall design. If everything looks perfect, your customized form is ready to use.
Why Add Timer Features in Google Forms?
Time-bound activities like quizzes, assessments, or surveys require a sense of urgency and structure to keep respondents focused and on track. A timer feature adds this dynamic element, making your forms not only functional but also interactive.
Here’s why you should consider adding a timer to your Google Forms:
- Create Accountability: Timers encourage respondents to stay focused and manage their time effectively, especially in quizzes or exams.
- Enhance Efficiency: With a set time limit, you ensure that the form serves its purpose without dragging on, improving the overall user experience.
- Add Professional Features: For educators, trainers, or employers, a timer can make forms feel more like formal assessments, giving them an edge over basic questionnaires.
- Encourage Fairness: In competitive scenarios, a timer ensures all participants work under the same constraints, leveling the playing field.
By adding a timer, you elevate the utility of Google Forms, making them suitable for more advanced use cases while maintaining simplicity and accessibility.
Steps to Add Timer Feature in Google Forms
Step 1: Create a New Form and Add the Necessary Details
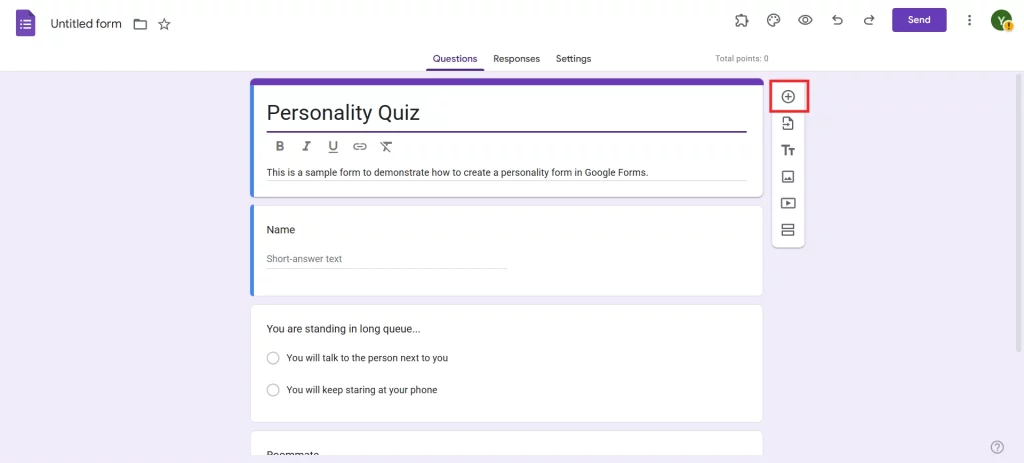
Begin by creating a new form just as before. Add all the required questions and make sure your form is complete before moving on to the timer feature. It’s essential to have the content finalized to avoid any disruptions during the timer integration.
Step 2: Download the ‘Extendedforms’ Addon
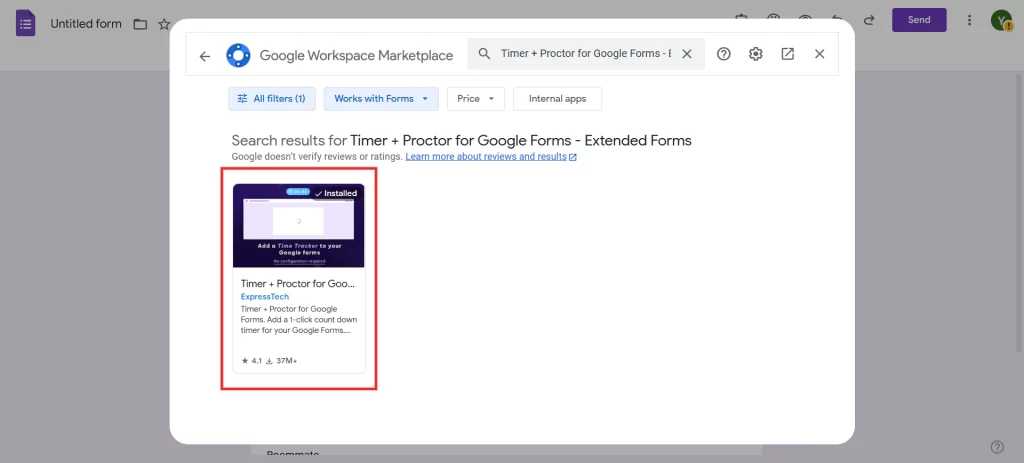
Go to the Google Workspace Marketplace and search for the ‘ExtendedForms’ add-on. Install it by clicking ‘Install’ and grant the necessary permissions. Once installed, you’ll see it added to your add-ons menu in Google Forms. You can also download the add-on from the link below.
Want to connect your forms with Google Sheets? Read, How to Connect Google Forms to Google Sheets? (Explained in 2 ways).
Step 3: Navigate Settings
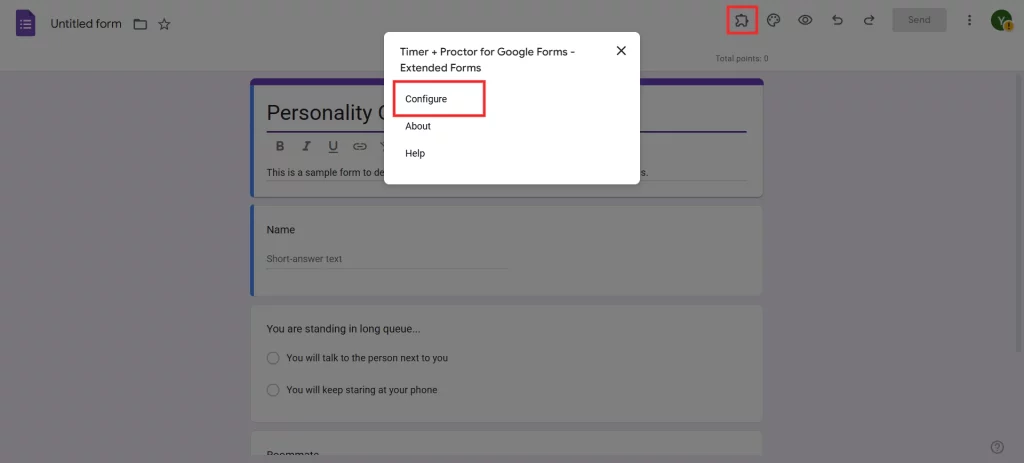
Open the ExtendedForms add-on from the menu and select the form you want to add a timer to. The settings allow you to customize the timer duration, add a countdown, and even enable features like auto-submission when time runs out. Adjust these settings according to your specific requirements.
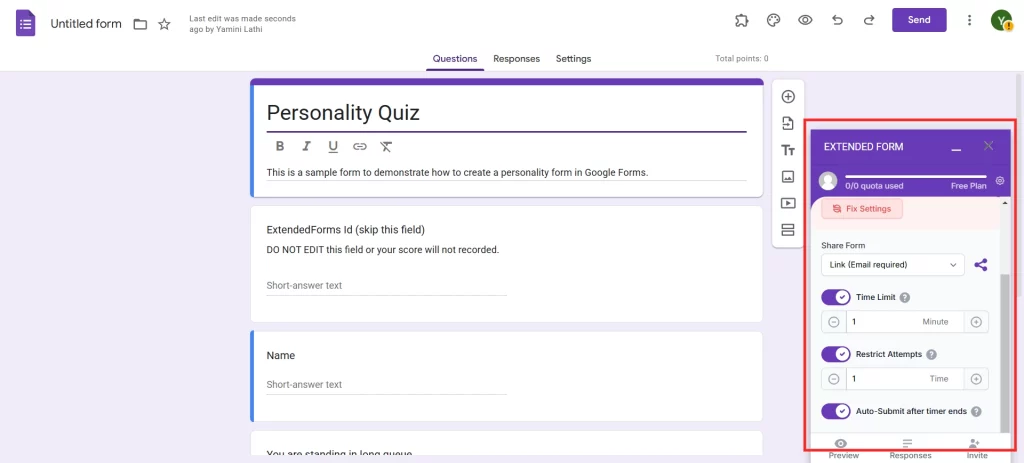
Step 4: Preview and Share
After setting up the timer, preview your form to see how the timer appears to respondents. Ensure it works seamlessly without glitches. Once satisfied, share the form link or email it directly to your audience. Your timer-enabled Google Form is now ready to be used.
Concluding Everything Above
Customizing your Google Forms with branding and timer features is easier than you think. By following the steps above, you can create forms that are not only functional but also visually appealing and professional. Whether you’re hosting a quiz, collecting feedback, or conducting surveys, these enhancements will leave a lasting impression on your audience.
If you like reading this blog, also read our detailed guide on How to Add a Countdown in Google Forms? (4 Easy Steps) and How to Italicize in Google Forms (4 Easy Ways).
