
Wondering what responder input means in Google Forms?
Google Forms is one of the most user-friendly tools for creating surveys, quizzes, and data collection forms. Whether you’re a teacher, business owner, or event organizer, ensuring accurate and relevant responses is crucial. This is where Responder Input comes in. It helps maintain the quality of the data by ensuring users provide responses in the correct format.
In this guide, we’ll walk you through what Responder Input means and how to validate responses in Google Forms to improve data accuracy and usability.
Table of Contents
What Is Responder Input?
Responder Input refers to the data entered by individuals filling out a Google Form. It could be a name, email address, numerical value, or even a paragraph of feedback. However, not all responses are necessarily correct or useful. Someone might enter text where a number is expected, or provide an incomplete response.
To avoid such issues, Google Forms allows you to validate Responder Input, ensuring that it meets specific criteria. By setting response validation rules, you can filter out incorrect or incomplete answers, saving time on manual data correction later.
Guide to Validate Responder Input in Google Forms
If you want to ensure high-quality responses in your Google Forms, follow these simple steps to enable response validation.
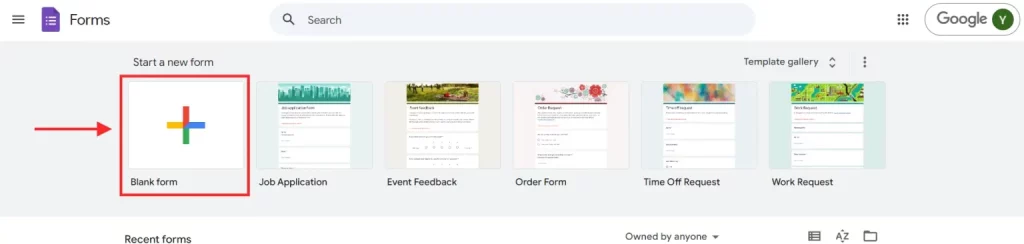
Step 1: Open up a New Google Form
To get started, visit Google Forms and click on the blank form option. If you already have a form, open the one you want to modify.
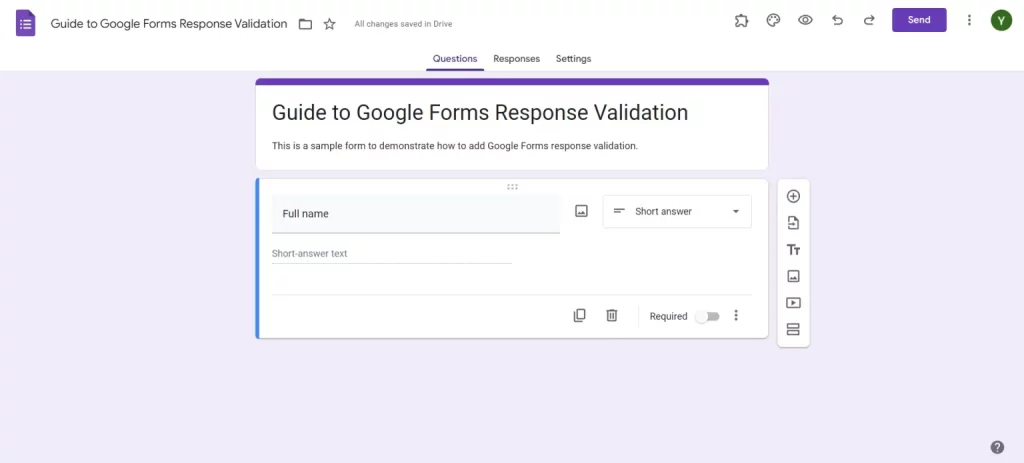
Once inside, give your form a meaningful title and description so that responders understand its purpose.
Step 2: Add a New Question
Click on the “+” button on the right sidebar to add a new question. Choose the type of question that best suits your needs, short answer, paragraph, multiple choice, checkboxes, etc.
For response validation, a Short Answer is the most commonly used question type because it allows you to set specific rules for input validation.
Enhance security by adding CAPTCHA to Google Forms. Read, How to Add CAPTCHA to Google Forms? (4 Easy Steps) to know more.
Step 3: Enable Response Validation
After selecting the Short Answer format (or another relevant format), click on the three-dot menu (⋮) in the bottom right corner of the question field. You’ll see an option called Response Validation, enable it.
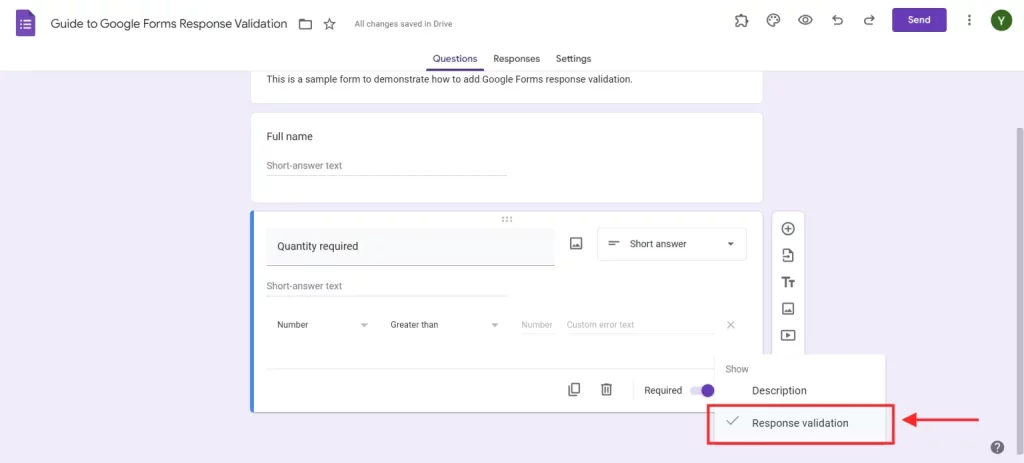
Once turned on, you’ll be able to choose validation criteria to ensure the response is in the correct format.
Step 4: Choose the Rule You Want
Google Forms provides multiple validation rules to ensure high-quality input. Depending on your needs, you can choose from the following options:

- Number: Ensures that only numbers (whole or decimal) are entered.
- Text: Requires the response to contain or exclude specific words.
- Length: Restricts responses to a certain number of characters.
- Regular Expressions: Advanced users can use regex patterns for custom validation.
- Email and URL: Ensures that the response is a properly formatted email or website URL.
For example, if you want to collect phone numbers, you can set the response validation rule to accept only numbers with a minimum and maximum length.
Want to create an order form for your business? Read, How Do You Create a Google Forms Order Form? (4 Easy Steps)
Step 5: Enter an Error Message
To guide respondents when they enter incorrect input, you need to set up an error message. This message appears when someone tries to submit a response that doesn’t match the validation criteria.
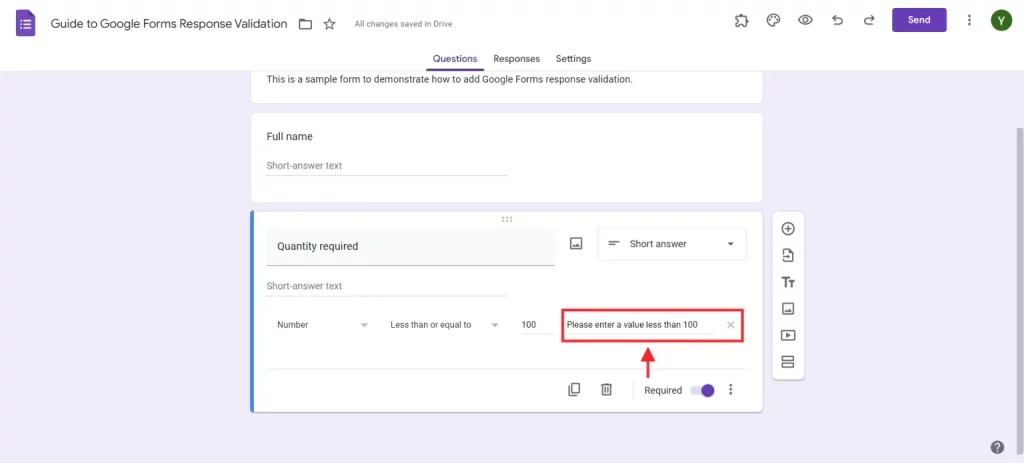
For instance:
- If collecting email addresses, your error message could be: “Please enter a valid email address (e.g., [email protected]).”
- If requiring a number, your error message could be: “Please enter a valid numerical value.”
This helps responders quickly correct mistakes, leading to more reliable data collection.
What Is the Difference Between Verified and Responder Input in Google Forms?
Responder Input is the raw data entered by users into a Google Form. It may or may not be correct, formatted properly, or useful for data collection.
Verified Input, on the other hand, refers to responses that have been checked for correctness, either through response validation rules set within Google Forms or through manual review. Verified Input ensures that the collected data is reliable, properly formatted, and meets the predefined conditions.
For example:
- If an email address field only accepts emails with a valid domain (e.g., “@gmail.com” or “@company.com”), this becomes Verified Input.
- If a form requires responses within a specific word limit, responses outside that range would be flagged as incorrect, preventing submission until fixed.
By implementing response validation, you move Responder Input closer to Verified Input, improving the overall quality and usability of your data.
In Conclusion
Google Forms is a powerful tool, but ensuring Responder Input meets specific requirements can take it to the next level. By enabling Response Validation, you can reduce errors, improve data accuracy, and ensure responses align with your needs.
With just a few simple steps, you can make your Google Forms more structured, professional, and efficient. Next time you create a form, take a few extra minutes to set up validation rules, it’ll save you a lot of time in the long run.
We hope this blog has helped you add add response input in Google Forms. If you like reading this, also read our detailed guide on How to Print Google Forms Responses. (3 Easy Methods) and How to See the Google Forms You’ve Submitted? (Easiest Way in 2024)