Google Forms expense tracker is an efficient way to track finances for financial control, both personally and professionally. However, manually typing information into spreadsheets can be tiresome.
Fortunately, there is a simple and efficient way to do this with the help of Google Forms. In a few simple actions, it is possible to develop the Google Forms Expense Tracker that automatically saves information and can be supplemented with Google Sheets for real-time calculations.
Here, in this blog, we will take you through a detailed guide on creating a Google Forms expense tracker.
Table of Contents
Why Create a Google Forms Expense Tracker?
Google Forms are flexible and can be personalized in any way possible which makes the data entry simple. By using a Google Form to track expenses, you’ll benefit from:
- Real-time Data Collection: Input your expenses on the go from any device with an internet connection.
- Automated Calculations: Connect your form to Google Sheets to track totals, categorize expenses, and more without the need for manual calculations.
- Accessibility: Share the form with others, like team members or family, to collectively manage expenses.
- Customization Options: Tailor the form and tracker to fit your specific needs by adding relevant fields and categories.
Want to create an order form for your business? Read, How Do You Create a Google Forms Order Form? (4 Easy Steps)
Creating a Google Forms Expense Tracker
1. Start a New Google Form
The very first step to creating a Google Forms expense tracker is to create a new Google Form. Go to the Google Forms website and click on the (+) icon to create a form from scratch.
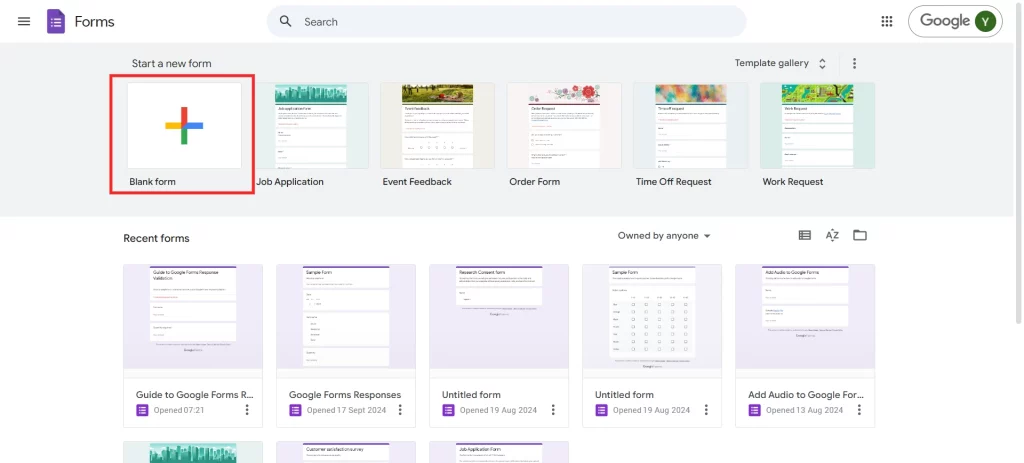
Google Forms also provides you with a library of ready-made templates to use. You can simply click on that and start editing the form.
For this tutorial, we will create a Google Forms from scratch.
2. Name Your Expense Tracker Form
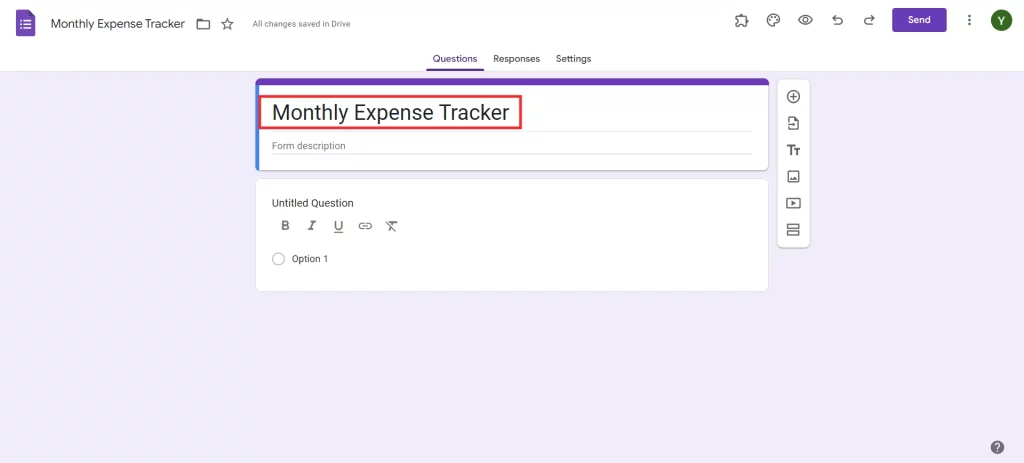
After creating your form, name it. Make sure the name is relatable to the use case of Google Forms. For instance ‘Personal Expense Tracker’.
3. Insert Essential Fields for Expense Data
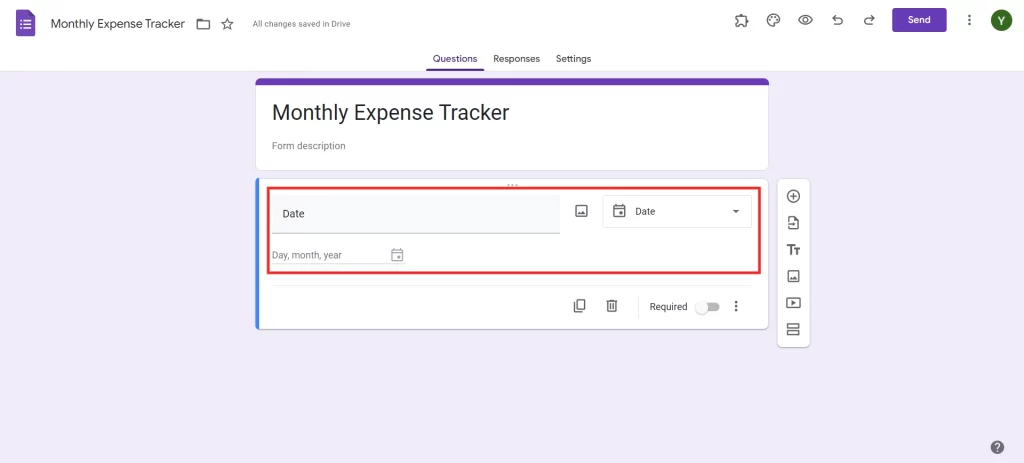
The next step to create a Google Forms expense tracker is to add the necessary fields. These fields may include:
- Date: When the expense was incurred.
- Expense Description: A short description of what the expense was for.
- Amount: The monetary value of the expense.
- Category: (e.g., food, transportation, rent, etc.)
- Payment Method: (e.g., cash, credit card, online transfer)
4. Choose Correct Data Types for Each Field
Make sure to use the correct data type in your Google Forms expense tracker. For example:
- Date should be a “Date” question type.
- Amount should be a “Short Answer” field with response validation to allow only numbers.
- Category can be a “Multiple Choice” or “Dropdown” field to give users pre-set options.
5. Ensure All Essential Fields Are Required
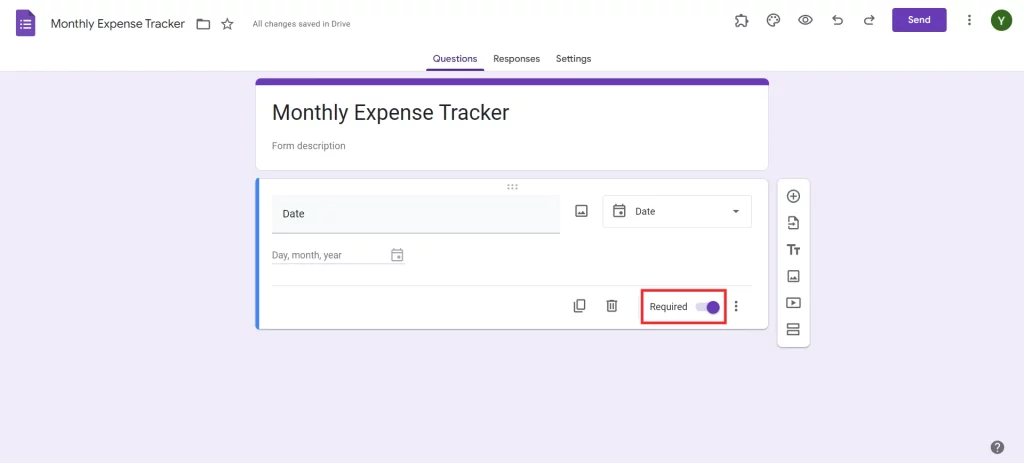
Make sure to turn on all the essential fields and check the “Required” button. This will confirm that no important information has been missed.
6. Review and Test the Form for Accuracy
After creating the Google Forms expense tracker, click on the eye button on the top left corner of the interface and you can preview the form. Try out each field and if the form needs any alteration, go back and make the changes.
Setting up Expense Tracker Calculations in Google Sheets
After creating the Google Forms expense tracker, you will need to link it to the Google Sheets. This will help you organize, sort, and filter data more efficiently.
1. Automatically Link Your Form Responses to a Google Sheet
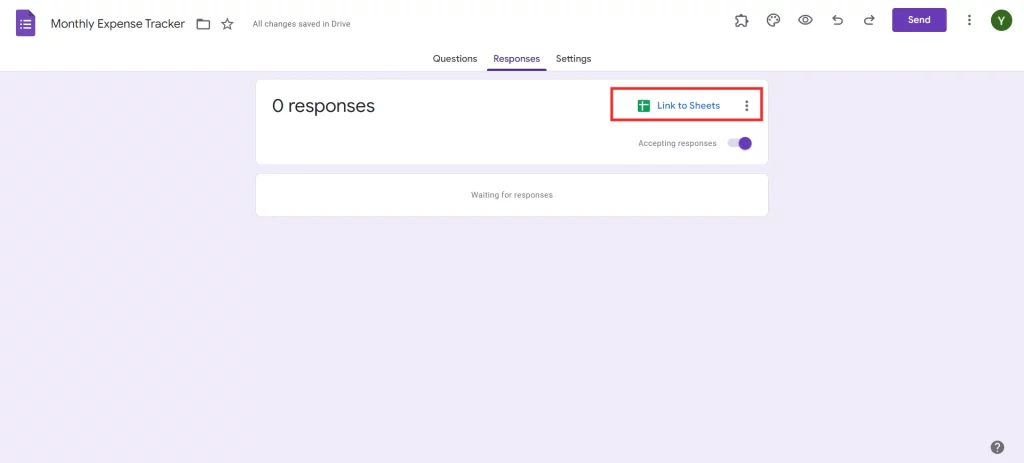
Go to the “Responses” tab and click on the “Link to Sheets” button. Here, you will have 2 options:
- Create a new spreadsheet
- Select an existing spreadsheet
Select one that suits your requirements.
Enhance security by adding CAPTCHA to Google Forms. Read, How to Add CAPTCHA to Google Forms? (4 Easy Steps) to know more.
2. Access and Review Auto-Categorized Expense Data
Now, when you open the spreadsheet, you will find that all your responses are neatly categorized in different columns with proper titles.
3. Implement Sum Formulas for Expense Category Totals
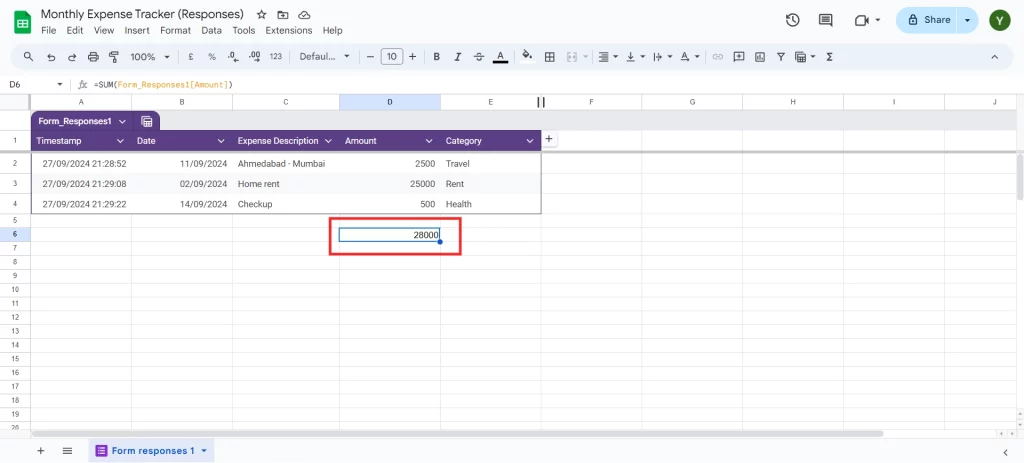
To calculate the total of your expenses, you will have to add a new row or column to the Google Sheets. Use the SUM function to calculate the total expenses. For example, use `=SUM(A3:A8)`, where ‘A3:A8’ represents the specific expenses.
4. Utilize Sorting and Filtering for Custom Data Views
To analyze specific data, you can use the filtering option. If you want to filter by specific category, navigate the column header and then select the ‘Filter by cell value” option. Further, you will find multiple options to filter your expenses. Choose one that aligns with your goals.
5. Visualize Data With Custom Charts
For a graphical representation of your expenses, navigate Insert > Charts. Here, the Google Forms expense tracker will show you various formats of chart types, like a pie chart. You can further customize this to align with your requirements.
Considering Everything Above
Now, you have set up an intuitive Google Forms which is an expense tracker, and connected it to Google Sheets for calculations and charting. This tool is an excellent way to monitor your spending and overall budget without having to enter information manually and without the need for more complicated accounting programs.
Google Forms expense tracker can be used to track an individual’s expenses, expenses of a certain team, or even event budget. Now, the next time you have an expense to record, all you need to do is to enter your data in the form and sit back as Google Sheets works its magic.
Try it today and begin taking a step towards managing your finances in the right manner!
If you like reading this guide, also consider reading our detailed guide on Creating Business Forms Using Google Forms (7 Simple Steps) and How to Add a Hyperlink to Google Forms. (7 Simple Steps).

