
Google Forms is one of the most convenient tools for creating surveys, feedback forms, and registration pages. It’s free, easy to use, and seamlessly integrates with Google Sheets for data collection. But instead of sharing a link, embedding the form directly on your website ensures a smooth user experience.
If you’re wondering how to embed Google Forms on a website, you’re in the right place. In this guide, we’ll walk through the exact steps, from creating a form to embedding it properly. No technical expertise is required – just follow along!
Table of Contents
Why Embed Google Forms on a Website?
Embedding Google Forms on your website offers several advantages over simply sharing a link. First, it provides a seamless user experience, as visitors don’t have to leave your site to fill out the form. This reduces drop-off rates and increases responses.
Another key benefit is better branding. When users see a form directly on your site, it feels more integrated and professional, rather than looking like an external survey. Plus, embedding helps you organize responses efficiently, as all data goes directly to Google Sheets, making analysis easier.
With these benefits in mind, let’s move on to the step-by-step process of embedding Google Forms.
Steps to Embed Google Forms on Your Website
Step 1: Create Your Google Form
Before embedding, you need to create a Google Form. If you already have one, you can skip to the next step. Otherwise, follow these instructions:
Start by visiting Google Forms and logging in with your Google account. Click on the “+” (Blank Form) option or choose a template that suits your needs. This will open a new form editor.
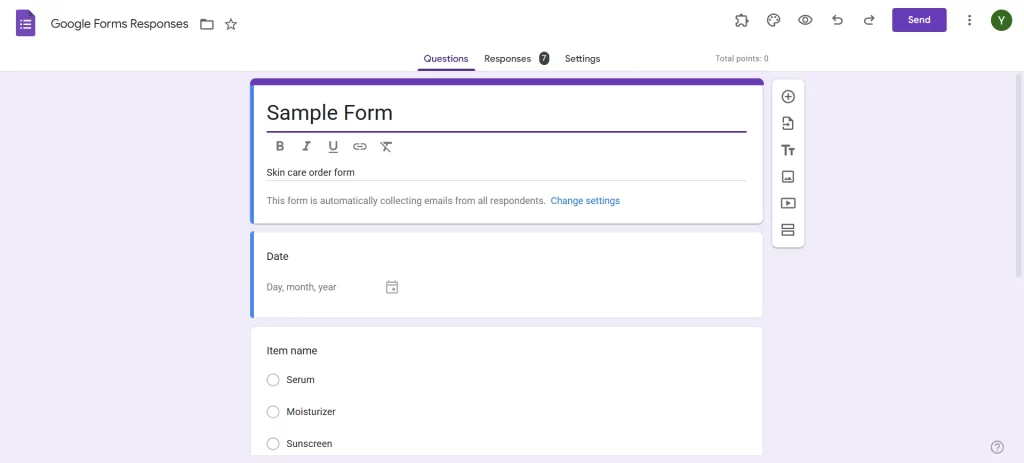
Now, start adding your questions. Google Forms supports multiple question types, including multiple-choice, dropdowns, short answers, and file uploads. If necessary, you can enable response validation to ensure users enter the correct format (e.g., email addresses or numbers).
Once the form is set up, go to the “Settings” tab to adjust response collection preferences. You can limit responses, enable email notifications, or allow users to edit their submissions.
After completing these steps, your form is ready for embedding!
Step 2: Get the Embed Code for Google Forms
Now that your form is ready, it’s time to grab the embed code. This code allows you to place the form directly on your website.
Click on the “Send” button at the top-right corner of your form. A pop-up window will appear with different sharing options. Select the “<>” (Embed HTML) option to generate an iframe embed code.
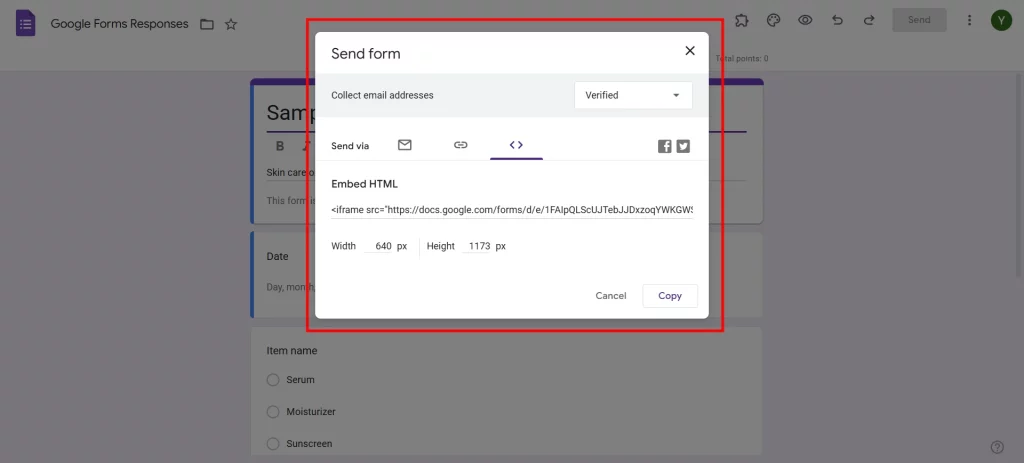
Before copying the code, you’ll see width and height settings. Adjust these values to ensure the form fits well within your website’s layout. A standard width of 640px and height of 800px works well in most cases, but you can customize it based on your design.
Once you’ve set the dimensions, click “Copy” to copy the iframe embed code. This code will be used in the next step to embed the form on your website.
Want to add audio to the Google Forms? Read, How to Add Audio to Google Forms? (5 Easy Steps)
Step 3: Embed Google Forms on Website Using HTML
Now that you have the embed code, let’s add it to your website. The process varies slightly depending on whether you’re using WordPress or a custom HTML website.
For WordPress Users:
If you have a WordPress site, go to the page or post where you want to embed the form. Open the editor and select the “+” (Add Block) button. Search for “Custom HTML” and click on it.

In the HTML block, paste the iframe embed code that you copied from Google Forms. Once pasted, click “Preview” to see how the form looks. If everything appears fine, click “Publish” or “Update” to make it live.
For HTML Websites:
If your website is built using plain HTML, open the page where you want to embed the form. Locate the <body> section and find the spot where you’d like the form to appear.
Paste the copied iframe embed code within the <body> section. Once done, save the HTML file and upload it to your web server. When you visit the page, you’ll see the embedded Google Form ready for users to fill out.
Step 4: Customize the Embedded Google Form
By default, an embedded Google Form may look plain and out of place. Fortunately, you can customize it to match your website’s design.
If the form appears too small or too large, you can adjust the width and height values in the iframe code. Increasing the width ensures the form doesn’t look squeezed, while adjusting the height prevents unnecessary scrolling.
Step 5: Test the Embedded Google Form
Before sharing the form with your audience, it’s crucial to test it. Open your website and go to the page where you’ve embedded the form. Check if it loads properly and fits within the layout.
Next, try filling out the form yourself. Submit a test response and verify whether it appears in Google Forms’ response section. If responses aren’t being recorded, ensure that “Accepting Responses” is enabled in the form settings.
Finally, check the form on mobile devices. Since many users access websites from their phones, the form should be mobile-responsive. If it doesn’t display well, consider tweaking the embed size or using a responsive design.
Are you a business owner looking to add a logo to your Google Forms? Read, How to Add a Logo to Google Forms.(4 Easy Steps)
Troubleshooting Common Issues
Even though embedding Google Forms is simple, you may encounter some issues. Here are quick fixes for common problems:
- Form Not Displaying Properly: Some website builders block iframes. If your form doesn’t appear, try embedding it within a different section or using a Google Forms plugin (for WordPress).
- Form Cut Off or Cropped: If the form isn’t fully visible, increase the height in the embed code.
- Scrollbars Appearing: Set scrolling=”no” in the iframe code or increase height to fit all questions.
- Responses Not Being Recorded: Make sure “Accepting Responses” is turned on in Google Forms.
- Slow Loading Time: Large forms may take longer to load. Optimize by reducing unnecessary fields or sections.
If these solutions don’t work, consider using a direct link instead of embedding.
In Conclusion
Embedding Google Forms on your website is a simple yet powerful way to collect information while keeping users engaged. Instead of redirecting visitors to an external page, an embedded form ensures a seamless experience, increasing response rates and making data collection more efficient. Whether you’re gathering feedback, managing event registrations, or conducting surveys, this method keeps everything organized in one place.
If you liked reading this blog on embed Google Forms on website, also read on Boost Your Google Forms With Custom Branding & Timer Features (3 Minutes Easy Guide) and How to Number Questions in Google Forms? (5 Easy Steps).