Are you looking for an easy way to add a checkbox grid in Google Forms?
Whether you’re a teacher evaluating student skills or a researcher conducting a detailed survey, the Checkbox Grid can streamline your data collection process.
Google Forms is one of the most versatile tools. One of its standout features is the checkbox grid. Here, in this blog, we will take you through a detailed guide on how you can easily add a checkbox grid in Google Forms.
Table of Contents
When to Use the Checkbox Grid in Google Forms?
The Checkbox Grid in Google Forms can be applied when you wish to get multiple answers with regard to the subject of the options offered. Here are some scenarios where a Checkbox Grid would be appropriate:
- Matrix-style Surveys: When you have to record more than two attributes from a number of items that are of a similar kind. For instance, assessing the product or the service from different clearly defined perspectives respectively.
- Event Planning: When it is necessary to get the attendees to make a decision on which of the several sessions, workshops, or activities they want to attend in a given time frame or days.
- Preference Surveys: When the case is about getting the respondent to make specific choices of their preferences of various categories. For instance, a survey where participants can choose preferred genres for different types of entertainment.
- Educational Assessments: For teachers to collect information on student skills or progress across multiple subjects or criteria.
- Feedback Forms: Gathering detailed feedback on various aspects of a service, product, or event. For example, rating different aspects of a conference (e.g., content, speakers, venue) on various parameters (e.g., satisfaction, relevance, organization).
- Resource Allocation: When needing to allocate resources or assign tasks where multiple items need to be matched with multiple criteria.
- Project Management: Collecting input from team members on various tasks or aspects of a project where multiple responses are needed for different categories.
Steps to Add a Checkbox Grid in Google Forms
Step 1: Open up a Google Form
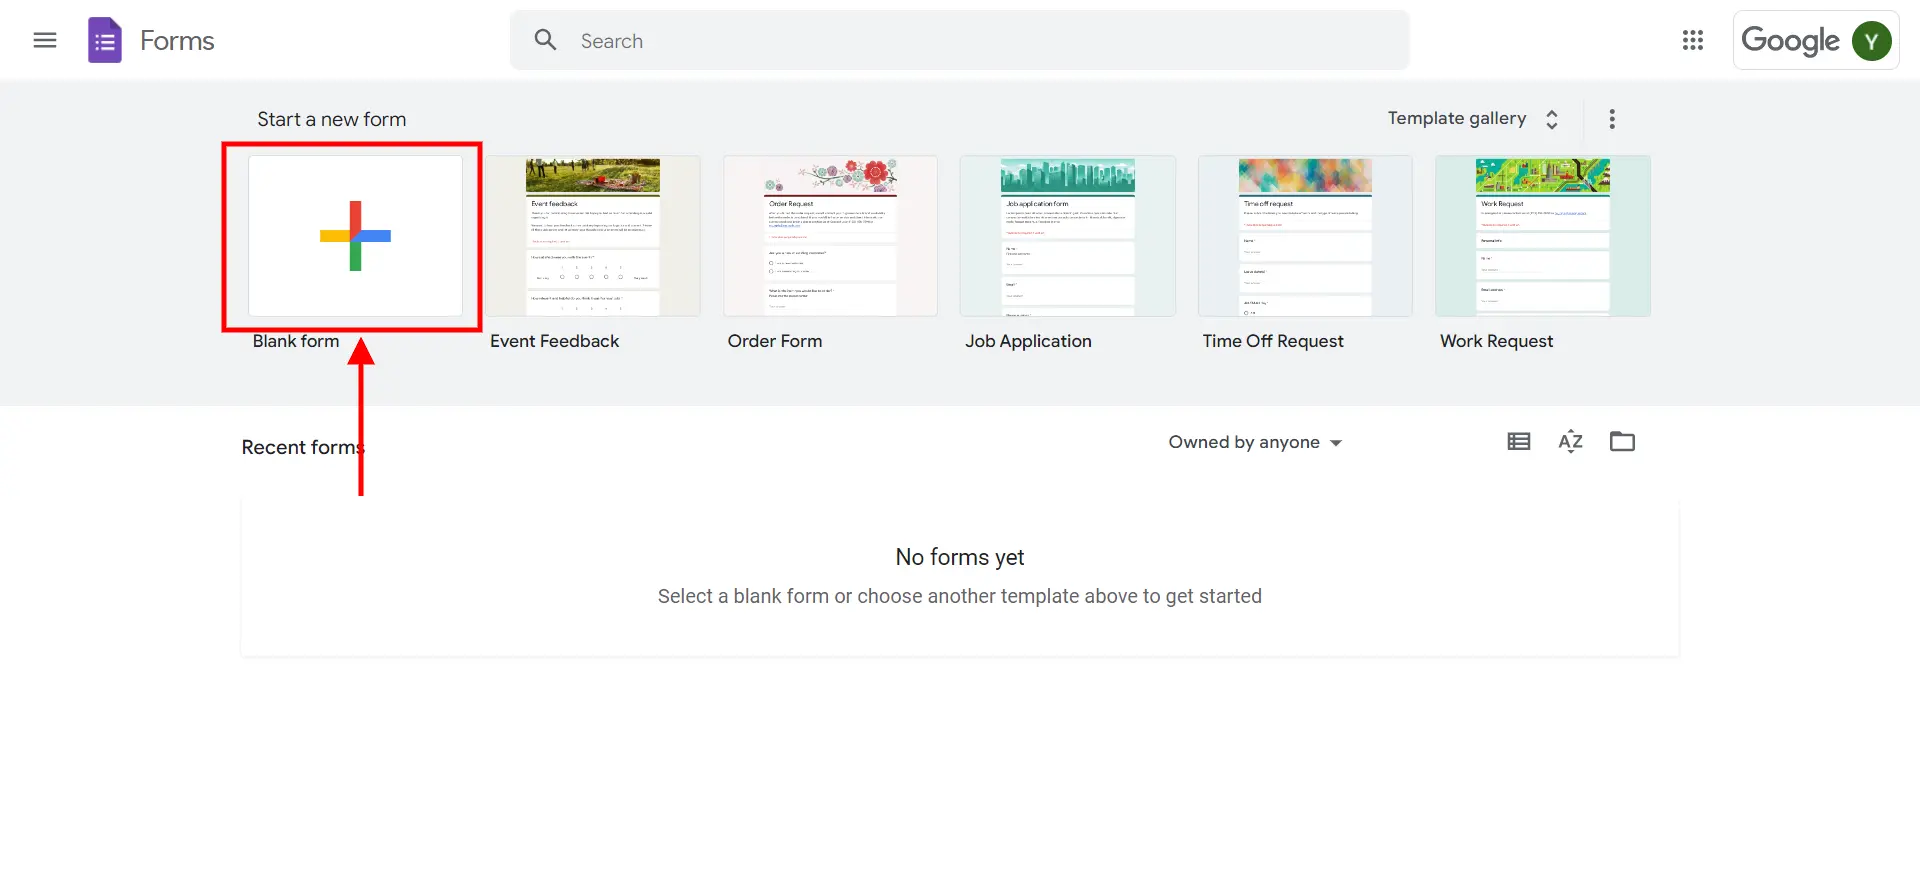
The very first step to add a checkbox grid in Google Forms is to create a Google Form. Once logged in to Google Forms, you can begin a new form by selecting the ‘ Blank” option which gives you a fresh form. Otherwise, you can go directly to the form you are editing if you already have an existing form that you want to edit.
Step 2: Add a New Question
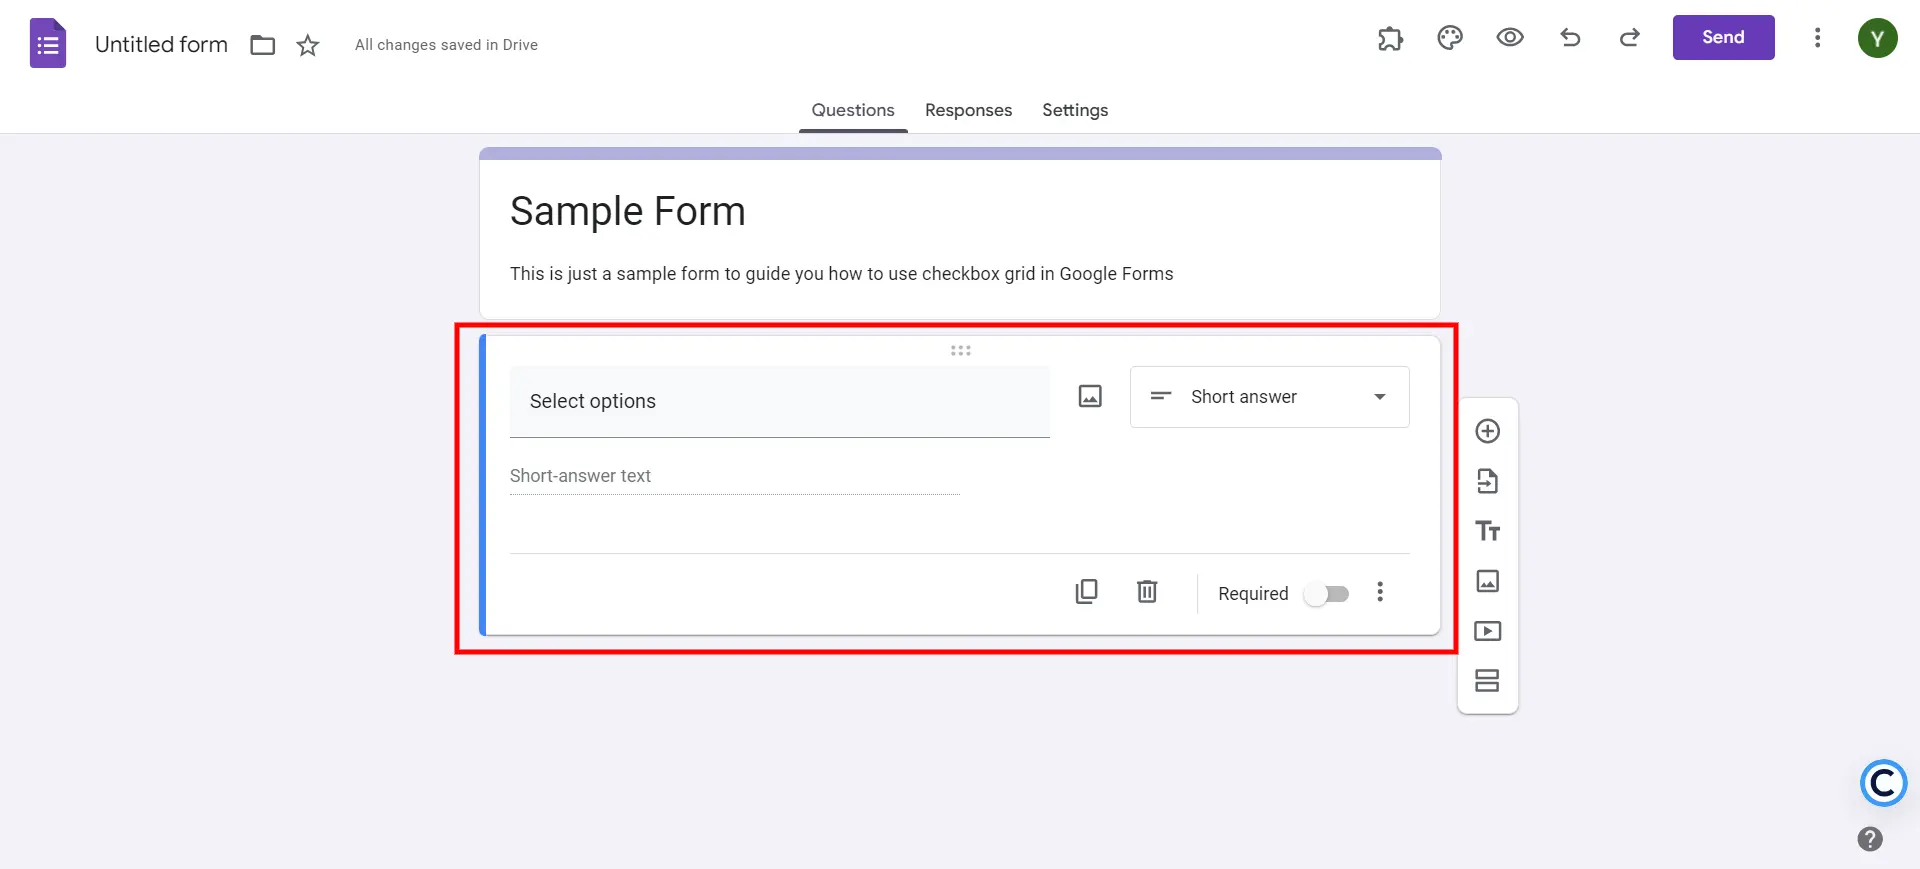
Once you have your form opened, the next process you need to do is to insert a new question. This can be done either by right-clicking on the mouse or by clicking on the “+” symbol which can be seen on the right-hand side of the toolbar. It will open a new question field on your form to do this from where you can define the type of question you wish to incorporate in your form.
Step 3: Choose the Checkbox Grid
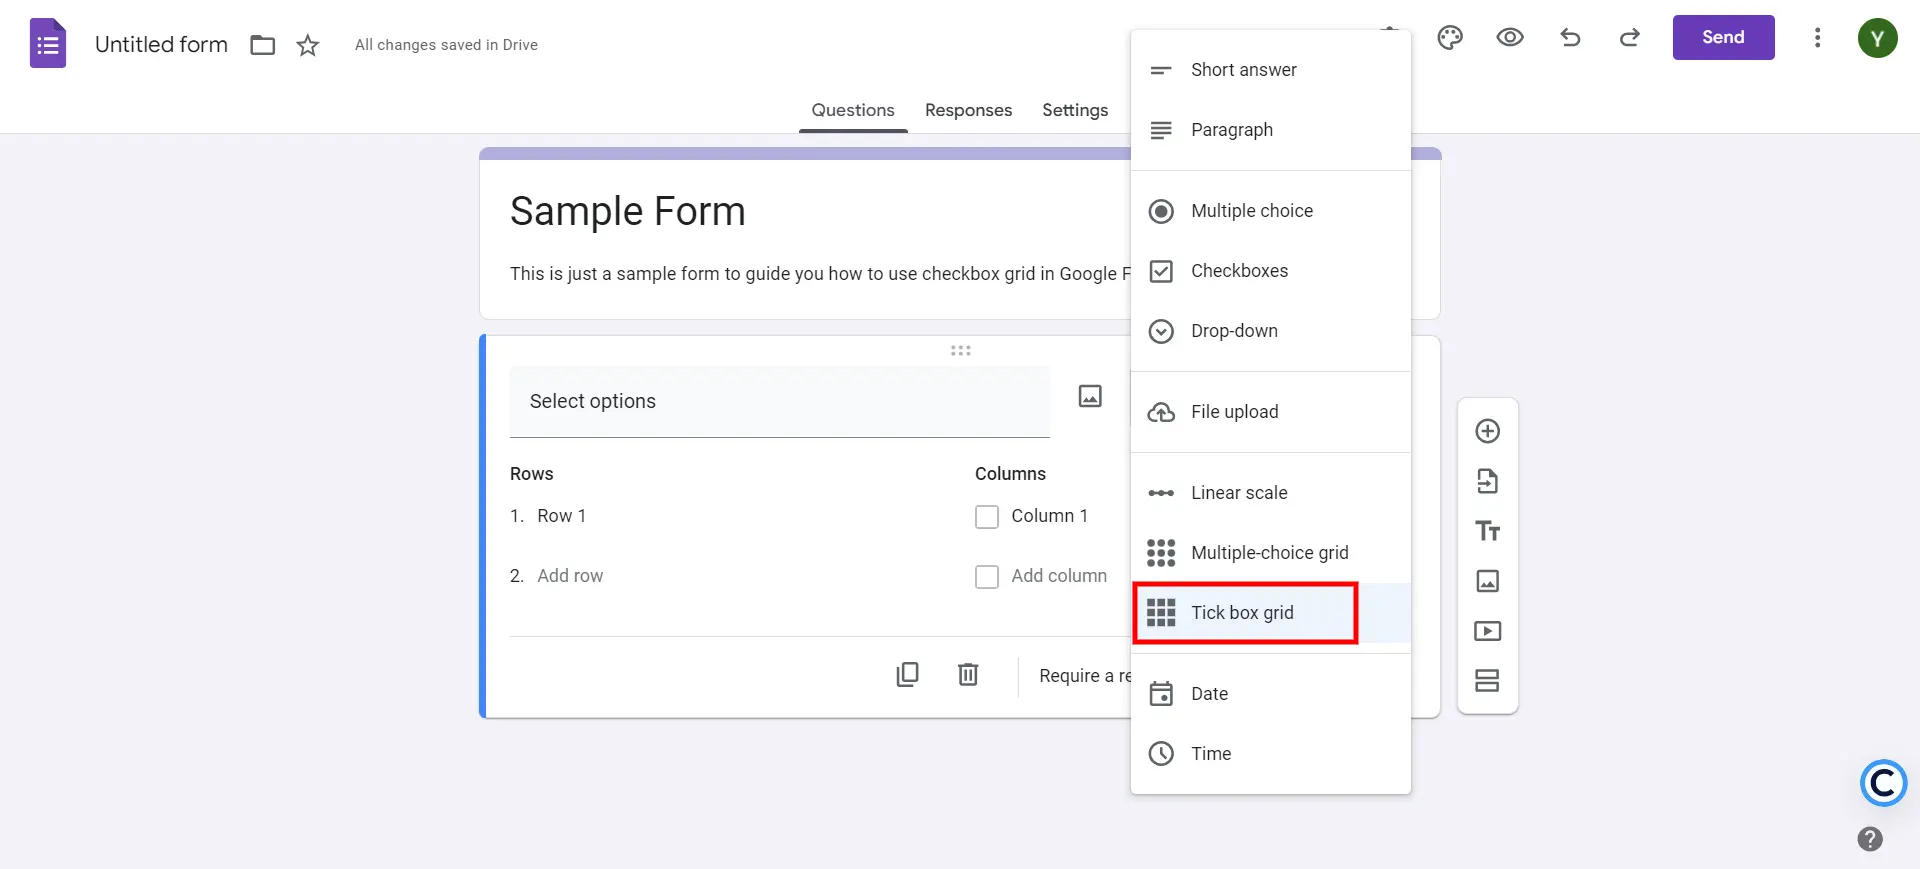
Next, to add a checkbox grid in Google Forms, you need to select the type of question you want. Click on the dropdown menu next to the new question field and choose “Tickbox Grid” from the list of available question types. This will change the question format to a grid layout where respondents can select multiple options in a matrix.
Step 4: Fill in Your Rows and Columns
After selecting the Tickbox Grid, you can start customizing it by filling in your rows and columns. Each row represents a different item or question, while each column represents the possible responses.
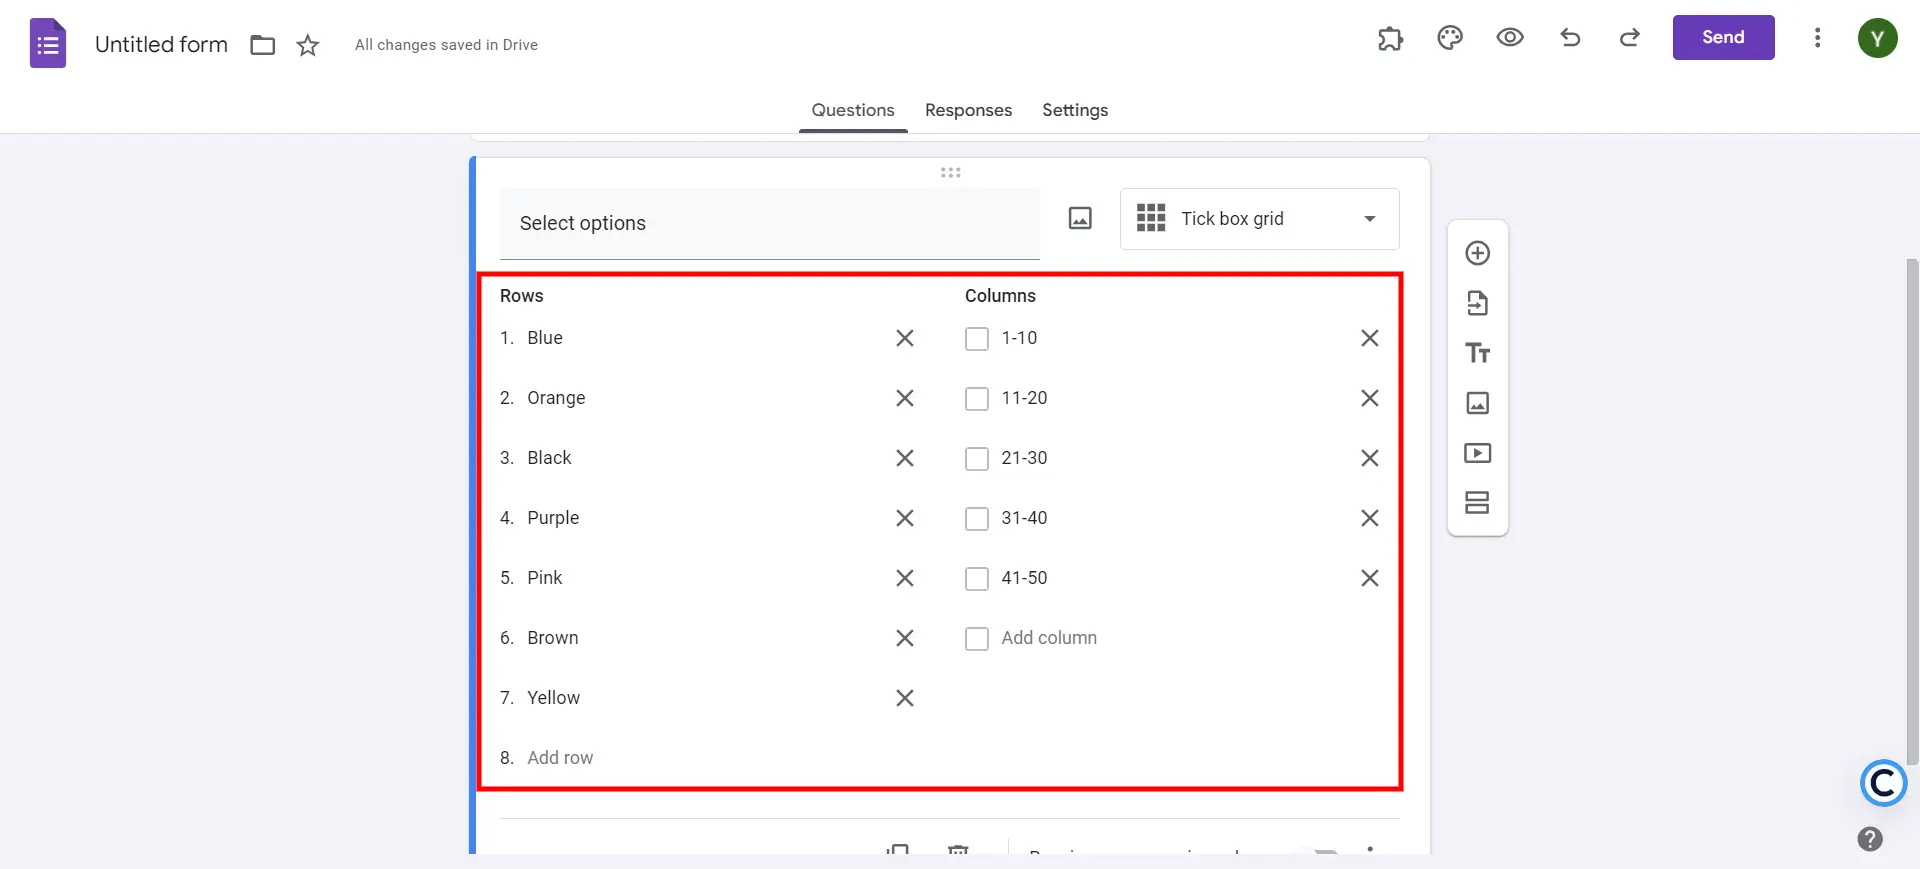
For example, if you’re surveying preferences for a tshirt, rows could be different names of colors and columns could be various ranges.
Step 5: Add a Timer to Your Forms (Optional)
Add an extra layer of functionality to your Google Forms by adding a timer to it. ExtendedForms is an amazing Google Forms addon that helps you with customized timer themes.

You can set time limits for your forms, which can be particularly useful for timed quizzes, assessments, or any situation where you need to control the amount of time respondents have to complete the form. Additionally, ExtendedForms provides features like automatic form submission when time runs out and the ability to send email notifications, making it a comprehensive solution for managing timed responses.
Step 6: Preview Your Form and Share
Before finalizing your form, it’s crucial to preview it to ensure everything is set up correctly. Click on the eye icon at the top right to preview your form. This allows you to see how the form will appear to respondents and check that all rows and columns are correctly labeled and functioning.
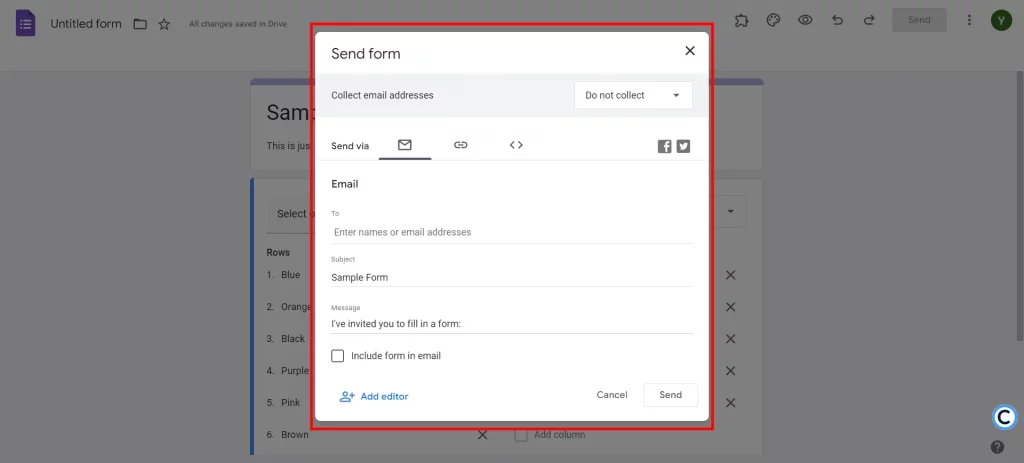
Additionally, review the form settings by clicking on the gear icon to configure options such as response collection, limits, and presentation settings.
In a Nutshell
Adding a checkbox grid to Google Forms can make your data collection process smoother and more efficient. This versatile feature not only saves time but also improves the accuracy and depth of the data you gather. By following the steps as mentioned above, you will be able to add a checkbox grid to Google Forms.
If you like reading this blog, also read our detailed guide on How to Add a Logo to Google Forms? (4 Easy Steps) and How Do You Create a Google Forms Order Form? (4 Easy Steps).