Google Forms response validation might seem tough at the beginning, but once you get the hang of it, it becomes a powerful tool for ensuring data accuracy.
It helps you ensure respondents provide the correct type of data in the right format. By using these validation options, you can make sure your form collects the information you need in the right format. Mastering Google Forms response validation, you can
Here, in this blog, we will take you through a detailed guide on adding Google Forms response validation.
Table of Contents
What Is Response Validation in Google Forms?
If you feel that the respondents might provide the wrong type of information when filling out a Google Form that you have created, you can use response validation. There are 4 types of Google Forms response validation. Here is the brief of it:
- Text Validation
This validates whether the answer is in a given format. For instance, you can make it in such a way that the response must be an email address or the given word.
- Number Validation
This makes certain that the answer is a number and it can even state a range. For instance, you can specify that the response should be an integer within the range of 1 to 100.
- Length Validation
This checks the length of the response. There are options to limit the number of characters or words in the given answer, which is useful when it comes to admitting concise replies.
- Regular Expression
This is a little more complex with essential information being extracted in a somewhat organized priority scheme. When used, it allows users to set creating rules for the responses using patterns. For instance, you can insist that answers be given in a certain format such as a phone number or a date.
Looking for an easy way to create a checkbox grid in Google Forms? Read, How to Use Checkbox Grid in Google Forms. (6 Easy Steps).
Guide to Google Forms Response Validation
Step 1: Open up a New Google Form
The step to creating a Google Forms response validation is creating a new form. You can start by clicking on the (+) icon to create a new form or select from the pre-built templates.
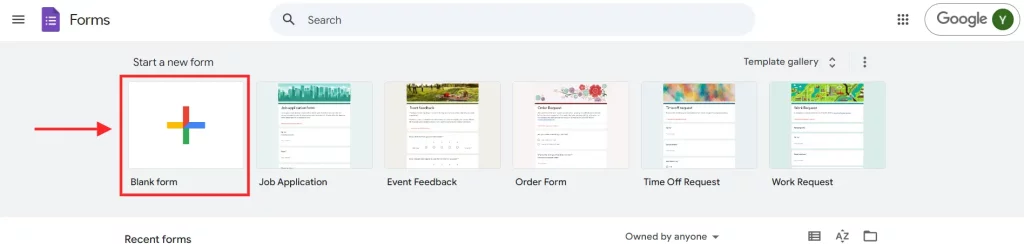
Here, in this guide, we will create a form from scratch.
Step 2: Add a New Question
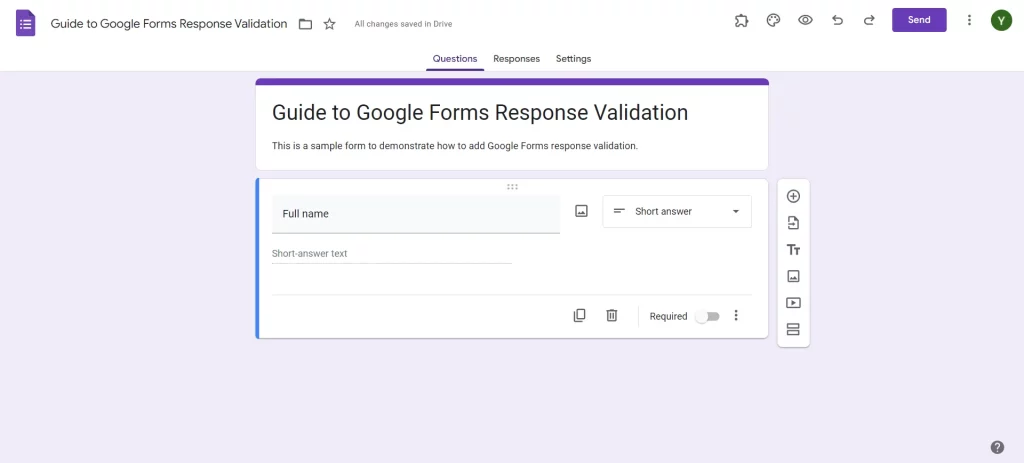
After creating a new form, you will need to give it a relevant title and a brief description of the form. Choose the type of questions according to the information you plan to gather (for instance, brief answers or short paragraphs).
Step 3: Enable Response Validation
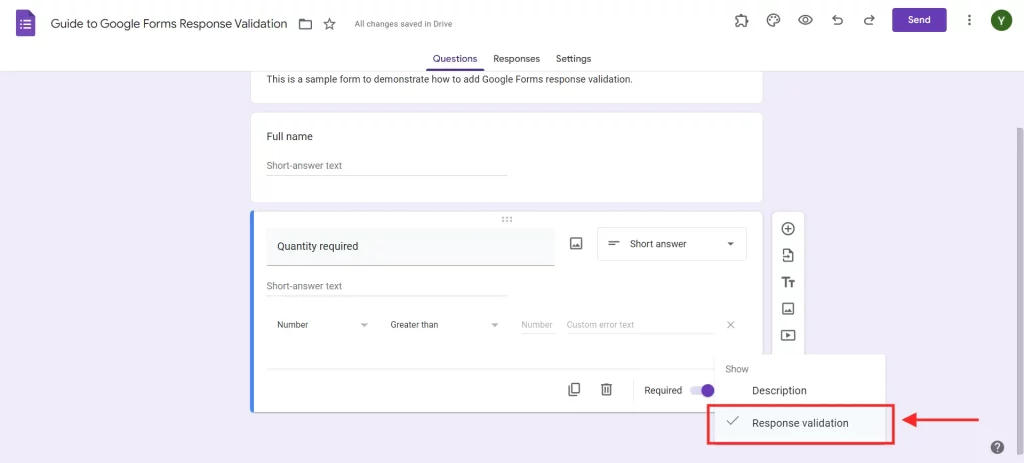
After you post your question, simply go down to the bottom of the box where your question is and click on the three-dot menu (⋮). Locate the option towards the top right corner of the screen and choose “Response validation”. This will expand the possibility of setting validation rules.
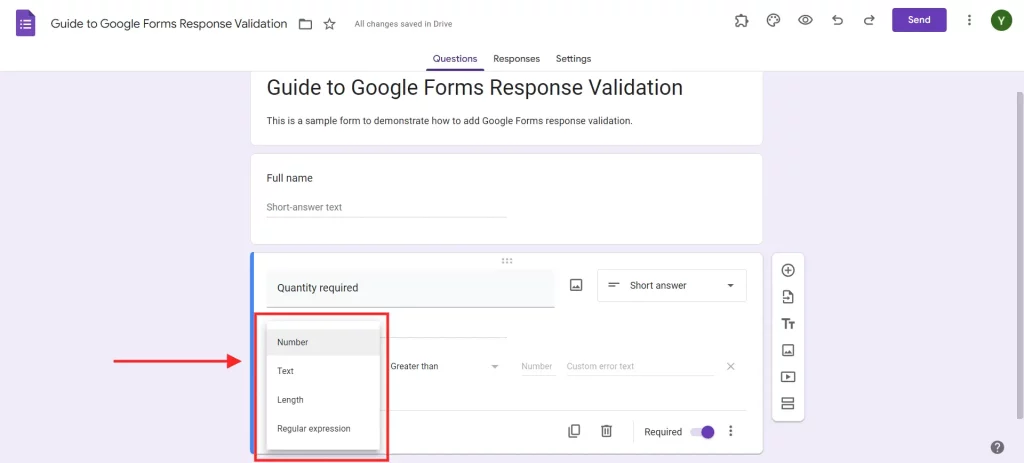
Step 4: Choose the Rule You Want
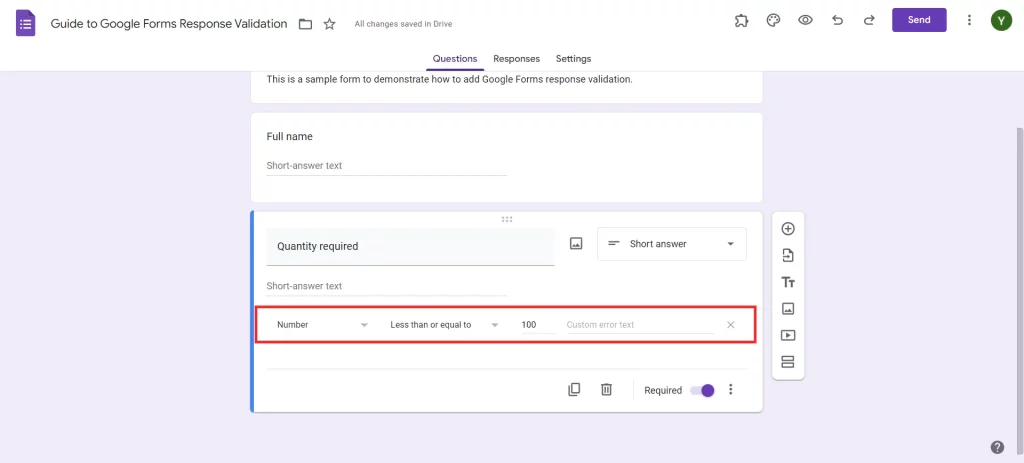
You’ll see a dropdown menu where you can choose the type of validation you want to apply:
- Text Validation: Specify requirements like email addresses or specific text.
- Number Validation: Set constraints on the number range, requiring a number between 1 and 100.
- Length Validation: Define minimum and maximum lengths for the answer.
- Regular Expression: Use custom patterns for complex validation rules.
Are you a business owner and want to create forms? Read, Creating Business Forms Using Google Forms (7 Simple Steps)
Step 5: Enter an Error Message
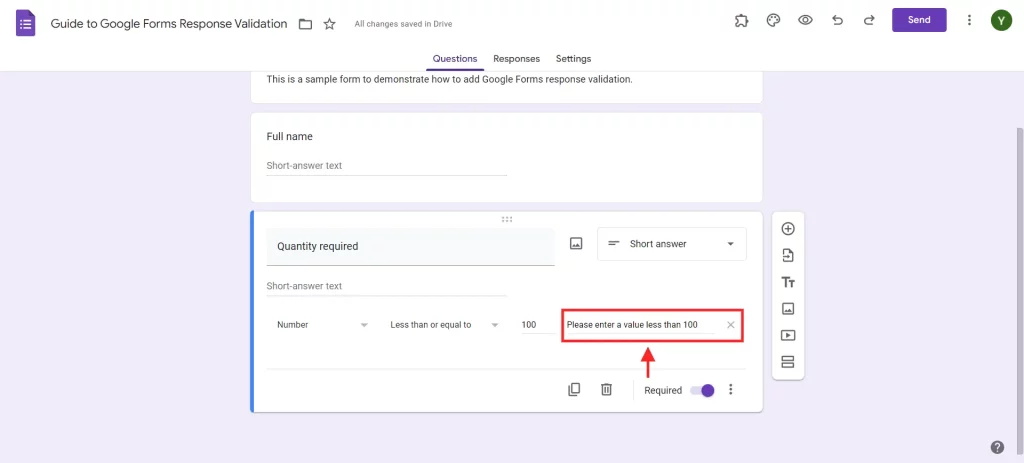
The last step of creating the Google Forms response validation is to create an error message. In the ‘Custom error text” box, enter a message that will be displayed when a user enters an incorrect response to the validation. For instance, if you are confirming an email address, the error message might read “Please enter a valid email address.”
Create Timer Based Forms with ExtendedForms
By integrating a countdown timer during assessments or quizzes, users’ engagement can be improved, and allotted timeframes can be adhered to. It is a cutting-edge tool for conducting assessments, making the process both more efficient and productive. It has powerful features that are designed to increase engagement, offer real-time input, and give more equal opportunities.

It has extensive features like-
- Countdown timer: Set a time limit for sections and set auto-submissions when the time is up.
- Proctor settings: Track whether the user is taking form in full screen or not. Also, take random snapshots while filling out the forms.
- Negative marking: Automatically import scores from the linked Google form to the created classwork, making it easy for your teachers to assign Grades.
- Team management: Take a birds-eye view of your form’s performance on the app dashboard. Export all the data to Google Sheets and analyze the forms’ responses.
Considering Everything Above
With the basics of Google Forms response validation now at your fingertips, you’re well-equipped to create forms that gather the right information in the right format. Whether you’re validating text, and numbers, or using more complex patterns, mastering these features will make your forms more reliable and effective.
Make sure to use ExtendedForms for your Google Forms to unlock advanced features like countdown timers, proctor settings, and detailed analytics. It enhances both the functionality and efficiency of your data collection.
We hope this blog has helped you add Google Forms response validation. If you like reading this, also read our detailed guide on How to Print Google Forms Responses. (3 Easy Methods) and How to See the Google Forms You’ve Submitted? (Easiest Way in 2024)