Crafting an effective online quiz is crucial, and while the process of making one has become commonplace, ensuring its quality and value to your users remains significant. If your intention is to create a Google Forms quiz, this article is tailored to your needs.
While you might be familiar with crafting Google Forms tests and quizzes, incorporating a time limit into Google Forms quizzes could be a new concept.
Designing a Google Forms quiz or test without a countdown timer is like baking a cake without knowing the precise temperature and time – we all know how that turns out!
Here, in this blog, we will take you through a detailed guide of how you can easily make a Google Forms quiz.
Table of Contents
Steps to Create a Google Forms Quiz
Therefore, in this article, I am going to guide you on how to make a Google Form quiz with the help of a google forms timer add-on in simple steps like a pro.
Let’s start!
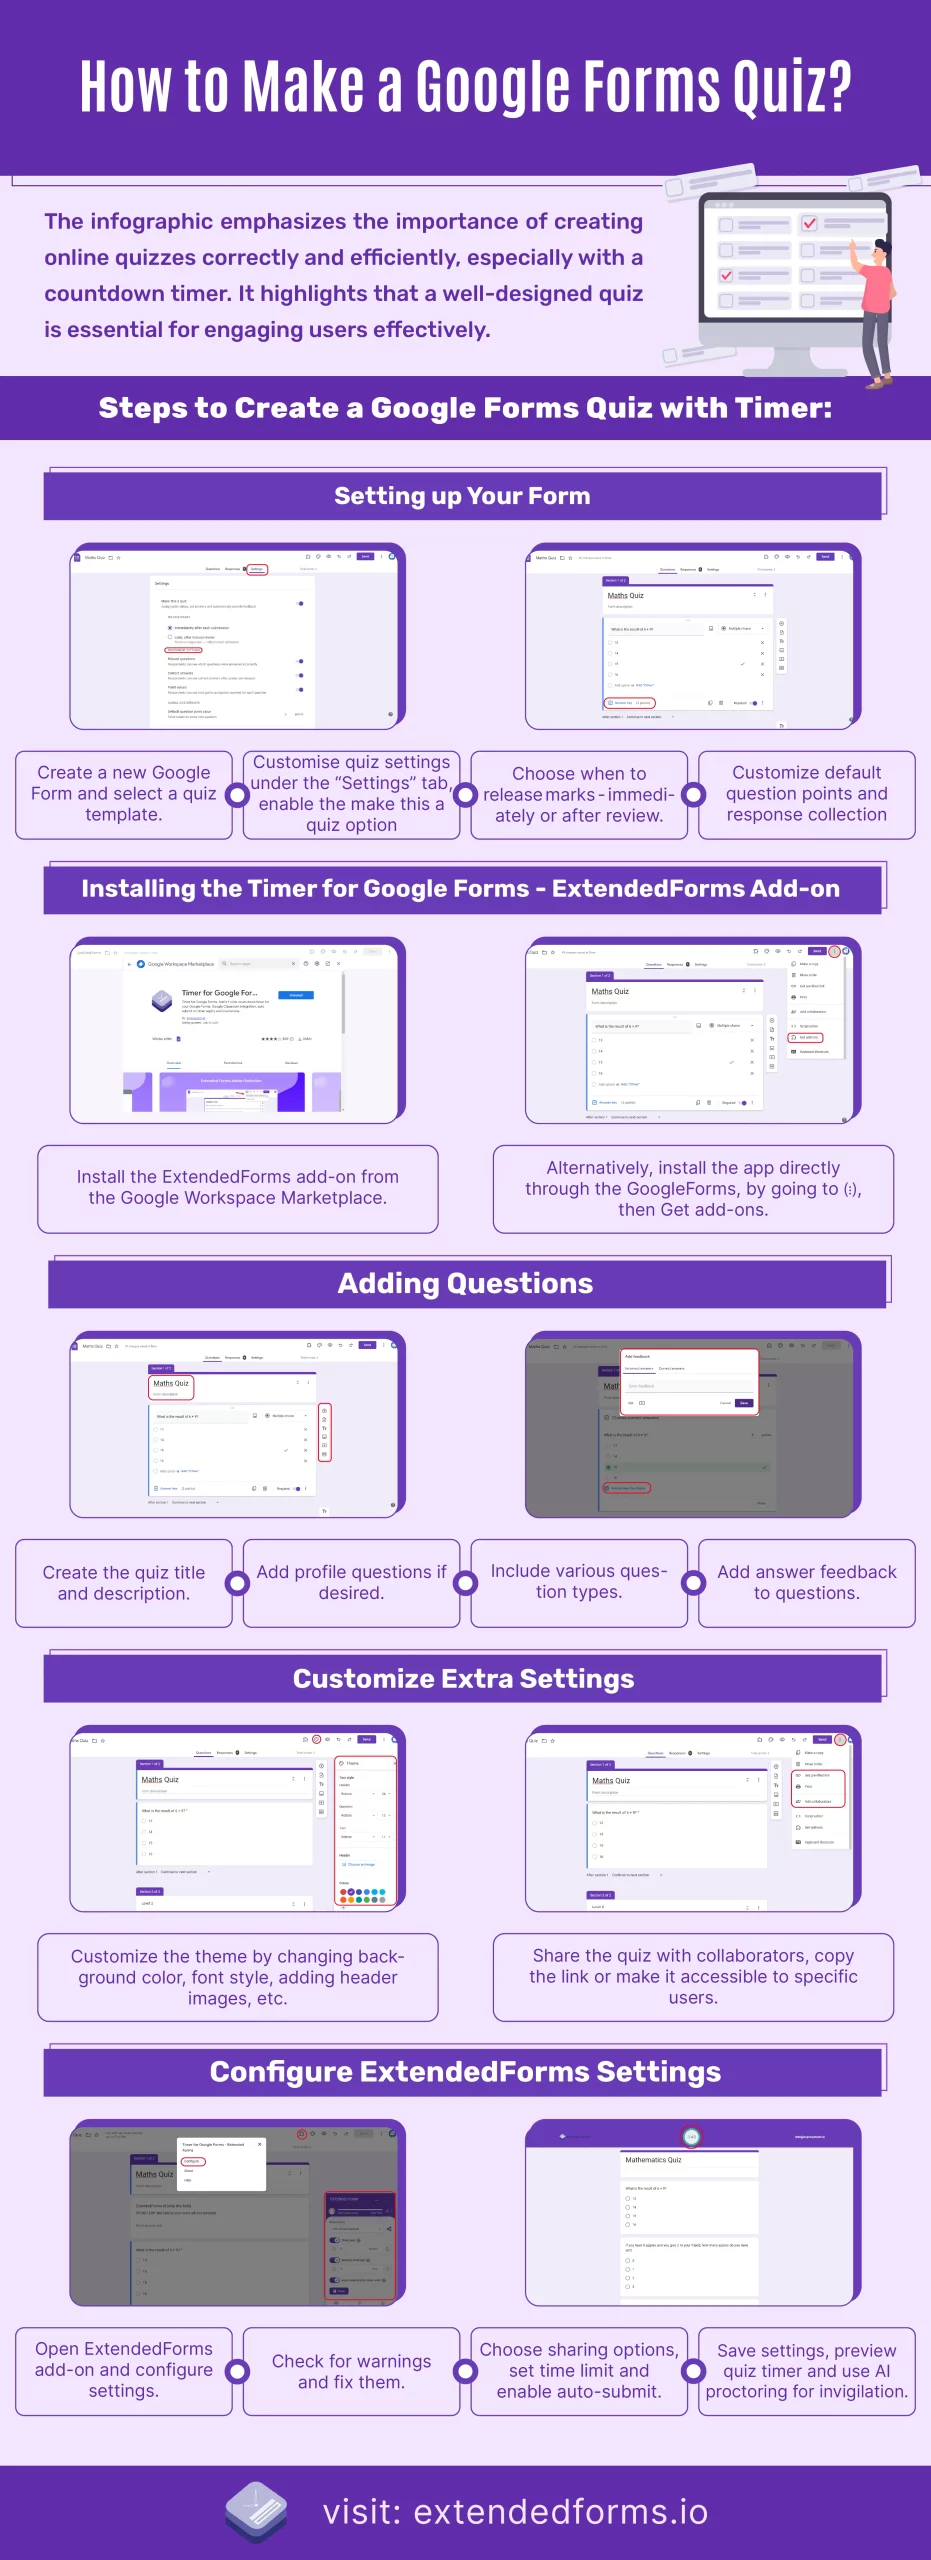
1. Setting up Your Form
To start with, we have to first create a new Google form, which you can do by going to the website – Google Form. Select the blank quiz template if you want to create a quiz or there are other specified templates you can go through based on your requirement.
(Tip: The quickest way to create a quiz is to go to g.co/createaquiz.)
Once you have opened up the form, click on the ‘Settings’ option. There you’ll see all the options which you can enable/disable or customize as per your need.
(Tip: if you have not directly selected a blank quiz template or instead selected a ‘blank form’, then don’t worry you can change it from ‘form’ to ‘quiz’ inside the forms’ settings. Just Navigate to ‘Settings”, and turn on the ‘Make this a quiz” option and it converts to a Google form quiz.)
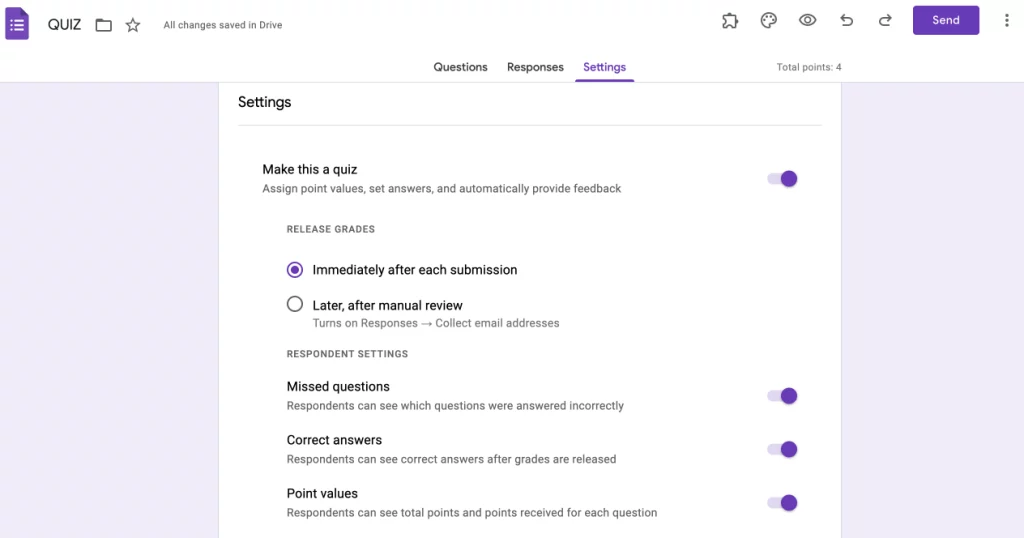
Settings options like:
1. You can under ‘Release Marks’ choose to give marks immediately after each submission. Or you can choose to give it later, after a manual review.
2. Further, you can configure ‘respondents’ settings’ depending on whether you want to keep transparency with your users, keep it as default, or change it.
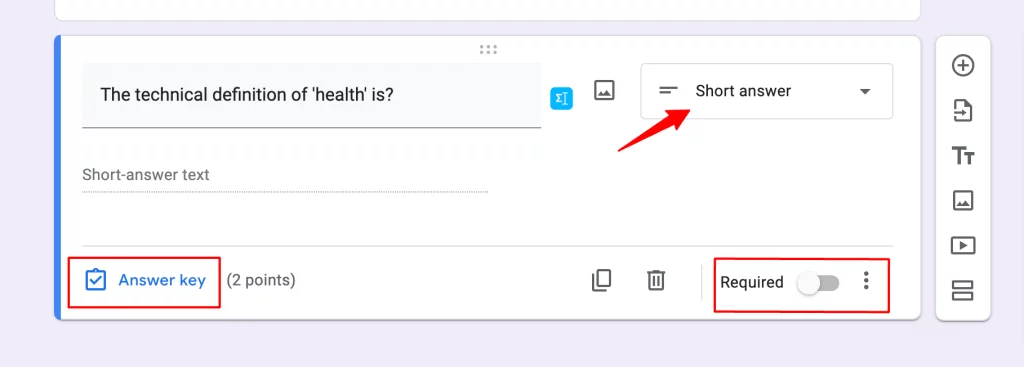
3. You can put the ‘default question point value’ for every new question. So that you don’t have to do it manually while creating questions. Otherwise, you can manually put add point values under each question. Just select the question and you get the ‘answer key’ text, click on it and add points.
4. Plus, you can manage how responses are collected and presented to customize.
2. Install the Timer for Google Forms – ExtendedForms Addon
If you are planning to create a quiz or test then a timer is an essential step. By default, Google Forms doesn’t have a count-down timer facility. So, we have here an addon for adding Timer on Google Forms i.e. ExtendedForms.
Add-ons are external apps that are integrated with Google business tools, many of them are also available to use independently through their websites or with other SaaS applications. But most of the add-ons are part of Google tools and can be used with either all or some of the Google apps.
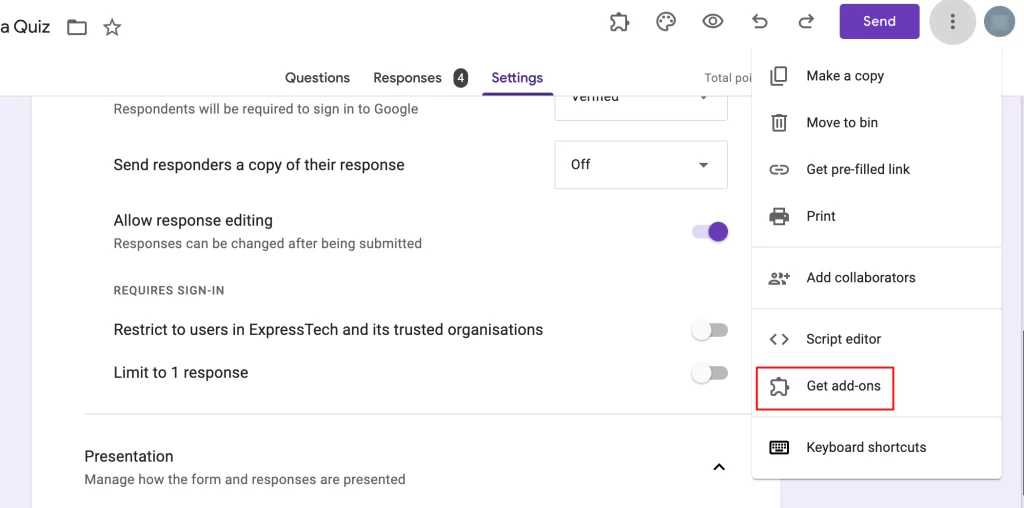
First, you will have to install the addon, go to Google Workspace Marketplace and install the ExtendedForms addon. Otherwise, you can also install it directly through google forms.
Go to “፧” this symbol and navigate to ‘Add-ons’ from their install ExtendedForms. Refresh the page and you will see a puzzle-shaped symbol on the Addons menu.
ExtendedForms addon is one of the most used and best Timers for Google Forms. It turns your Google forms into timer quizzes or tests by integrating a one-click countdown timer. Let’s complete to make google forms quiz.
Note* – If you are installing extended forms then you can configure them after creating the questions or you can install the add-on before. (like mentioned in this article).
3. Add Questions
Now, it’s time to start working on the body of the article. I mean, it’s time to create questions for your quiz.
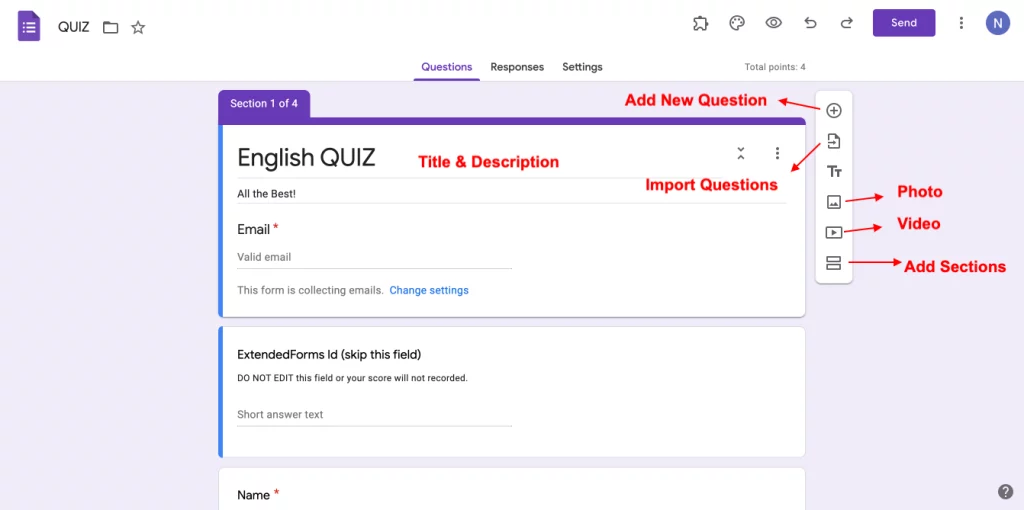
- First, add the title and description in the Untitled Form or Blank Quiz area. If you have enabled ‘collect email addresses,’ you will see the Email option which your users will have to fill in compulsorily while attending the quiz.
- Then, you can create users profile questions, if you want to know more about your respondents. Like, demographic data like age, gender, geographic location, occupation, etc.
- Once we are done with the profile section, it’s time to add the quiz questions. You can add new sections for different sets of questions. For that, click on the last option from the right-side field box.
- You can add MCQs, short answers, long answers, and Likert scale-type questions. You can in every question add answer feedback with correct and incorrect answers. Click on ‘Add answer feedback’ at every question’s bottom.
- Further, if you have already created a quiz file in google docs then you don’t have to copy-paste it on google forms quiz. Just select the import questions option from the right-side form box and import the file.
4. Customize extra settings
Once you have created all the questions, it’s time to move forward and configure the google forms extra settings. To, customize your quiz a little extra then follow this step first.
Start with themes, click ‘Customize Theme’ on the top navigation bar and you will see a dialog box of ‘Theme options.’ You can change the background color, and font style, and add a header image, and theme color.

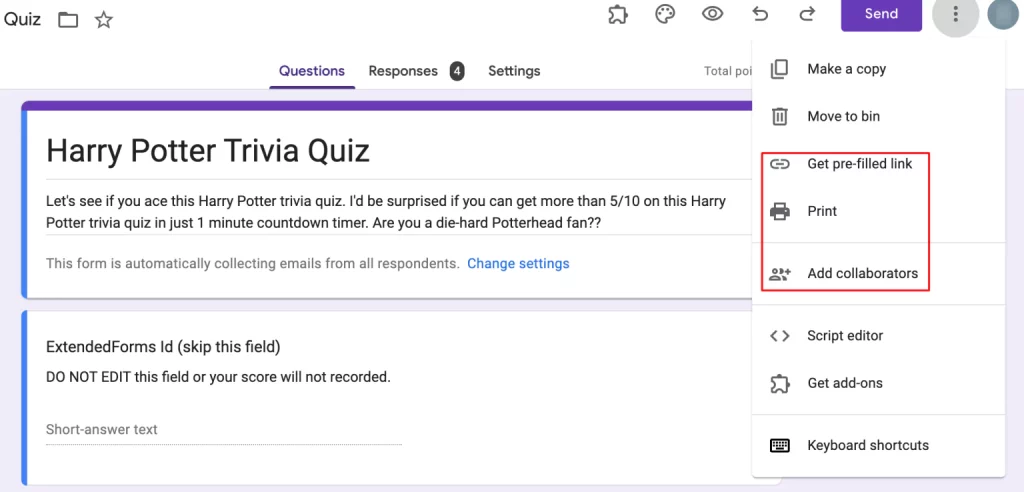
Now moving further, if you have a collaborator with whom you want to share the quiz then you can do so by navigating to “፧”. Click on ‘Add Collaborators’ and add another person’s email-id or copy the link and make it accessible to all, if required. Further, in the same settings, you can also get a copy of this quiz or get a prefilled link.
5. Configure ExtendedForms settings
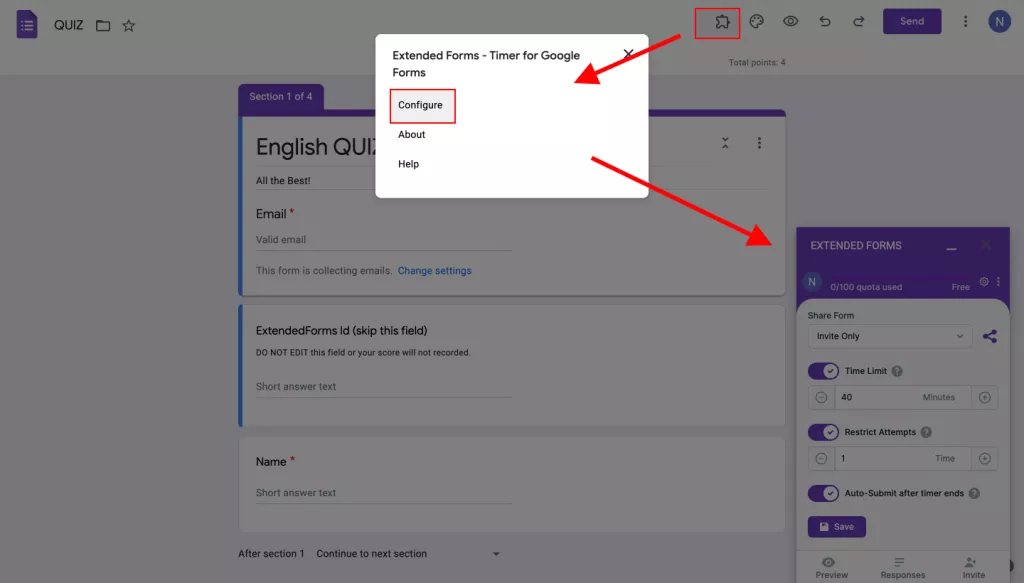
Now, moving on to the last step in this guide is to add a count-down limit to your quiz. So, for that click on the puzzle shape icon > ExtendedForms > Configure, you’ll see the Extended Forms settings box on the bottom right of the Google Form.
[ Tip: Make sure there are no warnings, if you see any warnings then click on “Fix Settings”].
Then to ‘Share Form’ you get 2-3 options from which you can select. Like ‘send link with email required’, ‘anonymous link’, or ‘invite-only.’ Further, configure the “Time Limit” for the online tests and “Restrict Attempts” if you are not sharing it anonymously.
Also, to auto-submit the the form after time ends, enable the “Auto-Submit” option. Don’t forget to hit the “Save” button to save the settings. Click on the ‘Preview’ button to see your timer google forms quiz. Once satisfied with the outcome, send it to your users!
If you want to make your google forms quiz more challenging and provide students with a remote invigilation experience, then you can use the app’s AI proctoring feature.
Click on Responses, it will lead to the dashboard, under the Forms > click on ⋮ > Form Settings > Proctor, enable the tracking and update it.
To use proctor feature you’ll have to subscribe to the pro plans, you’ll get more other features along with it.
FAQs
How do I create a quiz in Google Forms?
To simply create a quiz in Google Forms, choose a ‘blank quiz’ or in the forms’ settings turn the form into a quiz. You can then move forward by adding questions and customizing as usual. But in the questions, you get an extra option to add ‘Answer Feedback’ and point values to each question.
How do I create a self-grading quiz in Google Forms?
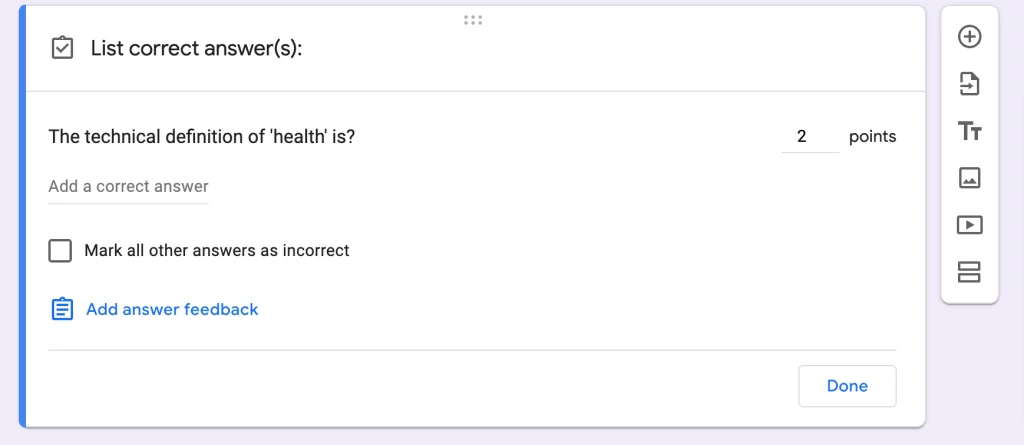
To create a self-grading quiz in Google Forms, convert forms into quizzes, under each question tab you’ll see the ‘Answer Key” option. Click on it and add point values, then click on ‘add answer feedback’ to add correct and incorrect answers.
Are Google Forms quizzes anonymous?
While the form itself is not anonymous, there are various ways to make it anonymous for users. You can keep the ‘collect email addresses’ settings as – ‘do not collect’ and keep disable the ‘limit to 1 response.’ Besides, through ExtendedForms, you can also hide the email of users from respondents if needed.
Finishing Up
So, this is the end of our easy and simple guide on how to make a google forms quiz. Thank you for reading this article, I hope this guide will help you in creating amazing Google quizzes and tests.
ExtendedForms is very simple and easy to install and use Google add-on. As I mentioned before, it is one of the most used and highly-rated add-ons when it comes to Google Forms. It not only lets you create quizzes and tests with Google Forms by integrating a one-click countdown timer but further, comes with more advantages than meets the eye.
Like with the ExtendedForms add-on, you can:
Track responses along with submission time.
Customize based on your brand
Google Classroom integration
Auto Score Import in dashboard and classroom
Invite team members, customize invitation messages and welcome screens (in different languages), etc.
ExtendedForms consistently upgrade and improve itself and add features that users want!