
Want to make a multiple choice grid in Google Forms? Read this detailed guide.
Google Forms is a powerful tool for creating surveys, quizzes, and feedback forms. Among its many features, the Multiple-Choice Grid stands out as a great option for collecting structured responses. Whether you’re gathering opinions, conducting research, or managing event sign-ups, this feature helps you organize responses in a clear and efficient manner.
In this guide, we’ll walk you through five simple steps to create a Multiple-Choice Grid in Google Forms.
Table of Contents
Steps to Make a Multiple Choice Grid in Google Forms
Step 1: Create a New Form in Google Forms
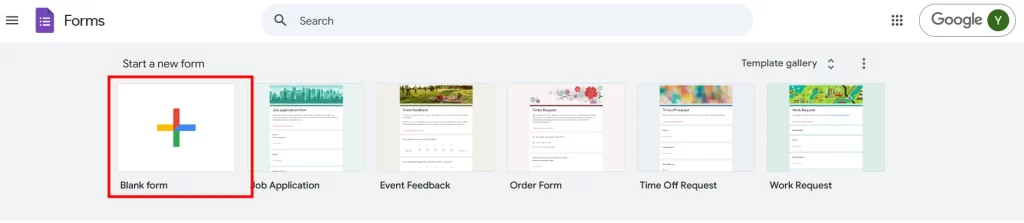
To begin, open Google Forms and log in with your Google account. Once logged in, you can either start with a blank form or choose a template that fits your needs. After selecting your form type, give it a clear title and description. This helps respondents understand the purpose of your form and ensures they provide relevant responses.
Step 2: Add a Multiple-Choice Grid Question
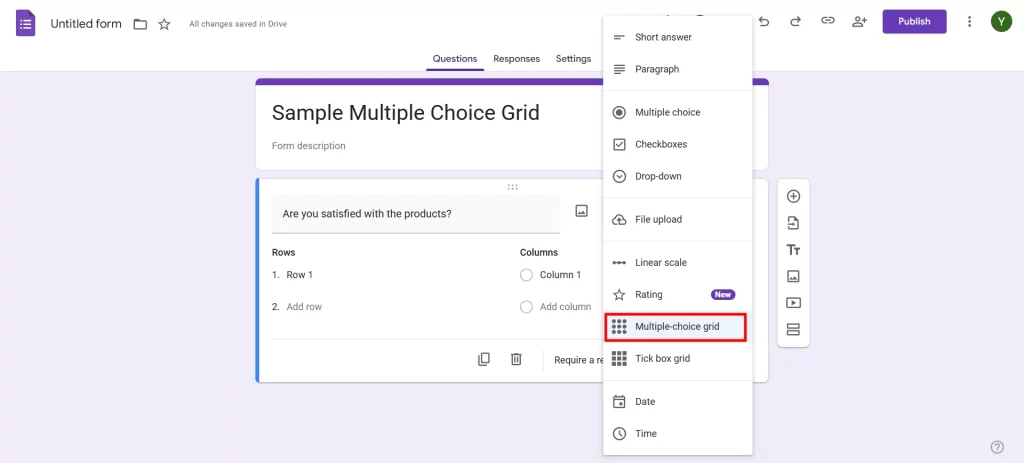
Once your form is set up, it’s time to add the Multiple-Choice Grid question. Click on the “+” button on the right-hand toolbar to insert a new question. From the dropdown menu that appears, select Multiple Choice Grid. This will generate a new question format where you can define both rows and columns. The grid layout allows respondents to answer multiple related questions in a structured way.
Want to connect your forms with Google Sheets? Read, How to Connect Google Forms to Google Sheets? (Explained in 2 ways).
Step 3: Edit Your Rows and Columns
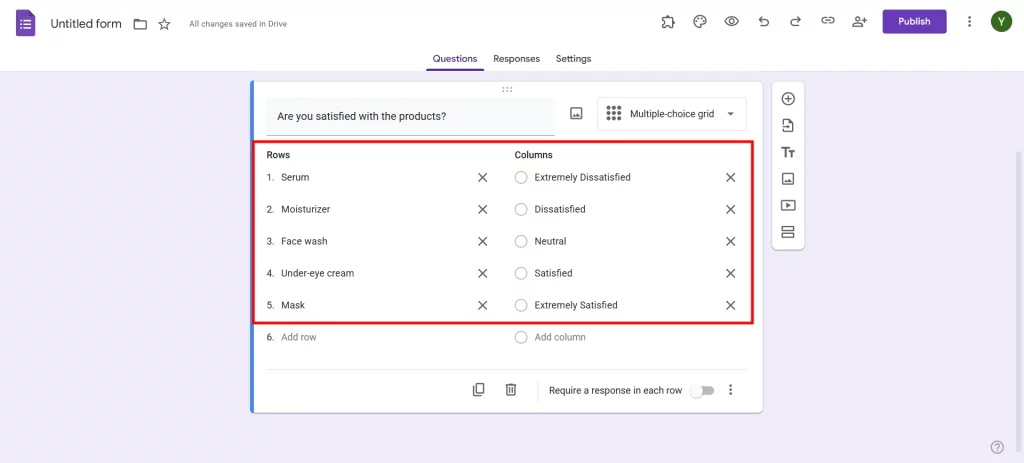
Now, customize your grid by adding appropriate rows and columns. The rows represent the items, statements, or questions you want users to evaluate, while the columns serve as the possible answer choices. Be sure to keep your labels clear and concise to avoid confusion. For example, if you’re collecting feedback on different aspects of a service, your rows could list various features, and the columns could include options like “Excellent,” “Good,” “Average,” and “Poor.”
Step 4: Change Your Multiple-Choice Grid Settings
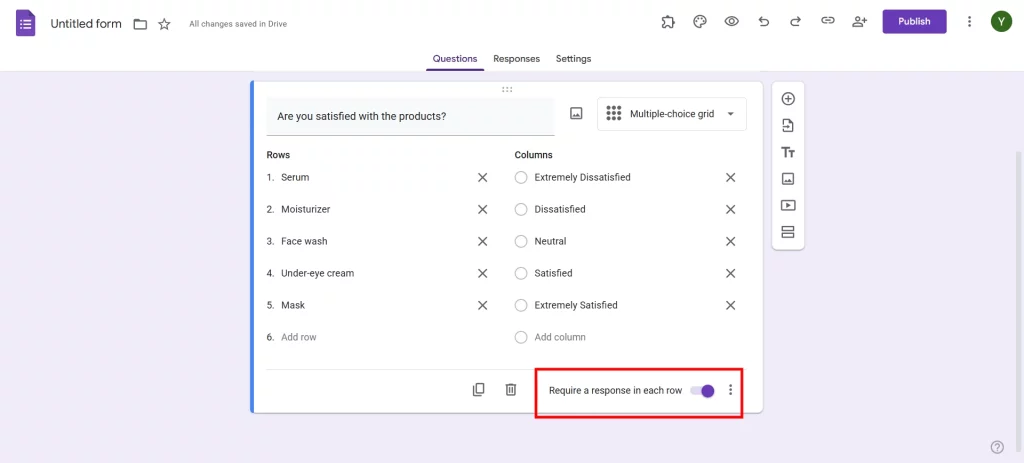
To fine-tune your grid, click on the three-dot menu (⋮) in the bottom-right corner of the question box. Here, you’ll find various settings to enhance the usability of your grid. If you want to ensure respondents answer every row, enable “Require a response in each row.” You can also choose “Limit one response per column” to prevent duplicate selections within the same row. Additionally, explore response validation settings to customize how users interact with the grid based on your specific requirements.
Step 5: Finish Your Form and Test It Out
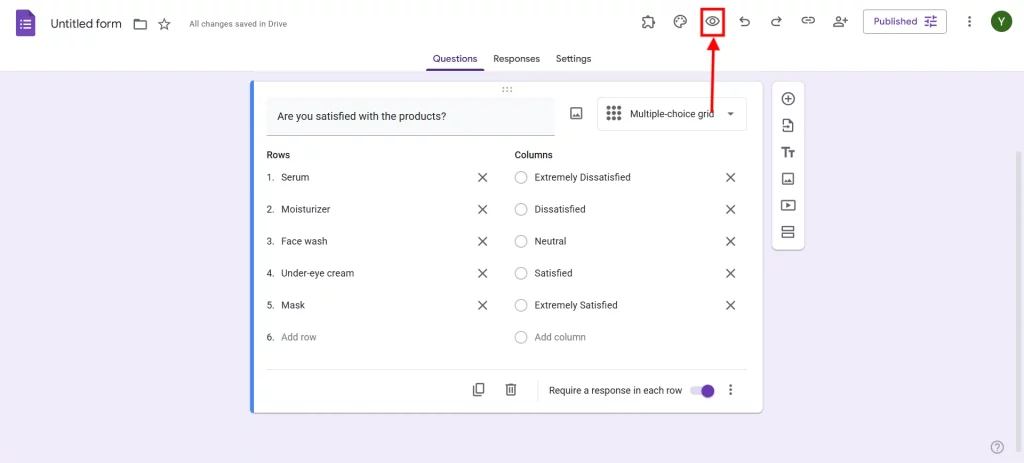
Before sharing your form, always test it to ensure everything works correctly. Click on the eye icon in the top-right corner to preview how respondents will see the form. Go through the grid, select responses, and check for errors or confusing elements. If everything looks good, click Send to distribute your form. You can share it via email, generate a shareable link, or even embed it on a website to reach a wider audience.
Want to create an order form for your business? Read, How Do You Create a Google Forms Order Form? (4 Easy Steps)
Use Cases for Multiple Choice Grids
The Multiple-Choice Grid is ideal for various scenarios, including:
- Surveys & Feedback Forms: Collect structured feedback on different aspects of a service or event.
- Quizzes & Assessments: Create matrix-style multiple-choice questions for educational purposes.
- Event Planning: Allow participants to choose preferences for multiple event sessions.
- Performance Reviews: Help managers rate employee skills and competencies efficiently.
Google Forms Checkbox Grid vs. Multiple Choice Grid
Both the Checkbox Grid and Multiple Choice Grid in Google Forms allow users to respond using a tabular format, but they function differently. A Multiple Choice Grid lets respondents select only one option per row, making it ideal for rating scales, quizzes, and structured preference selection. In contrast, a Checkbox Grid in Google Forms allows multiple selections per row, making it useful for surveys, feedback forms, or scenarios where users need to choose multiple applicable options.
Another key difference lies in response validation. In a Multiple Choice Grid, you can enforce rules like limiting choices per column, ensuring a more controlled response pattern. Meanwhile, the Checkbox Grid provides flexibility by allowing respondents to select multiple options within the same row. Choosing between the two depends on your specific data collection needs – if you need single responses per row, go with the Multiple Choice Grid, but if multiple selections are necessary, the Checkbox Grid is the better choice.
In Conclusion
The Multiple-Choice Grid in Google Forms is an excellent feature for organizing structured responses. By following the five easy steps outlined above, you can create an efficient and professional-looking form tailored to your needs. Whether you’re conducting surveys, planning events, or managing assessments, this tool simplifies data collection and analysis.
We hope this blog has created a multiple choice grid in Google Forms. If you liked reading this, also read our detailed guide on How to Add a Countdown in Google Forms? (4 Easy Steps) and How to Italicize in Google Forms (4 Easy Ways).