Looking for an easy way to create order forms for your business?
In this article, we’ll guide you through creating order forms using Google Forms, a powerful and user-friendly tool that enables businesses to collect customer information, track orders, and even process payments with the help of third-party options.
Order forms for businesses play a crucial role in managing customer orders and streamlining the purchasing process for businesses. With the ease of access to technology and the increasing demand for online ordering, businesses need to have an efficient and user-friendly platform to manage their orders.
Whether you’re starting a new business or looking to improve your existing order process, this article provides you with all the information you need to create an effective and efficient order form using Google Forms.
Table of Contents
What Are Order Forms and Why Are They Important for Businesses?
Order forms are documents or digital forms that businesses use to collect information & keep it as a record from customers when they make a purchase. These forms are used to gather all the necessary information required to process an order, such as the customer’s contact information, payment details, and shipping preferences.
It can also be referred to as a business order form, sales order form, procurement order form, inventory order form, or service order form. This establishes a legally binding agreement between both parties regarding the transaction.

Order forms are important for businesses because they provide a structured and organized way to manage customer (or even business) orders. They help streamline the ordering process by allowing businesses to collect all the necessary information in one place, which reduces the risk of errors and speeds up the delivery process.
Additionally, order forms allow businesses to track and manage customer orders, making it easier to fulfil orders and provide excellent customer service. In short, order forms are essential for businesses because they provide an efficient way to manage customer orders, and help businesses gather valuable customer data to drive growth and success.
Are you a business owner who wants to create forms? Read, Creating Business Forms Using Google Forms (7 Simple Steps)
Steps to Create Order Forms
Let’s look into the steps below to give you an idea of one way to create order forms. Then from onwards you will be able to place orders using Google Forms.
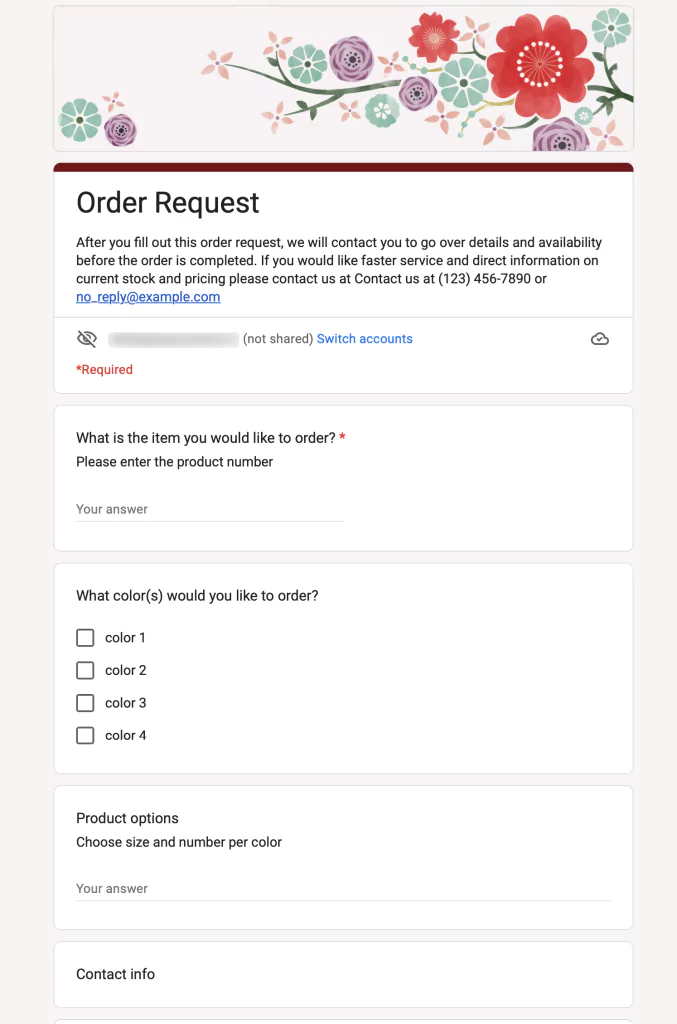
- Create a form – Log in to your Google account, navigate to Google Forms, and choose a blank form or you can also select the order form template.
Give your form a suitable title and description.
- Add relevant details for order – Click on the plus ‘+’ icon to add question fields. Choose the type of form field you want to add – short answer, multiple choice, dropdown, etc.
Next, add a question and any necessary options for each form field. Be sure to include essential fields that are required when creating order forms.
Add every product in different fields with the quantity & price that you intend to sell. Along with that,
- Delivery method,
- shipping addresses
- Contact information,
- Payment method – Google Forms doesn’t have a dedicated payment field. To sell anything via Google Forms, the third-party solution is required (we’ll focus on this step in the last step)
- Customize the look and feel of the Form – use the ‘customize theme’ to change the background, fonts, and header image of the form.
Use the “Settings” tab to adjust privacy settings like collect email addresses, and restrict attempts, and further you can custom add a confirmation message.
- Share form – Share the form with your customers or vendors, you can also embed it as HTML in your webpage. You can also share it via Facebook & Twitter from google forms.
- Link to third-party website – As I mentioned earlier, Google Forms doesn’t have any payment fields that can help anyone filing the order forms to pay directly from the form. However, there are different ways to collect payments in Google Forms.
One way is to pay ahead: link your customers to a third-party website. Here’s what you’ve to do – Include a static link to your third-party payment platform (such as PayPal) within the confirmation message in Google Forms to solicit a defined sum from your customer. The message (or link) will be displayed to the user once they have submitted the form.
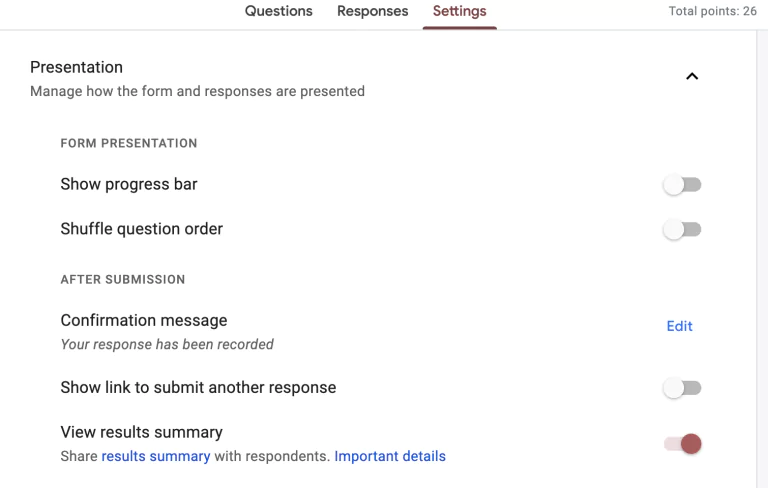
To add a link to the confirmation message, go to ‘Settings’ under ‘presentation’ you’ll find the confirmation message option, edit it with the link, and done. Once your respondents submit the form, they’ll see the confirmation message and link. That’ll lead them to the potential payment page.
- Another way is to use an add-on for payment with Stripe or Paypal and accept payments directly in your Google Forms. For instance, you can try the “Neartail” add-on that allows you to link your Google Form with your Stripe account.
- Payable Forms is another add-on that can be installed and tried for payments via Google Forms.
Wrap Up
In conclusion, creating an order form with Google Forms is simple and efficient, offering numerous benefits for businesses. By following the steps outlined in this article, you can design custom order forms tailored to your business’s unique needs and requirements.
Additionally, if you use Google Forms for creating quizzes or assessments, you should check out ExtendedForms, one of the top-rated add-ons. This timer and proctor add-on is free to install and use (with some paid features), making it ideal for educational purposes.
However, apart from that it has other features that may be useful in many use cases like export .CSV file (you can save data in an Excel sheet for later purposes), custom welcome message (you can provide in different languages), custom invitation message, & so forth.
If you want to customise or create teams, the add-on allows you to do so and offers branding settings such as profile logos and brand URLs. I recommend giving the add-on a try to see its features for yourself.
If you like reading this blog, also read our detailed guide on How to Add a Hyperlink to Google Forms. (7 Simple Steps)