Discover the seamless power of Google Forms for inventory management. In today’s digital era, businesses are harnessing the convenience of Google Forms to effortlessly track stock levels, automate data entry, and optimize their workflow.
This comprehensive guide will walk you through creating customized forms, integrating them with spreadsheets, and maintaining vigilant control over your inventory.
Say goodbye to stockouts and hello to efficient inventory management with Google Forms! By the end of this article, you will have a clear understanding of how to use Google Forms for effective inventory management.
Table of Contents
Steps to Manage Store Inventory with Google Forms & Sheets
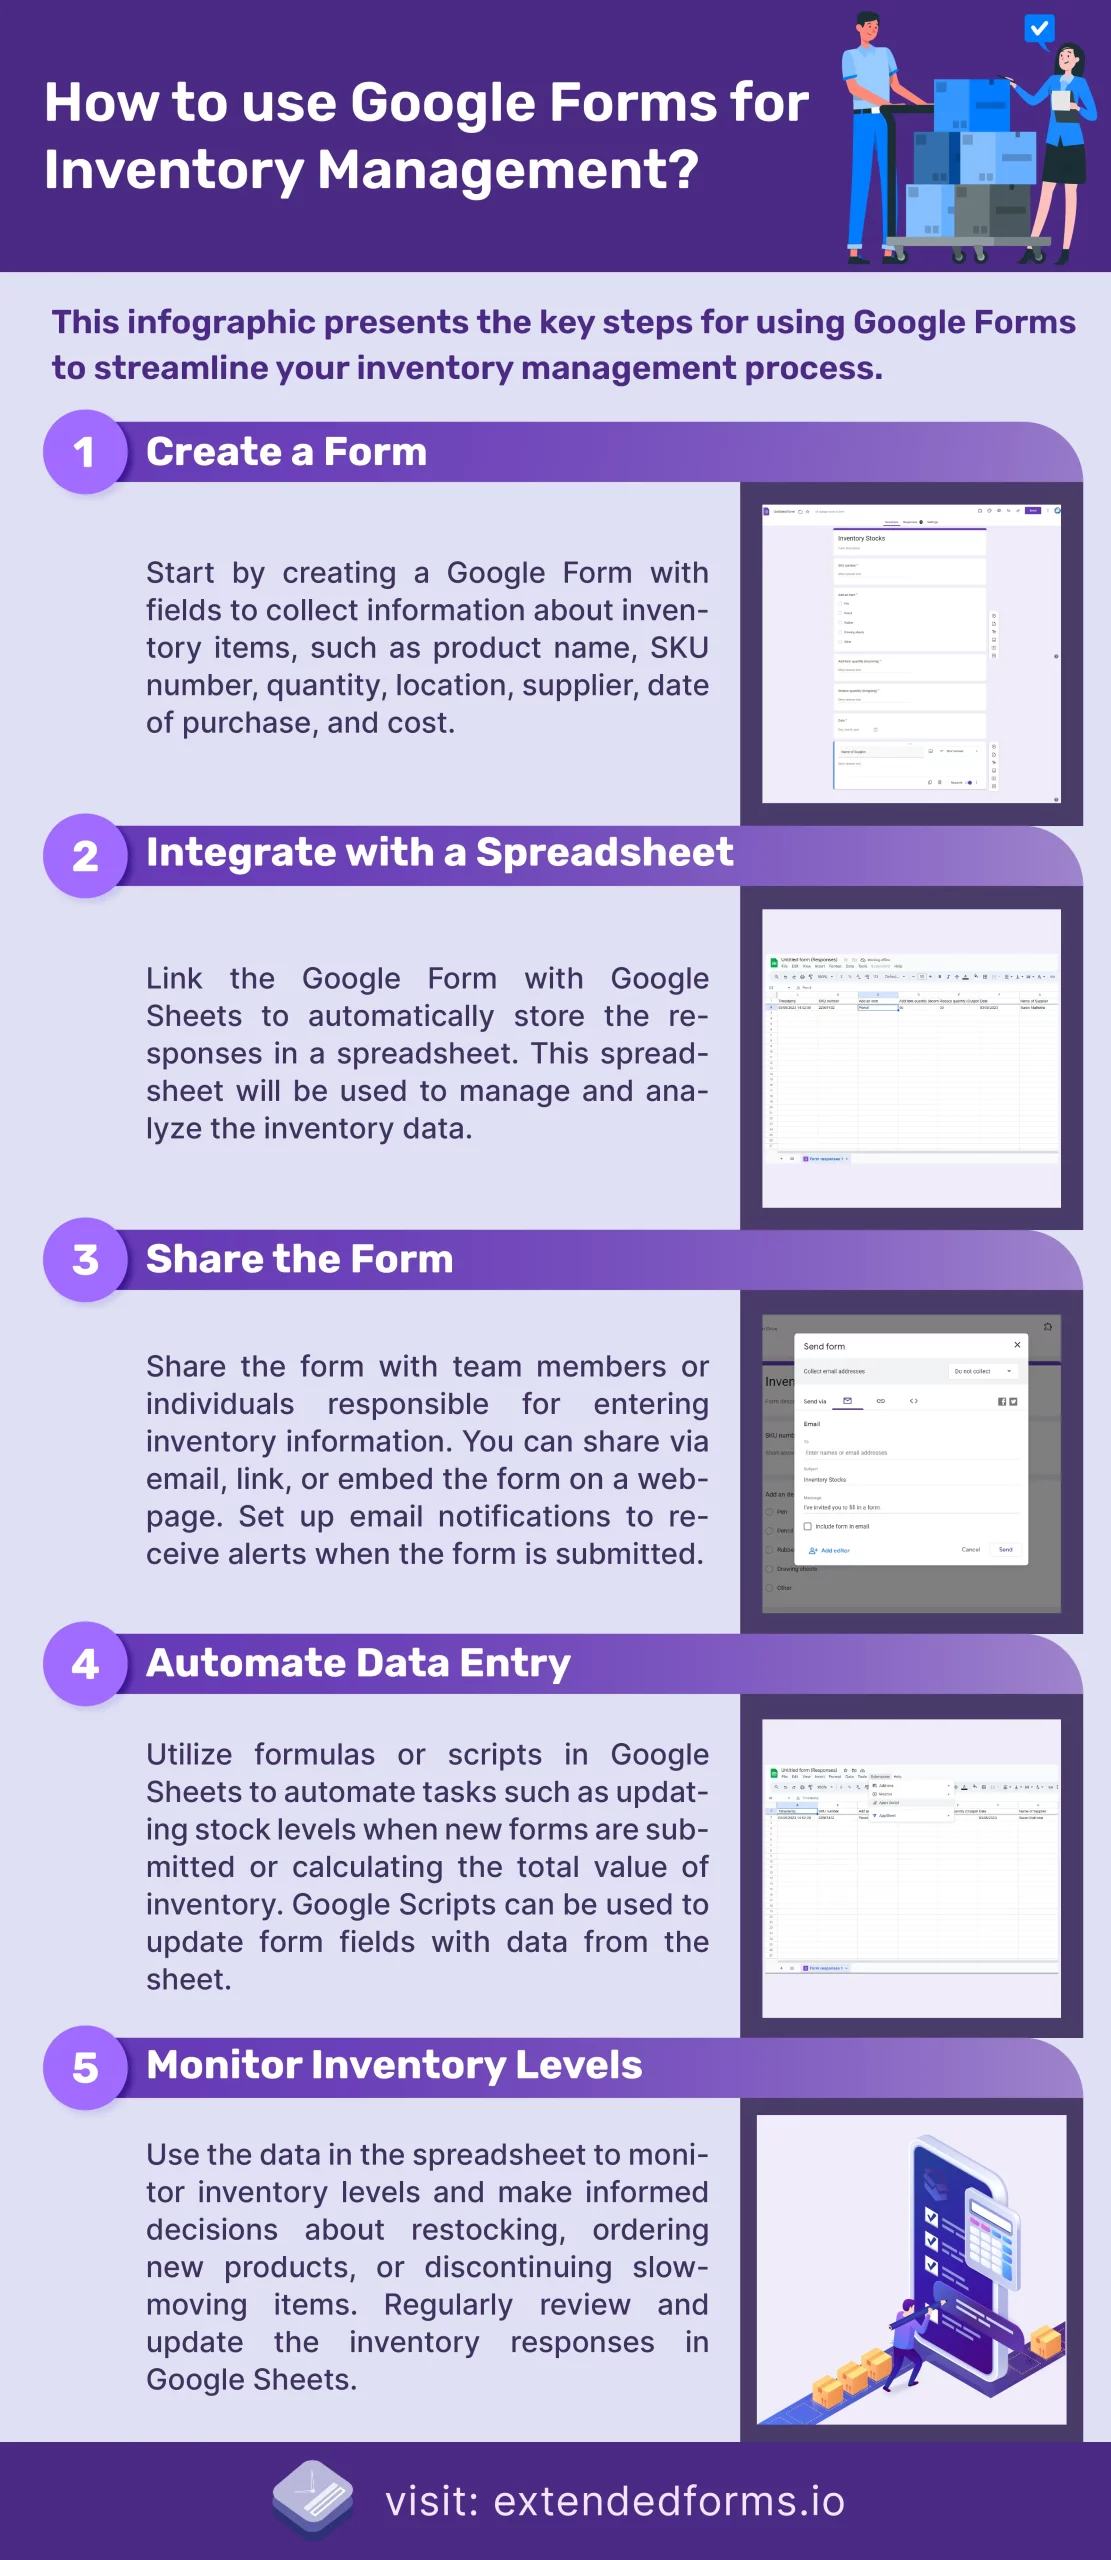
Here are the steps to use Google Forms for inventory management:
1. Create a form
- Start by creating a new Google Form and adding fields to collect information about your inventory items, such as product name, SKU (stock keeping unit) number, quantity, location, and supplier. You can also include fields for tracking the date of purchase and the cost.
- Further, add item quantity questions – check-in total & check-out total. And so on, depending upon your business you can add certain questions for inventory management. But above mentioned fields are necessary for every inventory sheet.
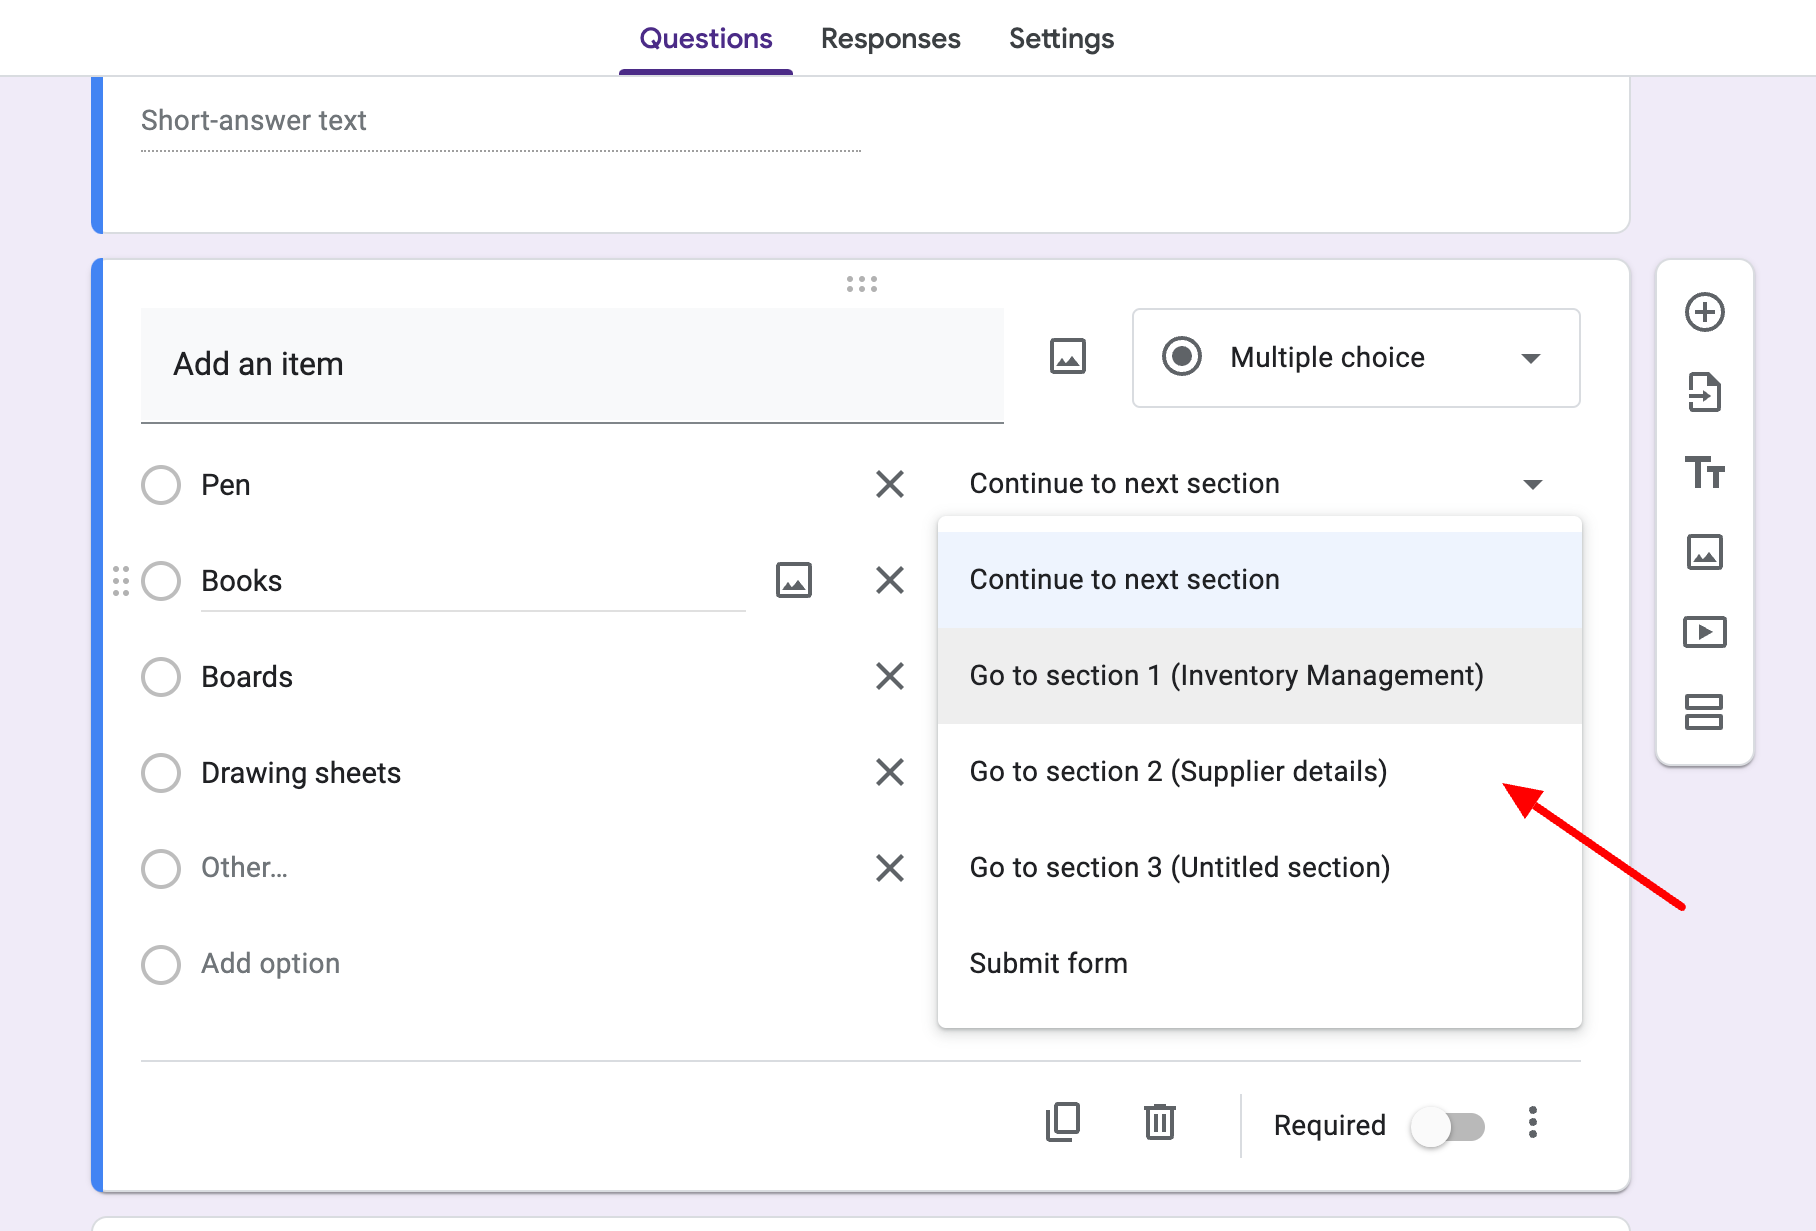
- You can add logic branching in the form and create sections for every query or item. For example, keep the first field question as a branching question with different options that lead to different sections like add an item, add suppliers, add customers, etc.
- Furthermore, you can configure form settings, under the Settings tab and adjust settings like ‘limiting to one per person,’ ‘show a progress bar,’ and enable the ‘allow response editing’ option.
2. Integrate with a spreadsheet
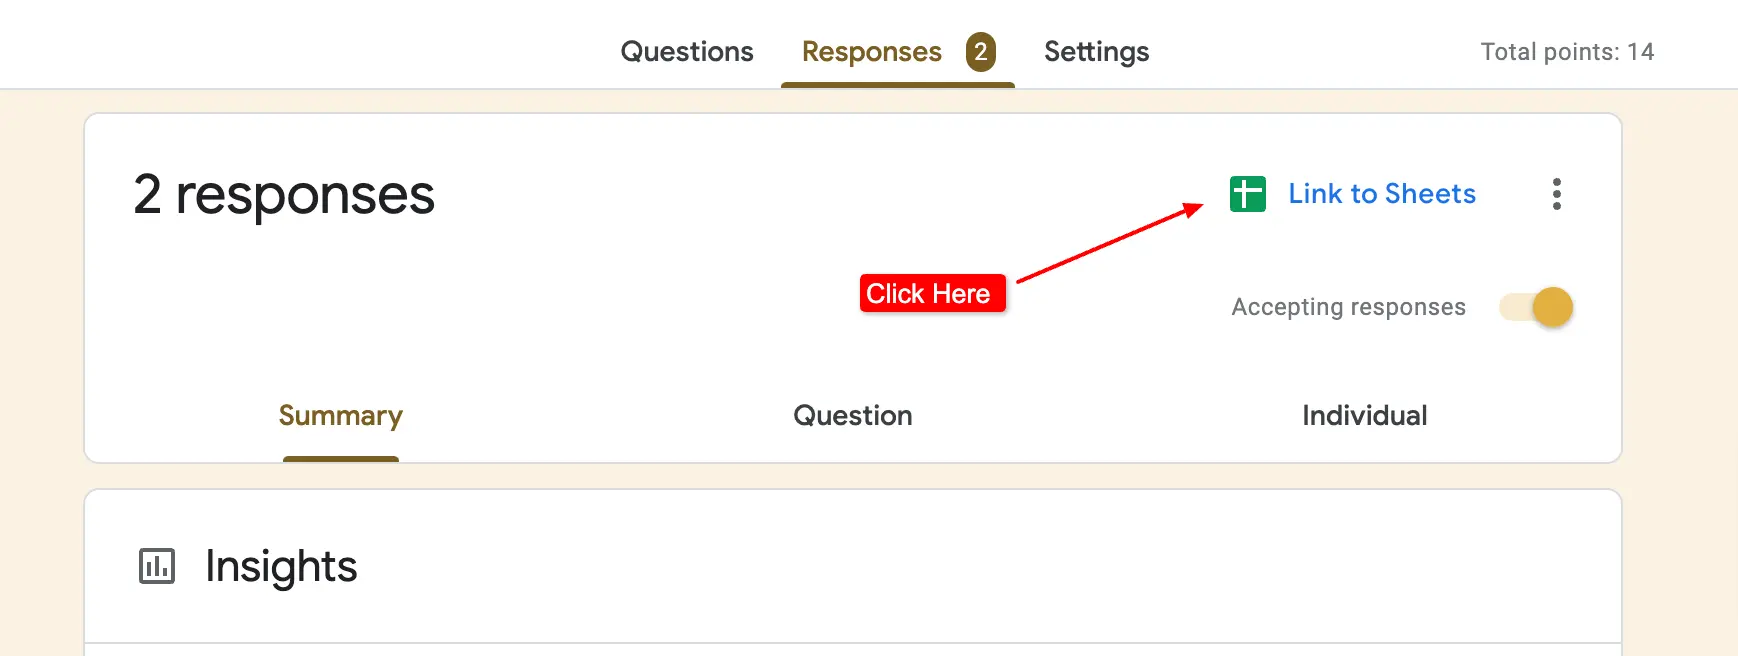
- Once you have created your form, connect it with Google Sheets. Go to the ‘Response’ tab click on the ‘link with sheets’ option and Google will automatically create a spreadsheet to store the responses.
You can use the spreadsheet to manage and analyze your inventory data.
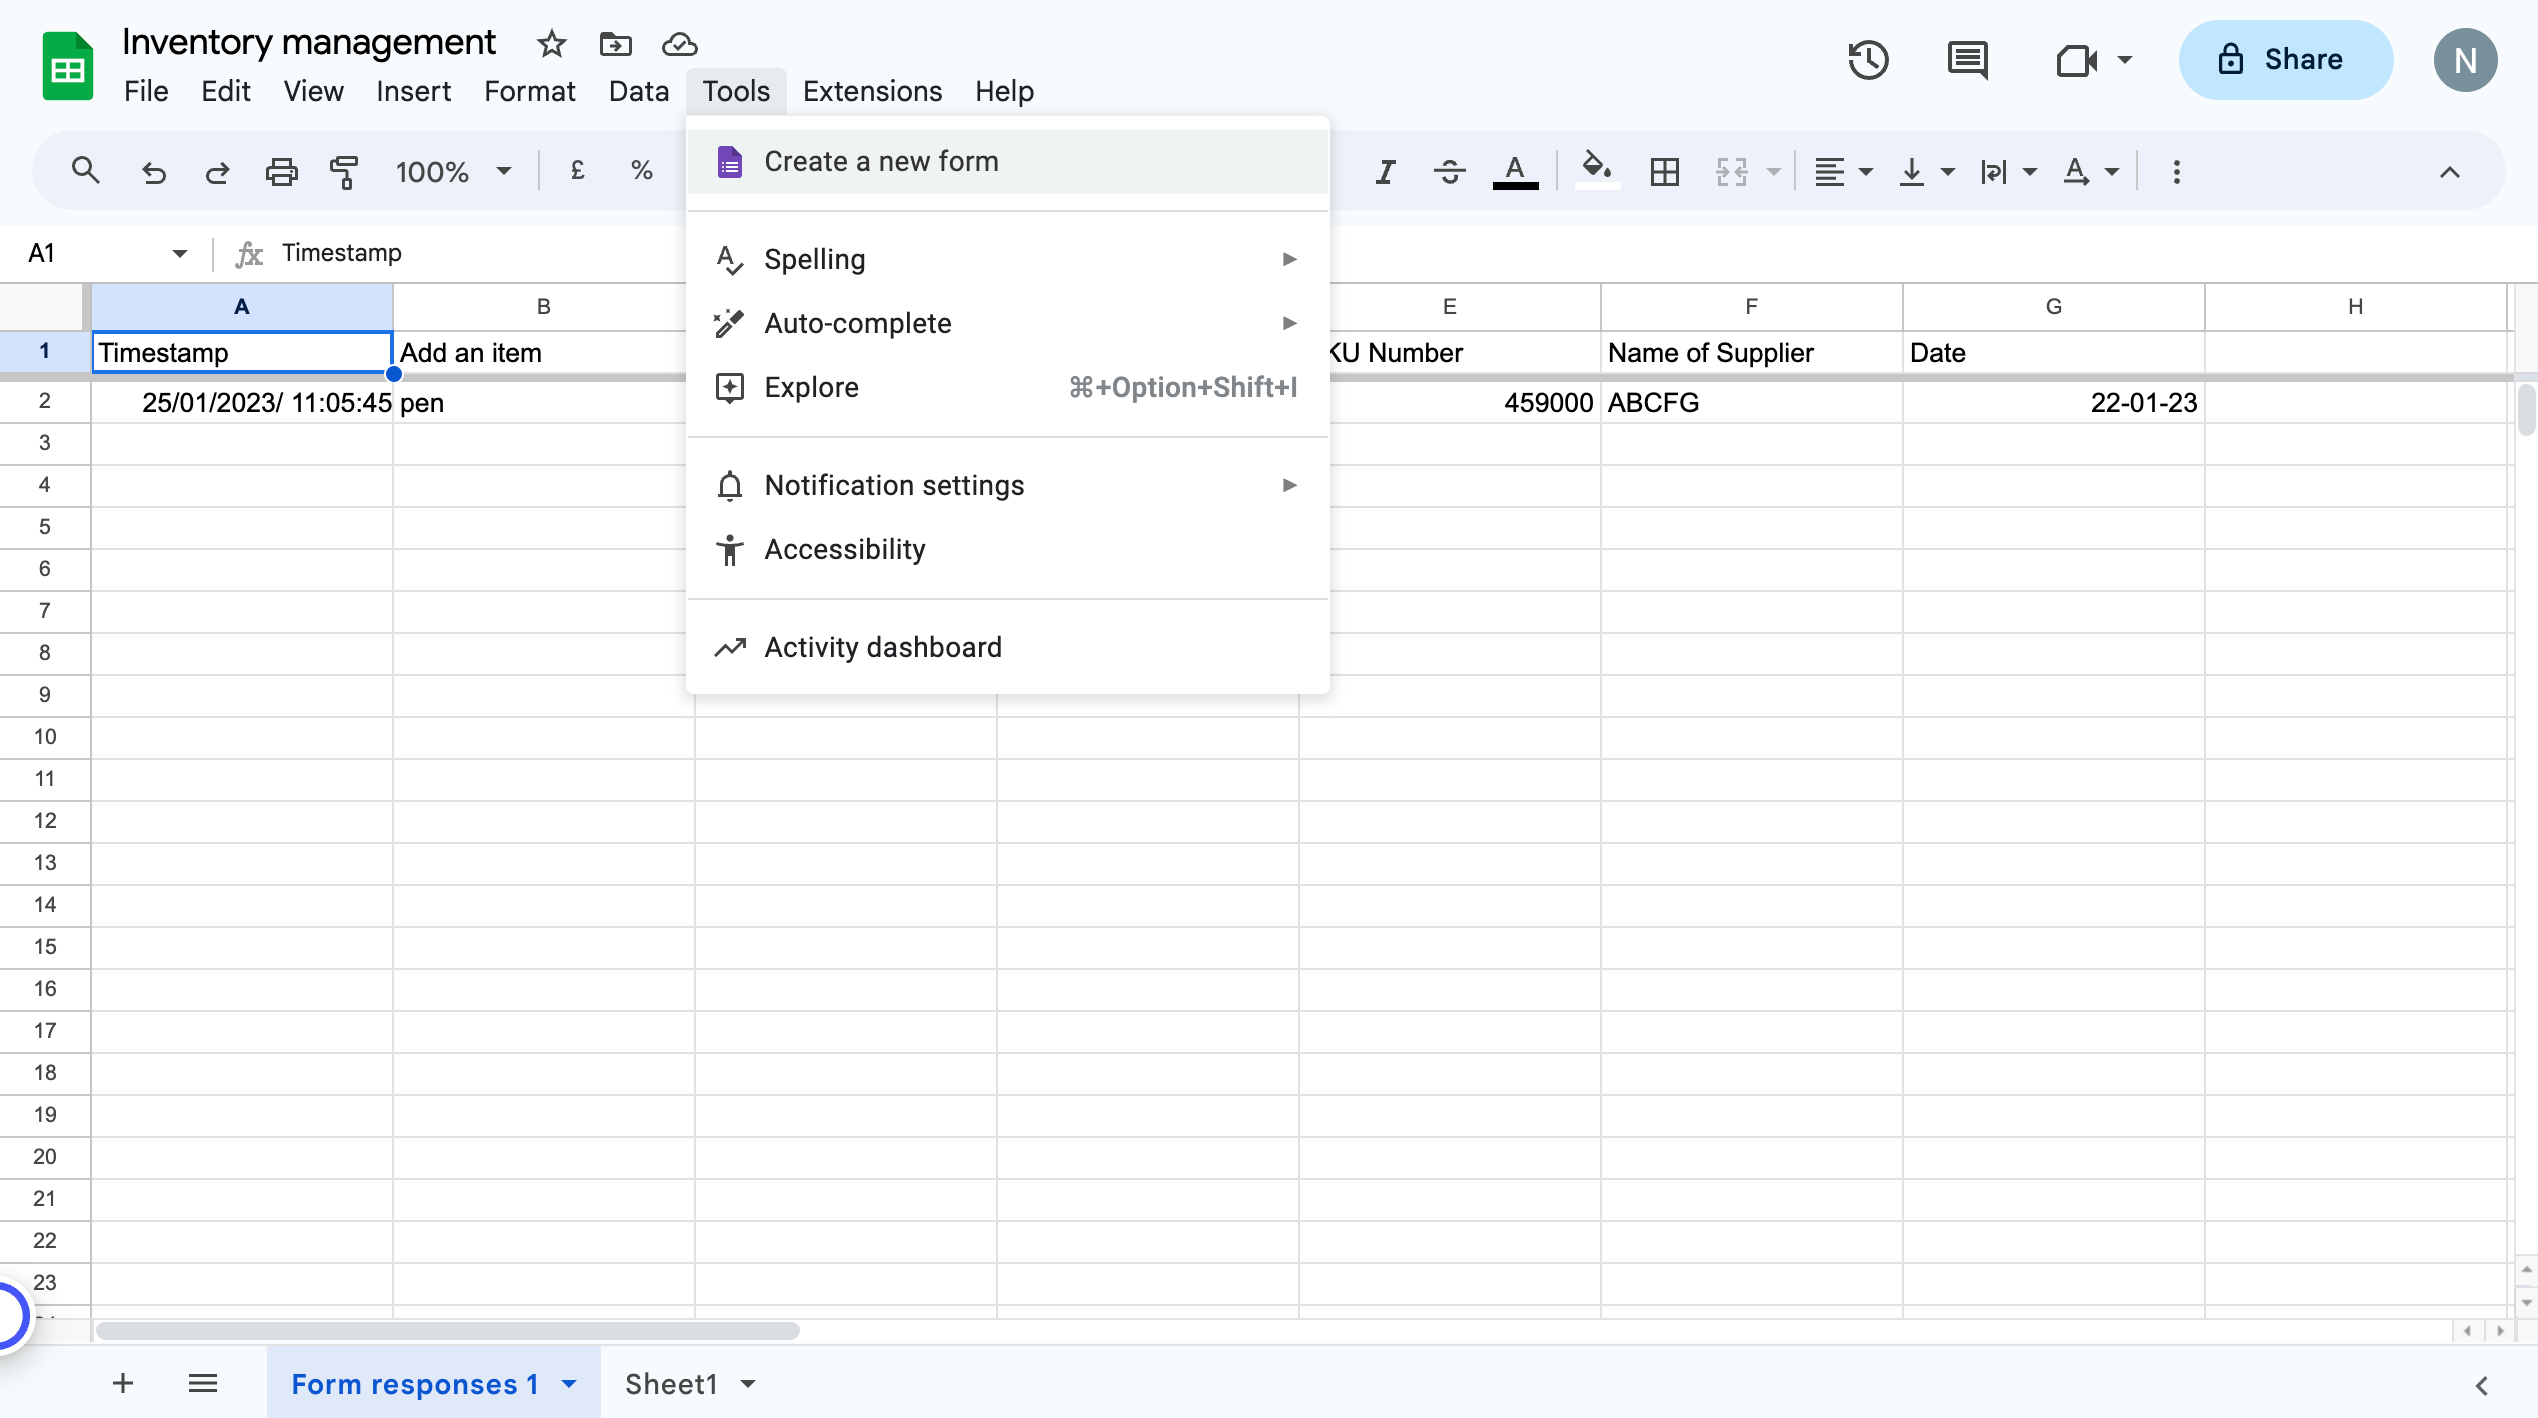
Note – You can also start the Google inventory management process by first creating a spreadsheet and then linking the form with the Sheets. Go to Tools > Create a new form.
A new spreadsheet tab with the name ‘Form responses’ will be created, go to the Forms & add fields that’ll be automatically added to the spreadsheet as columns.
3. Share the form
- Share the form with your team members or anyone who will be responsible for entering inventory information. Click on the ‘Send’ button and share via email or link.
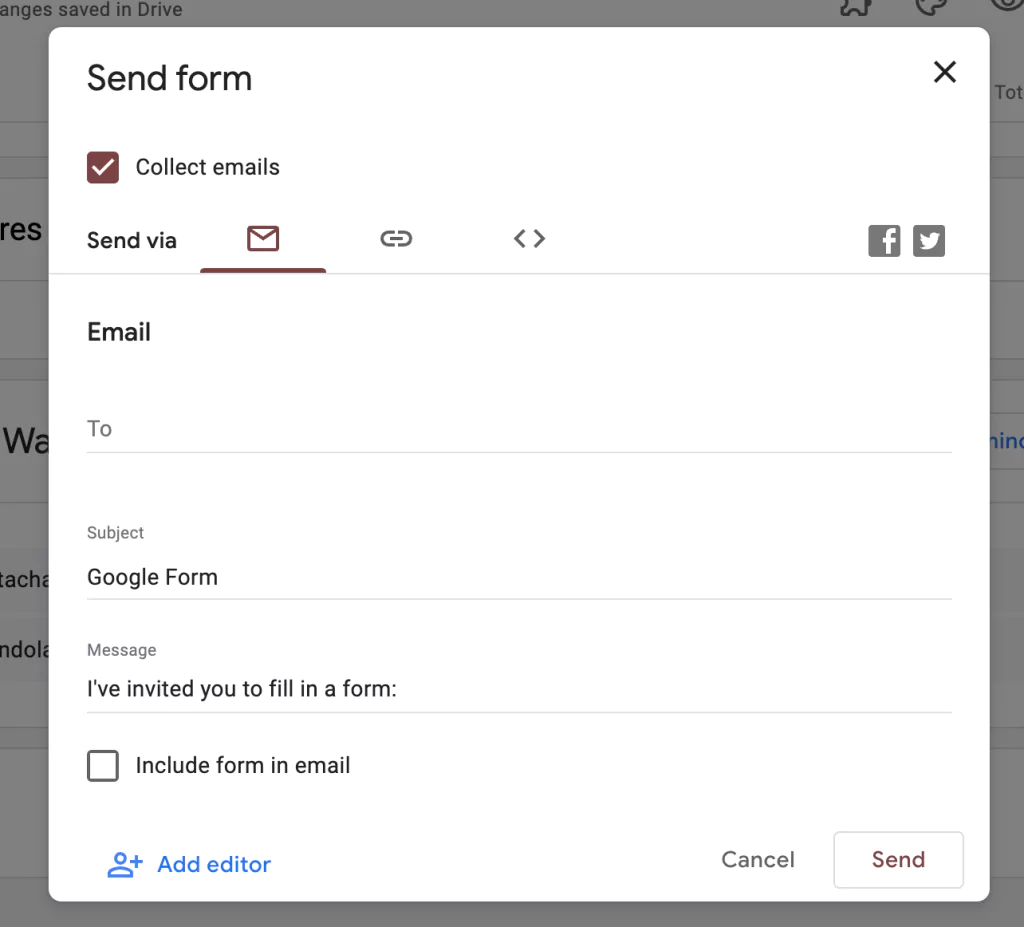
- There is also the option to share through embedding HTML code or via social media platforms, but Google Forms for inventory management purposes sharing these ways may not be feasible.
- You can also set up email notifications to receive alerts when a form is submitted.
4. Automate data entry
- Use the “Formulas” or “Scripts” feature in Google Sheets to automate certain tasks, such as updating stock levels when a new form is submitted or calculating the total value of your inventory.
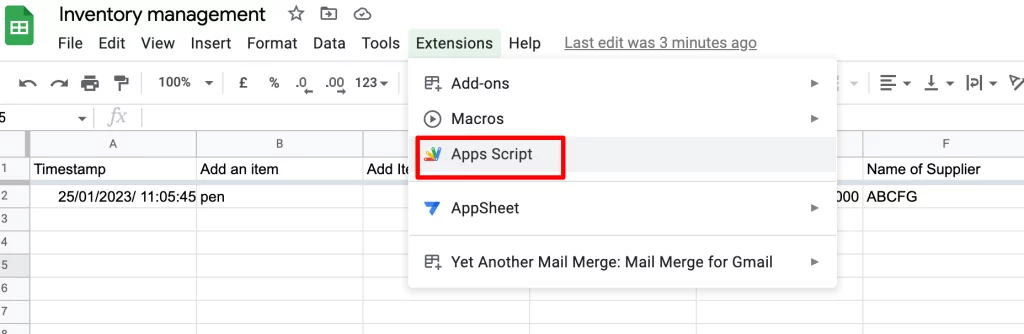
- To update the form with the latest data from the sheet that you’ve added, use ‘Google Scripts’ to update items, status, suppliers, or any field. In the Sheet, you’ll find the scripts under the Extensions option. You’ll have to work through the codes to update the form.
5. Monitor inventory levels
- Use the data in the spreadsheet to monitor inventory levels and make informed decisions about ordering new products, restocking existing items, or discontinuing slow-moving items.
Note – Routinely check the responses in Google Sheets to review and update the inventory responses. Or users can ask the people to fill the form again with updated details.
This is how we can use Google Forms for inventory management. It is easy to use and manage the inventory data in the sheet. If you are a coder then it is also easier to update the form with whatever latest data you’ve gathered in the Sheet.
FAQs
How do I manage inventory in Google Forms?
In Google Forms, you can create an inventory survey form and share it with your team and traders who can update the form with all the inventory-related details. Along with it, connect the form with Sheets to keep an inventory list of data and manage it from that data you’ll be receiving from the people.
Does Google have an inventory management system?
Google has tools like Google Sheets and Google Forms that can help in an inventory management system. In Google Sheets, you can prepare a chart or table with all inventory details from certain data columns.
Through Google Forms, you can collect the information related to the inventory system and auto-update it on Sheets. There are even inventory management system templates available online that you can use in Google Sheets.
How do I create a Google inventory spreadsheet?
Through Google Forms users can link Sheet which will create an inventory spreadsheet automatically with all the details available in Forms. However, manually, in a separate window, go to Google Sheets make a new spreadsheet, and add inventory with columns for your Product ID, SKU, and quantity.
Does Google Forms have a database?
Google Forms itself has a Summary section that provides the responses summary and even individual responses to every question. However, for structured database management, Google Forms is not enough, but with Google Sheets, you have a database and you can link Form with the Sheets. Aside from that, you can even download the Form responses and create a database in Excel.
Here’s the way to advance Google Forms
Extended Forms add-on, designed to elevate your Google Forms experience with enhanced features and functionalities. Unleash the potential of your forms with a countdown timer, forms accessibility deadline, online proctoring, progress restoration for responses, branding options, and more with this app!
Take your forms to the next level beyond Google Forms’ standard capabilities. Customize invitation messages, welcome your participants with personalized welcome memos, and streamline customer support emails using this fantastic add-on.
Simplify form creation and automate form submission tasks with ease, allowing you to craft custom, professional-looking forms effortlessly.