
Have you ever wondered or tried, whether you can create Google Forms on mobile phones instead of a laptop or tablet? Most tutorials show form creation on larger devices, but what if you don’t have access to them?
Creating forms is generally easier on larger screens with keyboards, but when you have a smaller screen, it becomes more challenging to navigate software applications. This is where mobile-friendly responsive design comes into play.
Responsive (Mobile-friendly) web designs are a way of transforming websites or web pages into easily accessible and adjustable for different screen sizes. However, the question remains: Can Google Forms be created on mobile devices?
Let’s get into this short and quick article to check how users can create Google Forms on mobile devices. But before that, let’s look at tips for creating effective mobile-friendly forms.
Table of Contents
Tips for Designing Mobile Responsive Forms
According to the statistics, smartphone penetration is over 80%, which means currently over 6.8 billion population in the world are smartphone users. That shows, how much users rely on mobile phones for day-to-day activities.
Besides, when we see data on web traffic that came through mobile devices has increased a lot since 2015. Statista data shows that mobile devices generate around 58% of global web traffic.
This statistical data displays the smartphone’s penetration globally and the change from big screens to small-screen device usage. This ultimately points out the necessity of mobile responsive websites or forms in today’s time. So, in this case, knowing some tips when creating Google forms (or any) on mobile is a must.
1. Keep Fewer Fields (Concise)
The fewer the fields, the less chance of users jumping out of the form midway. No matter how responsive forms on a mobile device are, it is still more difficult than a larger screen device to go through filling out forms.
Thus, the first tip is to create fewer fields form, keep your forms concise, and add only the most necessary information that you want to gather from your respondents. It will be easier for mobile visitors to fill out Google forms on mobile.
2. Choose Mobile-Friendly Question Fields
There are various question fields in Google Forms that users can use depending on the type of information they want to gather. However, choose certain question fields that are mobile-responsive for respondents.
When creating the form, choose question types that are easy to fill out. If your question exceeds 6 then use dropdown or Likert scale questions that don’t lengthen the form. And if your form is short, you can choose checkboxes or multiple-choice fields.
Want to create a voting poll? Read How To Create A Voting Poll In Google Forms? (7 Simple Steps)
3. Make Sure Forms Load Rapidly
You can customize your form however you like, but what is more important is to ensure that forms load faster. Because people don’t like slow websites or waiting for forms to get loaded gradually.
In that sense, keeping the form simple and highly optimized for mobile devices will keep your users happy. Apart from that, keeping forms simple to read is also necessary for it to be optimized.
4. As Usual, Test Them Beforehand
Overconfidence always lets things get out of control. And not testing your form beforehand speaks just that. So, it’s better to share the form created on mobile to sample people and check if it is mobile-friendly, and then share it with your audience.
Step to Create Google Forms on Mobile
The process of creating Google Forms on a mobile phone is similar to how you would’ve done it on your laptop. Just a bit of change in interface navigation here and there, apart from that everything is the same.
Step 1: Create a Form
- To create a form, first, go to Google Forms on the browser on your mobile device.
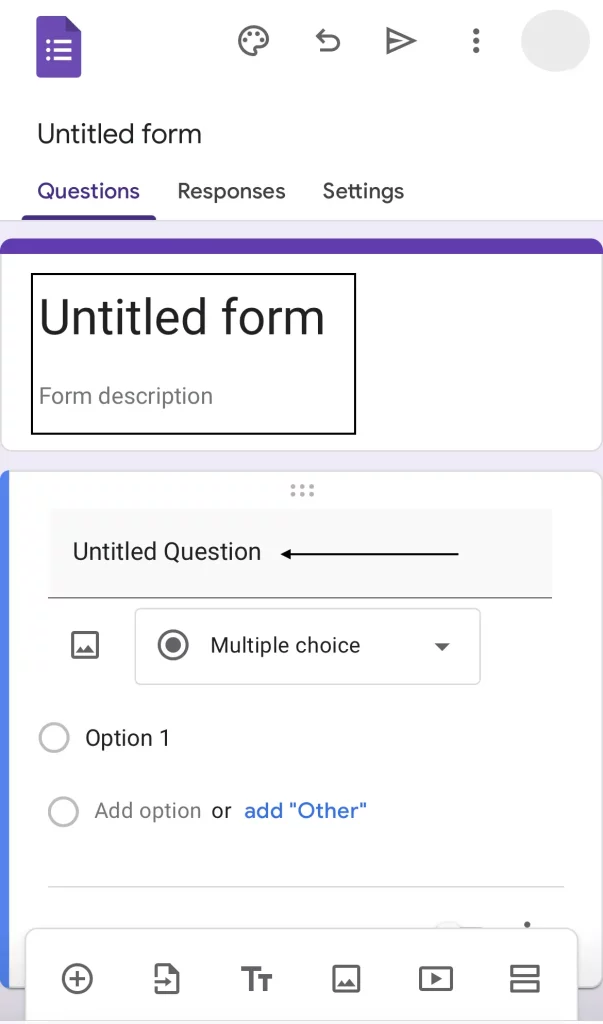
- A new ‘Untitled Form’ will appear on your screens, unlike in the computer browser that takes you to the Google Forms homepage from where you can select a form.
In the case of Google Forms on mobile devices, it directly creates a new form (sign in to your Google account if you haven’t already).
- The interface will greet you this way – title and one question tab. To add the title, click on the ‘Untitled Form’ and type the title, and below that the same way you can add the description.
When you tap any of the fields, a formatting bar appears just below the title/description/question. Select the text and format it from the options available or add a link to a text.
- Similarly, if you want to add sections or titles in between question fields, then at the bottom of your device screen (unlike on a big screen where the form fields are shown beside the question box) you’ll find the form fields bar.
Click on the “T𝗧” icon to add a title and description. When you add a title, below that you’ll see this ‘⋮’ icon, if you click on it you get the option to duplicate the item, remove the title, or add/remove the description.
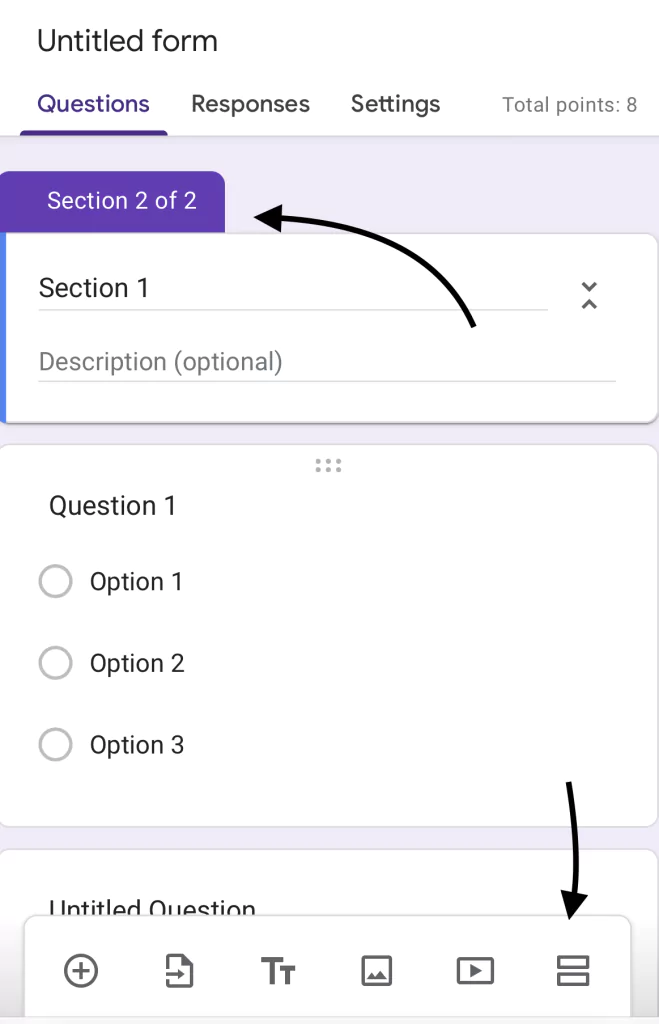
- Furthermore, to add sections in the form to create a multi-section form then, from the bottom field tab, click on the “two horizontal square” icon. A new section will appear on your screens.
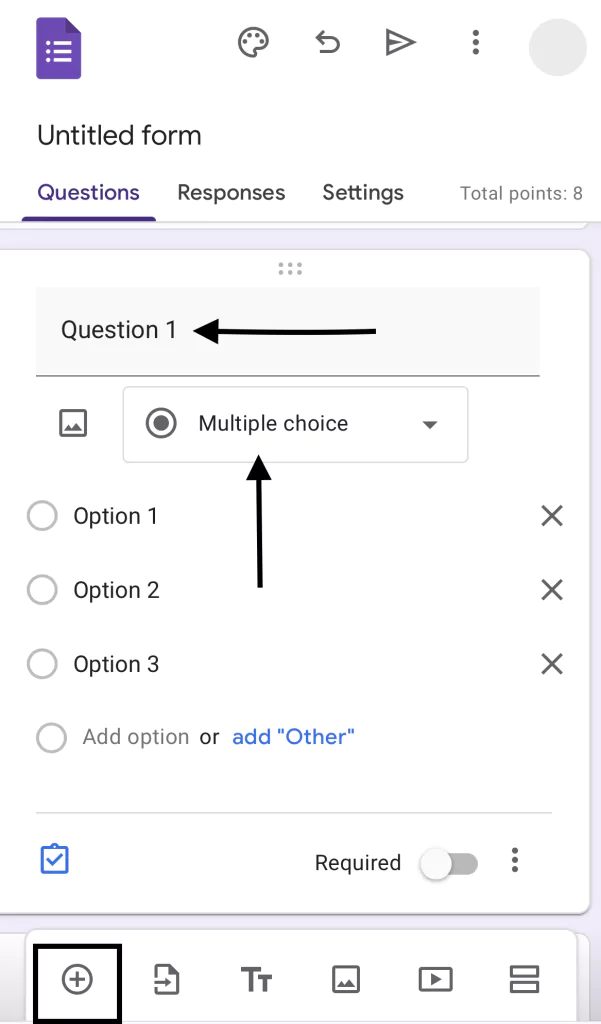
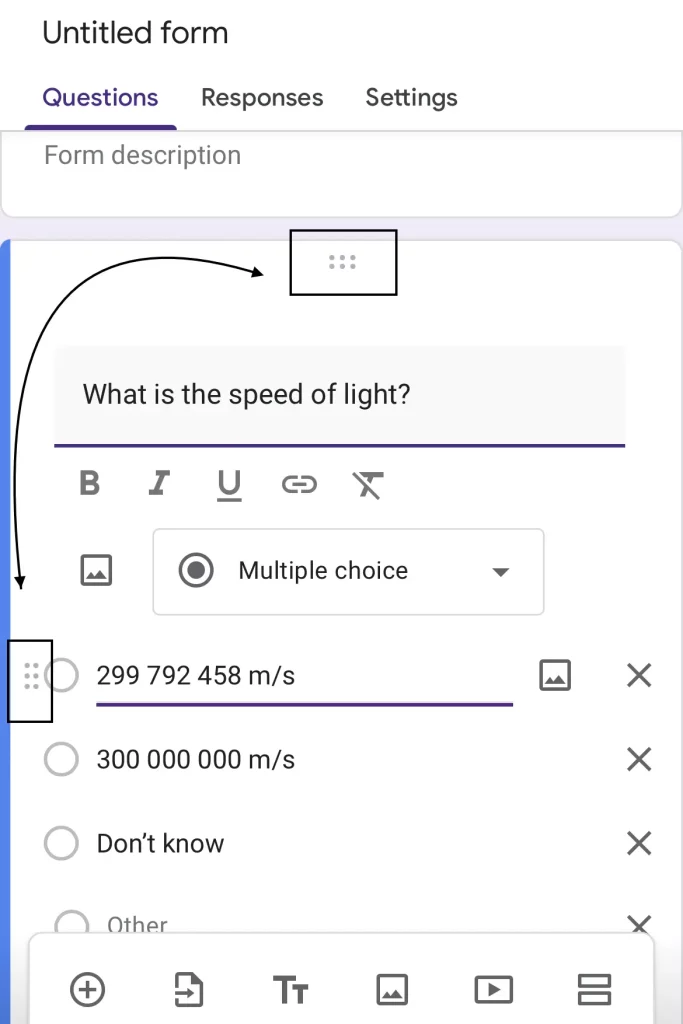
- Now moving forward to add or edit questions in Google Forms on mobile – tap ⨁ from the toolbar at the bottom and a question field will be added.
Select the question box to enter the question and if you want to change the question type then below the question you’ll see the ‘Multiple choice’ dropdown menu.
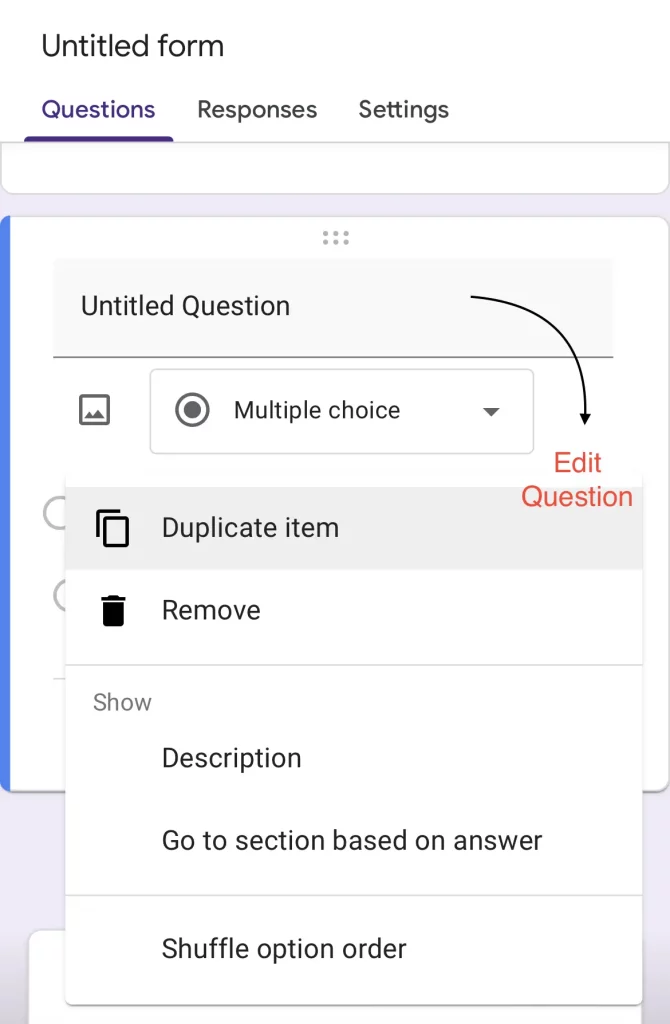
- Click on it and choose the question you want to add. Besides, you can duplicate the question without starting from scratch, if you think the two questions are almost identical.
Click on the ⋮ icon at the bottom of the question field, and from there you can duplicate the question, remove it, add a description box in it, shuffle the question order, and so on.
Step 2: Edit the Form
- In case you want to change the order of questions or options, click on the question or options and you’ll see six dotted icons, tap, hold it, and drag it up and down.
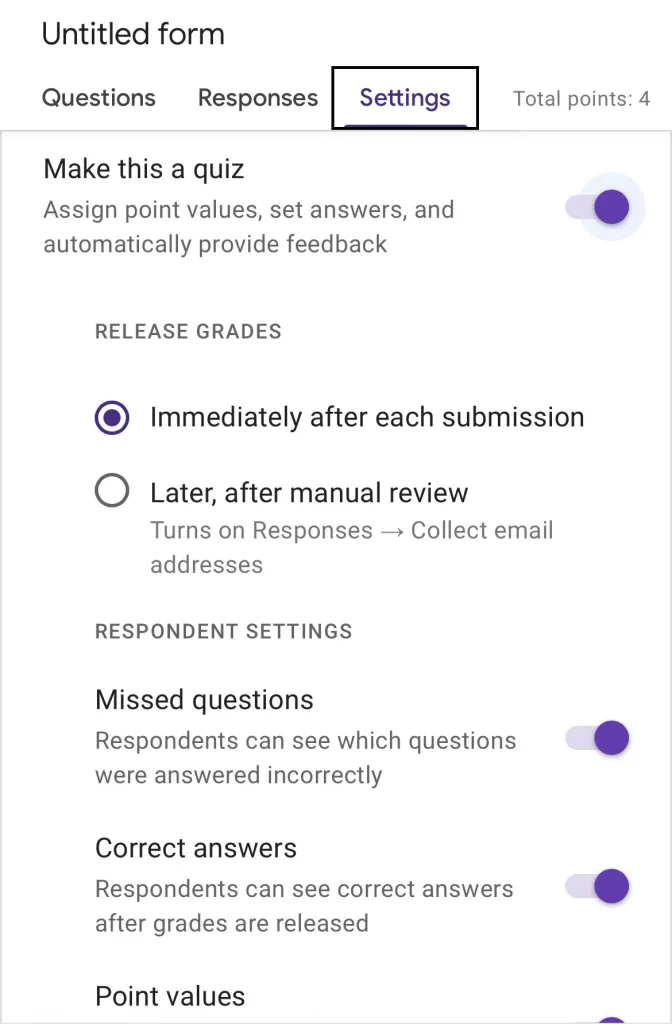
- To make your form a quiz, go to ‘Settings’ and enable the ‘Make this a quiz’ option. More options will appear to configure like ‘release grades,’ respondent settings, and quiz defaults.
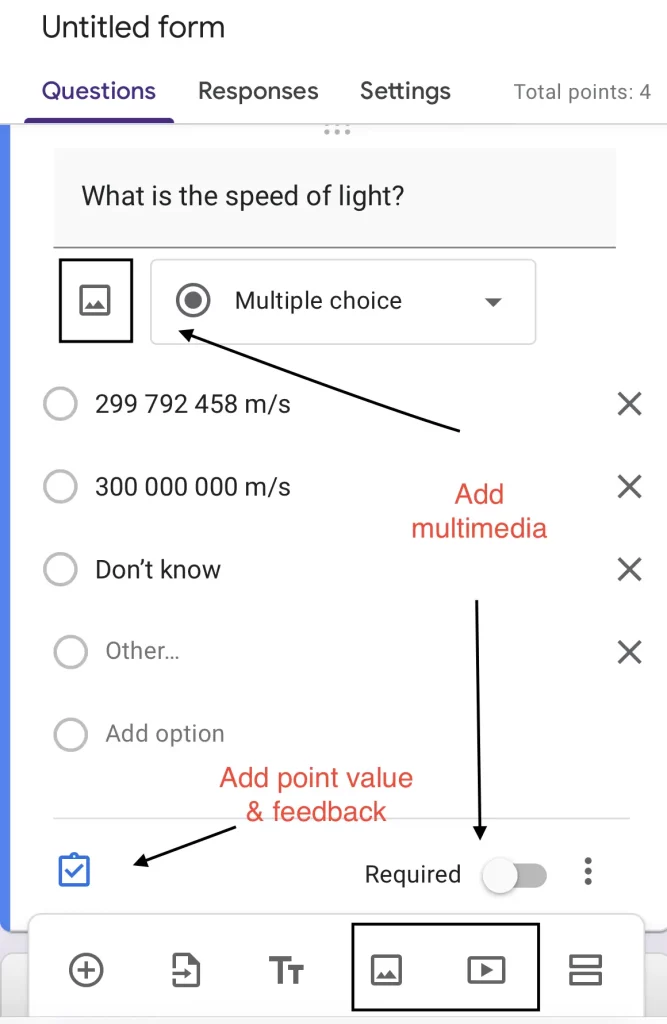
- Once you turn the form into a quiz, you’ll see an extra icon in every question tab. Click on it and add point values and answer feedback.
- If you want to add multimedia like photos and videos to your question, then you can click on the image icon (present in every question tab). You can also opt to click on the image and video icons at the bottom toolbar to add an image or video question.
Step 3: Customize and Share Form
- Similar to the desktop version, Google Forms on android & iOS interface for ‘customize theme’ is the same but in a compact size.
- To preview the form, you’ll have to click on the ‘⋮’ icon at the top and choose Preview.
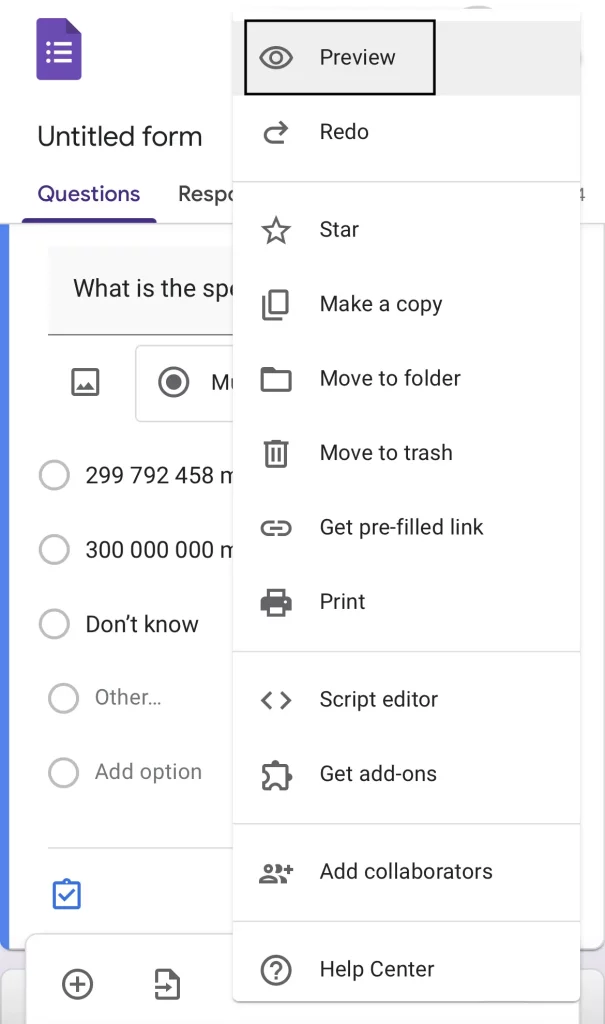
- It is unlike how we navigate to Preview in the desktop version which is present in front.
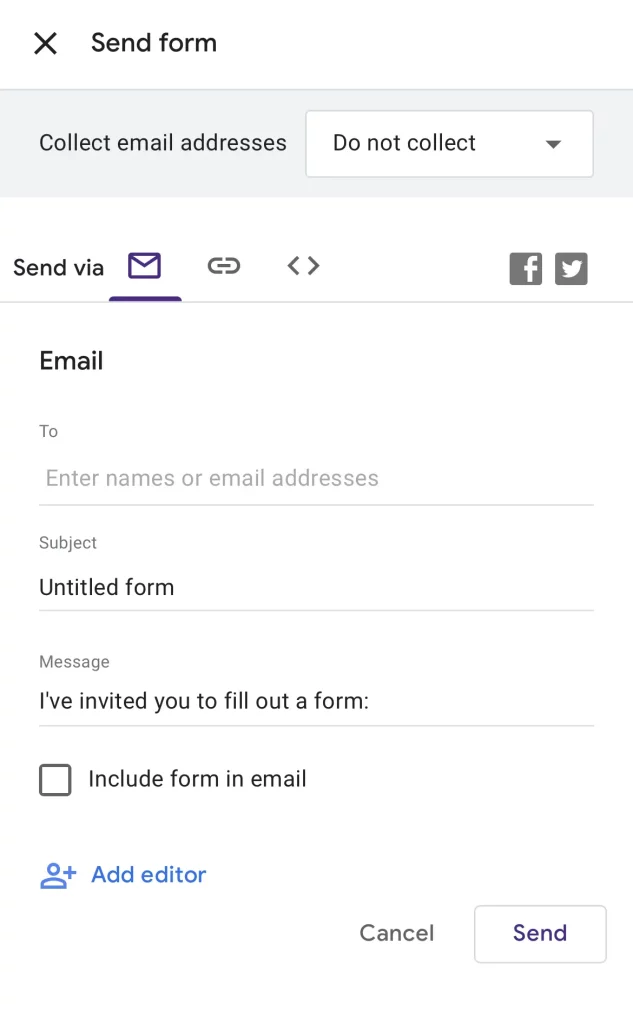
- To share the form, click on this ‘⩥’ icon.
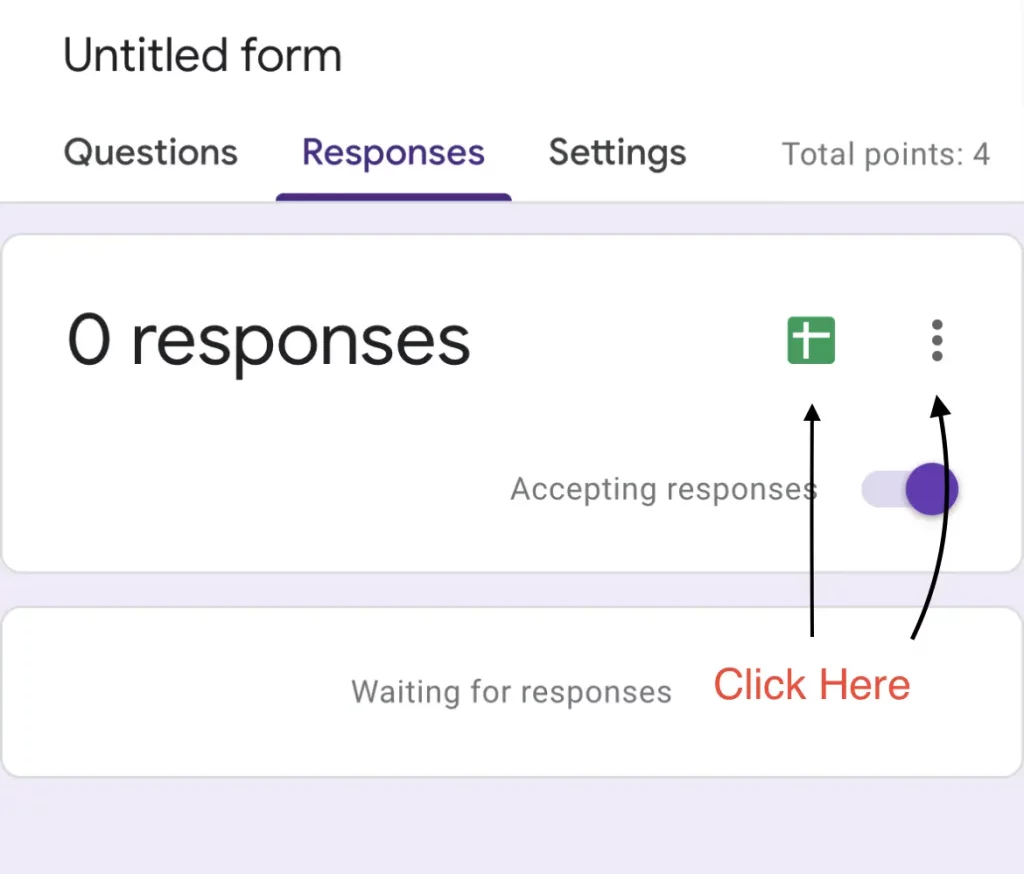
Step 4: Manage Responses
- To manage responses, go to the ‘Responses’ tab and select the Sheet icon and you can either create a new spreadsheet or save it to an existing one.
- Besides, you can get notified of every new response, by clicking on the ⋮ icon and enabling the option.
- In the Responses tab itself, you’ll see all the responses that will be seen after responses are entered.
Note – The process of creating Google Forms on mobile is similar to how you do it on a desktop. There are just slight interface differences that can be easily understood.
In Conclusion
Creating Google Forms on mobile offers unmatched convenience and flexibility. While traditional guides focus on laptops and tablets, mobile form creation ensures productivity on the go.
By designing concise, mobile-friendly forms, you can effectively engage a broader audience and collect valuable data effortlessly.
Whether mobile or desktop, you can enhance your forms with add-ons to suit your needs. For quizzes or tests, consider the timer and proctor add-on. ExtendedForms is a notable option you can try for free, with the option to upgrade to a paid plan if it meets your needs.
If you like reading this blog about creating mobile-friendly Google Forms, also read our detailed guide on Best Google Forms Test Maker: ExtendedForms and How to Make Google Forms Accessible. [In 4 Steps].