Looking to add a timer to your Google Form quiz? You’re in the right place! A timer can help ensure your quiz or test is completed within a set timeframe, adding a sense of urgency for participants.
In this article, we’ll guide you through setting a time limit on your Google Forms quiz using the ExtendedForms add-on. This tool lets you set a time limit for the entire quiz and establish deadlines for submissions.
Whether you’re an educator, a business owner, or just a quiz enthusiast, incorporating a timer can enhance the challenge and engagement of your Google Form quiz.
Table of Contents
Unlocking the Potential of ExtendedForms
ExtendedForms is a Google form timer add-on that is one of the best and top-rated add-ons of Google tools. It is the perfect solution for creating timed Google forms for any purpose – quizzes, assessments, surveys, questionnaires, and much more.
Aside from turning your no-limit form into a timer quiz, Extendedforms also caters to a few other things with its various great features. Some of them that are useful in tests/quizzes use-cases are;
- Automate Proctoring – you can also enable online proctoring to prevent cheating from happening in online exams (to a certain extent). Through its tracking functionalities, you can add tab switch detection, full-screen tracking, and camera snapshots
- Negative Marking – Extendedforms also has a new feature of adding negative marking to your tests and quizzes, adding more challenge and advancement to assessments.
- Google Classroom Integration – The app also allows users to add a form-created quiz or test in Google Classroom directly through the ExtendedForms dashboard. It also auto-import scores from linked Google Forms to the created classwork.
The add-on is a great freemium app, you can for free add timer countdown, auto-submit, and restrict attempts functions to your forms.
Steps to Set a Timer for the Google Form Quiz
Here’s the step-by-step guide to set Google Forms time limit in a quiz without any hassle.
Step 1: Setup Google Forms
- Sign in to Google Forms, if a form is also created then select that form to set a timer for. Otherwise, select a blank quiz or choose from one of the templates.
- If creating a new form, then set up the Google Form by adding Q&As, configuring the settings of the form, and customizing the form.
- Once your Google Form quiz is set up, let’s add the Google Forms timer function to it.
- We’ve to install the Google timer add-on – ExtendedForms; for the timer function. And there are two ways to install the extended forms add-on.
Install from the Google Marketplace website
- Go to ExtendedForms in Google Marketplace Workspace
- Sign in to your Google Account
- Click the “Install” button to install the add-on
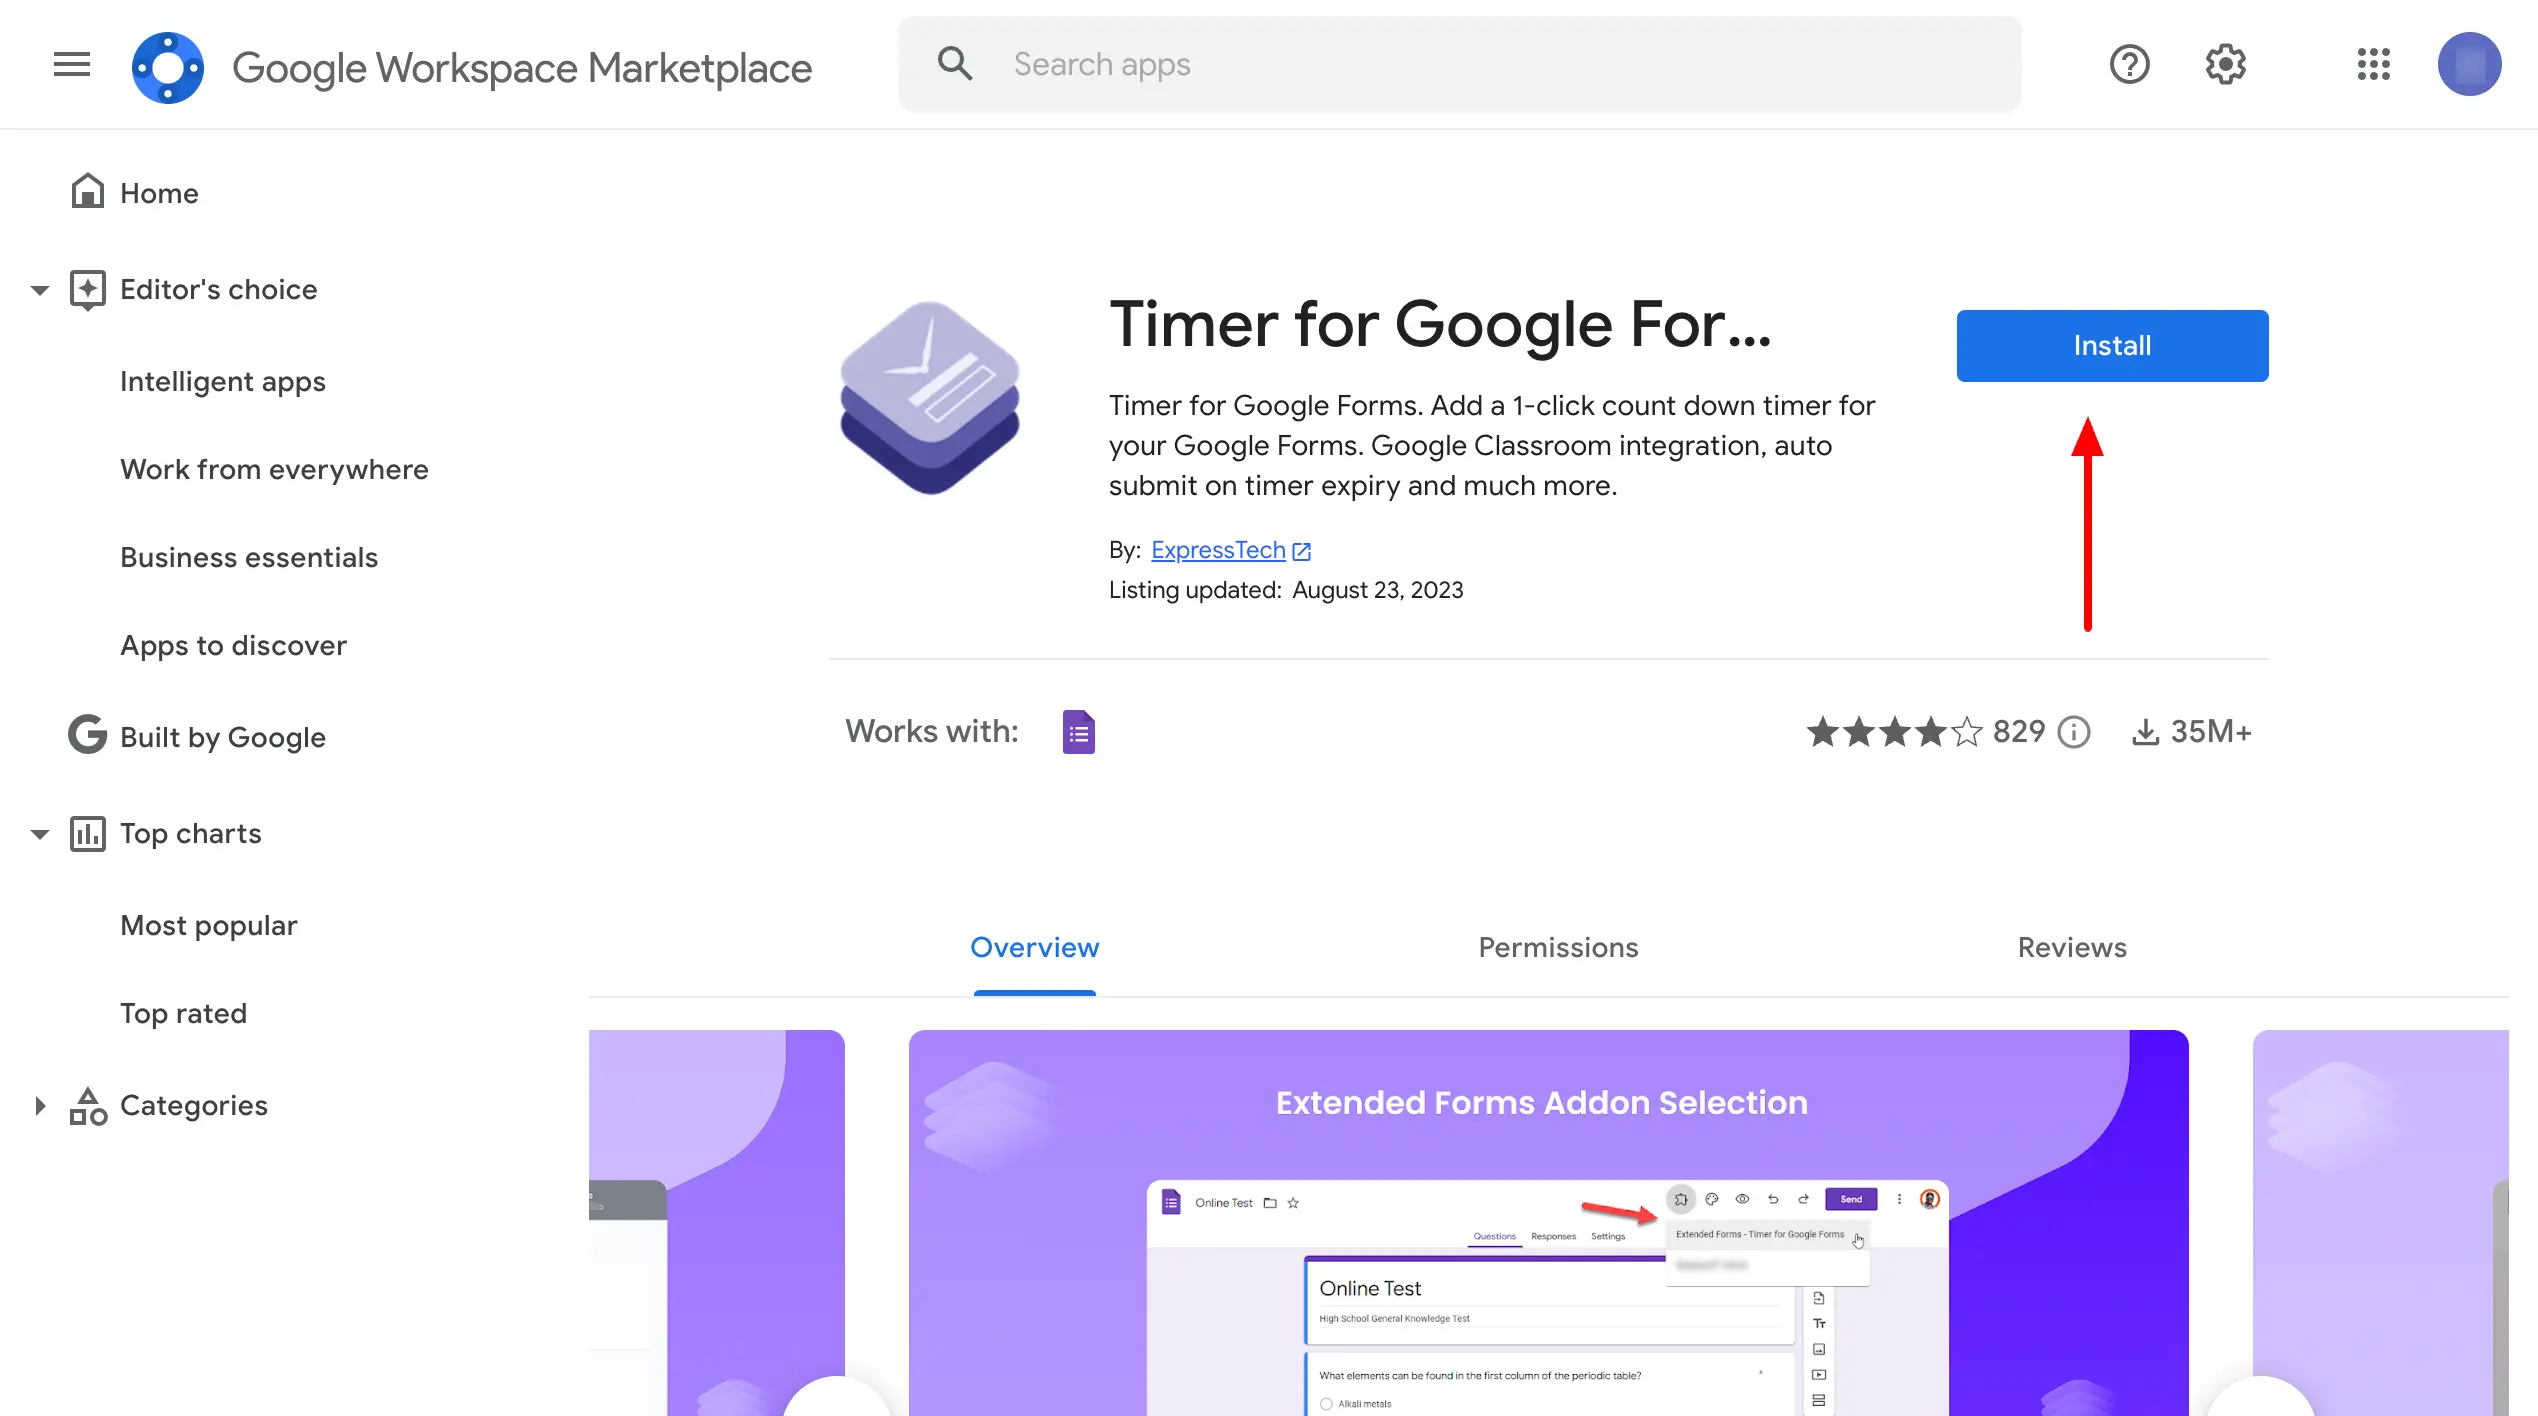
- Once the add-on is installed, you can access it from Google Forms.
Alternatively, install directly from Google Forms.
- Click on the More icon in the top right and choose Get Add-ons.
- Search for ExtendedForms, install the app
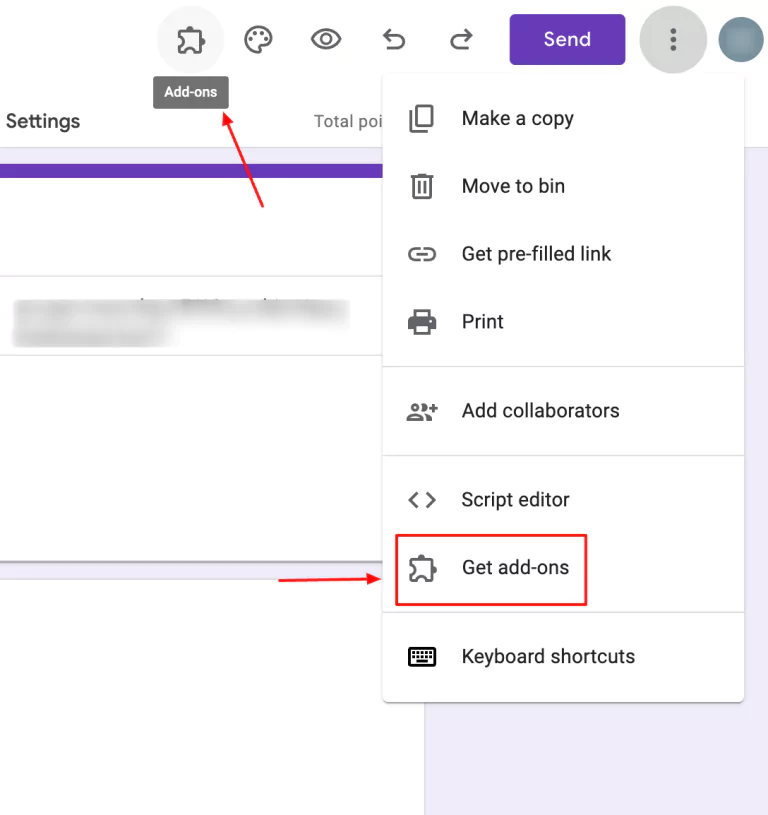
- Click on the puzzle-shaped icon, you’ll see it after you have installed the add-on.
- Click on the ExtendedForms > Configure. The extended forms settings box appears at the bottom of the Google form quiz.
Want to create business forms in Google Forms? Read, Creating Business Forms Using Google Forms (7 Simple Steps)
Step 2: Set Google Forms time limit
- In the settings box, you’ll see some options to configure. First and foremost is to share forms, and next is to set up the timer for Google Forms – add a time limit to your forms, you can also disable the feature but the minimum timer is 1 minute.
- After that, enable/disable restricted attempts – set the limit number to it (if you share a form anonymously the restrict attempt will be disabled by default). Further, configure whether you want the Google Form quiz to be auto-submitted once the timer ends automatically.
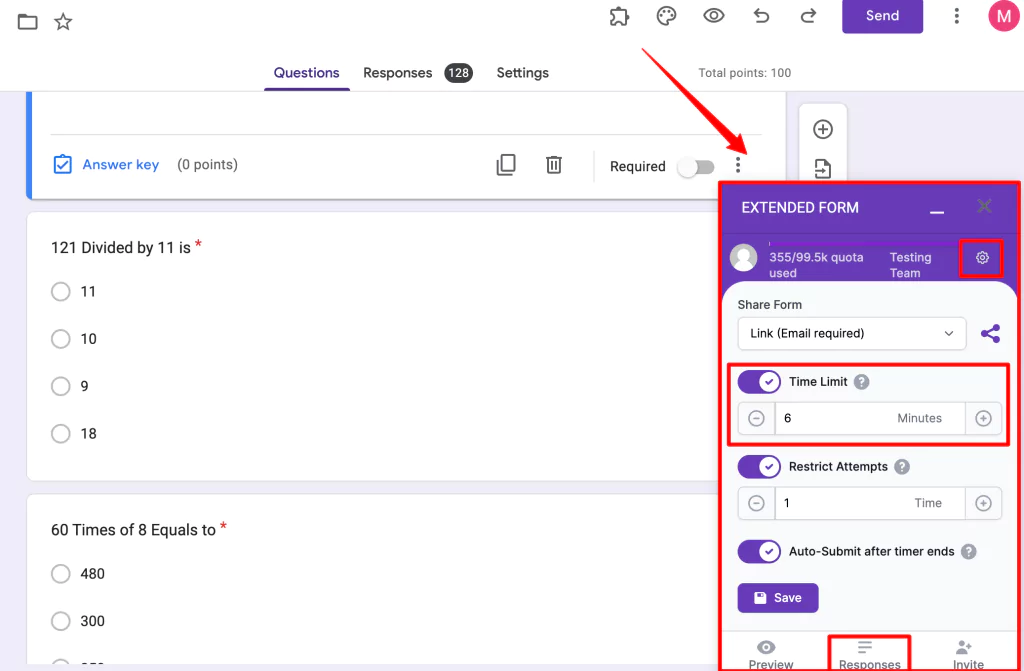
- To access all the available settings for the Timer add-on, you can click on the gear icon or ‘Responses,’ to access all the extended forms dashboard.
This will take you to the Extended Forms website where you can see all the features and advanced settings (under Form > ⋮ > Form Settings) for the add-on.
Looking for an easy way to add CAPTCHA to your Google Forms? Read, How to Add CAPTCHA to Google Forms? (4 Easy Steps)
Sep 3: Configure Advance Settings from Dashboard
- When you click on the gear icon, it will open up to “Forms Setting.” You’ll see all the settings that you saw earlier, along with some extras like – negative marking, hide back button, and hide user email-id.
- The Form Settings is divided into three major settings tabs – General, Proctor, and Theme.
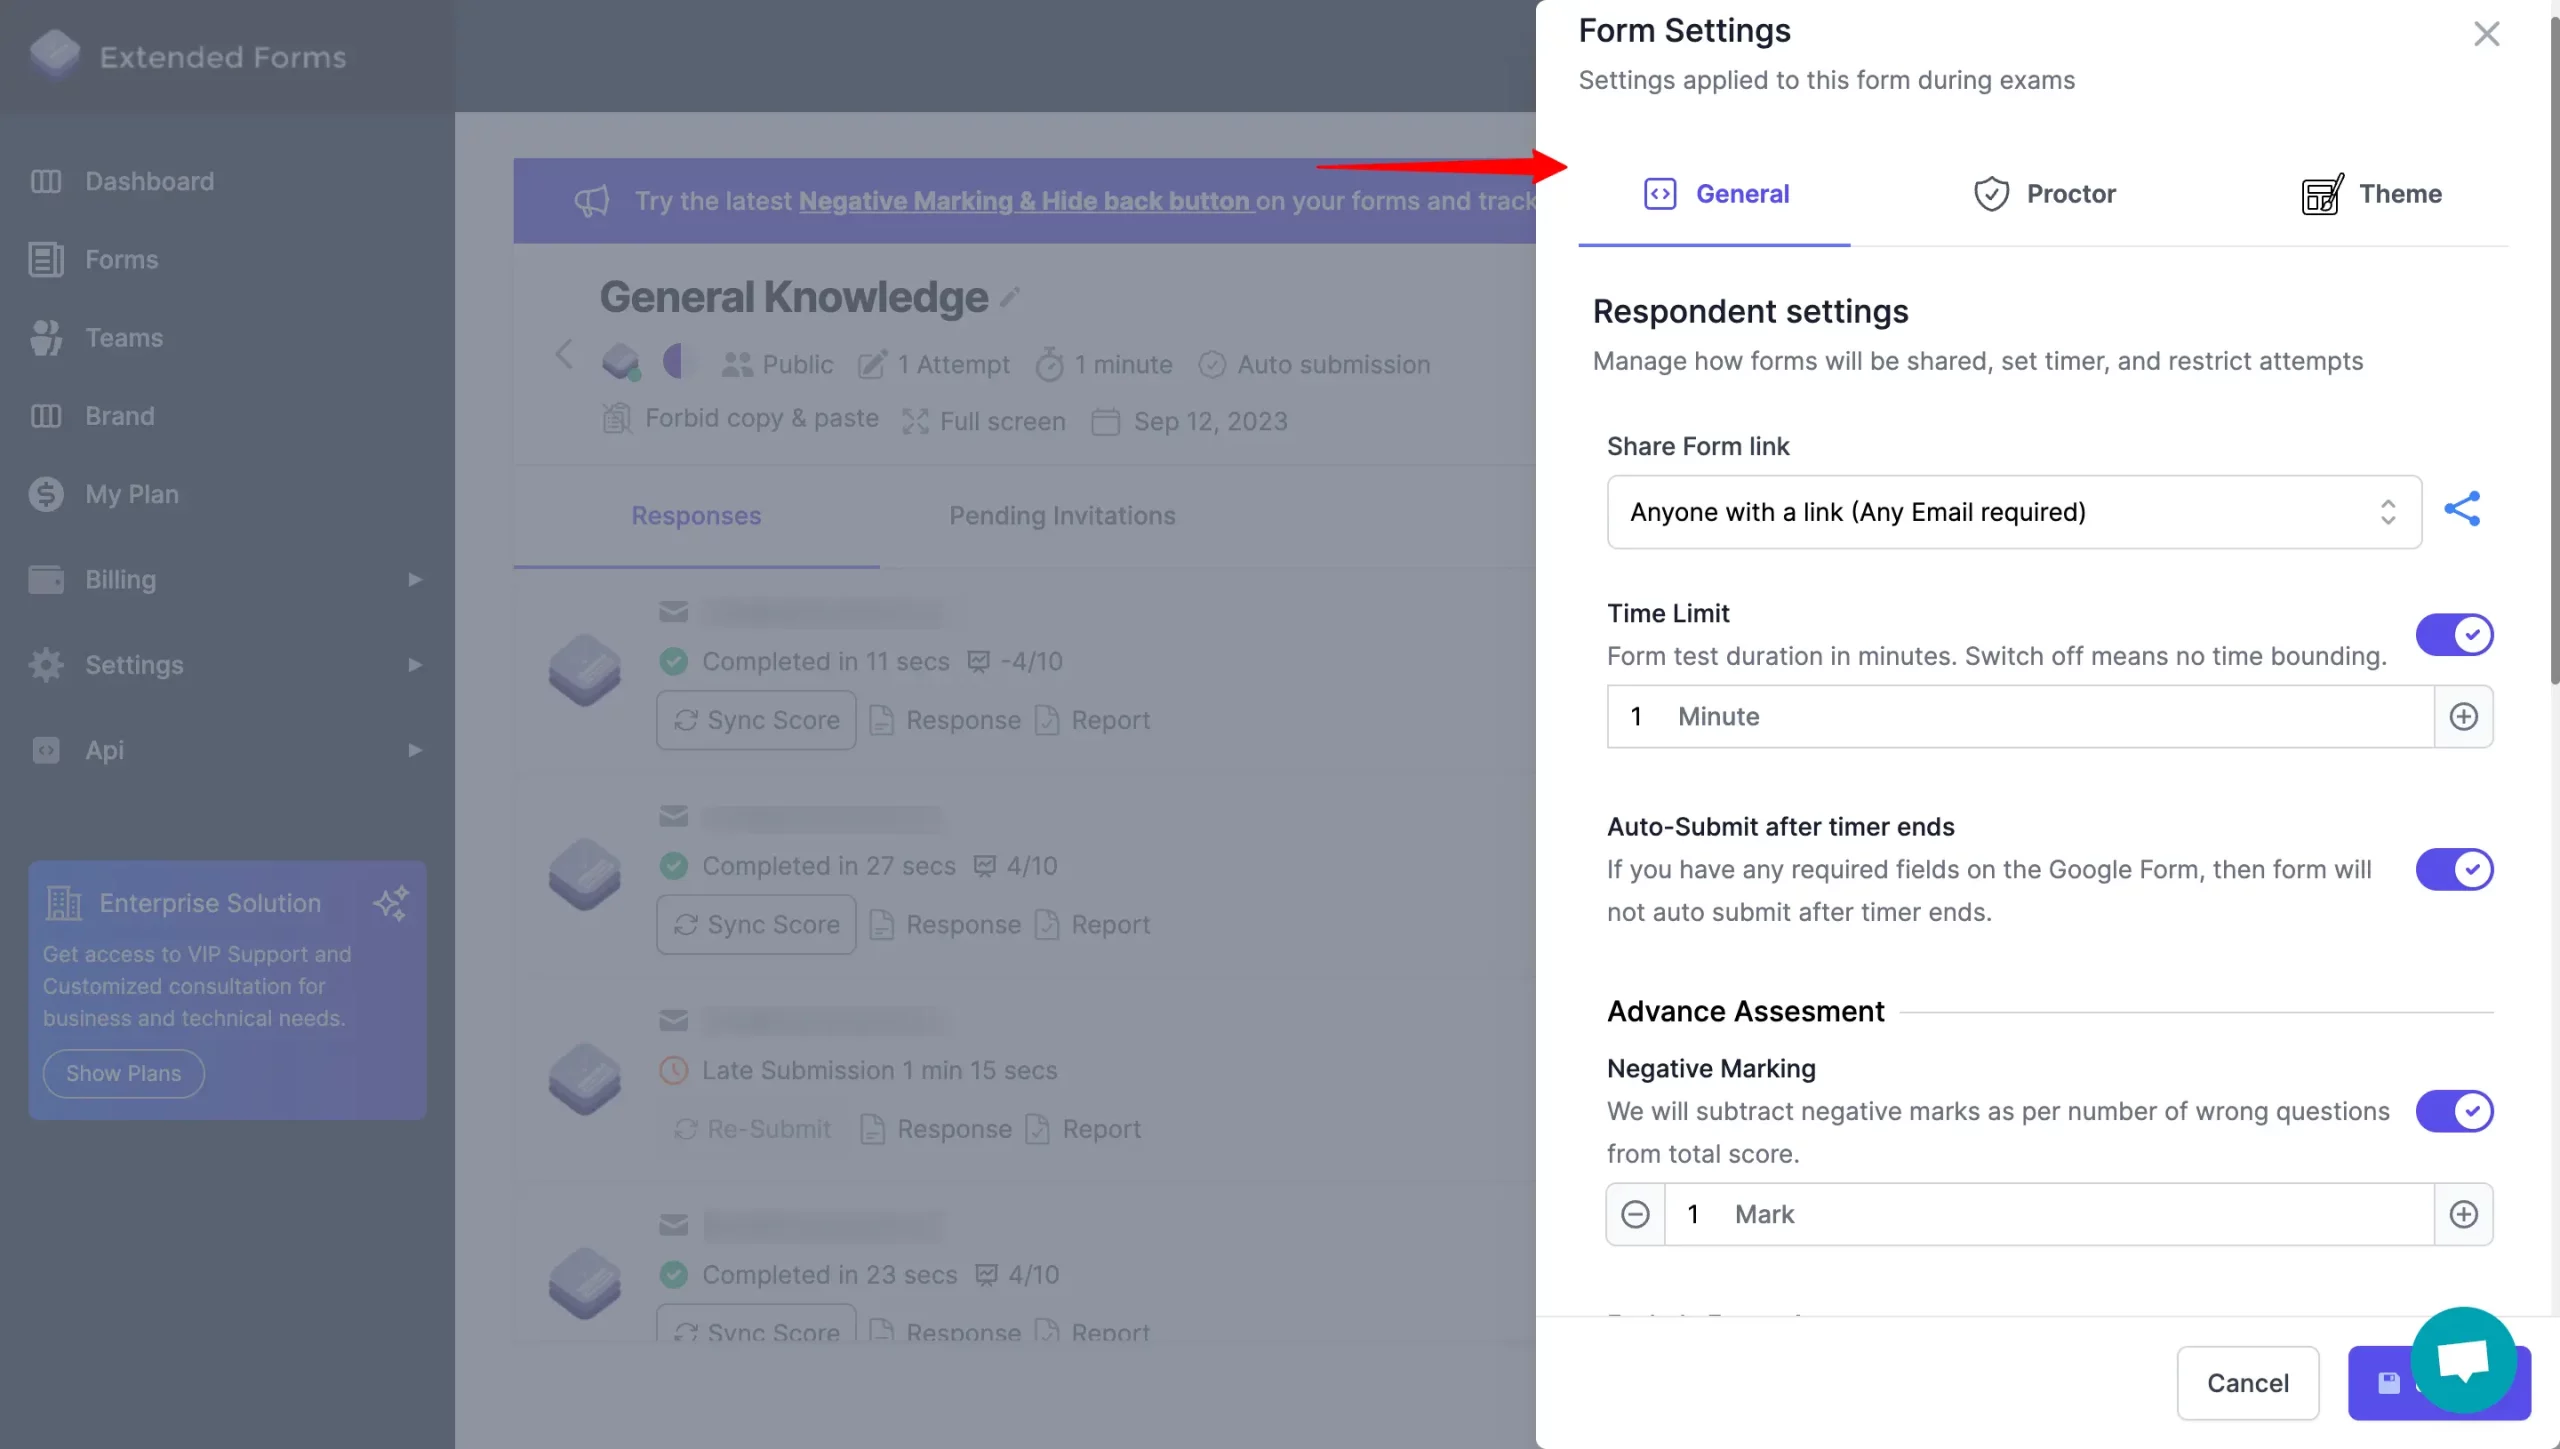
- Moreover, you’ll see proctor settings and brand theme settings to configure. Close the dialogue box, and you’ll see all the responses and pending invitations. Along with some more settings options. Like –
- Toggle Accept Response – The toggle button is used to turn ON/OFF the ExtendedForms’ ability to accept the responses.
- Send Invitation – You can send custom invites to people wanting or having to take the test.
- Preview – To preview your form and see the changes made and how it will look to the participants
- Share form – you can share the link from here, and shorten and customize the form to share it as well.
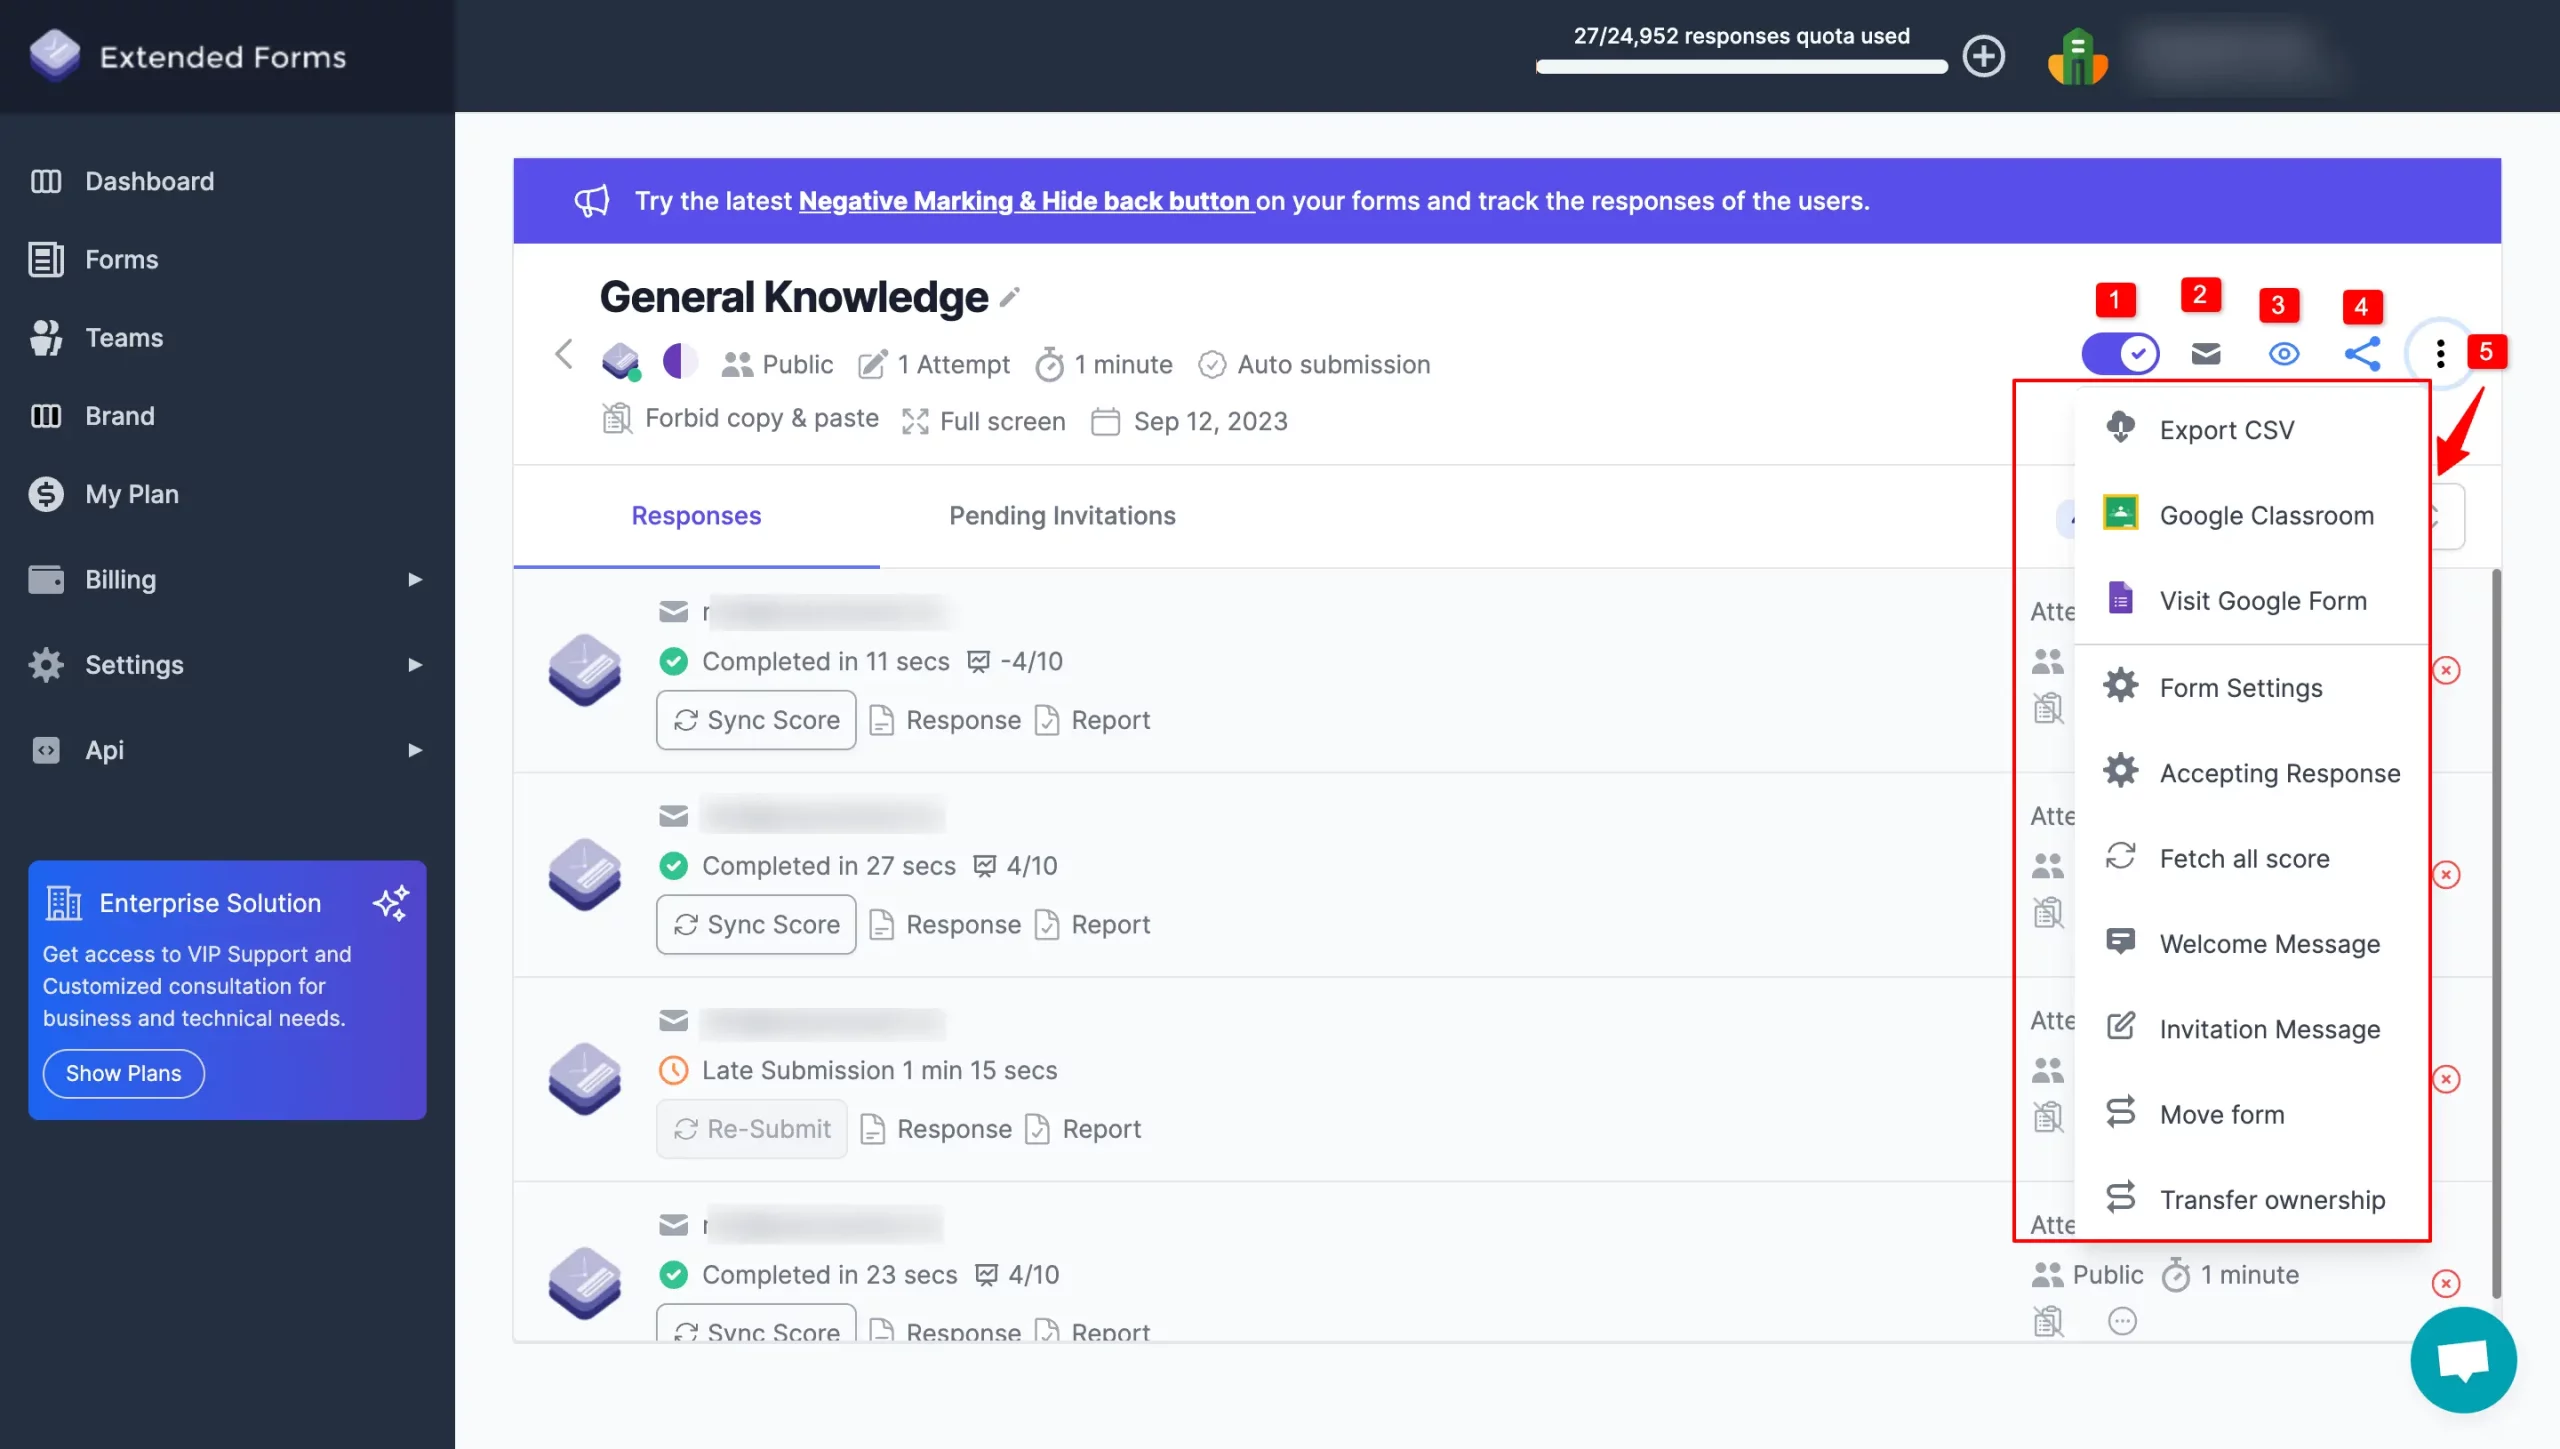
- More – under this you get multiple settings that are some of the best features of ExtendedForms. (explained them briefly below);
- Export CSV – it allows you to download/export forms’ responses into. CSV format.
- Google Classroom – The ExtendedForm has this feature that allows you to sync your work with Classroom. You can add classwork from the ExtendedForms dashboard itself.
- Visit Google Forms – you can go back to the potential form for which you’ve configured the ExtendedForm functions.
- Form Settings – it will open up to the forms advanced settings dialogue box that we discussed earlier.
- Accepting Responses – this feature is another great part of extended forms. Users can add DateTime range deadlines to accept responses, and you can set email reminders as well.
- Fetch scores – through this feature, you can sync all scores.
- Welcome Message – This feature allows you to add custom display messages in different languages (you’ll have to copy and paste the statement from an external source into different languages).
- Invitation Message – You can click here to open the invitation message box directly and add a customized invitation message.
- Move Form – this feature allows the form owner to transfer the form between the team and the personal account.
- Transfer Ownership – You can transfer the ownership of the Extended Forms to another person who has access to Extended Forms and has installed the add-on using this function.
You can find your Token in Extended Forms > Dashboard > Settings > Token.
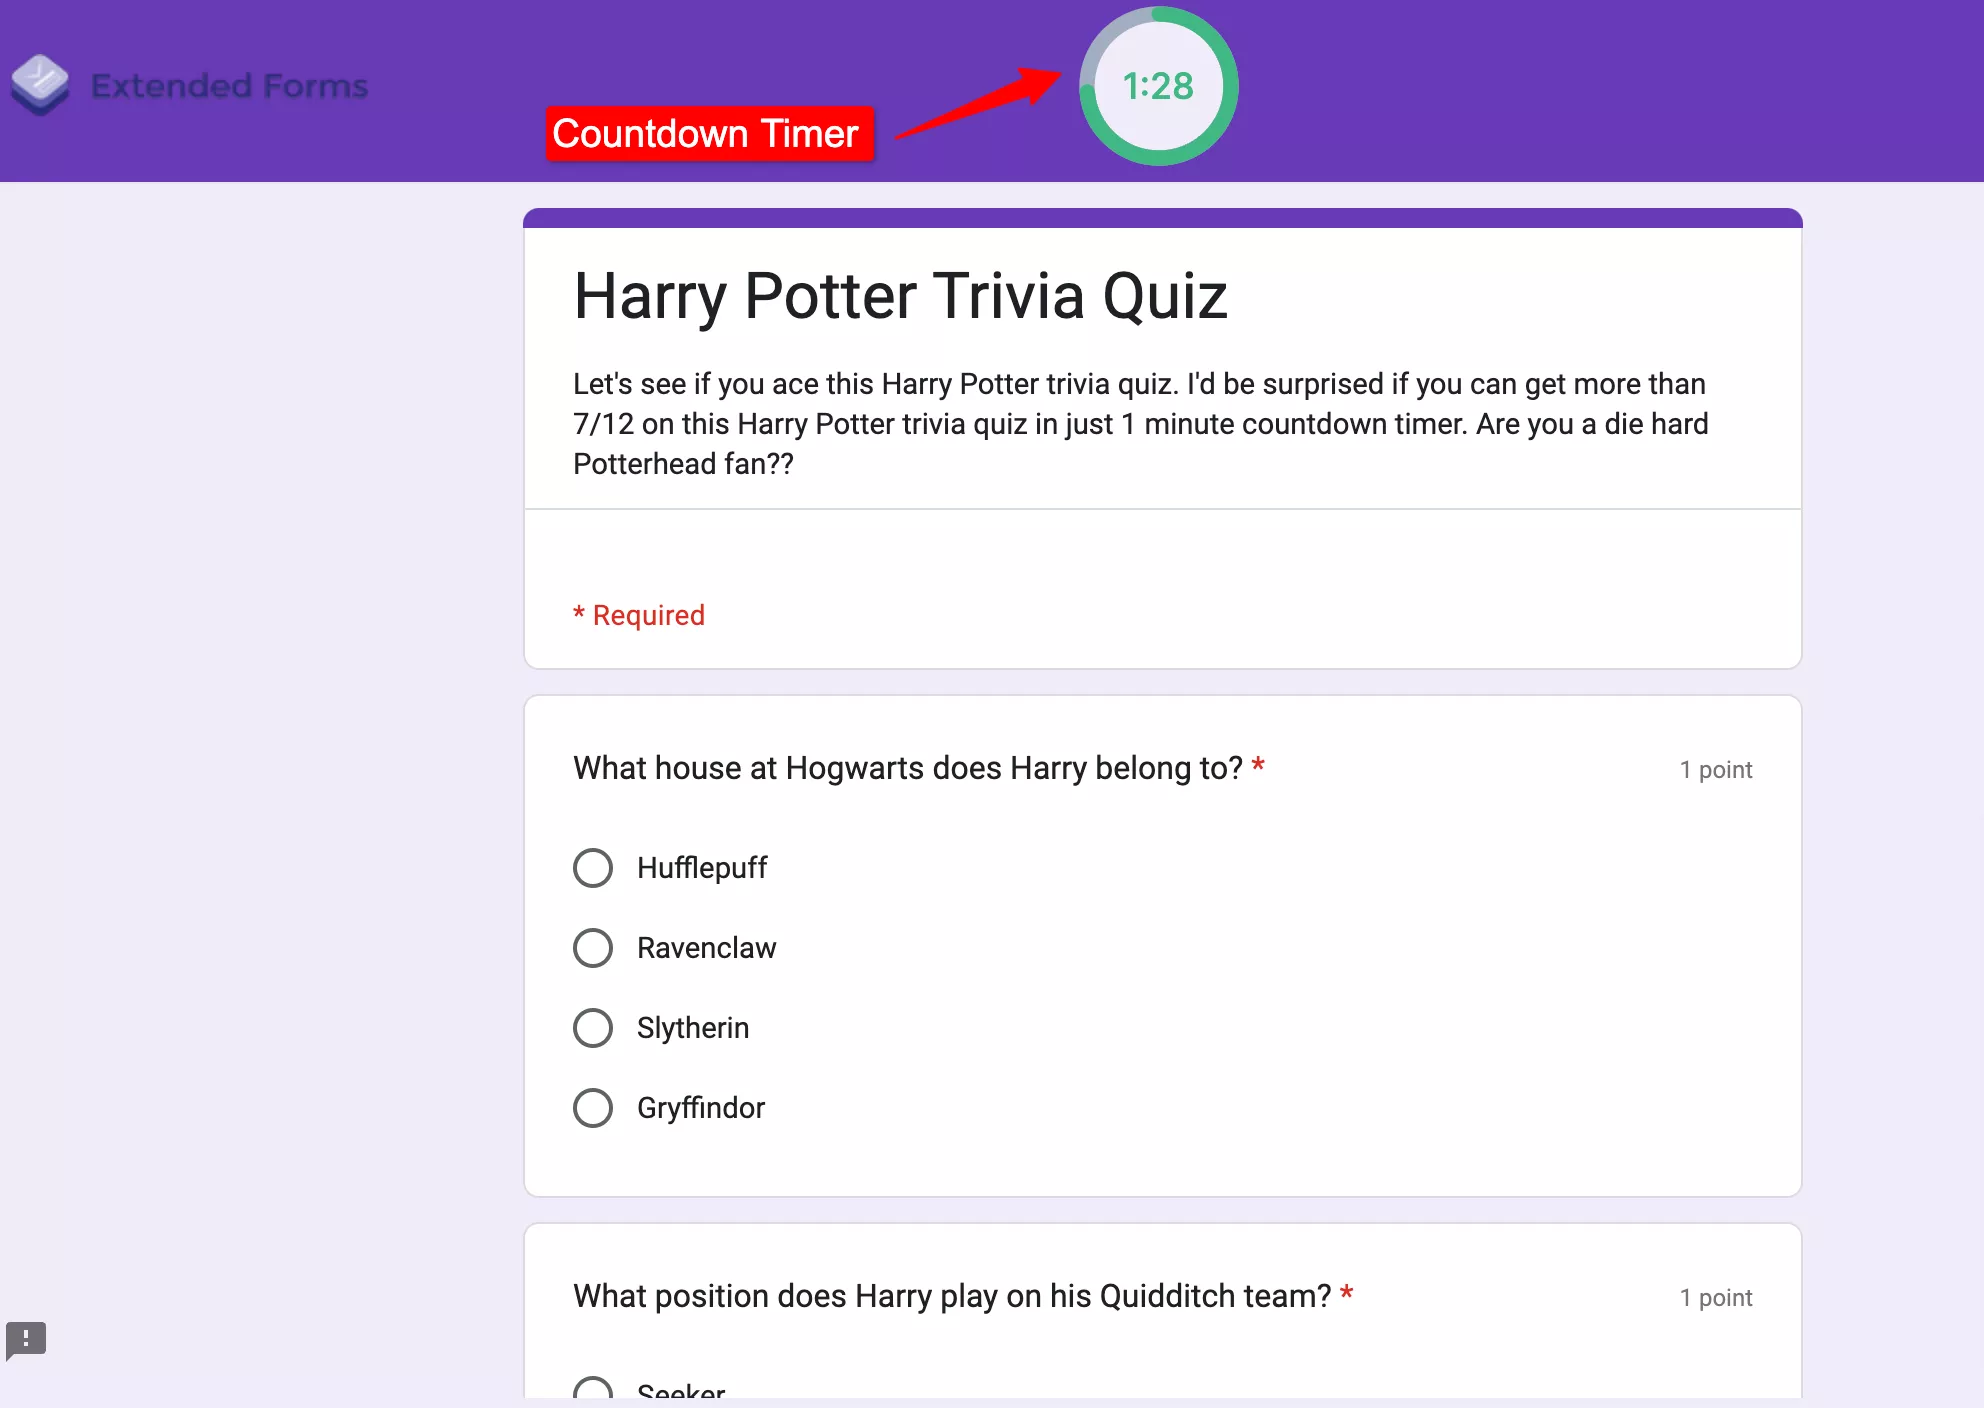
Once you’ve set a time limit for your form, it will be visible to anyone who takes the form, and they will be able to see how much time they have left while they are taking the quiz.
To Conclude,
Setting a time limit for a Google Form quiz is a simple and effective way to ensure that your quiz is completed within a certain time frame. Once you’ve set a time limit for your form, it will be visible to anyone who takes the quiz.
This can help ensure that everyone completes the quiz in a timely manner. Overall, setting a time limit for a Google Form quiz is a useful way for educators, business owners, and anyone else who wants to create and administer quizzes online.
ExtendedForms is by far a great add-on to try timer Google form quiz. It is a one-stop solution for both a countdown timer and proctoring for your quiz/exam. Many features are under pro-version, however, you get the timer feature for free. So go visit the website and install the app now!
If you like reading this blog, also read our detailed guide on How to Make Google Forms Accessible. [In 4 Steps] and Data Analysis with Google Forms: A Comprehensive Guide.